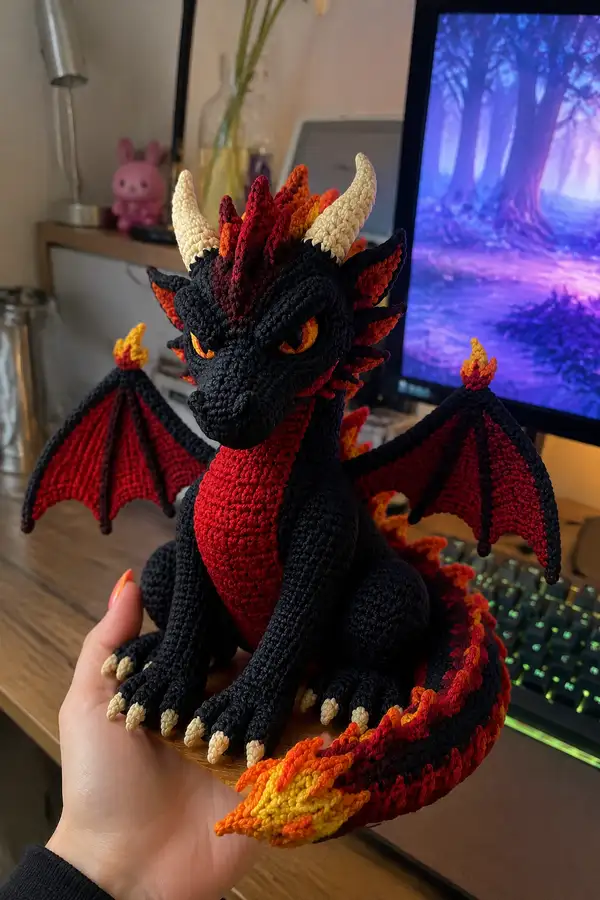
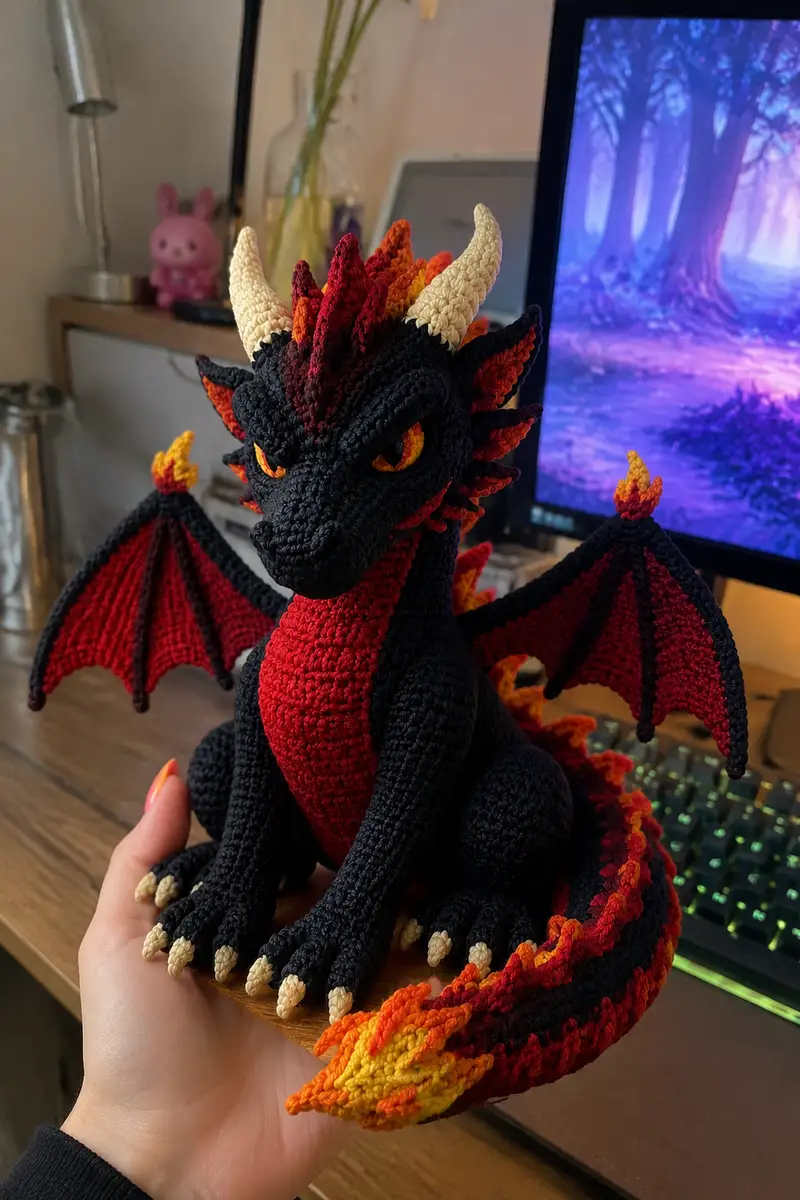
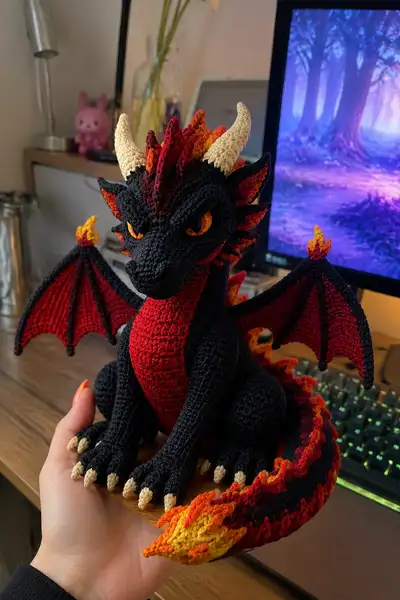
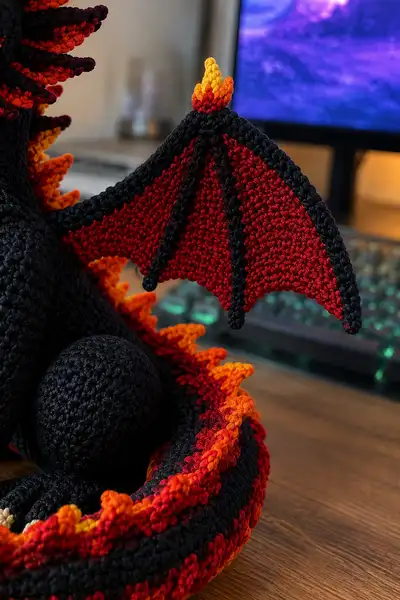
Bring fire and fierce charm to your crochet collection with this Inferno Scary Dragon Amigurumi Pattern. This dramatic black-and-red dragon features fiery gradient spikes, sculpted snout and brows, cream horns and claws, articulated wings with ribbing, and a long flame-tipped tail. The pattern includes detailed round-by-round instructions for every piece so you can recreate this imposing, poseable dragon with a glowing, molten personality.
Progress Tracker
0% Complete
— Head (main) :
Round 1 :
6 sc in magic ring (6)
Round 3 :
(1 sc, 1 inc) x 6 (18)
Round 4 :
(2 sc, 1 inc) x 6 (24)
Round 5 :
(3 sc, 1 inc) x 6 (30)
Round 6 :
(4 sc, 1 inc) x 6 (36)
Round 7 :
(5 sc, 1 inc) x 6 (42)
Round 8 :
(6 sc, 1 inc) x 6 (48)
Round 9-14 :
1 sc in each st (48)
Info :
These rounds build the crown of the head. Keep tension tight for a dense fabric. Place a stitch marker at the first stitch of each round.
Round 15 :
1 sc in each st BLO (48)
Round 16-18 :
1 sc in each st (48)
Info :
Prepare for eye placement. Place safety eyes between rounds 12-13 or embroider irises on rounds 13-14. Typical spacing is 7-9 stitches apart for expressive, slightly angry eyes.
Round 19-20 :
1 sc in each st (48)
Round 21 :
(6 sc, 1 dec) x 6 (42)
Round 22 :
(5 sc, 1 dec) x 6 (36)
Info :
Begin stuffing the head lightly but leave room for the snout attachment. Stuff more firmly near the brow and cheeks for sculpted facial features.
Round 23 :
(4 sc, 1 dec) x 6 (30)
Round 24 :
(3 sc, 1 dec) x 6 (24)
Round 25 :
(2 sc, 1 dec) x 6 (18)
Round 26 :
(1 sc, 1 dec) x 6 (12)
Info :
Fasten off leaving a long tail for sewing. Do NOT overstuff — the head will get more structure when the snout and neck are attached. If using safety eyes, make sure they were placed and secured before continuing.
— Snout / Muzzle (make 1) :
Round 1 :
6 sc in magic ring (6)
Round 3 :
(1 sc, inc) x 6 (18)
Round 4 :
(2 sc, inc) x 6 (24)
Round 5 :
(3 sc, inc) x 6 (30)
Round 6-7 :
1 sc in each st (30)
Info :
The snout is sculpted and slightly elongated. Work evenly for two rounds to form the bridge of the nose before shaping the muzzle tip.
Round 8 :
(3 sc, 1 dec) x 6 (24)
Round 9 :
(2 sc, 1 dec) x 6 (18)
Round 10 :
(1 sc, 1 dec) x 6 (12)
Round 11 :
6 sc (12) — work in continuous spiral without closing
Round 12-16 :
1 sc in each st (12)
Info :
Rounds 11-16 create an elongated muzzle. Stuff firmly near the tip and less firm toward the base so it blends smoothly into the head. Use the long tail to sew the snout to the head, positioning slightly under the brow line.
Round 17 :
(1 sc, 1 dec) x 4 (8)
Round 18 :
4 dec (4). Fasten off leaving tail for sewing.
— Eyelids and Brow Sculpting (make 2 small panels) :
Round 1 :
6 sc in magic ring (6)
Round 3-5 :
1 sc in each st (12)
Info :
Sew eyelid strips above the eyes then stitch extra yarn through the brow area to create a furrowed sculpt. Use surface slip stitches to accentuate brows if desired.
— Neck :
Round 1 :
6 sc in magic ring (6)
Round 3 :
(1 sc, 1 inc) x 6 (18)
Round 4 :
(2 sc, 1 inc) x 6 (24)
Round 5-10 :
1 sc in each st (24)
Info :
Neck should be proportionate — length in this build is 6 rounds after increases to sit the head properly. Stuff lightly and leave the bottom opening for sewing to body. Insert a short piece of wire if you want a poseable neck (cover with yarn and pad before final stuffing).
Round 11 :
(2 sc, 1 dec) x 6 (18)
Round 12 :
(1 sc, 1 dec) x 6 (12)
Info :
Fasten off leaving long tail. When sewing, position the neck so the head leans slightly forward for the proud, hunching pose in the reference.
— Body (main) :
Round 1 :
6 sc in magic ring (6)
Round 3 :
(1 sc, 1 inc) x 6 (18)
Round 4 :
(2 sc, 1 inc) x 6 (24)
Round 5 :
(3 sc, 1 inc) x 6 (30)
Round 6 :
(4 sc, 1 inc) x 6 (36)
Round 7 :
(5 sc, 1 inc) x 6 (42)
Round 8 :
(6 sc, 1 inc) x 6 (48)
Round 9 :
(7 sc, 1 inc) x 6 (54)
Round 10 :
(8 sc, 1 inc) x 6 (60)
Round 11-18 :
1 sc in each st (60)
Info :
This creates the belly and torso girth. For sitting posture, work even rounds so the bottom is flat when the legs are attached. Add a safety stitch marker to indicate the front center for belly panel alignment.
Round 19 :
(8 sc, 1 dec) x 6 (54)
Round 20 :
(7 sc, 1 dec) x 6 (48)
Round 21 :
(6 sc, 1 dec) x 6 (42)
Round 22 :
(5 sc, 1 dec) x 6 (36)
Round 23 :
1 sc in each st (36)
Round 24 :
(3 sc, 1 dec) x 6 (30)
Round 25 :
(2 sc, 1 dec) x 6 (24)
Round 26 :
(1 sc, 1 dec) x 6 (18)
Info :
Fasten off leaving long tail for sewing to belly and bottom plates. Make sure the front opening where the neck attaches aligns with the neck size. If you prefer a flat bottom, you can crochet a circular base (see assembly) and sew it to rounds 11-18.
— Belly Panel (sewn on) :
Round 1 :
Ch 19, sc in 2nd ch from hook and across (18)
Round 2 :
Ch1, turn, 1 sc in each st (18)
Round 3-32 :
Ch1, turn, 1 sc in each st (18) — continue until the panel covers from throat to belly base (30 rounds total creates a long panel)
Info :
Work the belly panel in deep red. You can shape the bottom by decreasing along the final row edges to match body curve. Block lightly and sew the panel to the front center from neck opening down to the belly bottom, using invisible whip stitch for a smooth seam.
— Front Legs / Forearms (make 2) :
Round 1 :
6 sc in magic ring (6)
Round 3 :
(1 sc, inc) x 6 (18)
Round 4 :
(2 sc, inc) x 6 (24)
Round 5-6 :
1 sc in each st (24)
Info :
The foot is rounded and will be stuffed firmly. Keep the thumb side slightly flattened when stuffing to give a paw-like impression. Place claws later as separate small pieces.
Round 7 :
(2 sc, 1 dec) x 6 (18)
Round 8-14 :
1 sc in each st (18) — work 7 rounds to create lower arm length
Round 15 :
(1 sc, 1 dec) x 6 (12)
Round 16-18 :
1 sc in each st (12) — leave opening at top for sewing to body
Info :
Stuff the paw area firmly, and taper stuffing toward the top so that the arm flattens smoothly into body. Fasten off leaving long tail for sewing. Make two identical pieces.
— Hind Legs / Thighs (make 2) :
Round 1 :
6 sc in magic ring (6)
Round 3 :
(1 sc, inc) x 6 (18)
Round 4 :
(2 sc, inc) x 6 (24)
Round 5 :
(3 sc, inc) x 6 (30)
Round 6 :
(4 sc, inc) x 6 (36)
Round 7-10 :
1 sc in each st (36)
Info :
These rounds form a rounded thigh that will sit against the body. Insert a small amount of stuffing to hold shape while you form the knee and lower leg area.
Round 11 :
(4 sc, 1 dec) x 6 (30)
Round 12 :
(3 sc, 1 dec) x 6 (24)
Round 13-18 :
1 sc in each st (24) — these rounds form lower leg toward paw
Round 19 :
(2 sc, 1 dec) x 6 (18)
Round 20 :
(1 sc, 1 dec) x 6 (12)
Round 21-22 :
1 sc in each st (12) — leave opening for sewing to body
Info :
Stuff the thigh firmly but leave the top edges unstuffed enough to sew flat to the side of the body. The finished legs should allow the dragon to sit with the knees forward and paws on the surface.
— Claws (make 10-12 small claws) :
Round 1 :
3 sc in magic ring (3)
Round 3 :
1 sc in each st (6) — fasten off leaving tail for sewing
Info :
Use cream yarn and a small hook for compact claws. Sew 3-4 claws to each paw, spacing evenly. Use a little stuffing if you want more rounded claws but typically leave them flat for easier sewing.
— Horns (make 2) :
Round 1 :
6 sc in magic ring (6)
Round 2 :
(1 sc, inc) x 3 (9)
Round 3 :
(2 sc, inc) x 3 (12)
Round 4 :
(3 sc, inc) x 3 (15)
Round 5-8 :
1 sc in each st (15) — these rounds form the horn length
Round 9 :
(3 sc, 1 dec) x 3 (12)
Round 10 :
(2 sc, 1 dec) x 3 (9)
Round 11 :
(1 sc, 1 dec) x 3 (6)
Round 12 :
6 sc. Fasten off leaving long tail for sewing.
Info :
Horns are slightly curved. To encourage curvature, block the horns over a tapering dowel while sewing and stuff lightly. Consider inserting a thin wire inside for stronger poseability; wrap wire ends with yarn to avoid sharp edges.
— Dorsal Flame-Spikes (make 14, various sizes) :
Spike Pattern - Small :
Round 1: 6 sc in magic ring (6). Round 2: 6 inc (12). Round 3: (1 sc, inc) x 6 (18). Round 4: 1 sc in each st (18). Round 5: (1 sc, 1 dec) x 6 (12). Round 6: 6 sc, fasten off leaving tail for sewing.
Spike Pattern - Medium :
Round 1: 6 sc in magic ring (6). Round 2: 6 inc (12). Round 3: (1 sc, inc) x 6 (18). Round 4: (2 sc, inc) x 6 (24). Round 5: 1 sc in each st (24). Round 6: (2 sc, 1 dec) x 6 (18). Round 7: 1 sc in each st (18). Round 8: (1 sc, 1 dec) x 6 (12). Round 9: 6 sc, fasten off.
Spike Pattern - Large :
Round 1: 6 sc in magic ring (6). Round 2: 6 inc (12). Round 3: (1 sc, inc) x 6 (18). Round 4: (2 sc, inc) x 6 (24). Round 5: (3 sc, inc) x 6 (30). Round 6-8: 1 sc in each st (30). Round 9: (3 sc, 1 dec) x 6 (24). Round 10: (2 sc, 1 dec) x 6 (18). Round 11: (1 sc, 1 dec) x 6 (12). Round 12: 6 sc, fasten off.
Info :
Use gradient flame yarn and alternate colors for layered appearance (yellow inside, orange mid, red edges). Make a mix of small (6), medium (5) and large (3) spikes to place down the neck and tail. Sew them directly to the seam between head/neck/body or to an attached spine strip for precise placement.
— Tail (main) :
Round 1 :
6 sc in magic ring (6)
Round 3 :
(1 sc, inc) x 6 (18)
Round 4 :
(2 sc, inc) x 6 (24)
Round 5-8 :
1 sc in each st (24)
Round 9 :
(2 sc, 1 dec) x 6 (18)
Round 10-14 :
1 sc in each st (18)
Round 15 :
(1 sc, 1 dec) x 6 (12)
Round 16-20 :
1 sc in each st (12) — continue tapering as desired
Info :
Attach flame-spikes along the top edge of the tail by sewing medium and small spikes staggered to create a flowing flame ridge. The tail tip is finished with a flame motif (see Tail Flame section).
Round 21 :
(1 sc, 1 dec) x 4 (8)
Round 22 :
1 sc in each st (8)
Round 23 :
8 sc in BLO around final ring to create a flat base for tail tip (8)
Round 24 :
1 sc in each st (8)
Round 25 :
Fasten off leaving long tail for sewing to body. Stuff tail moderately firm and adjust taper by adding or removing stuffing along length.
— Tail Flame Tip (make 1 large and 2-3 medium flames) :
Large Flame Round 1 :
6 sc in magic ring (6)
Large Flame Round 2 :
6 inc (12)
Large Flame Round 3 :
(1 sc, inc) x 6 (18)
Large Flame Round 4 :
(2 sc, inc) x 6 (24)
Large Flame Round 5 :
(3 sc, inc) x 6 (30)
Large Flame Round 6 :
1 sc in each st (30)
Large Flame Round 7 :
(3 sc, 1 dec) x 6 (24)
Large Flame Round 8 :
(2 sc, 1 dec) x 6 (18)
Large Flame Round 9 :
(1 sc, 1 dec) x 6 (12)
Large Flame Round 10 :
6 sc — leave long tail and do not fully stuff. Layer medium flames inside the large flame during assembly for a 3D, gradated look.
Info :
Work flames in color order: inner yellow small flame, orange medium, and red large outer flame. Sew flames together by nesting smaller ones inside bigger ones then attach to tail tip with small whip stitches.
— Wings (make 2 mirror panels) :
Panel Setup :
Using red yarn, start with ch 31, sc in 2nd ch from hook and across (30)
Row 1 :
Ch1, turn, 1 sc in each st (30)
Row 2 :
Ch1, turn, 1 sc in each st BLO (30) — creates a slightly denser edge
Rows 3-12 :
Ch1, turn, 1 sc in each st (30) — continue for 10 more rows to create a roughly triangular wing membrane
Info :
After these rows you will shape the wing edge to be scalloped. Keep edges tidy; block panels flat before adding ribs.
Row 13 :
Ch1, turn, (2 sc, dec) across to create slight taper (24)
Row 14 :
Ch1, turn, 1 sc in each st (24)
Row 15 :
Ch1, turn, (1 sc, dec) across (16)
Row 16 :
Ch1, turn, 1 sc in each st (16)
Row 17 :
Ch1, turn, dec across to close to 8
Info :
Fasten off leaving long tail for sewing to wing armature. Make two panels mirror-imaged (reverse starting chain) for left and right wings.
— Wing Ribs / Fingers (make 4 per wing) :
Round 1 :
6 sc in magic ring (6)
Round 2-14 :
1 sc in each st (6) — work 13 rounds to create long, thin ribs
Info :
Make ribs in black yarn. Optionally insert a thin wire through the rib and secure ends by stitching to the wing base; this creates poseable wings. Sew ribs onto the wing membrane running from wing base to outer edge, spacing them evenly (see photo reference: 3 ribs and 1 edge support = 4 total).
Round 15 :
Fasten off leaving tail for sewing.
— Wing Edge & Flame Tip (make 2 small flame tips per wing) :
Round 1 :
6 sc in magic ring (6)
Round 3 :
(1 sc, inc) x 6 (18)
Round 4 :
1 sc in each st (18). Fasten off leaving long tail to sew to top tip of wing.
Info :
Create small layered flame tips in yellow, orange, red as used on tail tips. Sew one to each wing top point and secure firmly with multiple stitches to keep orientation stable.
— Inner Membrane Ribbing (surface crochet) :
Step :
Use black yarn and surface slip stitch or sc to create three diagonal ribs across the red membrane. Start from the wing base and work outward to the scalloped edge, keeping lines evenly spaced. Backstitch end securely.
Info :
Surface crochet ribs give the wing its bat-like appearance and sharp visual lines. Do this after attaching ribs to maintain alignment with body and armature.
— Assembly & Internal Supports :
Info :
Before sewing large parts, block flat where appropriate. Insert wire into ribs and optionally into tail for poseability. Seal wire ends by wrapping with yarn or using tape to prevent piercing through stitches.
— Finishing Details :
Info :
Embroider the eye irises with yellow and orange yarn or use safety eyes of appropriate size. Use darker yarn for eyelid outlines and a small highlight with white embroidery. Add surface slip stitch lines around the snout to accent nostrils and mouth creases. Weave in all tails and hide joins by running the yarn needle through multiple stitches.
Info :
Sew claws to paws and shape with slight forward curve. Sew dorsal spikes along the midline from nape to tail, staggering sizes for natural flame flow. Attach wings to upper back between rounds 10-14 of the body so they sit high and proud. Sew tail to back center at body rounds 2-6 depending on where you want the tail to rest.
This dramatic inferno dragon is the perfect project to flex your amigurumi sculpting skills and colorwork. Each flame, horn and wing rib adds to a fiery overall effect that is both sculptural and whimsical. Take your time assembling and enjoy watching all the separate pieces come together into a fierce, character-filled companion. 🐉🔥 Display proudly or gift to a fantasy-loving friend — every stitch is worth it! 🎨