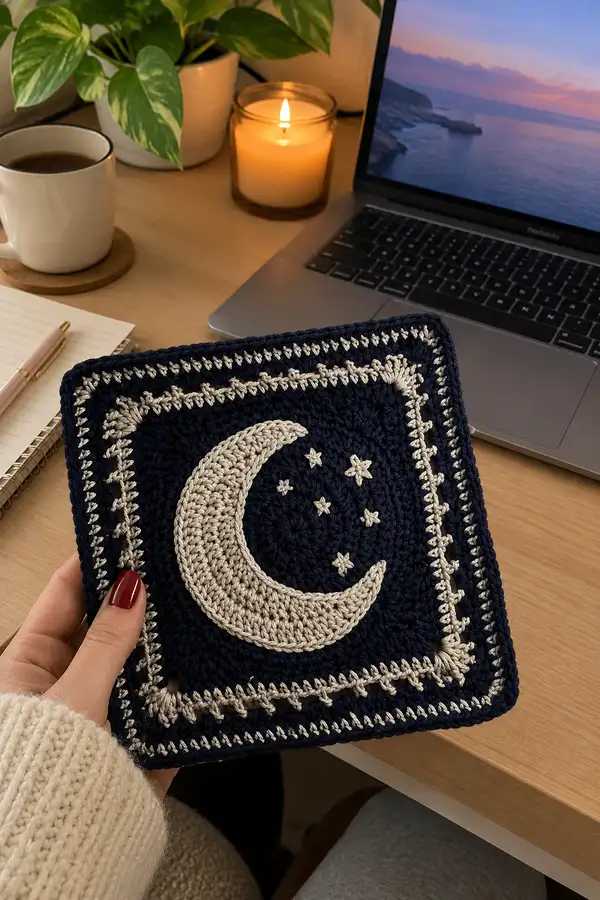
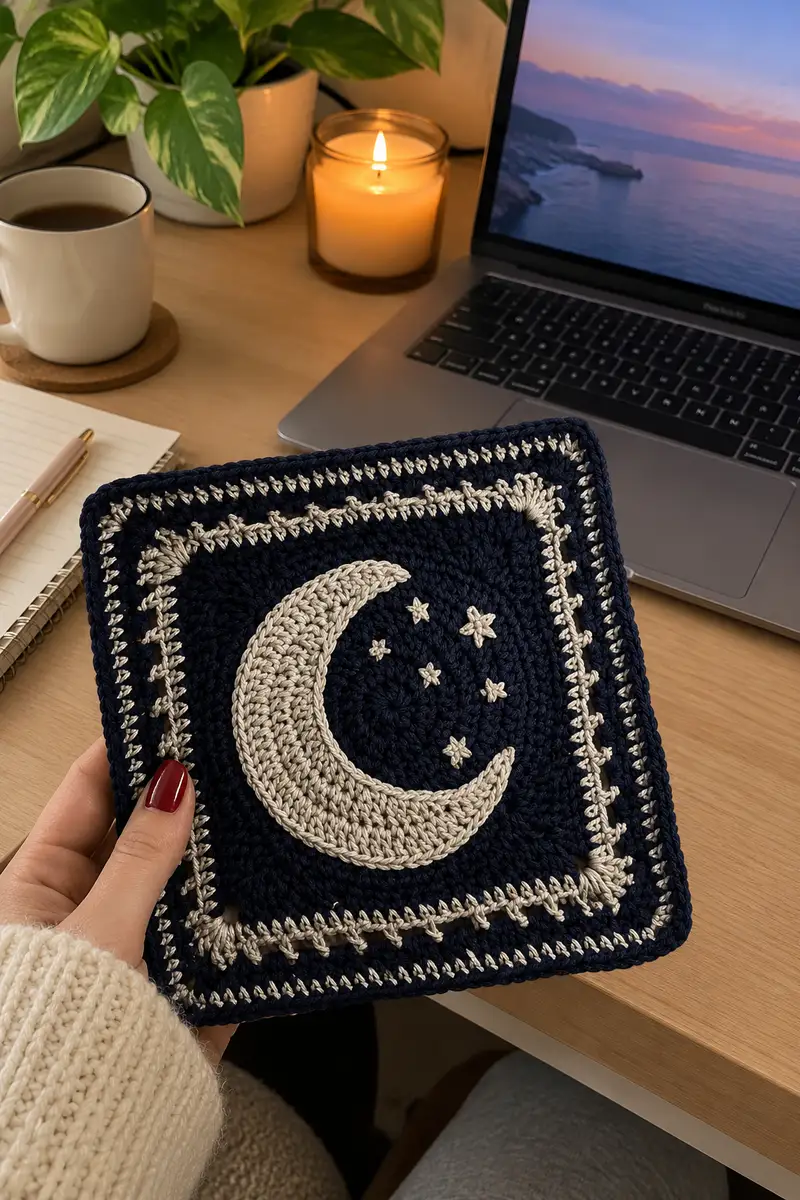
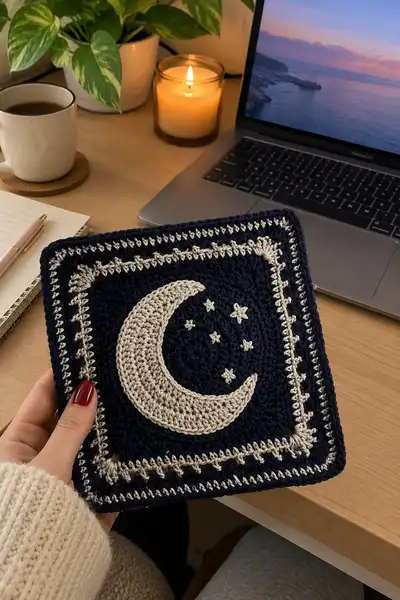
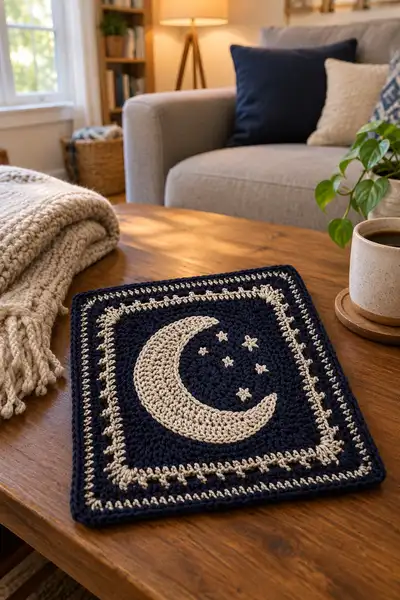
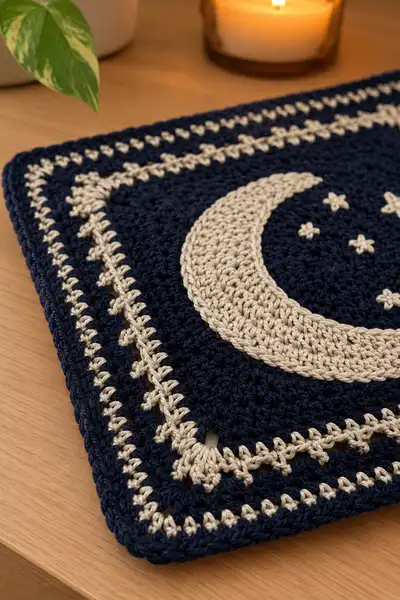
A cozy, starry bedspread made from individual celestial squares in deep navy and silver. Each square features a raised silver crescent moon and embroidered stars or constellation motifs, joined together to create a large, luxe bed covering. The set includes matching pillow shams and a wide decorative border to finish the blanket. Worked in worsted/aran weight yarn with textured stitchwork for a warm, contemporary look.
Progress Tracker
0% Complete
— Overview & Gauge :
Info :
Gauge is flexible for this bedspread but for uniform squares test: 18 dc x 12 rounds = 10 cm/4in using 5.0mm hook in pattern stitch (after square rounds complete). If your gauge is tighter/looser, adjust hook size to match and remember final blanket size scales with each square. Pattern uses US terms.
Info :
Suggested finished bedspread: approx 210cm x 230cm (queen/large throw) made from a 7 x 9 grid of 63 squares measuring approx 30cm (12in) each blocked. Adjust rows/columns for smaller or larger sizes.
— Motif Square (make 63 squares for 7x9 bedspread) :
Info :
Each motif square is worked from the center out in rounds creating a textured circular center that is squared off and then edged. Main color (MC) = Deep Navy; Accent color (AC) = Silver. Use 5.0mm hook unless you prefer tighter fabric; switch to 4.0mm for final edging for crisp corners.
Round 1 :
Make a magic ring, ch 3 (counts as dc), work 11 dc into ring. Join with sl st to top of ch3.(12)
Round 2 :
Ch3 (counts as dc), *1 dc in next st, 1 inc (2 dc) in next st* repeat from * to * around. Join. (18)
Round 3 :
Ch3, *2 dc in next 2 sts, inc in next st* repeat around. (24)
Round 4 :
Ch3, *3 dc in next 3 sts, inc in next st* repeat around. (30)
Round 5 :
Ch3, *4 dc in next 4 sts, inc in next st* repeat around. (36)
Round 6 :
Ch3, *5 dc in next 5 sts, inc in next st* repeat around. (42)
Round 7 :
Ch3, *6 dc in next 6 sts, inc in next st* repeat around. (48)
Round 8 :
Ch3, *7 dc in next 7 sts, inc in next st* repeat around. (54)
Round 9 :
Ch3, *8 dc in next 8 sts, inc in next st* repeat around. (60)
Info :
At this point you have a flat round approx the diameter you want for the moon area. If you prefer a larger or smaller circle under the moon, work one more increase round (see optional round 10 alt) before squaring off. Blocking after squaring will help keep edges even.
Round 10 :
Prepare to form 4 corners and change from circle to square. Ch3, *dc in next 13 sts, (2 dc, ch2, 2 dc) in next st* repeat from * to * 3 more times, join with sl st to top of ch3. (72)
Info :
Explanation of math: you started Round 10 with 60 sts. Each corner cluster (2 dc, ch2, 2 dc) replaces 1 existing st with 4 stitches, adding +3 per corner; 4 corners add +12, 60+12 = 72. You now have a square with 18 stitches per side between corner clusters (72/4 = 18).
Round 11 :
Ch3, 1 dc in each st and into each ch-2 corner space (work 4 dc into each ch-2 corner space to maintain corner bulk), join. (72)
Round 12 :
Ch3, 1 dc in each st around, working 4 dc into each corner ch2 space. Join. (72)
Round 13 :
Ch2 (counts as hdc), hdc in next 71 sts, join. (72)
Info :
Switching to hdc in this round lowers the profile slightly and creates a smooth background for the applique moon. If you prefer a taller textured center, use dc instead and keep counts identical.
Round 14 :
Ch1, sc in each st around working 4 sc into each corner space to keep square shape, join. (72)
Round 15 :
Ch2, *dc in next 8 sts, skip to create texture: (dc3tog cluster sequence) - Instead of clusters we create a spiral texture by working front post double crochet (fpdc) around previous round dc, repeat to create visual depth.* Work fpdc around next 72 sts evenly. Join. (72)
Info :
If you are unfamiliar with fpdc: yarn over, insert hook from front to back to front around the post of the stitch below, complete dc. This creates a raised line that frames the moon. Keep stitches even; mark the first stitch of the round.
Round 16 :
Ch1, sc in each st around in BLO (back loops only) to create a subtle ridge. Work 4 sc in each corner ch2 space. Join. (72)
Round 17 :
Ch3, dc in each st around keeping corners full (4 dc in corners). Join. (72)
Round 18 :
Ch1, sc in each st around. Join and fasten off MC if you plan to add a contrasting inner border. (72)
Info :
At this stage each square measures approx 26-28cm depending on tension. Blocking will expand to target 30cm/12in. Add an optional inner silver accent round next for the framed look before attaching the moon applique.
Round 19 (Optional Accent) :
Join AC (silver) in any side st, ch1, sc in each st around, but work a picot-like cluster every 6th st: *(sc in next 5 sts, ch2, sl st in 2nd ch from hook, sl st into same st) repeat* — this creates small star-like bumps along inner edge. Join. (72)
Info :
If you're making a blanket with alternating squares (moon, constellation, full moon, partial moon), make sure to alternate which squares receive the optional accent so that the layout on the bed feels dynamic.
— Raised Crescent Moon Applique (Make one per square) :
Info :
The crescent is worked flat in AC (silver) and shaped by increasing and decreasing, then appliqued to the square and edged with surface crochet. Work with 4.0mm hook for tighter fabric to prevent gaps and allow a sculpted crescent.
Round 1 :
With AC, ch 6. Row 1: sc in 2nd ch from hook and next 3 chs — 5 sc. Turn. (5)
Round 2 :
Ch1, 2 sc in first st, sc in next 3 sts, 2 sc in last st. (7)
Round 3 :
Ch1, 2 sc in first st, sc in next 5 sts, 2 sc in last st. (9)
Round 4 :
Ch1, sc across (9). Turn. (9)
Round 5 :
Ch2 (counts as hdc), hdc across 9 sts, increasing at the outer edge: work an extra hdc at the last stitch. (10)
Round 6 :
Ch2, hdc across 10 sts. (10)
Round 7 :
Start shaping crescent curve. Ch1, sc across first 3 sts, hdc next 4 sts, 2 dc in next st, skip last 2 sts. (variable, see note)
Info :
From now on you'll create a tapered shape by alternating shorter rows and shaping increases at the outer curve and decreases at the inner curve. Keep a stitch marker at the start of each row to keep edges even. The crescent is asymmetrical: one side stays fuller (outer curve) while the other is tapered (inner curve).
Round 8 :
Turn, ch1, sc in next 7 sts, dec over last 2 sts. (8)
Round 9 :
Turn, ch2, hdc in next 6 sts, 2 hdc in next st, skip last st. (9)
Round 10 :
Turn, ch1, sc in next 5 sts, dec over next 2 sts, sc in final 2 sts. (8)
Round 11 :
Ch2, hdc across 8 sts. (8)
Round 12 :
Ch1, sc across 8 sts but at outermost edge do 2 sc in the single outer stitch to keep a rounded outer lip (8 + 1 = 9)
Round 13 :
Ch2, hdc across 9 sts. (9)
Round 14 :
Shape inner curve by sc across first 6 sts, dec 2 sts together, sc last st. (8)
Round 15 :
Ch1, sc across 8 sts. Fasten off leaving a long tail for sewing. The crescent should measure about 12-14 cm long depending on tension.
Info :
Adjust the number of rows to change crescent size. If you prefer a fuller moon, add extra increase rows at rounds 5-6 before shaping. Always keep outer edge slightly fuller than inner edge for an obvious crescent curve.
Applique Attachment :
Position the crescent centrally on the square's circular center so the crescent curve points toward one corner if you want a directional layout (images show curve rotated slightly). Pin or use removable glue dots to hold in place. Using AC tail and yarn needle, sew around the crescent edge with small whipstitches or a slip-stitch surface crochet to secure it to the square, hiding the sewing stitches under the applique edge.
Info :
To add a slightly raised border around the crescent, use surface slip stitch with MC (navy) around the outer seam after sewing: insert hook from wrong side and work slip stitches evenly to outline the moon; this helps hide joining and deepen contrast.
— Stars & Constellations (Embroidered Details) :
Info :
Stars are embroidered after the crescent is attached. Use AC and a small tapestry needle or a darning needle. Two star styles appear in the sample: French knot-style 5-point stars and small plus-sign constellations connected with a simple backstitch line. Work stars in groups of 3-6 around the moon.
Step 1 :
Lightly mark star positions with a removable fabric marker or pin. Keep stars clustered to one side of the crescent to mimic the photos or scatter evenly if desired.
Step 2 :
For tiny puffy stars: bring needle up through fabric, wrap yarn around needle 2 times and reinsert near starting point to make a French knot. Pull through and secure on wrong side. For small 5-point star: use star stitch — make 5 spokes from the center and pull center tight and weave across to lock the spokes in place.
Step 3 :
To create constellation lines: use backstitch or stem stitch with MC or AC and keep lines thin. Connect groups of stars with subtle straight lines—do not overdo the density; the blanket looks best with negative space.
Info :
If you prefer crocheted stars, make small 5 SC star motifs and tack them on. Embroidery provides the most delicate finish for the small stars visible in the image.
— Square Border & Decorative Rounds :
Round 1 :
With MC rejoined at any side st, ch1, sc in each st around working 4 sc in each corner ch2. Join. (72)
Round 2 :
Ch2, hdc in each st around; at corners work (hdc, ch2, hdc) into corner space. Join. (72)
Round 3 :
Change to AC, join in any side st, ch1, *skip next st, 3 dc in next st, skip next st, sc in next st* repeat around for a small shell-like decorative line. At corners work shell in corner space. Join. (72)
Info :
This AC round creates the silver decorative inner frame visible in the photos. You can adjust the frequency of shells (every 6th st vs. every 4th st) to change look; verify counts remain consistent and corners are worked with shells to keep square.
Round 4 :
Switch to MC, ch1, sc in each st around in BLO to create a thin ridge. Join. (72)
Round 5 :
Ch3, dc around for 2 rounds to bulk up the border and match neighbor squares when joined, working 4 dc into each corner space. Join. (72)
Round 6 :
Ch1, sc around evenly; join and fasten off, leaving a long tail for joining. Block square to final measurement (approx 30cm/12in). Repeat to make required number of squares in your layout.
Info :
When blocking, pin corners square and breathe steam or spray water to relax fibers. Allow to dry completely so squares hold shape when joined. Blocks of the same tension produce a professional even blanket.
— Pillow Sham Options (Make 2 shams using 4 squares each) :
Option A - Front Panel :
Sew 4 motif squares into a 2x2 block for each pillow sham. After sewing, work 2 rounds of MC around entire sham to create a border, then add one AC round of decorative shells to match the bedspread squares. Leave the back separate (use a zipper or envelope closure).
Option B - Single Large Square :
Alternatively, make a larger focal square by increasing the center circle rounds of one square and then do wider borders to create a 40cm square for a standard sham front. Add pillow back in woven fabric or matching crochet panels.
Info :
For shams that sit nicely on pillows, sew squares tightly and add extra stitches in the corners of the sham to keep the pillow from slipping out. Insert pillow form and test fit before finishing last round.
— Joining Squares & Full Bedspread Assembly :
Info :
Layout your blocked squares on a large flat surface in your desired layout before joining. The sample layout uses 7 squares across and 9 squares down (7x9 = 63 squares). This yields approx 210cm x 234cm after joining and final border. You can adjust to 6x8, 8x8 or any configuration; total yardage adjusts accordingly.
Method 1 - Whipstitch Join (Invisible)
Place two squares wrong sides together and whipstitch through the back loops only of both squares for a subtle seam. Work across entire row joining squares horizontally first, then join rows vertically. Use MC yarn held single strand for neat invisible seams.
Method 2 - Join-As-You-Go (JAYG)
Work the final round of each square as a joining round: when you reach a side that touches an already finished square, slip stitch into the corresponding st of the adjacent square instead of working normal st; continue across to join on the fly. This produces a crochet seam visible on the right side and is quicker to assemble.
Info :
If making 63 squares, join them in horizontal strips of 7 squares each first (7-square rows), then join those rows vertically. Use blocking pins to align corners before joining for even seams. Weave in all ends as you complete each seam to prevent tangles.
Edge Reinforcement :
After joining, work 2 rounds of MC sc around the entire blanket with 3 sc in each corner to square it and stabilize edges. This will create a foundation for the final decorative border.
— Final Wide Decorative Border (Worked around whole bedspread) :
Round 1 :
With MC, join in any stitch along the edge, ch1, sc around the entire blanket working 3 sc in each corner. Keep corners square; join. (st count varies with blanket size)
Round 2 :
Ch2, hdc in each st around; work (hdc, ch2, hdc) in each corner. Join.
Round 3 :
Change to AC, ch1, *skip next st, shell (3 dc) in next st, skip next st, sc in next st* repeat around for a decorative silver chain. In corners work shell into the corner space. Join.
Round 4 :
Change to MC, ch1, sc around in BLO to create a ridge. Join.
Round 5 :
Ch3, dc across around 2 rounds, working 4 dc in each corner space for a rounded final border. Join each round. Fasten off AC details and weave in ends securely.
Round 6 (Final Finishing Round) :
With MC and 4.0mm hook, join and work crab stitch (reverse sc) around the entire edge for a neat firm finish. This creates the subtle twisted rope effect visible in the sample photos. Fasten off and weave ends.
Info :
The final border may require an extra round or two if your blanket pulls in or if the seam lines create slight waviness. Use blocking after joining and again after the entire blanket is bordered to relax and square the final piece.
— Alternate Square: Constellation or Star Variation (Optional) :
Round 1-11 :
Work rounds 1-11 from Motif Square above to create the circular center up to square formation (72 sts).
Round 12 :
Ch1, sc around in MC, join. (72)
Round 13 (Constellation Placement) :
Mark positions for constellation dots and embroidered stars. Use AC to embroider a small cross or French knot at each point using a tapestry needle, then connect with MC backstitch lines to form constellations. Keep lines thin and sparse—the sample uses 3-5 knots per square in diagonal patterns.
Info :
Alternate star squares among moon squares to mimic the blanket arrangement in the photos and to add visual rhythm across the bedspread. Use roughly 50-60% moon squares and 40-50% constellation squares for balanced composition.
— Finishing Touches & Care :
Info :
Weave in all ends along seams and under border rounds to hide them. Trim stray fibers and steam-block lightly if yarn fiber allows (check label). Hand-wash or gentle machine wash in cold water depending on yarn fiber; lay flat to dry to keep shape. Avoid tumble drying to preserve color and shape of appliques and embroidery.
Final Checks :
Inspect all seams and appliques to make sure they are secure. Add a second pass of stitching where needed on heavily handled edges like pillow shams or the top of the blanket. Remove any pins used for blocking and fluff the blanket after fully dry.
Info :
If you plan to gift or sell the finished blanket, include care instructions and advise the recipient to re-block after washing for best longevity and appearance.
Completing this celestial bedspread is a truly rewarding experience — each square is a tiny night sky you create stitch by stitch. The contrast of silver on deep navy gives a dramatic, cozy look that transforms the bedroom into a restful, dreamy space. I love how the raised crescent and tiny embroidered stars add tactile charm and slow down the pace of the project in a meditative way. Enjoy the process and celebrate your finished piece — it will become a treasured handmade heirloom! 🌙🧶