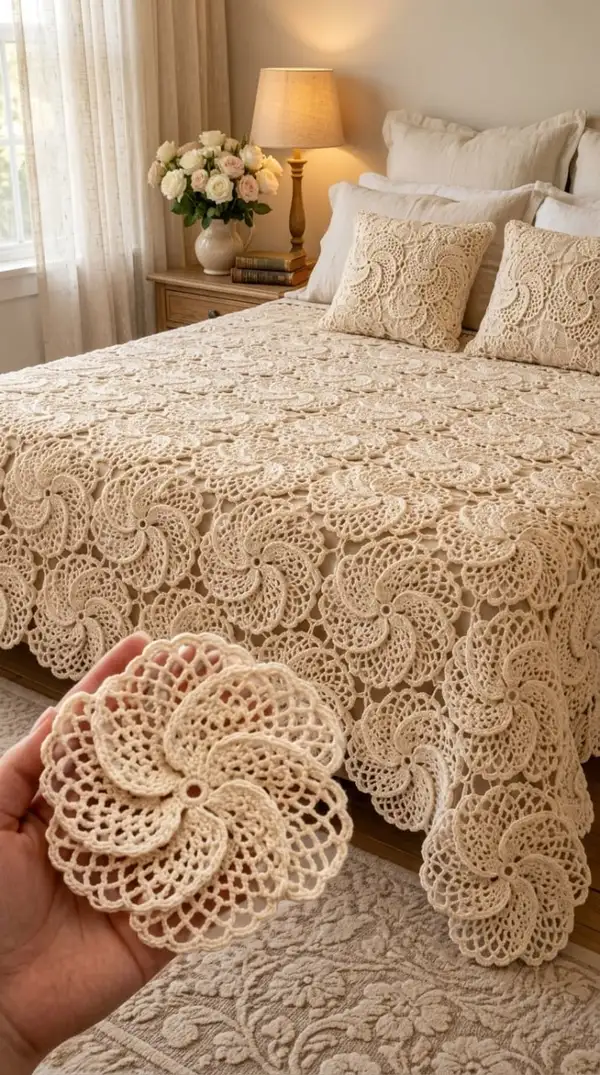
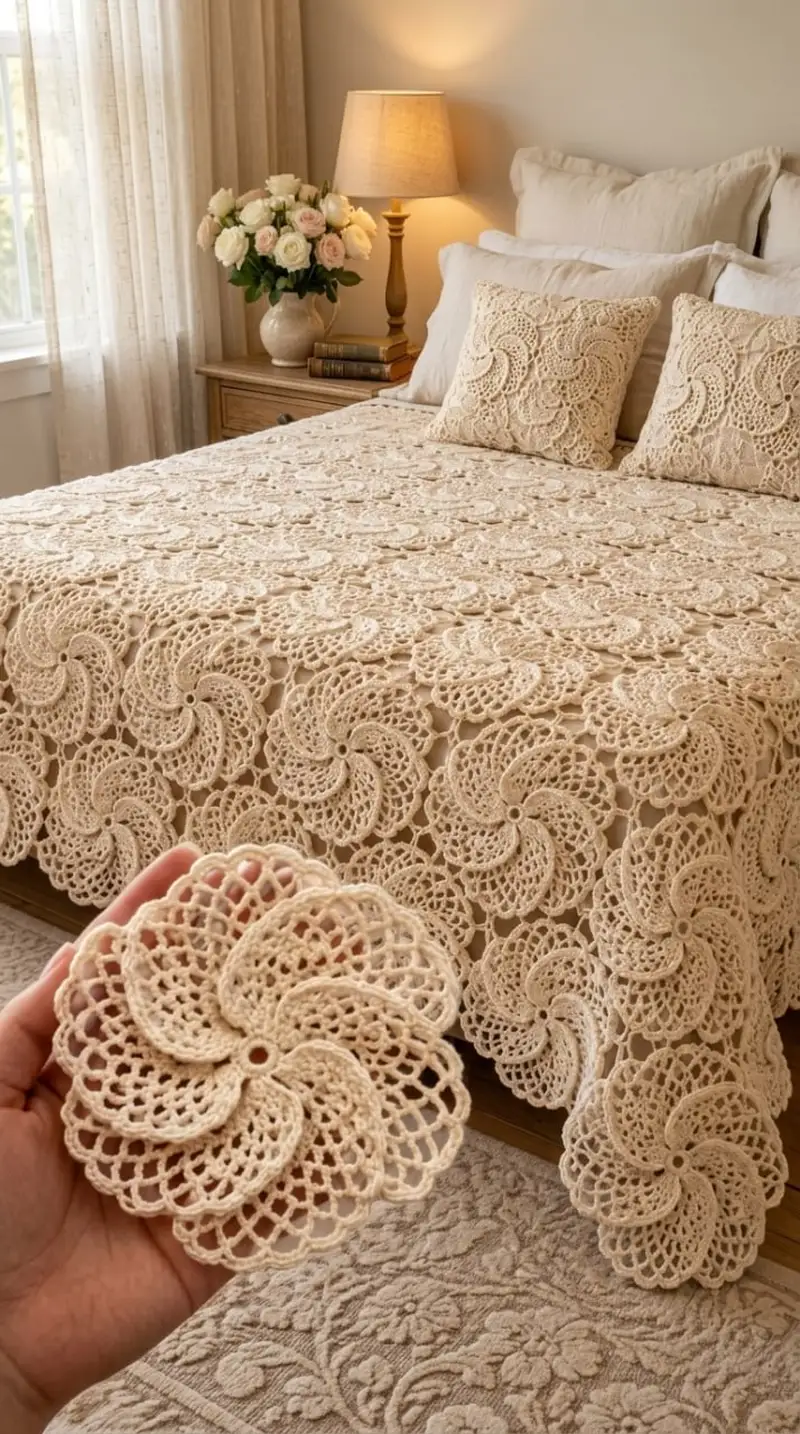
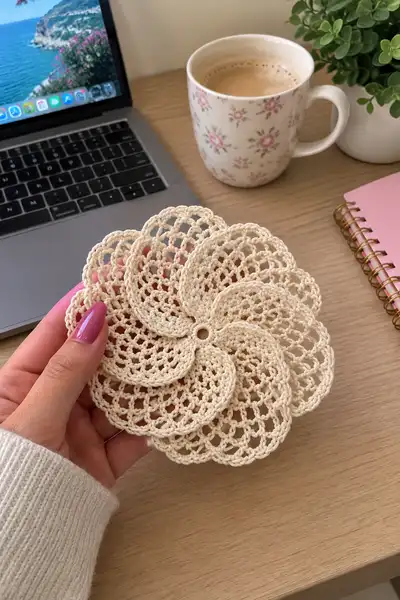
A timeless vintage-style cream bedspread made from delicate circular lace motifs joined into a large heirloom coverlet. This pattern recreates the swirling floral medallions, openwork mesh, and scalloped edging visible in the photos. The finished spread drapes elegantly over a bed and can be scaled to any size by adding or subtracting motifs. Detailed rounds, joining methods, and an ornate border are provided to guide you through an authentic heirloom finish.
Progress Tracker
0% Complete
— Central Motif :
Round 1 :
Start with a magic ring. 8 sc in magic ring (8)
Round 3 :
(1 sc, 1 inc) x 8 (24)
Round 4 :
(2 sc, 1 inc) x 8 (32)
Info :
Check your center: the small hole should be tidy and round. If your center is too tight, loosen your magic ring slightly to let subsequent rounds lie flat.
Round 5 :
(3 sc, 1 inc) x 8 (40)
Round 6 :
(4 sc, 1 inc) x 8 (48)
Round 7 :
Ch 3 (counts as dc), *skip 5 sts, 1 dc in next st, ch 3, 1 dc in same st* repeat around to form 8 small picot spoke spaces; sl st to top of ch-3 to join. You will have 8 ch-3 loop points (48 base sts still present under loops)
Info :
This round creates eight evenly spaced loop points that mark where each petal will be built. Count your loops; there should be exactly 8. If not, adjust by using a different starting point before proceeding.
Round 8 :
Work into each ch-3 loop: (ch 1, 3 dc, ch 2, 3 dc) into first loop; sl st into next loop; rep around. This forms the first layer of petals. After finishing the round sl st to first dc. (8 shell sections)
Round 9 :
Ch 1, sc in same st, *ch 5, sc in center of next shell (in ch-2 space)* repeat around to create a mesh bridge between petals; sl st to first sc to join. You should have 8 ch-5 mesh loops across the motif.
Info :
Keep tension even through the mesh rows so the motif lies flat. If ch-5 loops pull too tight, increase to ch-6 for slightly larger mesh; mirror this change in later rounds for balance.
Round 10 :
Work into each ch-5 loop: (sc, ch 3, 5 dc, ch 3, sc) in each ch-5 loop, sl st to first sc. This creates the secondary petal fan and adds height to each petal (8 fans)
Round 11 :
Ch 2, (2 dc, ch 1, 3 dc) in space between fans (the ch-3 spaces from previous round), *ch 4, slip stitch into the top of the fan to anchor* repeat around creating an open lattice between fans. Join with sl st to first ch-2.
Round 12 :
Ch 1, sc in same st; *ch 7, sc in the central stitch of the next fan (use the row 10 central dc cluster as reference)* repeat around forming larger mesh windows; sl st to join (8 large windows)
Info :
At this stage the motif shows 8 prominent fans (petals) arranged in a slight spiral. Count your windows and fans to ensure even repeats. Use markers on every second petal if it helps to keep track during long mesh rounds.
Round 13 :
Into each ch-7 window: (sc, ch 2, 7 dc, ch 2, sc) in window; sl st to join (8 large fan clusters)
Round 14 :
Ch 1, sc around each dc of the new fans (work 1 sc into each of the 7 dc of each fan and 1 sc into each ch-2 space) to create a tidy baseline for the next layered petals. After completing all fans you will have total stitch count = 8 fans x (7 dc + 2 ch spaces converted to sc) = 8 x 9 = 72 sc (72)
Info :
When converting chains and cluster spaces into sc rows, count carefully. Your motif should be increasing in circumference; if your number does not match, recount the fans and ch spaces.
Round 15 :
Ch 3, (2 dc, ch 1, 2 dc) in the first sc group to form smaller shell across each fan center; *ch 4, skip 8 sc, work shell into next group* repeat across. You should form 8 medium shells separated by ch-4 spaces. Join with sl st (8 shells plus 8 ch-4 spaces)
Round 16 :
Ch 1, sc in same st and in each dc across the shell, *5 sc across each ch-4 space* repeat around. Final stitch count after this tidy round will be 8 shells x 5 sc + 8 ch-4 spaces x 5 sc = 80 sc (80)
Info :
This round flattens shell edges and prepares the piece for the spiral shaping. Maintain consistent tension to preserve petal curvature.
Round 17 :
To introduce the shallow spiral: Ch 1, *sc in next 9 sts, (2 sc in next st) repeat around* This creates 8 increases distributed across the row and shifts stitch alignment for the spiral effect. Calculation: (9 sc + 1 inc) x 8 = (10 x 8) = 80 becomes 88 sc (88)
Round 18 :
1 sc in each st (88)
Info :
The spiral effect is subtle and comes from staggered increases and the shaping of petals. If your motif seems symmetrical but not spiraled, check that your increases are offset by one or two stitches between adjacent petals.
Round 19 :
(8 sc, inc) x 8 (96)
Round 20 :
1 sc in each st (96)
Round 21 :
Ch 3, *sk 2 sts, (5 dc in next st) sk 2 sts, ch 3, sl st in next st* repeat to create deep fan arches over each petal top. You will create 8 deep fan arches seated above the existing surface.
Round 22 :
Work (sc, ch 3, 5 dc, ch 3, sc) into each ch-3 loop created in previous round; sl st to join. These fans are taller and create the lace scallop lines later used for joining motifs.
Info :
These tall fans form the outer petal edge that gives the motif its swirled, layered look. Keep fans even by counting dc and ch spaces in each repeat; blocking will accentuate the shape.
Round 23 :
Ch 1, sc in each dc and ch space across the fans to form a tidy base for the outer mesh (approx. 120 sc depending on exact counts from earlier; we will standardize to 112-128 range). For pattern continuity count the total; if your count differs, make a note — this motif can be adjusted while joining.
Round 24 :
*Ch 5, sc in next sc* repeat around creating small mesh arches between scallops. Expect number of sc anchors to equal number of fans x number of anchor points (e.g., 8 fans x 3 anchors = 24 sc anchors producing 24 ch-5 loops)
Round 25 :
Into each ch-5 loop: (sc, ch 3, 9 dc, ch 3, sc) to form the final tall petal arches. Join with sl st. This decorative round creates the large outer lacy loops seen in the photo.
Info :
If your outer arches appear too tall or droopy, reduce the central dc count (e.g., 7 dc) and increase ch lengths proportionally in the mesh rounds to maintain flow. These adjustments will affect motif diameter slightly.
Round 26 :
Ch 1, sc around each dc and ch space across the tall arches, creating a stable rim. Even out by distributing 1 sc into each dc and 1 sc into each ch-3 space (resulting stitch count will likely be between 160-200 sc depending on prior counts). For consistency, if you used 9 dc in each arch in round 25, your final sc count here will be 8 arches x (9 dc + 2 ch spaces) = 8 x 11 = 88 sc; but because earlier rounds may have added anchors the typical motif circumference ranges 120-200 sts. It's acceptable for slight variation, but aim for consistent motifs if making many pieces.
Round 27 :
Picot round: *ch 3, sl st in 3rd ch from hook (small picot), sc in next 4 sts* repeat around to create a delicate scalloped edging. Join with sl st. This gives the motif a refined finish and helps visual continuity when motifs are joined into the bedspread.
Info :
Fasten off and weave in ends if you plan to store or block motifs before joining. For large bedspreads make 160–220 motifs for a queen size, depending on motif size and overlap desired. Block each motif to exact diameter before assembly.
— Small Connector Motif (used between large motifs) :
Round 1 :
mr, 6 sc in mr (6)
Round 3 :
(1 sc, inc) x 6 (18)
Round 4 :
Ch 4, *sk 1 st, sc in next st, ch 4* repeat creating 6 ch-4 loops; sl st to first sc. This small connector is worked into corners between motifs when joining.
Info :
Make many connector motifs in advance to determine spacing and placement between central motifs. These act as unobtrusive anchors for the lace join.
Round 5 :
Into each ch-4 loop: (sc, ch 3, 3 dc, ch 3, sc), join and fasten off. Make as many connectors as needed to fill the gaps between the large motifs when laid out on the bed.
— Joining Motif Rows & Assembly Motif (join unit used to link central motifs) :
Round 1 :
Make a chain joining base: ch 8, sl st to form a small ring. Work 8 sc around ring to create a compact join base (8)
Round 2 :
1 sc in each st (8)
Round 3 :
Ch 5, *sl st in next st, ch 5* around producing 8 ch-5 loops used to anchor into the outer arches of central motifs
Round 4 :
Into each ch-5: (sc, ch 3, 5 dc, ch 3, sc) then finish by leaving a long tail for sewing. These small anchor fans are used at intersection points when motifs meet. Make enough join motifs to match the lattice intersections in the layout.
Info :
For the bedspread in the photo, the pattern uses a continuous join method where join motifs are crocheted into the outer scallops of adjacent central motifs as you go, rather than sewing later. If you prefer sewing, join motifs first, block, then whip-stitch edges together invisibly.
— Field Join Instructions (connecting central motifs into panels) :
Info :
Decide your bedspread layout first: count how many motifs across and down. For a typical queen bed in the photo, a 9 x 12 (108) motif grid is a reasonable estimate depending on your motif diameter. Lay motifs on a blocking mat to finalize placement before joining. This section gives the continuous join method used by crocheters to produce seamless lace joins.
Step 1 :
Block motifs to exact diameter and place them right-side-up on a flat surface. Identify outer scallop points with small pins; these will be the anchor points for the join motifs.
Step 2 :
Place two central motifs side-by-side. With right sides facing up, attach thread at the outermost point (pick a consistent starting scallop location). Ch 1, sc through the outer edge picot of motif A, ch 3, sc through corresponding picot of motif B. Continue across the touching scallops using (sc in picot of motif A, ch 3, sc in picot of motif B). This forms a small flexible bridge between motifs. Repeat chaining between every adjacent pair of motifs in the row.
Info :
Use the same color thread and tension as the motif to make joins nearly invisible. Work joins on the bedspread laid flat to keep motifs aligned and avoid skewing the spiral orientation.
Step 3 :
Between three motifs that meet at a corner, use the small join motif: place the join motif centered at the point where three outer scallops meet. With a long tail from the join motif, sew through each scallop picot and around the join motif base using mattress stitch, then weave tail through several stitches to secure. This creates a triangular anchor stabilizing three adjoining motifs.
Info :
Continuous join method: once you have joined a row, start joining the next row to the completed rows using the same sc-ch3-sc bridges. The join motifs slip into the lattice at intersections, producing the open airy look visible across the spread.
— Outer Border & Scalloped Edging :
Info :
The border is worked after all central motifs are joined into the full spread. It cleans up the outer edge and extends scallops to create the flowing skirt-like drape. The border is worked around the entire perimeter and includes 22 rounds of decorative lace that echo the motif’s petal design.
Round 1 :
With right side of bedspread up, pick up yarn at a midpoint on an outer scallop. Work sc evenly around the entire outermost edge of the bedspread, placing 1 sc in each picot or outer ch-space to create a stable baseline. Use extra sc where there is large curvature to avoid rippling. Count total sc around and record (variable depending on size).
Round 2 :
Ch 3, *sk 2 sc, 5 dc in next sc, sk 2, ch 4, sl st into next sc* repeat around to create large shell arches sitting on the outermost edge. These will mirror motif petals and provide loops for later mesh work.
Round 3 :
Into each ch-4 space: (sc, ch 3, 9 dc, ch 3, sc) forming tall fans; join around. This deepens the scalloped effect and lengthens the spread drop.
Round 4 :
Ch 1, sc across each dc and ch space, smoothing the base for more lace. Count and correct any gaps by adding 1 sc where a spat occurs.
Round 5 :
Repeat mesh insertion: *ch 6, sl st into center point between two fans* repeat to create long mesh loops between fans; join.
Round 6 :
Into each ch-6: (sc, ch 3, 11 dc, ch 3, sc) creating an even larger outer fan that echoes motif petal form. Join and fasten off if you want a dramatic long scallop; otherwise continue to round 7 for additional ornamentation.
Info :
At this point the bedspread edge will have a pronounced scalloped border. If you prefer shorter scallops reduce the dc count in these outer fans. Make adjustments before the final decorative rounds.
Round 7 :
Ch 1, sc evenly across all dcs and ch spaces to stabilize (this is your working baseline for decorative outer rounds). Stitch count will depend on chosen fan size; expect 250-600 sc for full-perimeter baseline on a large spread.
Round 8 :
*(sc, picot (ch 3 sl st to tip), sc) across each outer dc cluster; ch 5 between clusters* repeat around to add decorative picots along scallop edges. Join.
Round 9 :
Ch 3, (2 dc, ch 1, 2 dc) in each picot-anchored cluster to form a small shell; ch 6 between shells. Join.
Round 10 :
Work sc in each dc and ch space to smooth the shell edges and prepare for final delicate edging rounds. Add or remove sc to keep the final shape flat.
Round 11 :
Delicate lace picot round: *ch 5, sl st in 3rd ch (small picot), sc in next 6 sts* repeat around to create even airy border. Join.
Round 12 :
Optional beaded edge: if desired, using a beading needle add small seed beads onto the thread prior to completing this round and place beads into every third picot for a subtle sparkle. Otherwise continue with sc and picot adjustments to finish the perimeter.
Round 13 :
Final scallop finishing: *3 sc in next 3 sts, picot, 3 sc* across the outermost loops to create a clean scalloped edge. Fasten off and weave in ends carefully, hiding tails into the backside of the border rounds.
Info :
Blocking the entire bedspread after joining and edging is critical. Pin the perimeter scallops to a consistent depth and steam/wet-block to open all lacework evenly. For very large spreads block in sections and re-join if necessary to maintain flatness.
— Pillow Cover Motif (make 2 or 4 to match spread) :
Round 1 :
mr, 8 sc in mr (8)
Round 3 :
(1 sc, inc) x 8 (24)
Round 4 :
(2 sc, inc) x 8 (32)
Round 5 :
Follow central motif rounds 7–13 to create matching petals but stop after the smaller fan stage so the pillow sits flatter and doesn’t build too much height. This usually means stopping at the ch-7 windows and sc tidy round (roughly round 14 in the central motif sequence). Fasten off and weave tails. Make 2 for standard cushions or 4 for a cluster display.
Info :
For a pillow back use a plain fabric or a solid crocheted square in matching thread. Sew the motif on top as an applique9 or create a complete lace front and attach backing with a hidden zipper or slip-stitch closure along one side.
— Extra Filigree Insert Motif (small oval connectors for corners) :
Round 1 :
ch 8, sl st to join (make ring), 12 sc into ring (12)
Round 2 :
1 sc in each st (12)
Round 3 :
*ch 6, sl st in next st* repeat creating little long loops used to fill small gaps. Finish with sc around and fasten off. Use these sparingly to hide odd gaps and shape the bedspread perimeter.
Info :
These small inserts are excellent to maintain visual continuity where full motifs would not fit due to bed corners or mattress overhang. Work as needed to tidy the overall shape.
— Finishing & Blocking :
Info :
Once all motifs are joined and the border is complete, prepare to block the full spread. Use rust-proof pins and blocking mats (or clean towels on a flat surface). Wet-block by soaking a small hanging section, then pin each scallop and petal into the desired shape and allow to dry completely. For very large spreads block in manageable sections (for example quadrants) then re-join edges by invisible ladder stitch if small seam adjustments are required.
Step 1 :
Pin each outer scallop to ensure even scallop depth and consistent curvature across the spread. Measure perpendicular distances from bedspread center to edge at several points to ensure symmetry.
Step 2 :
Steam gently using an iron (no steam directly on cotton thread; hover and use a damp cloth barrier) or let air-dry. Avoid direct high heat which can shrink or flatten delicate cotton thread.
Info :
After blocking, sew in all ends securely and trim thread tails close to the work. Small invisible stitches through the back of the border rounds will secure loose scallops for durability during washing and use.
Care :
Hand wash in lukewarm water with a mild detergent. Reshape and lay flat to dry. Avoid tumble drying and harsh bleach to keep thread integrity and color even. Store folded with acid-free tissue to preserve shape over time.
Completing this Vintage Cream Heirloom Bedspread is a truly rewarding labor of love — each lace motif fits into a broader tapestry of texture and light. The delicate spiraled petals and scalloped borders create a timeless statement for your bedroom. Blocking, joining, and finishing are the final meditative steps that turn many small motifs into a single luxurious heirloom. 🧶 Take pride in every stitch — you are creating a piece to treasure for generations! ✨