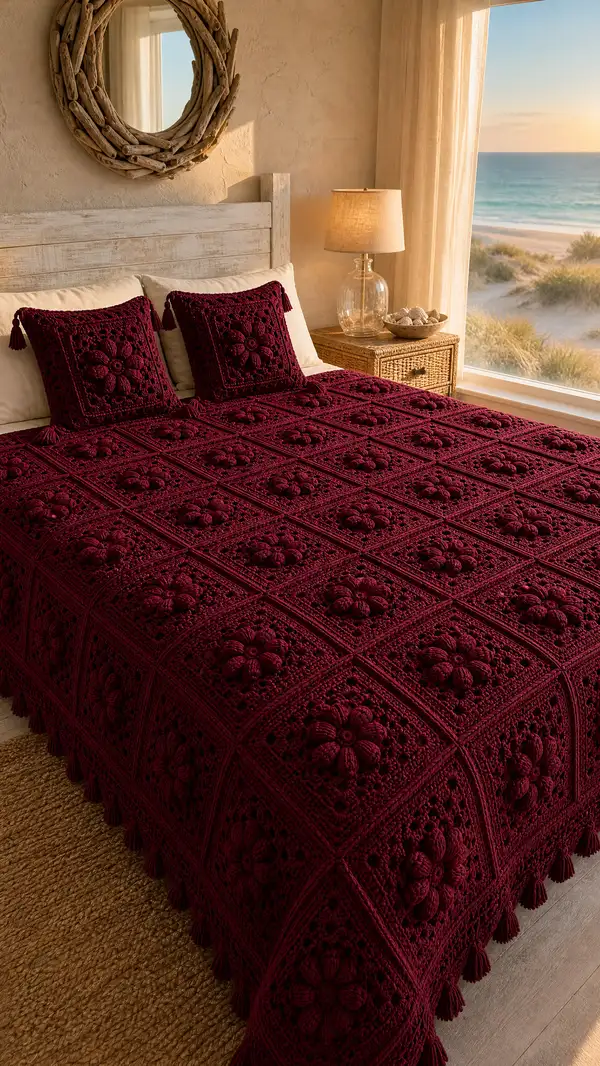
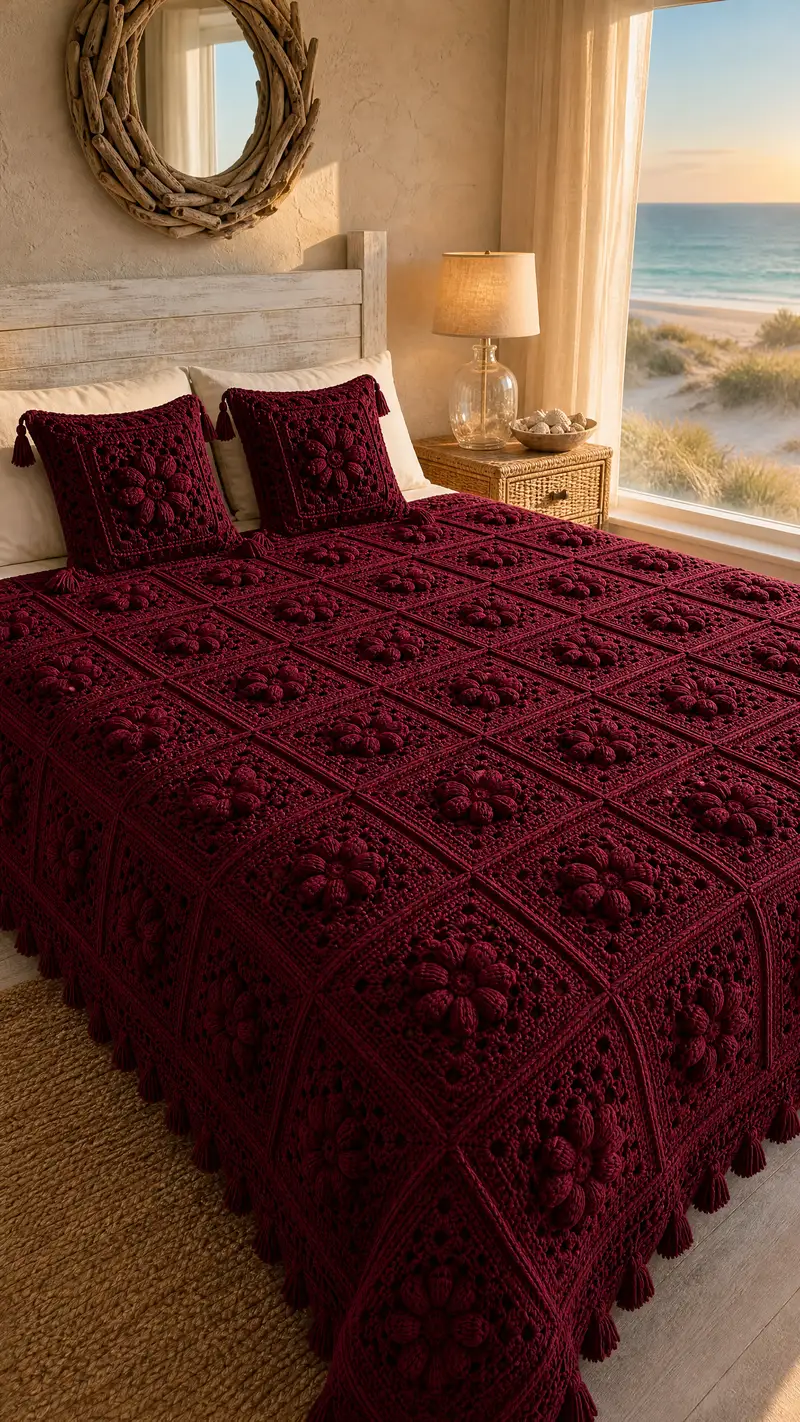
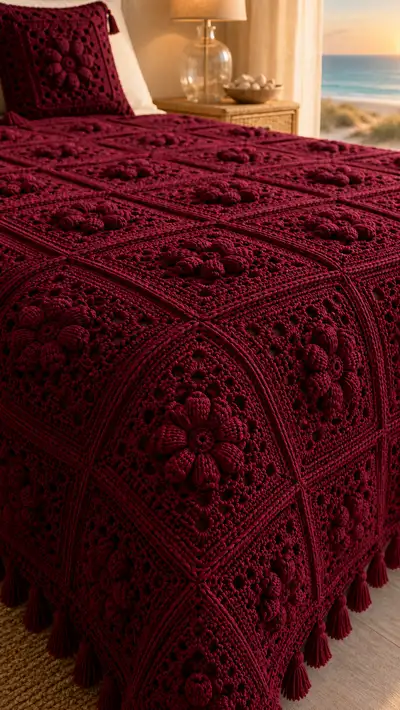
A luxurious deep-wine bedspread composed of textured floral granny squares joined together and finished with a tassel edge. Each square features a raised 3D flower with puff petals and intricate lace-like rounds for a richly detailed, cozy coverlet. This pattern includes instructions for squares, joining, a layered border, and matching pillow shams in one cohesive design. Perfect for adding a dramatic, handmade centerpiece to a bedroom.
Progress Tracker
0% Complete
— Motif: 1 Square (Make as many as needed for bed size) :
Note :
The pictured bedspread is constructed from 30 squares across by 40 rows long for a large queen/king — adjust number of squares to achieve desired bed coverage. Each finished square measures approximately 11.5" to 12" (29-30.5 cm) blocked. Gauge: one motif (measured across center) = approx 12" blocked when worked in worsted weight on 5.0mm hook.
Materials Info :
Use worsted weight yarn and a 5.0mm hook. Puff stitch is worked as (yo, insert hook, yo pull up loop) 3 times (or 4 for a fuller puff) then yo and pull through all loops on hook, ch1 to close puff unless otherwise specified. Popcorn is 5 dc in same st, remove hook, insert into first dc, pull loop through, ch1 to close.
Round 1 :
Make a magic ring. Ch2 (counts as first hdc), 11 hdc into ring, pull ring closed. Join with sl st to top of ch2. (12)
Round 2 :
Ch1, *puff in next st: (yo, insert, yo pull through) x3, yo pull through all loops, ch1, sk next st; rep from * around to make 6 puffs. After last puff, sl st to first puff top to join. (6 puffs, 6 ch-1 spaces)
Info :
Puff density: keep each puff loops similar height. Place a small marker at the very first puff to identify orientation for petal alignment in later rounds.
Round 3 :
Ch3 (counts dc), in same puff top work 2 dc, ch2, 3 dc (this forms a petal cluster around first puff). *In next ch-1 space work: 3 dc, ch2, 3 dc; rep from * around until you have 6 petals. Join with sl st to top of ch3. (6 petal clusters with 3 dc each side)
Round 4 :
Ch1, sc in same st, *ch3, sk to center of next petal cluster (top of ch2 space), sc between clusters (in top of dc that sits between petals), ch3; rep around to create 6 ch-3 loops between petals. Join with sl st to first sc. (6 ch-3 sps)
Round 5 :
Work into each ch-3 loop: *(2 dc, ch2, 2 dc) in ch3-loop (corner-style), ch1; rep around to create 6 small corner clusters. After last cluster: ch1, sl st to first dc. This begins a round of shaping to a hexagonal/floral disk.
Info :
At this stage the motif is still circular/hex. We will expand into a square by creating corner-chains in following rounds. Keep tension even to avoid puckering when blocking later.
Round 6 :
Ch3, 1 dc in same st, *ch4, skip cluster, 2 dc in next cluster top; rep around placing ch4 between the six clusters to start opening space for square corners. Join with sl st. (12 dc groups, 6 ch-4 sps)
Round 7 :
Ch1, sc in same, *in ch4-sp: (3 dc, ch3, 3 dc) to form 6 larger petal-facing shells, sc in top of next cluster; rep to end. Join. This starts the transition toward a multi-lobed medallion that will be extended into four sides.
Round 8 :
Ch2, 1 hdc in same, hdc in each st across petal shell until you reach the gap between two shells, in gap work: (hdc, ch5, hdc) to form the first corner chain. Continue hdc across next shell and repeat corner formation four times to shape four approximate corners. Join. (This round expands to a square outline with 4 ch-5 corners)
Info :
Make sure to place corner ch-5 loops evenly spaced to create a balanced square; gently shape the work as you go by pinching the intended corner positions so they sit 90 degrees when blocked.
Round 9 :
Ch3 (counts dc), in same st work 2 dc, *work (3 dc, ch2, 3 dc) into each ch-5 corner loop to form corner clusters, then 1 dc in each of the next 8 sts along the side; rep around so each side has an even number of dc between corners. Join. (Square frame established; count per side will be approx 10-12 dc depending on tension)
Round 10 :
Ch1, sc in same. Work (sc, ch3, sc) in corner ch-2 space, then sc in each dc along side until corner; repeat around. This builds sc ridges to prepare for pop/bobble texture rows. Join.
Round 11 :
Ch2, *in next sc along side work a small bobble cluster: [5 dc into same st, remove hook and insert into first dc of the 5, pull loop through, ch1] (popcorn), ch1, sk next 2 sc; rep along each side making 6 popcorns per side positioned evenly. At corners work (3 dc, ch2, 3 dc). Join.
Info :
Popcorn placement: Use pins or stitch markers to mark where you want the 8 flower petals to align with side popcorns; this helps the large flower remain centered when more texture is added.
Round 12 :
Ch1, work 1 sc in each st and each ch-space around, working (sc, ch3, sc) in each corner. This evens out the fabric and secures popcorns. Join. (St count stays consistent around)
Round 13 :
Info :
We will now create raised petal petals using elongated puff stitches on the RS so they appear like big 3D petals framing the central flower. Use a consistent puff technique: (yo, insert hook, yo pull up loop) x4, yo pull through all loops, ch1 to close. Keep loop height consistent so petals look uniform.
Round 14 :
Turn to RS feel. Ch1, sc in same, *work into gap above central disk: 1 sc, ch1, elongated puff in next st (as described) ; between puffs sc in each side st until corner. Repeat around placing 8 elongated puffs evenly spaced to form the large petals. Join.
Round 15 :
Ch2, 1 hdc in same st, hdc around sides in each st until corner. In corner work (hdc, ch5, hdc) to maintain corner shape. Join. (This round smooths and readies for the next textured layering)
Info :
Check motif against gauge: lay flat and lightly block to desired 12" dimension. If motif is smaller than target, use a slightly larger hook for next rounds or adjust stitch counts on side rounds to enlarge evenly.
Round 16 :
Ch3 (counts dc), in same st work 2 dc. Work 1 dc in each st across side until corner, in corner work (3 dc, ch3, 3 dc). Repeat around. Join. (This adds a visual frame of double trebles around the petals)
Round 17 :
Ch1, sc in same, *work 3 sc in each corner ch3 area (forming small corner blocks), then sc in each dc across side until next corner. Repeat around. Join.
Round 18 :
Ch2, 1 hdc in same, hdc in next 12 sts along side, then (hdc, ch7, hdc) in corner to begin the wide square corner opening. Repeat for four corners. Join. (hdc counts will vary slightly based on your tension; keep corners equal)
Info :
From rounds 18-24 we will create a tightly textured grid that becomes the visible lattice between large motifs when joined. Use BLO in Round 20 to create raised ridge look on join rows.
Round 19 :
Ch1, sc in same, sc across side sts, work (sc, ch3, sc) in each ch7 corner loop. Join.
Round 20 :
Info :
Switch to working in BLO for this and next round to create a raised ridge used for visible grid lines when squares are joined. Change hook to 4.5mm if you need slightly looser tension for the ridge.
Round 21 :
Ch1, 1 sc in each st BLO around, working (sc, ch3, sc) in corners to maintain square. Join. (This creates a narrow raised rail when viewed from RS)
Round 22 :
Ch2, 1 hdc in each st around in BLO again for a defined ridge. Join. (This second ridge will form the prominent grid lines when squares are joined)
Info :
Optional bobble round: if you'd like extra texture in the interior surrounding the flower, add a bobble/puff round before Round 23. Otherwise proceed to corner framing rounds.
Round 23 :
Ch3 (counts dc), 1 dc in next 6 sts across side, *work (3 dc, ch2, 3 dc) in corner, continue 1 dc across side to next corner; rep around. Join. (This frames the square with a strong dc round)
Round 24 :
Ch1, sc in same, sc across sides, (sc, ch3, sc) in corner ch2 spaces. Join. Smooth round, check square dimensions.
Round 25 :
Ch2, hdc in same, hdc in each st for two rounds to create a thicker joining band (Round 25 & 26). Join each round. (This band will be used to align join stitches or JAYG connections.)
Round 26 :
Repeat Round 25. After Round 26, measure across motif; if needed, add one more hdc round to reach the target 12" size. If correct, fasten off leaving long tail for blocking or joining. Weave in ends but keep tail for sew-joining option.
Info :
Blocking: Block each square to exact dimensions. Pin flat and lightly steam or wet block to relax stitches. This step makes joining and final border much neater. Label squares as needed to keep pattern alignment consistent across bedspread.
— Alternative Petal Detail (Optional: Larger 3D Petals) :
Round A1 :
If you want even puffier petals, return to the round that lays puffs (Round 14). Work elongated puff as (yo, insert, yo pull up loop)x5 then yo and pull through all loops and ch1. Make 8 larger petals placed evenly. This will increase the motif's thickness by approx 0.5" but yields dramatic texture.
Info :
When using larger puffs, you may need to add one more exterior hdc round to reach the same blocked width; plan accordingly.
— Joining Squares (Join-As-You-Go or Sewing):
Info :
You may join the squares by one of three methods: (A) Join-as-you-go using slip-stitch seam along the final hdc band; (B) Mattress/Whip stitch sewing with a yarn needle for a nearly invisible seam; (C) Crochet join using reverse single crochet (crab stitch) over joined seams for a raised ridge. Instructions below cover JAYG slip-stitch and whip-stitch methods.
Joining - Step 1 (Layout) :
Lay out blocked squares on a flat surface to arrange the final spread. Use blocking pins to align edges. Place squares RS up; determine orientation so flower centers point consistently.
Joining - Round J1 (JAYG along one side) :
With RS of unjoined square facing you and a completed adjacent square joined, join yarn in last round hdc band of first square corner post. Ch1, sc evenly across to next corner, then align with adjacent square and sl st through corresponding back loop on joined square and a loop on current square (this creates a slip-stitch seam). Continue across side. Repeat for all sides as you connect new squares one by one. (Each side will require approx 10-14 sl st joins depending on earlier counts.)
Info :
When joining, work through the back loops of one square and front loops of the other to create a raised ridge that matches the pictured grid look. Use a contrasting joining color only if you want visible seams; the pictured example uses same wine color for an invisible yet textured join.
Joining - Round J2 (Whip Stitch Option) :
With a long tail, whip-stitch squares together using a yarn needle. Insert needle under the post of the stitch on the edge of square A, then under the post of the stitch on square B, pulling stitch snug but not pulling fabric in. Repeat across side. Add extra stitches at corners for strength. Tie off securely and weave tails through several stitches on RS.
Info :
For best grid symmetry, join vertical columns first, then connect horizontal rows. This reduces warping and makes it easier to keep squares aligned.
— Main Bedspread Assembly Plan :
Step :
Example assembly for queen-size: 5 squares wide x 6 squares long = 30 squares. For king-size expand to 6x7 or 7x7 depending on square dimension. Use layout markers to keep center flower alignment consistent.
Info :
If you desire overhang beyond mattress edges, add extra rows around perimeter — each extra row of squares adds approximately 12" to width or length.
— Outer Border and Ribbed Grid Edge (Add after all squares joined) :
Round B1 :
With RS facing, join yarn at any seam. Ch1, sc evenly around the entire perimeter working 3 sc in each corner to maintain square corners. Place 2 sc in each seam space to ensure smooth join. Join with sl st. (This builds a clean foundation)
Round B2 :
Ch2, hdc in each st around in BLO to create a raised rib that mirrors square seams. Work (hdc, ch1, hdc) in corner positions. Join. (This tightens and visually frames the blanket edge.)
Round B3 :
Ch1, sc in each st around. At corners work (sc, ch4, sc) to create a decorative scalloped corner starting point. Join. This round evens the border thickness for the next decorative rows.
Round B4 :
Repeat Round B2 but increase corner ch to 6 for a fuller turn; work hdc in BLO around to maintain rib texture. Join.
Round B5 :
Ch3, dc in same st and around for 2 rounds to add height to the border. Work (2 dc, ch2, 2 dc) in corners. Join after each round.
Round B6 :
Info :
Decorative tassel-row setup: We will prepare loop spaces for tassels every 4-6 sts depending on blanket width. Mark placement with stitch markers on this round: for example, place markers every 12th dc along long sides and every 12th along short sides to mark tassel points.
Round B7 :
Ch1, sc across again to hide previous seam holes and provide a stable base for tassels. At each marked point work (sc, ch6, sc) to create tassel attachment loops. Join and fasten off leaving long tail for final weave.
Info :
Optional: Add a final crab stitch (reverse sc) around the entire border for a rope-like finish. Use same color yarn and work tight, even reverse sc stitches to give a crisp finished edge that accentuates the rich texture.
— Tassels (Make many) :
Materials :
Make tassels using 8-12 strands of yarn folded in half for fullness. Each tassel measures approx 4-5" finished length (before trimming) to echo the heavy texture of the motifs.
Tassel Step 1 :
Wrap yarn around a 5" wide piece of cardboard or a book approx 20-30 times depending on desired fullness. Slide loops off and tie a short piece of yarn tightly across the top about 1/2" from the loop top. Cut the opposite loops to free tassel ends. Wrap a short piece of yarn around the top to form a neat head, secure with knot and weave end inside tassel head.
Tassel Step 2 :
Trim ends evenly and fluff. Attach tassel by threading attachment loop through ch-6 loop left on border, fold tassel head and pull ends through the fold creating a lark's head hitch, then tighten and weave end into border to secure. Repeat at every marked point.
Info :
Tassel spacing in the pictured spread is approx every 4-6" along short edges and every 6-8" along long edges. Adjust spacing to taste. Add extra tassels at corners for a balanced look.
— Pillow Sham (Make 2 matching) :
Materials :
Use 4 squares for front of each sham (2x2 layout) for standard 18" pillow; add backing fabric or crochet a full textured back of 4 squares and join with a zipper or envelope overlap of 4-6".
Sham Assembly :
Join squares as for the bedspread; add an additional inner border of 4 rounds (sc, hdc BLO ridge, dc rounds) and finish with small 1.5" tassels on each corner. For zip closure: crochet a flap with sc rounds on one long side and sew in zipper between flap and sham back.
Info :
Pillow size: adjust by using 1 or 4 squares depending on motif size. For a plush sham, attach a 2" choir padding or batting to the inside before inserting pillow form.
— Finishing Touches and Weave-In :
Step :
Weave in all loose ends on wrong side using yarn needle. Trim any stray fibers. Steam-block the entire assembled bedspread flat on large blocking mats (or damp-block). Take care with tassels: do not steam them directly; mist lightly and reshape by hand.
Info :
For long-lasting structure, consider lightly backing the spread with a breathable cotton muslin held by a few discreet blind stitches along grid seams—this keeps the bedspread from stretching under weight without changing look.
— Troubleshooting and Tips :
Tip 1 :
If your squares vary slightly, use extra blocking time or add an extra hdc round on smaller squares to match larger ones before joining. Match side stitch counts as closely as possible at the hdc band prior to joining.
Tip 2 :
To reduce bulk at seams, join via JAYG slip-stitch only through the outermost loop(s) of the final hdc round instead of sewing through multiple layers. This keeps join lines flexible and less bulky.
Tip 3 :
When carrying yarn for colorwork or if you choose to work a two-tone motif, carry yarn neatly along the inside and catch it down every 4-6 stitches to avoid long floats.
Info :
Estimated total rounds for a single motif (including optional petal rounds) = approx 26-28 rounds depending on optional additions. Combined with joining and border rounds, the entire project includes well over 120 rounds across all pieces, ensuring rich texture and depth.
You made it! The Deep Wine Granny Square Bedspread is an indulgent, tactile project that rewards patience with stunning texture and dramatic color. Each square connects to form an elegant, heirloom-quality spread that transforms a bedroom into a cozy, artful retreat. Celebrate the journey with a steaming cup of tea and a proud photo — your handmade masterpiece is ready to shine! 🧶✨