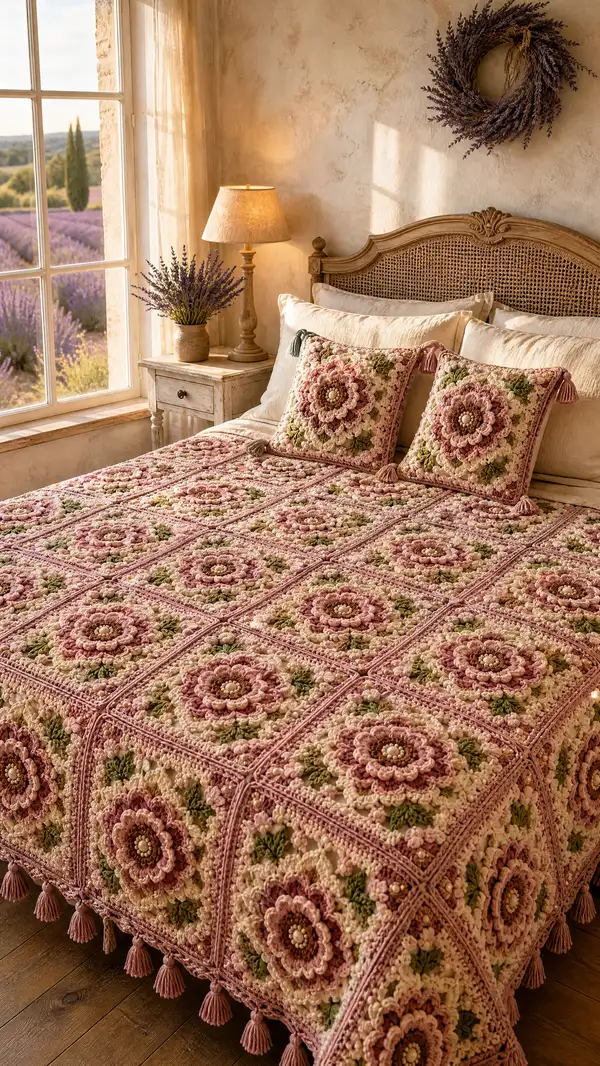
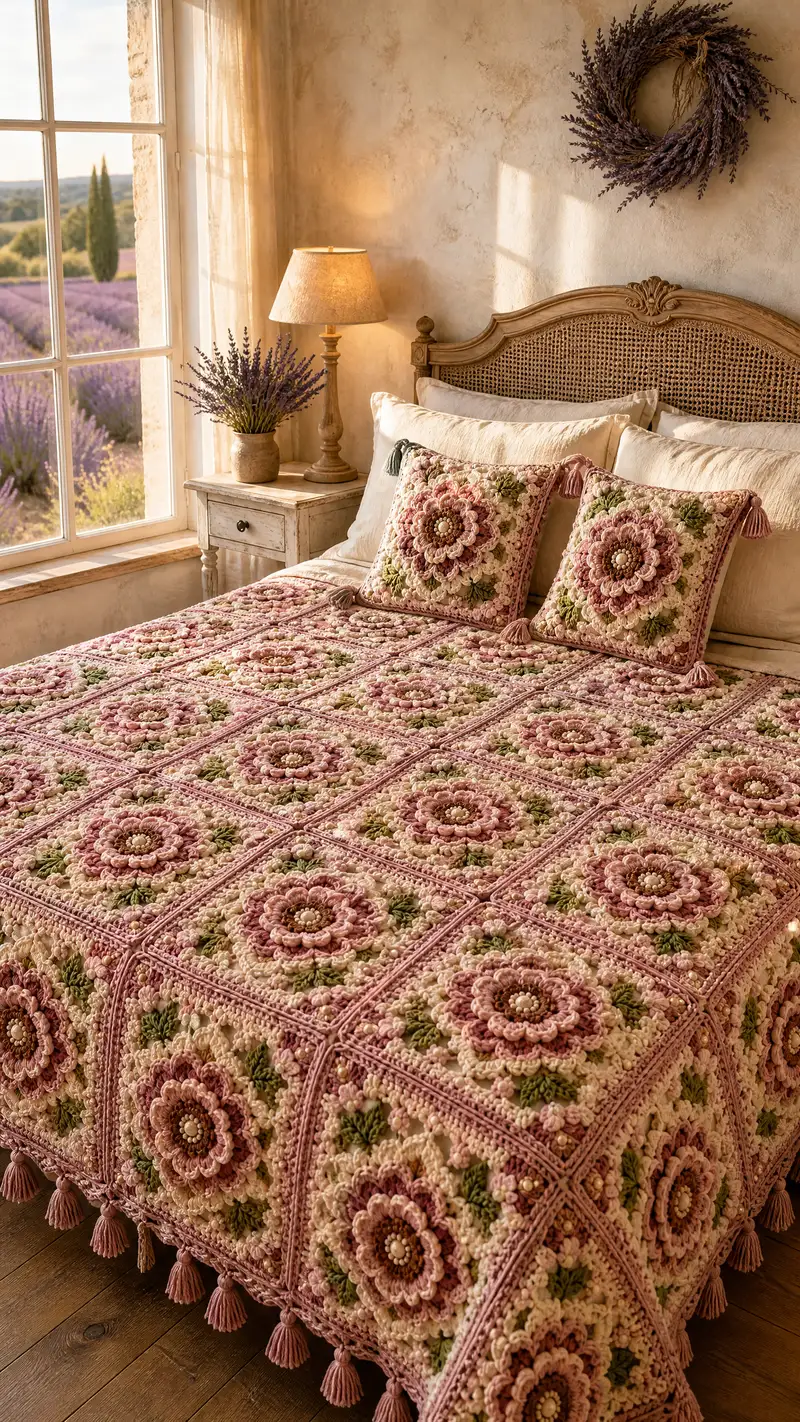
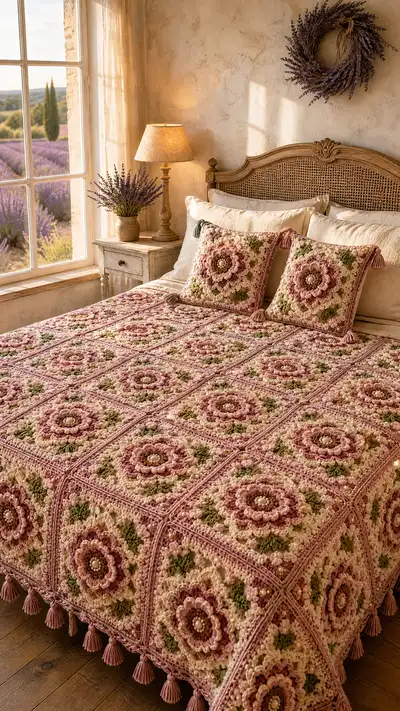
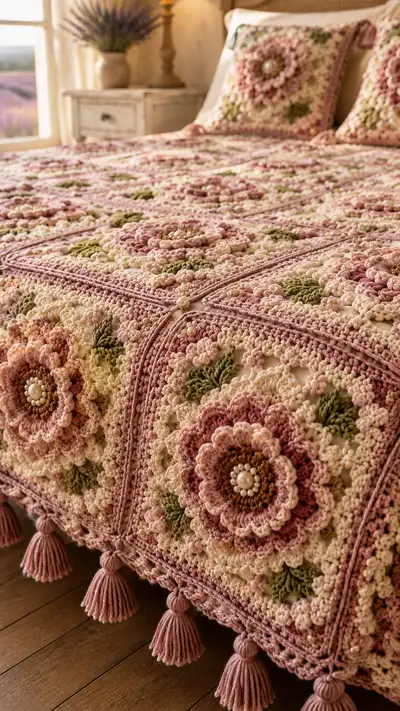
A romantic, vintage-inspired bedspread made from layered floral granny squares in dusty rose, cream and sage. Each square features a textured 3D flower center with pearl accents, leafy corners and a delicate scalloped join. Finished with a triple-row border and tasseled edge, this bedspread brings soft, handcrafted luxury to your bedroom.
Progress Tracker
0% Complete
— Overview :
Info :
This pattern is modular. Make individual floral granny squares (called 'motifs') and join them into a grid to create the bedspread. The instructions below cover a single motif in granular detail, then joining, border and finishing. Gauge per finished motif: approximately 12.5cm/5" square using the specified yarn and 4.0mm hook; adjust hook if necessary. Bedspread shown is 6 motifs by 6 motifs (36 motifs) for a queen-sized cover; adjust number of motifs for size preference.
Info :
Abbreviated technique notes: Puff stitch here is a 5-loop puff (yarn over, insert hook, pull up loop) unless otherwise noted. Cluster is a 3-dc cluster worked in same space and closed together. Join-as-you-go method used in one of the joining options; an alternative whip/flat seam is included.
— Motif (Make 36 motifs or desired quantity) :
Round 1 :
With warm brown (color A). mr, ch1, 8 sc into ring, sl st to first sc to join (8)
Round 2 :
Ch1, 2 sc in each st around (16)
Round 3 :
Ch1, (1 sc, inc) x8 (24)
Info :
Change to a slightly lighter brown or taupe for a subtle inner ring before petal rounds, carry yarn up the back if you prefer fewer ends.
Round 4 :
Ch1, (2 sc, inc) x8 (32)
Round 5 :
Ch2 (counts as hdc), hdc in same st, *ch1, skip next st, 2 hdc in next st* repeat around to make 16 small hdc clusters, sl st to top of ch2 (32 hdc spaces clustered)
Info :
Puff and petal rounds begin next. Use 3.5mm hook if you want looser, fuller petals. Keep tension consistent; puff stitches will draw in the round slightly.
Round 6 :
Change to dusty rose (color B). Ch3 (counts as dc), *in same st make 4-loop puff (yarn over, insert, pull up loop, repeat until 4 loops on hook), yarn over and pull through 4 loops once to secure a low puff, ch1, sl st in next st* repeat around for 16 low puffs separated by ch1 (32 total elements counting ch spaces)
Round 7 :
Ch1, sc in each st and ch space around to create tidy row (approx 48 sc) — this evens the foundation for petal build
Info :
Ensure petal base sits flat; if the center is cupping, ease the yarn with a blocking spray later. Place a small scrap of fiberfill in the center for structure if you prefer more domed petals.
Round 8 :
Change to blush pink (color C). Ch3, (2 dc, ch2, 3 dc) in first puff base space to form first petal peak, *sk next 2 sc, (3 dc, ch2, 3 dc) in next puff base* repeat around to produce 8 tall petals (8 petals, corners not yet formed)
Round 9 :
Ch1, sc in top of each dc and ch2-space around (approx 80 sc) to secure petals; work evenly into ch2 spaces with 3 sc across to stabilize
Round 10 :
Change to deeper dusty rose (color D). Ch1, work 3-loop puff into the center of each petal (into center dc of the 3-dc group) followed by sl st into next sc; repeat for each petal to add a second textured layer (8 puffs)
Info :
Important: keep counts accurate—if you have 8 petals, you should place 8 puffs. Use stitch markers at the top of each petal to help keep placement consistent while you work the second layer.
Round 11 :
Ch2, hdc in each st around to add a low ridge (approx 96 hdc). This evens the work for the square-round conversion
Round 12 :
Change to cream (color E). Ch3, dc in next 3 sts, *dc2tog over next 2 dc, dc in next 6 sts* repeat once more, then prepare to make the first corner: (dc3, ch3, dc3) in next space to begin squaring out the round; continue pattern placing corner shells spaced evenly to create 4 corners (you should end with 4 corner shells separated by panels)
Info :
This round starts to convert the round motif into a rough square. Count panels between corners — aim for 4 panels with equal stitch numbers. If necessary, adjust number of dc between corners by +/-1 to square up evenly.
Round 13 :
Ch1, sc around working 3 sc into each corner shell (dc3,ch3,dc3) spaces, and 1 sc in each dc along edges. Maintain stitch counts so that corners have 3 sc and edges are filled evenly (total around ~120 sc)
Round 14 :
Change to sage (color F). Ch1, *in corner shell work (sc, ch3, sc) to define corner; along edge work (sc, ch2, sc) in every group of 3 sc from previous round to create leaf pocket starts* repeat around (this prepares for leaf clusters in the corners)
Round 15 :
In sage, work leaf clusters into corner CH-3 spaces: (sc, ch1, 5 dc around ch-3 space working the dc as elongated leaves—dc worked around ch space forming a fan), ch1, sc to close; do the same for each corner making 4 leaf fans total. Along edges fill each (sc, ch2, sc) with 3 sc in ch2 space for texture.
Info :
Leaf cluster technique: to make a realistic leaf, pull slightly taller loops for the first and last dc of the fan and press the fan slightly to one side for shape. Don't overstretch yarn when making leaf dc.
Round 16 :
Switch to cream. Ch3, (2 dc, ch2, 3 dc) in each corner to reinforce square shape; along each side work 1 dc in each st across until reaching the next corner shell (approx final square size for motif will be 12.5cm/5").
Round 17 :
Ch1, sc in each st around, placing 3 sc in corner ch-2 spaces (approx 160 sc) — this provides a sturdy, neat edge for the next textured rounds
Round 18 :
Change to dusty rose. Ch1, BLO sc in each st around to create a raised ridge that frames the square (work approximately 160 sc BLO)
Round 19 :
Change to blush pink. Ch3, *in next space make puff (5-loop puff) around post of previous round to create small bobble clusters, ch1, sl st in next st* repeat around to create a halo of tiny puffs between petals (approx 48 puffs depending on spacing)
Info :
Puff stitches here are compact; do not close too tightly. Each puff counts as one ornament—if you have fewer or more puffs, that's acceptable but aim for a balanced distribution around the motif.
Round 20 :
Ch1, sc in each st and ch-space around to secure puffs and smooth the motif edge (approx 160 sc)
Round 21 :
Change to dusty rose (color B). Work 1 sc in each st BLO for a delicate ridge, placing 3 sc in corner spaces to maintain square geometry (approx 160 sc)
Round 22 :
Ch1, *in each corner work (sc, ch3, sc), across edges work (sc, ch1, sc) into every 6th sc to create small openwork clusters* repeat for all sides; this creates decorative chain spaces between motifs when joined
Round 23 :
Change to cream. Ch1, sc in each st and ch-space around to finish motif (maintain 3 sc corners). Fasten off leaving a 25cm tail if you plan to whip-join; leave long tail in contrasting color if choosing join-as-you-go method (approx 160-170 sc)
Info :
Weave in any inner ends at this stage, but leave corner tails if you plan to sew motifs together. Block motif lightly to open petals and flatten edges: spray with water and pin to square measurements, leave to dry before joining.
— Alternative Petal Layer (Optional Deep Layer) :
Round 24 :
(Optional) Add an extra outer petal layer: join dusty rose in any edge sc, ch3, work (5 dc, ch3, 5 dc) over the center of each side to create 4 large scalloped petals. This adds dramatic 3D texture for very large motifs.
Info :
Only use this optional layer if you have sufficient yarn and want a more sculptural motif. It will increase blocking time and make joining slightly more challenging; join carefully to preserve petal edges.
— Joining Motifs (Option A: Join-as-you-go) :
Info :
Join-as-you-go (JAYG) is recommended to create a neat raised joining ridge that becomes part of the border. Join motifs as you complete the final round or after blocking, working the final round while slip-stitching into the adjacent square's corresponding stitches to form a flat seam.
Round 25 :
Place two motifs with wrong sides together. On final round of second motif, when reaching a corner ch-3 space, dc3 into corner, then ch1 and sl st into the ch-3 space of the first motif to join corner. Continue along edge: where you would normally work sc in final round, instead sl st into the corresponding st on adjacent motif to join; for spaces where no adjacent motif exists work sc as normal.
Round 26 :
Continue joining row-by-row. When starting a new motif next to two already joined motifs, join along both sides: at edge intersections work a corner join (dc3, ch3, dc3) sl st to both adjacent squares to secure. Keep tension loose enough the seam lies flat but firm enough to hold firmly.
Info :
When joining, always align motifs so petals face the same direction unless you want a rotational pattern. Use pins to keep motifs aligned before final seam. Count stitches across sides to ensure corresponding stitches match; adjust last few sc if necessary to match counts.
— Joining Motifs (Option B: Mattress/Whip Join) :
Round 27 :
If you prefer, join motifs after all are made. Use a mattress stitch or whip stitch with matching dusty rose yarn through the back loops of adjacent motifs to create a subtle ridge. For a more decorative overlap, use a raised slip-stitch seam by whip-stitching then working a row of sc over the seam.
Info :
Mattress stitch: place motifs right side up flat, use tapestry needle with yarn and sew through the top loops or BLO depending on desired ridge. Use small even stitches and tie ends off discreetly.
— Assembling Bedspread Grid :
Round 28 :
Make a layout on a large floor or table (6x6 grid for queen shown). Join motifs row-by-row using the chosen method. Join each motif to the motif on its left first, then join rows together. After joining rows, check grid squareness—block if necessary.
Info :
To avoid a wavy blanket, join motifs in one direction only (e.g., left-to-right), then when joining rows, align joins consistently. If seams feel tight, relax them slightly by reworking with a larger hook in the seam stitches.
— Inner Border & Stabilizing Rows :
Round 29 :
With cream yarn, work one round of sc around entire assembled rectangle evenly, placing 3 sc in each corner. This smooths out the raw edges from joining and prepares for the decorative border (work evenly around, count sts for reference).
Round 30 :
Change to dusty rose. Ch1, BLO sc around entire blanket to echo motif ridges and create a subtle visual frame (maintain 3 sc in corners). This row frames each square and emphasizes the grid lines.
Info :
Blocking after this row helps the blanket keep its rectangular geometry prior to heavier decorative border rounds. Pin edges straight and steam lightly if needed.
Round 31 :
Change to blush pink. Work a round of 'puff and chain' border: *puff in next st, ch2, skip 1* around, filling corners with (puff, ch3, puff). Adjust spacing so puff clusters fall over seam lines for continuity across motifs.
Round 32 :
Ch1, sc in each st and ch-space around to secure the puff border. This provides a neat base for the final scalloped edges.
Info :
Count stitches along each side and record counts for the following scallop border so corner scallops align perfectly. If counts differ by a few stitches, add evenly spaced sc to correct rather than increasing scallop size unevenly.
— Main Decorative Border (Rows 33-50) :
Round 33 :
Work 2 rounds in dusty rose: Ch3, dc in each st around placing (dc3,ch3,dc3) in corners. This strengthens the border and creates a base for scallops (approx counts will depend on blanket size; maintain even tension).
Round 34 :
Ch1, sc in each st around. Place marker at start and keep track to ensure evenness.
Round 35 :
Change to cream. Start scallop row: Along straight edges work *skip 2, 7 dc in next st, skip 2, sl st in next* repeat to create rounded scallops. At corners work 11 dc in corner space to round the corner smoothly.
Round 36 :
Ch1, sc in each st and into each scallop to tidy the back. This anchors the scallops in place (use matching color to blend).
Info :
If scallops look too large, reduce to 5-dc shells instead of 7. Test on a small swatch to determine desired scale relative to motif size.
Round 37 :
Change to dusty rose. Work one row of front-post dc around each scallop peak to create raised ridges for a refined finish - work fpdc around the middle dc of each scallop shell.
Round 38 :
Ch1, sc in each st around. At corners maintain 3 sc for stability. This secures the post stitches into neat alignment.
Round 39 :
Optional decorative lace row: Using cream, *ch4, sl st in 3rd ch from hook to create small picot arches across each scallop peak; sl st to next* repeat. For a denser lace, work small V-stitches (dc, ch2, dc) linking scallops.
Round 40 :
Finish with 2 rounds of dusty rose sc to create a firm border edge ready for tassel attachment. Round 40 is sc evenly; Round 41 is BLO sc to create neat base for tassel loops.
Info :
Final border rounds create the anchoring row for tassels. Record the stitch count around so tassels can be spaced evenly—divide total stitches by number of tassels desired to get spacing interval.
— Tassels (Make 24-36 depending on border) :
Round 41 :
Make tassels in dusty rose: Wind yarn around a 7cm wide piece of cardboard 30-40 times depending on desired thickness. Slide off, tie a small 10cm piece tightly near the top to create the head, fold in half and wrap yarn around the head several times to secure. Trim ends evenly.
Round 42 :
Attach tassels: Using a crochet hook, pull loop through designated border stitch and pass tassel loop through and pull tassel ends through loop, tightening to create a lark's head knot. Space every 12th stitch for 36 tassels or as desired. Sew the top of the tassel head to the border with a few tiny stitches for security.
Info :
Block completed blanket with tassels dangling free. Tie tassels' wrapped head thread ends securely and weave in ends into the headwrap to avoid unraveling. If you want very sturdy tassels, insert a small stitch of fabric glue under the wrap—optional.
— Pillow Covers (Make 2 matching squares) :
Round 43 :
Make 2 motif squares as above. After final sc round, instead of fastening off, work 6-8 extra rounds of sc in cream to increase pillow size to 45cm/18" square if desired. Work evenly in rounds, placing 3 sc in corners.
Round 44 :
Edge the pillow front with a narrow band of dusty rose bump stitches: ch1, *sc, fpdc around next 2 sts, sc* repeat to create a textured frame. Fasten off leaving long tails for mattress-stitching back panel.
Round 45 :
For back panel make two plain cream panels: ch64 (or match front width), row of hdc across for desired height, seam sides with mattress stitch leaving one side open for insert. Alternatively make one large panel folded and sewn on 3 sides.
Info :
Insert a standard 18" pillow form and close opening with hidden stitches. Add matching tassels to corners if desired to echo bedspread finish.
— Bead Centers & Embellishment :
Round 46 :
Sew pearl beads into motif centers: using thread or thin yarn and a darning needle, stitch one 10mm flat-back pearl in the center and surround it with 6 small seed beads if desired to echo the photo. Secure with multiple passes and weave ends far into the motif.
Info :
Test bead placement before sewing: lay bead on center and ensure it sits snugly between inner puff rounds. If petals are very full, sew beads through foundation rounds rather than fragile puff stitches to prevent pulling.
— Final Finishing :
Round 47 :
Weave in all ends with large tapestry needle; hide ends within BLO ridges to make them invisible from front. Trim ends close but not into the wrapped yarn to avoid unraveling.
Round 48 :
Final blocking: lay blanket flat on blocking mats, pin edges to a straight rectangle. Steam lightly with iron at a distance or spray and air dry for 24 hours. Check tassels for uniform length and trim evenly.
Info :
For care, hand-wash gently in cool water with mild detergent, reshape and lay flat to dry. Cotton may soften and bloom over washes; re-block after washing if needed.
— Notes on Adjusting Size and Gauge :
Round 49 :
If you want a larger bedspread, make more motifs and add additional inner border rounds. For smaller (throw) size reduce motifs to a 4x5 grid. Keep motif dimensions consistent for square assembly.
Round 50 :
To change density of texture, adjust puff stitch loop counts: 5-loop puffs create large, dramatic petals; 3-loop puffs create a flatter, more delicate look. Adjust hook accordingly.
Info :
Always make a sample motif and block it before committing to yardage to prevent running out of key colors mid-project.
Completing this Dusty Rose Floral Granny Bedspread is a truly rewarding experience—watching each textured square come together into a bed covered in layered flowers is pure joy. The combination of puff petals, leaf clusters and pearl centers makes this a special heirloom piece with personality and charm. Take your time, block carefully and enjoy the meditative rhythm of repeating motifs; the finished result will be worth every stitch. 🧶💗