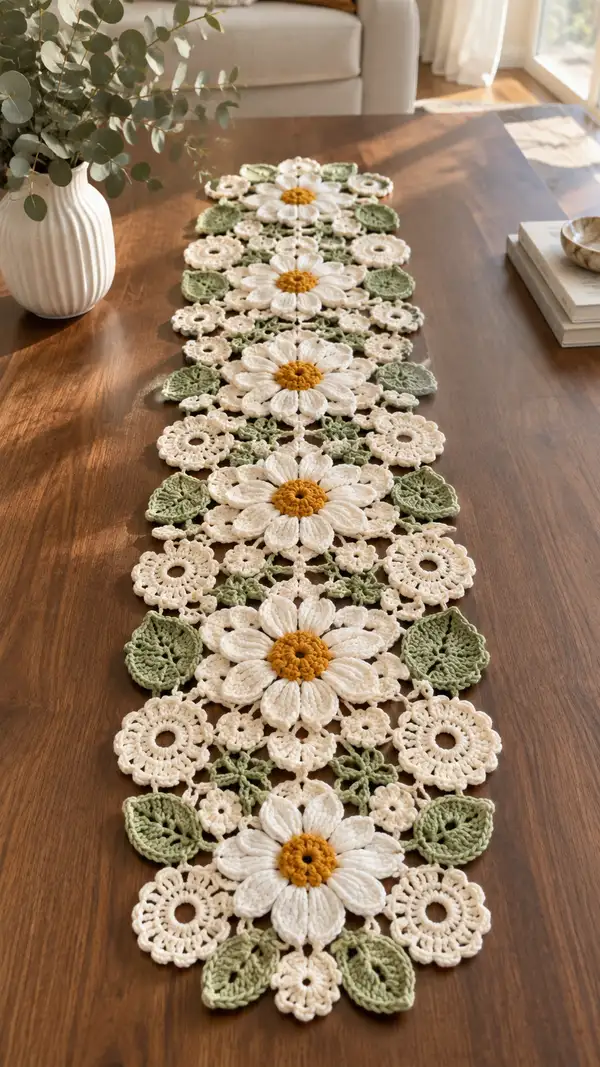
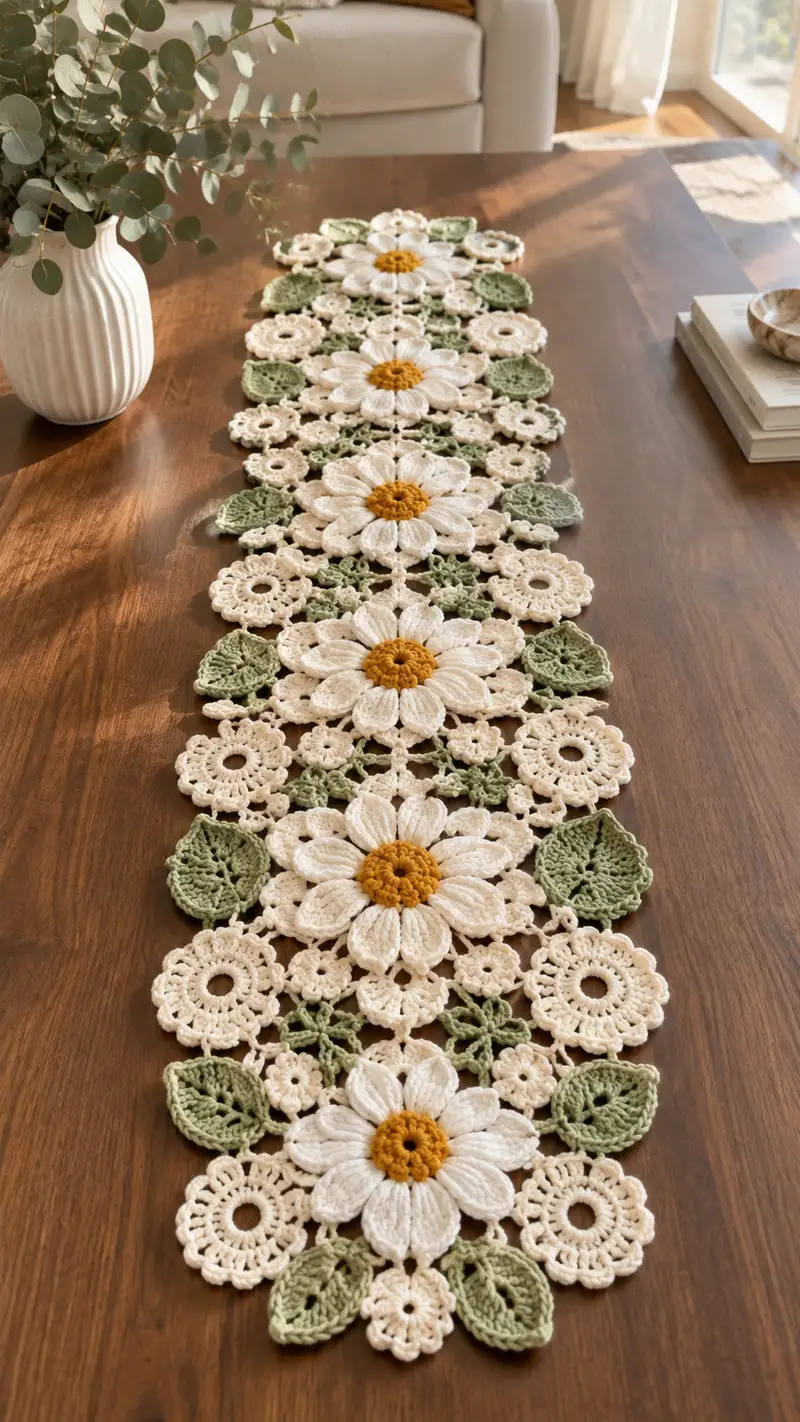
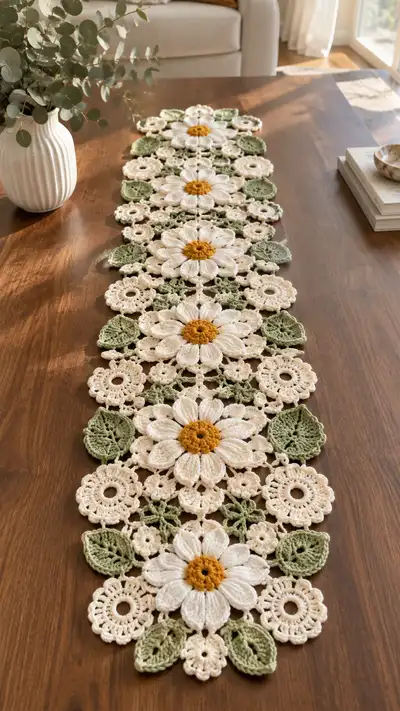
A delicate, vintage-inspired table runner made from interconnected crochet daisies, small rosettes and sage green leaves. The runner features prominent cream petals, warm mustard centers and soft sage leaves arranged in a repeating mosaic for an elegant, airy centerpiece. This modular pattern uses motif assembly so you can adjust length to fit your table. Finished piece shown measures approximately 48-60 inches long depending on motif count.
Progress Tracker
0% Complete
— Overview :
Info :
This runner is made from repeating large daisy motifs, medium circular motifs, tiny rosettes and sage leaf motifs. Work motifs separately, block them flat, then join using slip-stitch or whipstitch as described. The pattern below gives detailed round-by-round instructions for each motif type and extensive joining and edging instructions. Adjust motif counts to lengthen or shorten your runner.
— Daisy Center (Make 5 large centers for main daisies) :
Round 1 :
Make a magic ring, ch1, 8 sc into ring, pull tight (8)
Round 2 :
(inc) x 8 — work 2 sc in each st around (16)
Round 3 :
(1 sc, inc) x 8 — (24)
Round 4 :
(2 sc, inc) x 8 — (32)
Info :
Use mustard/gold yarn for center; keep tension snug so center is slightly cupped. If you prefer a raised center, use a smaller hook for rounds 1-3.
Round 5 :
1 sc in each st around (32)
Round 6 :
Work 8 groups: *(ch1, puff3 in next st, sl st in next st)* repeat 8 times to create textured petal base around the center; end with sl st to join (32 loops formed)
Round 7 :
Evenly single crochet around forming a tidy edge: 1 sc in each sc and 1 sc in each puff base (32)
Info :
If you wish centers to sit flush, add a tiny amount of fiberfill under the center before adding petal layer; do not overstuff. Leave long tail for sewing if assembling by hand.
Round 8 :
Fasten off mustard yarn leaving 8-10 inch tail for sewing to petal layer. Weave tail to the back and secure. Center finished.
— Daisy Petal Layer (Attach to each center; make 5 sets) :
Info :
Petals are worked around the center using cream yarn. Each petal is a puff/cluster worked into a foundation ring of chains and sl sts to space petals evenly. There are 12 petals per daisy in the pictured runner.
Round 1 :
With cream yarn join to any sl st between the puff groups on the center and ch5 (counts as 1 tr + ch2). *Skip 2 base sts, sl st in next base, ch5* repeat until you have 12 ch-5 loops around; join with sl st to first ch (12 loops)
Round 2 :
Work petals: *(into each ch-5 loop) [dc, puff4, dc] - puff4 = yarn over, insert hook, pull up loop, yarn over, insert hook again in same loop, pull up loop; repeat 4 times total then yarn over and pull through all loops, ch1 to close puff*; sl st to join between petals. Form 12 petals total.
Round 3 :
Ch1, 1 sc in base at the outer end of each petal around (12 sc). Between each sc work 3 sc into the space between petals for stability (12*(1 sc + 3 sc) = 48) — total 48
Info :
Keep petals upright and consistent. Pin petals gently during blocking to hold shape. If some petals are taller, work a slightly larger closing sc to even the edge.
Round 4 :
Work 1 sc in each st around (48) to tidy edge and create a junction row for attaching surrounding motifs.
Round 5 :
Optional decorative round: *(ch3, sk 1 st, sc) around to form small picot lace edging* — finish with sl st and fasten off leaving tail for sewing to connectors.
— Small Rosette Motif (Make 20 or more) :
Round 1 :
mr, ch2 (counts as hdc), 10 hdc into ring, pull tight and join (11)
Round 2 :
(1 hdc, inc hdc) x 5, 1 hdc — distribute to return to 16 sts (16)
Round 3 :
*(ch2, puff3) in next st, sl st in next st* repeat to make 8 small puff petals around the rosette; join with sl st (8 puffs)
Round 4 :
1 sc in each space and sc around base between puffs (count variable depending on spacing; aim for 24 sc total). Fasten off and leave tail for joining.
Info :
These tiny rosettes fill negative space between large daisies. Block flat to standardize diameter; when sewn, their centers should sit flush with the daisy petal base.
— Medium Lacy Round Motif (Make 8) :
Round 1 :
mr, ch3 (counts as dc), 11 dc into ring; join (12)
Round 2 :
(1 dc, inc) x 6 — (18)
Round 3 :
*ch4, sk 1 st, sl st to next, ch4, sl st* repeat to form 6 open loops around; join (6 loops)
Round 4 :
Into each ch-4 loop work [sc, hdc, 3 dc, hdc, sc] to form scalloped petals (6 scallops). Fasten off and leave tail for joining.
Info :
These lacy rounds anchor the composition and visually balance the larger daisies. Work them in cream for a subtle lace look; use BLO in round 4 for additional texture if desired.
— Leaf Motif (Make 20-24 sage leaves) :
Round 1 :
With sage yarn ch8. Row 1 (foundation): sc in 2nd ch from hook, hdc in next, dc in next, tr in next, dc in next, hdc in next, sc in last (7 sts across foundation)
Round 2 :
Turning to work along opposite side of foundation chain, work 1 sc in first st, 1 hdc, 2 dc, 1 tr, 2 dc, 1 hdc, 1 sc — leaf shaped top formed (total ~10-12 sts depending on placement)
Round 3 :
Edge: sl st around leaf edge working 3 sl st in top tr apex to form a pointed tip. Fasten off with long tail for sewing.
Info :
Optional vein: with contrasting sage (slightly lighter or darker), embroider two parallel veins on the leaf using stem stitch or sl st. Block leaves with pins to keep curve and dimension.
— Small Connecting Motif (Make many; used between daisies and rounds) :
Round 1 :
mr, ch3 (counts as dc), 11 dc into ring; join (12)
Round 2 :
*(ch3, sl st into next dc) x 12 to form 12 chain loops around; join with sl st*
Round 3 :
Into every other ch-3 loop work sc clusters: [sc, ch2, sc] to create a small 12-point lace connector. Fasten off leaving tail to sew.
Info :
These connectors are designed to nestle between petal bases and lacy rounds to knit the whole runner together. Make extras as needed to customize spacing.
— Joining Sequence For One Daisy Cluster (Detailed multi-round join steps) :
Info :
Each large daisy cluster in the runner has one large daisy (center + petals), surrounded by four lacy medium rounds and eight small rosettes plus four leaves and multiple connectors. The joining sequence below shows step-by-step slip-stitch joins and sewn seams so counts and placement are consistent.
Round 1 :
Place a completed daisy flat. Identify 12 outer petal base points where petals meet closing round. Attach cream yarn at an outer sc between petals nearest your first pairing point. Ch1, sc in same st to anchor.
Round 2 :
Work 3 sc across next 3 base spaces to create a small bridge extending outward; this forms a tab for sewing the medium lacy round. (3 sc)
Round 3 :
With medium lacy round positioned overlapping the tab, sl st through corresponding sc in lacy round and sl st back into tab, repeat 3 times to secure one anchor point. Fasten off and weave tail. Repeat at four equidistant points around the daisy to secure four medium rounds.
Info :
When slip-stitching motifs together, aim for small, tight joins. Use the joining yarn only through front loops if you want a visible decorative ridge; insert through both loops for flat joins.
Round 4 :
Sew small rosettes into the gaps between petals and medium rounds. For each gap, place rosette and sew through 6-8 stitches at its base using mattress or whip stitch. Work a minimum of 8 rosettes per daisy cluster.
Round 5 :
Sew leaves at outermost points where medium rounds and rosettes meet: place leaf tip pointing outward and stitch along leaf base securing to two or three stitches on the underlying motifs to prevent flapping.
Info :
Use pins to hold motifs in place before sewing. Check symmetry frequently — the runner is meant to read as repeating floral units, so consistent placement is key.
— Assembling Runner Rows (Detailed layout and joining rounds) :
Round 1 :
Decide runner length (example uses 5 daisy clusters in a column). Place first cluster at one end. Overlap next cluster with approximately 6-8 stitches of the medium lacy round touching adjacent rosettes; join at two symmetric anchor points using sl st through both motifs to create a flexible seam.
Round 2 :
Continue joining subsequent clusters in a linear sequence using the same two anchor points per cluster interface. After joining all clusters, the runner forms a continuous floral chain with interlocking leaves filling edges.
Info :
When joining clusters, keep tension of joins slightly loose to allow the runner to drape. Too tight joins will kink the runner and make it inflexible.
Round 3 :
Fill remaining gaps between clusters with additional small rosettes and connecting rounds. Use whip stitch to secure them by sewing through 4-6 stitches on each connecting motif for a stable join.
Round 4 :
Check the runner on a flat surface and add leaves at outer edges to square off the shape and create a soft scalloped border. Add 1-2 leaves between daisies to mimic the photo spacing.
Info :
Keep a note of how many connectors you use between each pair of clusters if you plan to reproduce the exact length. The pictured runner: 5 daisy clusters joined with 4 medium rounds and ~24 small rosettes and 20 leaves total.
— Border & Edging (Finishing the outside edge) :
Round 1 :
With cream yarn and 3.5mm hook, join at any outermost stitch on runner's edge. Ch1, sc evenly around all outer edges, working 3 sc in rounded areas to preserve scallop shape. Count total number of sc to estimate yarn needs.
Round 2 :
*(ch3, sk 1 st, sl st) repeat around to create an airy picot-like edging. In wider scallops work (3 dc, ch2, 3 dc) as a shell to accent petals. Fasten off and weave ends.
Info :
If you prefer a firmer edge, use BLO on Round 1 to create a ridge before adding decorative shells on Round 2. Blocking will help shells sit neatly.
— Blocking & Final Shaping :
Info :
Soak runner gently in lukewarm water with wool wash or mild detergent. Press out excess water, then pin motifs flat to a blocking board at desired spacing and shape. Pay special attention to petals and leaf curves. Allow to dry completely before removing pins.
Round 1 :
After blocking, check joins and add reinforcement stitches where motifs feel loose. Use matching yarn and small whip stitches to tack motifs together invisibly from the back.
Info :
Final pressing with a steam iron (on low, using a pressing cloth) can flatten any small irregularities and improve the runner's finished look. Do not press directly onto cotton too hot or you will flatten puff petals.
— Optional Variation: Smaller Daisy Motifs (For edges or short runners) :
Round 1 :
mr, ch1, 6 sc into ring, join (6)
Round 3 :
Work 6 puff petals using ch4 loops: *(ch4, puff3 in loop, sl st)* repeat 6 times; join and fasten off (6 puffs)
Info :
These mini daisies make lovely filler motifs for the outer border. They are quicker and require less yarn; use same joining methods as larger motifs.
— Finishing Details and Quality Check :
Info :
Weave all tails into the fabric using a yarn needle going through several hidden stitches. Trim ends close. Inspect all joins for gaps; add a few reinforcing stitches if needed. Make sure leaves are sewn down at 2-3 points near the base so edges do not lift when handled.
Round 1 :
Optional: gently tie a tiny length of embroidery floss into centers of rosettes to deepen the center color for extra contrast. Secure with a couple of tiny knots on the back.
Info :
Final measurement: block and measure runner. The photographed sample uses five large daisies and measures approximately 48-60 inches long by 8-10 inches wide depending on blocking and join spacing. You can scale up by adding more daisy clusters.
Completing this Cream Daisy and Sage Leaf Table Runner is so satisfying — the motifs come together like a floral collage that brightens any table. The rich textured petals and soft sage leaves create a timeless, cottage-style centerpiece you can be proud of. Each blocked motif and careful stitch builds a runner that feels handmade and special. Enjoy the process and share your creation for others to admire! 🌼🧶