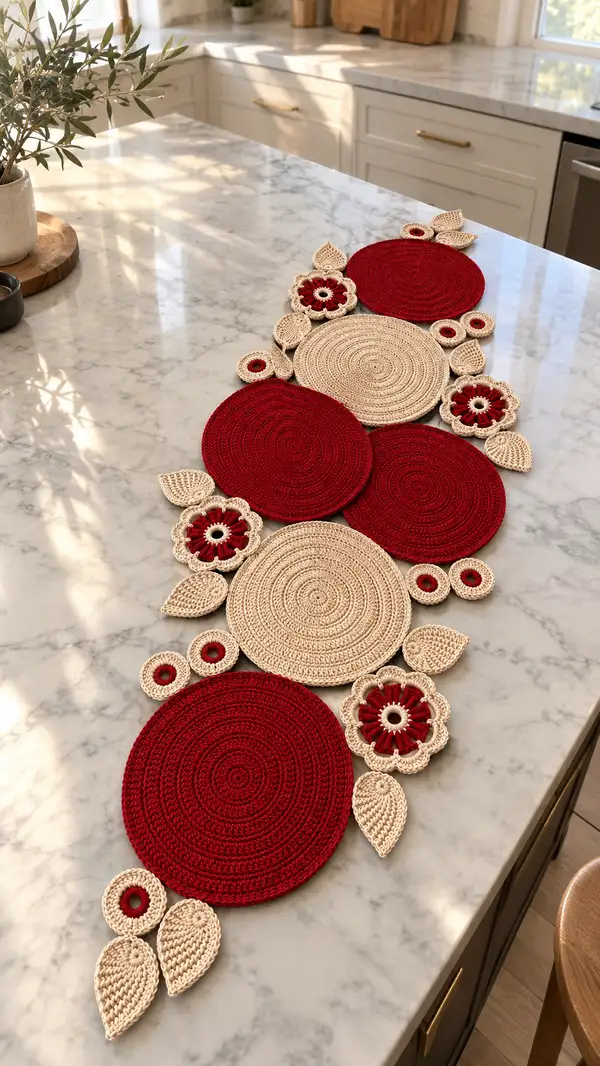
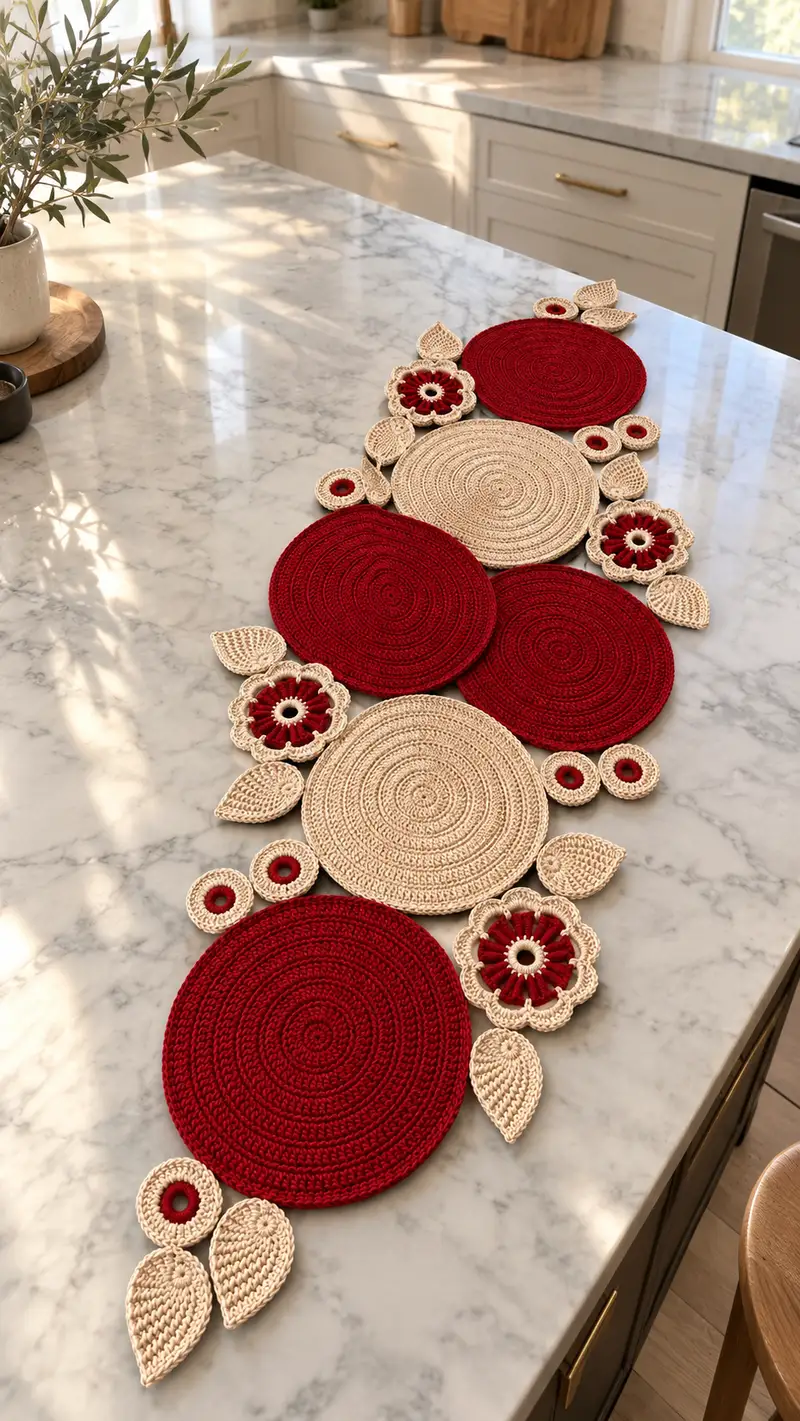
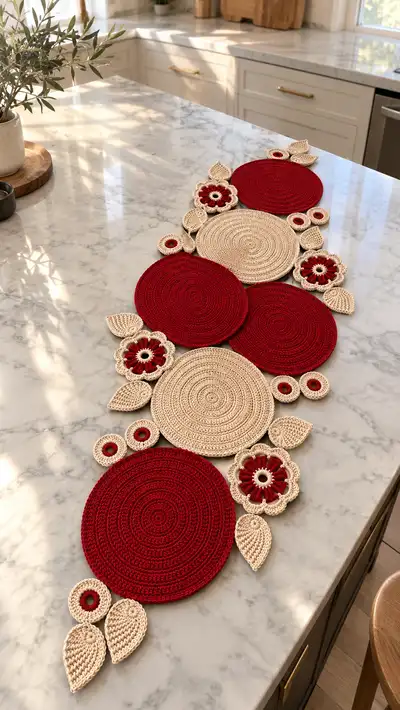
Create a striking table runner made from concentric circular motifs, delicate floral medallions and textured leaves in deep red and warm cream. This pattern guides you through crocheting each circular coaster, flower and leaf, then joining them into a graceful linear runner. Designed to be worked in worsted-weight cotton-like yarn for a crisp finish, it pairs bold color contrast with openwork floral details for an elegant centerpiece.
Progress Tracker
0% Complete
— Notes & Gauge :
Info :
This runner is worked from separate motifs: large circles (red), medium circles (cream), flower medallions (cream with red centers), small donut rings and teardrop leaves. All motifs are worked flat in the round unless otherwise noted. Use continuous spiral rounds for smooth results unless rounds mention joining with sl st. Gauge for each large circle: approximately 18-20 rounds with recommended hook yields a 7.5-8.5 inch diameter; adjust hook up/down to achieve desired size.
Info :
Use stitch marker at first stitch of each round. For denser fabric use a hook 0.25-0.5mm smaller than yarn label to avoid visible stuffing or droopy edges (this runner uses no stuffing but needs density for flatness).
— Large Circle Motif (Red) — Make 4 :
Round 1 :
6 sc in magic ring (6)
Round 3 :
(1 sc, 1 inc) x 6 (18)
Round 4 :
(2 sc, 1 inc) x 6 (24)
Round 5 :
(3 sc, 1 inc) x 6 (30)
Round 6 :
(4 sc, 1 inc) x 6 (36)
Round 7 :
(5 sc, 1 inc) x 6 (42)
Round 8 :
(6 sc, 1 inc) x 6 (48)
Info :
Check your motif lies flat. Lay the circle on a flat surface; if cupping, tighten tension or block flat. If rippling, reduce the number of increases in the next round.
Round 9 :
(7 sc, 1 inc) x 6 (54)
Round 10 :
(8 sc, 1 inc) x 6 (60)
Round 11-14 :
1 sc in each st (60)
Info :
Work rounds 11-14 evenly to build thickness. If you prefer a slightly raised spiral texture, work rounds 11-14 in BLO to show the spiral ridges. Move marker each round.
Round 15 :
1 sc in next 9 sts, inc, rep around (66)
Round 16 :
1 sc in each st (66)
Round 17 :
1 sc in next 10 sts, inc, rep around (72)
Round 18-20 :
1 sc in each st (72)
Info :
These rounds produce a large dense disc. If your circle is larger or smaller than desired, add or remove an even round of increases (always keep increases spaced evenly across rounds).
Round 21 :
1 sc in each st BLO (72)
Round 22 :
1 sc in each st (72). Fasten off leaving long tail for joining.
Info :
Weave in the tail on wrong side or leave for whipstitch joining. Block each finished circle flat by spraying with water or steaming and pinning to required diameter.
— Medium Circle Motif (Cream) — Make 3 :
Round 1 :
6 sc in magic ring (6)
Round 3 :
(1 sc, 1 inc) x 6 (18)
Round 4 :
(2 sc, 1 inc) x 6 (24)
Round 5 :
(3 sc, 1 inc) x 6 (30)
Round 6 :
(4 sc, 1 inc) x 6 (36)
Round 7 :
(5 sc, 1 inc) x 6 (42)
Round 8 :
(6 sc, 1 inc) x 6 (48)
Info :
Medium circles are slightly smaller than large ones. If you prefer equal diameter, work an extra increase round mirroring the large circle's increases.
Round 9 :
(7 sc, 1 inc) x 6 (54)
Round 10-13 :
1 sc in each st (54)
Round 14 :
1 sc in next 8 sts, inc, rep around (60)
Round 15-18 :
1 sc in each st (60)
Round 19 :
1 sc in each st BLO (60)
Round 20 :
1 sc in each st (60). Fasten off and block to flatten.
Info :
If you want a more textured center, replace one round of sc with a round of hdc or dc worked in FLO to create a slightly raised ring.
— Small Donut Ring Motif — Make 8 :
Round 1 :
Ch 6, join with sl st to form ring, ch 1, 8 sc into ring (8)
Round 2 :
Inc in each st around (16)
Round 3 :
(1 sc, 1 inc) x 8 (24)
Round 4 :
1 sc in each st (24)
Round 5 :
1 sc in next 3 sts, dec, rep around (18)
Round 6 :
1 sc in each st (18). Fasten off leaving tail for joining.
Info :
These small donuts act as connectors and visual accents. Work them in cream with a red center: after Round 2 switch to red for a single round (make internal ring red), then switch back to cream for outer rounds.
— Flower Medallion (Cream with Red Center) — Make 4 :
Round 1 :
Make a magic ring. Ch 1, 8 sc into ring (8). Pull tight (8)
Round 2 :
Change to red. Ch 1, 8 sc in BLO of previous round forming a small red ring in center (8)
Round 3 :
Change to cream. Ch 3 (counts as dc), *skip next st, 5 dc in next st (shell), skip next st, sl st in next st; rep from * around to make 4 shells. Join with sl st to base of first shell (4 shells)
Info :
The flower is formed with 4 or 6 petals depending on preferred look; the example uses 4 large petals spaced evenly. If you prefer 6 petals, increase the number of initial sc in Round 1 to 12 and adjust petal spacing accordingly.
Round 4 :
Ch 1, in front of each shell work: (sc, hdc, 3 dc, hdc, sc) into the base of shell to form fuller petals; rep around (4 petals)
Round 5 :
Ch 1, sl st into next st, sc around the entire petal edge working 3 sc across each petal top to shape scallop; join and fasten off leaving tail for joining.
Info :
For a more lacy flower, skip Round 4 and work small picot trims instead: (ch 3, sl st) across petal tops for decorative points. Block petals to open them fully before joining to circles.
— Leaf / Teardrop Motif — Make 12 :
Round 1 :
Ch 8. Row-shaping: 2 sc in 2nd ch from hook, sc next 4, 6 sc in last ch, rotate to work along opposite chain, sc next 4, inc in last (turn) ch; join into a small oval (16)
Round 2 :
Ch 1, sc in each st around (16)
Round 3 :
Ch 1, (sc, hdc, 2 dc, hdc, sc) in the 6-sc rounded end to build tip; sc along sides evenly to maintain teardrop; total (20)
Round 4 :
Ch 1, 1 sc in next 2 sts, BLO 1 sc in next 8 sts to create a subtle ridge along the center vein, 1 sc in last 10 sts (20)
Round 5 :
Ch 1, sc around. On the tip work (sc, picot, sc) to add a pointed finish. Fasten off leaving long tail for sewing (20)
Info :
Work leaves in cream. For a stronger center vein, after Round 4 run a contrasting line of sc through the central BLO stitches with a spare strand following same path and catch it into the edge when sewing.
— Alternative Petal Detail (Optional for fuller flowers) — Make as needed :
Round 1 :
Ch 5, sl st to form ring. Ch 2, 10 hdc into ring, join (10)
Round 2 :
Ch 1, *sk next st, 7 dc in next st, sk next st, sl st in next st; rep around to assemble 5 small petals; fasten off and block
Info :
These petals can be layered under the cream flower round to get deeper dimension. Use two sets staggered to produce a vintage rosette effect.
— Joining Motifs & Layout :
Info :
Arrange circles, flowers, donuts and leaves on a flat surface to match pictured layout: alternating red, cream, red large circles along a central axis, with flower medallions and cream leaves tucked between and around circle edges. Use pins to anchor placement before joining.
Step :
Work from one end of runner to the other. Start by placing first large red circle. With cream yarn (or yarn matching motif edges), using a yarn needle or your hook, whipstitch through adjacent motifs' edges aligning stitch spirals so surface remains visually continuous.
Method A (Whipstitch Join) :
Thread a long cream tail onto yarn needle. Insert needle through one stitch from the front of motif A and the corresponding stitch on motif B; pull snug but not tight. Continue around the shared arc until pieces are fully attached. Knot and weave tail into wrong side. Repeat for all motif adjacencies.
Method B (Crochet Join) :
Align two motifs RS together. With cream yarn and 3.5mm hook, insert hook in first stitch of both motifs, sl st through both loops; rep across joining arc with sl st or sc for stronger seam. For decorative seam use crab stitch (reverse sc) around outer edge later.
Info :
For a flat join, align starting points of spirals. If spirals don't match due to rounding differences, shift one motif by a couple stitches to equalize circumference before joining. Use blocked motifs to ensure edges meet evenly.
— Edge Finishing & Unified Border :
Round 1 :
With cream yarn and 3.0-3.5mm hook, work sc evenly around entire outer edge of joined runner, placing 1 sc per visible stitch along motifs (estimate 2-3 sc per inch depending on motif scale). Keep corners smooth by crocheting 2 sc in points where motifs meet to avoid puckering.
Info :
Count stitches per motif edge as you go and try to distribute stitches evenly. Use smaller hook if you want tighter border and more crisp scallops.
Round 2 :
Work 1 sc in each sc around, placing *sc, ch 3, skip 2 sc, sc* at petal junctions to form spaced picots (this creates a gentle scalloped trim). Join with sl st and fasten off.
Round 3 :
Optional decorative round: Switch to red or cream contrast and work *(sc, picot) in every 6th st* to pick out points and echo the circular motif rhythm. Fasten off and weave ends.
Info :
For a crisp vintage look, add a final crab stitch (reverse sc) worked left-handed around the edge in cream. It creates a rope-like finish and hides uneven edges.
— Assembly Sequence & Anchoring :
Info :
Always pin layout first. Attach central motifs together, then add surrounding flowers and donuts and finally sew leaves at outer edges to create gentle flowing form. Work joins in this order: center to center, then side connectors, then petal/leaf placements.
Tip :
Sew leaves slightly overlapping circle edges so they appear tucked under petals. Use ladder stitch or whipstitch through the very edge for an invisible attachment. If using crochet join, ensure the leaf sits with RS up and sl st through its base and circle stitches to anchor.
Info :
If the runner will be washed frequently, make joints with sc rather than sl st to withstand laundering. Use cotton yarn and avoid fabric stiffeners unless a firm look is desired.
— Blocking & Finishing :
Info :
Wet-block each motif by pinning to exact final diameter on blocking board and allowing to dry. This flattens spirals and evens circular edges. After joining, block entire runner flat to set joins and border shape.
Care :
Hand-wash in cool water with mild soap, reshape while damp, and dry flat. Avoid wringing to keep floral shapes intact.
Finishing Touch :
Weave in all ends with yarn needle following spiral direction for near-invisible work. Trim tails after securely weaving them in at least 2 inches deep inside stitched fabric.
This elegant runner brings handmade charm to any table with bold circles, delicate flowers and graceful leaves. Each modular motif is a satisfying stitch journey that rewards you with a stunning centerpiece. Whether you make it as a seasonal accent or a year-round focal point, you'll love pinning the petals and watching the design come alive. 🧶🌿 Share your finished runner — it’s a beautiful, functional piece to treasure!