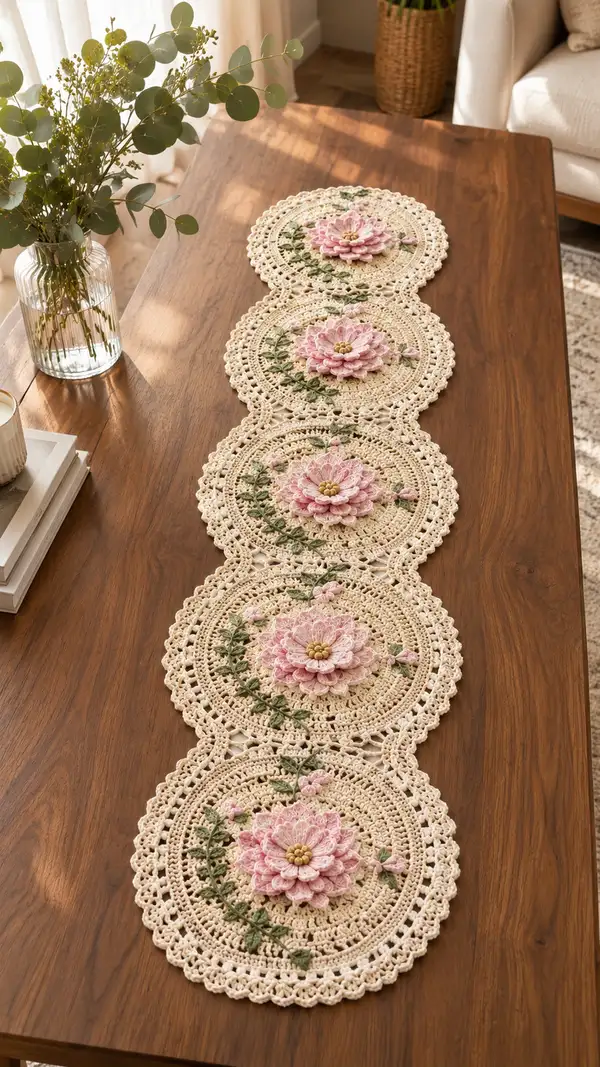
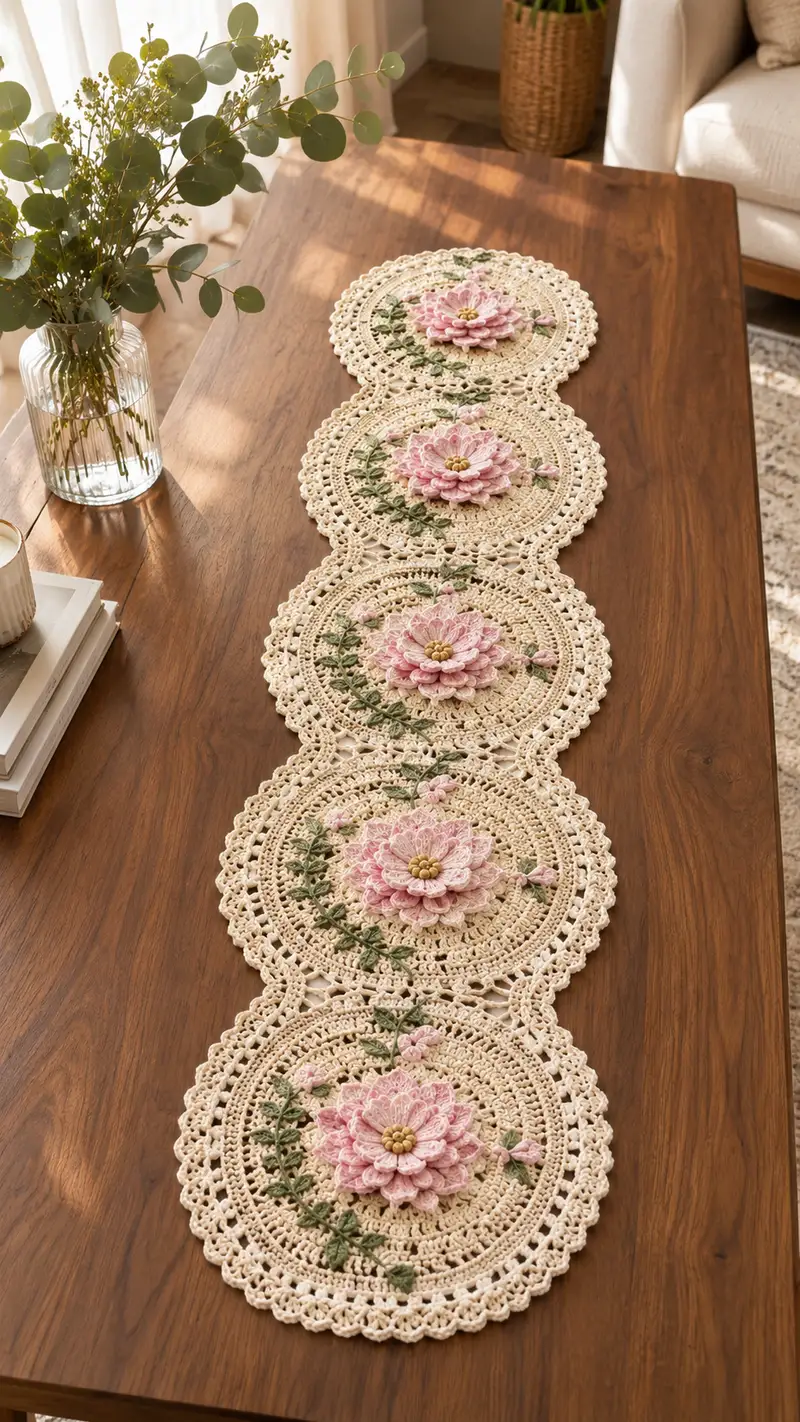
Create a stunning, vintage-inspired table runner made of five connected circular motifs with layered 3D pink flowers, delicate green vines, and a scalloped cream border. This pattern includes step-by-step rounds for each motif, 3D petal construction, embroidered leaves and buds, and a finished edging to join the motifs into a continuous runner. Perfect for dressing a dining table, sideboard, or console with timeless handmade charm.
Progress Tracker
0% Complete
— Notes & Gauge :
Info :
Gauge is not critical for this decorative table runner, but to match photo approximate motif diameter should be 11-12 inches (28-30 cm) when using worsted-weight cotton and a 3.5mm hook. Adjust hook size to achieve the diameter desired. Work tightly enough that petals hold their shape but not so tight that the piece becomes stiff.
Info :
Each motif comprises a base circle, a layered 3D flower, embroidered vine and leaves, small buds, and an outer lace join. Make five identical motif units and join them with the joining rounds. Block each base circle flat before attaching petals and embroidery.
— Motif Base Circle (Make 5) :
Round 1 :
6 sc in magic ring (6)
Round 3 :
(1 sc, inc) x 6 (18)
Round 4 :
(2 sc, inc) x 6 (24)
Round 5 :
(3 sc, inc) x 6 (30)
Round 6 :
(4 sc, inc) x 6 (36)
Info :
Check that the circle lays flat after round 6. If it ruffles, reduce hook or tighten tension; if it cupps upward, work one additional even round before increasing further.
Round 7 :
(5 sc, inc) x 6 (42)
Round 8 :
(6 sc, inc) x 6 (48)
Round 9 :
(7 sc, inc) x 6 (54)
Round 10 :
(8 sc, inc) x 6 (60)
Info :
By end of round 10 you should have 60 stitches. This establishes the base circumference used for the decorative rounds that follow. If your stitch count differs, adjust further increases by inserting or removing repeats evenly around.
Round 11-14 :
1 sc in each st around (60)
Info :
Work four even rounds in sc to build a stable base for the flower. Place a stitch marker at the start of round 11 and move it each round to track the beginning.
Round 15 :
*ch 3 (counts as dc), sk next st, dc in next 2 sts, ch 2, sk 2 sts, sc in next st* rep across to end; join with sl st to top of ch3 (60 pattern placements, 60 counts)
Info :
Round 15 creates a set of lacy spaces that will visually separate the center from the handsome textured band. Ch spaces do not change stitch counts; always return to counting base stitches (60).
Round 16 :
Sl st into first ch2 space, ch 3 (counts as dc), (2 dc in same ch2 sp), *sk 3 base sts, (3 dc in next ch2 sp)* rep around; join (20 shells, counts remain consistent with 60 base sts)
Round 17 :
Ch 1, sc in each base st around (60)
Round 18 :
Ch 3, dc in next st, *ch 2, skip 2, dc in next 2; rep around, join (60 placed dc groups)
Round 19 :
1 sc in each st around (60)
Info :
Rounds 15-19 build a decorative band with small ch-spaces and dc shells. The visual effect is a subtle lace ring on which flower petals will sit—ensure stitches are even to accept later sewing of petals.
Round 20 :
*ch 4, sk 2 base sts, sc in next st* rep around, join (20 ch-4 loops laid across the base) (60 base st count)
Round 21 :
Work into each ch-4 loop: *sc, hdc, 3 dc, hdc, sc* in each loop; join (20 shells, base count still 60)
Round 22 :
1 sc in each st around and in each dc of shells (maintain counting by verifying 60 base stitch anchors)
Info :
If you prefer a flatter motif, use fewer post stitches in round 21 (for instance sc, 3 dc, sc) to reduce height. Blocking will help flatten or relax the shell height to match the photo.
Round 23 :
(2 sc, ch 2, sk 2) around to create small ch-2 picot foundations. Join with sl st (60 anchors)
Round 24 :
*In each ch-2 space: sc, picot (ch 3, sl st to first ch), sc* rep around to form a delicate inner scallop; join (60 picots)
Round 25 :
1 sc in each st around (60)
Info :
At this stage the base circle has a subtle scalloped inner ring to accept and visually frame the layered flower. Block this piece flat to create a firm, even surface for sewing the flower center.
Round 26 :
Make a final decorative band: *sk 1 st, 5 dc cluster in next st (shell), sk 1 st, sc in next st* rep around (20 shells; maintain 60 base anchors)
Round 27 :
1 sc around in each stitch and in each shell edge to even the surface (60)
Round 28 :
Fasten off, weave ends, and block flat. Leave center area clear for attaching the 3D flower. (60)
Info :
Make five of these base circles. Block each one flat on a mat using rust-proof pins and a light mist of water or steam. Proper blocking ensures motifs join smoothly and the lace edging lines up neatly later.
— Flower Center Disk (Make 5) :
Round 1 :
Using golden yellow, 6 sc in magic ring (6)
Round 3 :
(1 sc, inc) x 6 (18)
Round 4 :
Switch to small wooden bead or seed beads (optional). Work 1 sc in each st around (18). Fasten off and leave tail for sewing center onto base circle.
Info :
Alternatively, you can create a slightly padded center by sewing a small felt circle behind the yellow disk and tack it to the base so the flower sits proud. If using beads, sew them securely with fine thread through several stitches.
— Layered 3D Flower Petals (Make 5 — stacked rounds) :
Overview :
The 3D flower is built in concentric petal rounds. Start with a small petal round anchored on the center disk, then build larger petal rounds around it to achieve the layered effect. Use two or three shades of pink for depth. Each petal round is anchored into a fixed stitch count (we will use 36 petal anchors for this construction).
Info :
To maintain even spacing choose petal anchor count divisible by 6 — here we will use 36 anchors to produce 36 petals per round which results in a rich, dense flower similar to the photograph.
Round 1 :
Join pale pink to the yellow center by slipping into any nearby stitch; ch 1, sc 36 evenly spaced around the yellow disk to create anchor points (36)
Info :
To space 36 stitches evenly around a smaller center, you can work 2 sc into some base stitches and 1 sc in others; but the base disk of 18 sts requires that you crochet sc into both front loops and into spaces between beads — create 36 anchors by placing 2 sc in each golden center stitch and 1 sc in the spaces as needed. Aim for visually even spacing rather than strict base stitch alignment.
Round 2 :
Petal forming: *ch 4, (3 dc, ch 1, 3 dc) into same anchor, ch 1, sl st into next anchor* rep around to create 36 petal loops; join (36 petals)
Round 3 :
Working into the ch-4 foundation of each petal: sc, hdc, 5 dc, hdc, sc to form a fuller petal; rep in each petal foundation (36 petals)
Info :
Gently flatten each petal as you complete it. You may want to press petal tips with a warm iron over a pressing cloth during blocking to shape curved petal edges. These inner petals will be the smallest and sit closest to the center.
Round 4 :
Switch to medium pink for contrast. Join in any stitch behind a petal: *ch 5, (tr, ch 1, tr) into same space to make a taller petal, ch 1, sl st into next petal base* rep around (36 larger petal foundations)
Round 5 :
Work taller petals into round 4 foundations: sc, hdc, 7 dc, hdc, sc into each foundation (36 petals). Fluff and shape petals upward from center.
Round 6 :
For extra dimensionality, work a reverse layer: join pale pink behind every other petal foundation; *ch 6, 9 dc cluster in same foundation (fan), ch 1, sl st in next foundation* rep producing 18 larger fans positioned between existing petals (18 fans)
Round 7 :
Into each fan: sc, 2 hdc, 11 dc, 2 hdc, sc to form broad outer petals (18 petals)
Info :
By staggering petal sizes and offsets you create the chrysanthemum-like layered look. Fasten off each color and weave in tails on the underside to keep the top neat. Use a small amount of starch if you want the petals to hold a stiffer shape.
Round 8 :
Optional tiny edge details: in a contrasting darker pink, work a picot trim along each outer petal edge by sl st to the edge and making picots (ch 3, sl st) every 3-4 stitches for subtle texture; join and fasten off.
Round 9 :
Arrange the full layered flower on the blocked base circle center, pin in place, and baste with a few small stitches using matching pale pink to hold position before sewing the yellow center disk on top.
Info :
Sew petals to the base circle at several anchor points: through the base sc rounds previously worked (Rounds 11-14). Tacking the petals down at 6-8 evenly spaced positions will secure them while allowing petals to remain three-dimensional.
Round 10 :
Sew the yellow center disk over the petal bases and secure with additional stitches. If using beads, sew through petals and disk into base circle and knot securely on underside. Fasten off and weave in remaining ends.
Info :
Repeat this entire petal suite to create five identical floral centers. Patience and blocking between layers ensure each petal tier sits correctly and the finished flower resembles the reference photo.
— Leaves & Vines (Make vine set per motif) :
Overview :
Vines are worked as long chain foundations with leaves crocheted into the chain, then sewn in flowing curves across the base to connect flowers visually and create the trailing vine effect.
Leaf Unit Round 1 :
Using sage green, ch 12 (foundation chain for one leaf and short stem)
Round 2 :
Working back along chain on 2nd ch from hook: sc in next ch, hdc in next, 3 dc in next, tr in next, 3 dc in next, hdc in next, sc in last 2 ; fasten off (leaf made) — shape by pulling slightly at tip for point
Info :
Make many leaves of varying chains: ch 8–16 for smaller/larger leaves to create natural variation. Use a blunt embroidery needle to curve and tack leaves to the base circle in a vine pattern before stitching permanently.
Leaf Unit Round 3 :
For a rounded leaf option: ch 10, in 2nd ch from hook sc, (hdc, 2 dc, 2 hdc, sc) across, sl st to join, fasten off.
Vine Stem :
To create the vine length per motif, ch 40 (or desired length to run from one edge of motif to the other), work sl sts along chain to compress into a thin cord-like stem, fasten off leaving long tail for sewing. Make two stems per motif to achieve a fuller effect.
Info :
Arrange vine stems on the base circle in a gentle S-curve from one side of the motif toward another motif's edge. Pin and tack leaves and small buds to the vine before sewing to ensure the placement matches the photo's sweeping vine that connects adjacent motifs.
Bud (Make several) :
Using darker pink, ch 3, join to form a ring, work 6 sc in ring (6). Round 2: (inc) x 6 (12). Round 3: (sc, inc) x 6 (18). Make 6-8 buds per motif and sew along vine with random spacing.
Info :
Sew buds so they tuck partly under leaves or petals. This creates naturalistic clusters similar to the photo's small pink buds dotted along the vine.
— Attaching Flower & Embellishments to Base :
Info :
Position the layered flower on the center of the blocked base circle. Pin in place so the largest petal tips sit just above the last decorative round (Round 26) but not past the outermost edge. The image shows the flower centered with vines trailing off to one side; mirror this placement on alternating motifs if desired.
Step :
Sew flower base around with small whip or ladder stitches using the same color as the base; secure the inner yellow disk by stitching through to the base and knotting underside. Use many small stitches to avoid wobbling.
Step :
Sew vine stems along the surface into the base rounds (ideally into round 17-21 for best anchoring). Tack leaves and buds into position, sew invisibly through the stem into the base circle at intervals of 6-8 stitches to keep the vine lying flat.
Info :
If you want a slightly raised vine, insert tiny pads of felt between vine and base before stitching to create dimension. Otherwise, secure vines flat for a cleaner, more classic look.
— Joining Motifs (Join five motifs into runner) :
Layout :
Lay motifs face-up in a straight line with edges slightly overlapping. The photograph shows five motifs joined in series with small connecting loops and a decorative framework that becomes the runner body.
Joining Round 1 (per seam) :
With right sides facing and using cream yarn, place two motifs together so that the outer scallops line up. Insert hook through outer edge of both motifs and sl st through both edges into the sc stitch that aligns; *ch 3, sl st into corresponding sc on second motif* rep across seam at every other scallop position to create small connecting ch-3 loops; fasten off.
Info :
For a continuous join, you may use wet blocking after joining to balance tensions between motifs. When joining 5 motifs, check alignment frequently — pin motifs together first, then join to achieve even spacing and symmetrical alignment.
Joining Round 2 :
Work a decorative bridging round across the join: with motifs joined, insert hook into ch-3 loops made in joining round and work *sc, ch 4, sc* into each loop; this will form a lacy bridge that visually continues the motif's edging and anchors motifs together.
Joining Round 3 :
Continue around the runner's outer edge (outermost scallops) adding extra sl st points to further secure join points and to prepare for the final outer scalloped border.
Info :
When joining five motifs, pay attention to motif orientation: the vines on adjacent motifs should flow naturally. Mirror vine direction every 2nd motif if you prefer a balanced repeat, or keep vines all curving the same way for a directional look.
— Outer Scalloped Border (Work around entire joined runner) :
Round 1 :
Attach cream yarn at any outermost sc on the combined runner; ch 1, sc in each st around and into each chain-bridge stitch to create an even edge. Count total anchor points across whole runner — expect approximately 300-320 anchors depending on exact joins. Work sc in each anchor (maintain same count across the round).
Info :
This round evens out the seam lines created by joins. Use a stitch marker every 20-30 sts to stay on track across the long runner and avoid losing count.
Round 2 :
*ch 3, sk 2, sc in next st* around forming evenly spaced ch-3 loops used as scallop foundations (maintain consistent number of loops across runner)
Round 3 :
In each ch-3 loop: (sc, hdc, 5 dc, hdc, sc) to form a scallop shell; rep around and join. This forms broad scallops matching base motif edges.
Round 4 :
Ch 1, sc in each st and in each dc of scallops to unify edge and tidy raw stitches. Join and fasten off.
Round 5 :
For a delicate edging detail similar to photo: rejoin cream into back loops of Round 4 and work *ch 4, sl st into 3rd ch from base, sc into next base st* rep around to add a lacy picot braid between scallops; fasten off and weave ends.
Info :
The outer scalloped border softens the runner silhouette and visually unites the five motifs. Adjust scallop size by changing the number of dc in Round 3. Block the entire runner flat after finishing to open lace and even stitches.
— Finishing Touches & Blocking :
Info :
Once all pieces are sewn and the runner is joined and edged, wet-block the entire runner by pinning it to a large blocking mat in the exact shape you want. Use rust-proof pins and allow to fully dry. This step opens the lace and evens out the scallops so the runner lays flat on the table.
Step :
Weave in all yarn ends securely on the underside. Consider a few extra invisible stitches on high-traffic seam points to prevent unravelling when the runner is moved.
Info :
If you want the runner extra-sturdy, cut thin craft felt strips to glue or stitch onto the underside of the motifs along the join areas. This is optional and helps prevent slipping on smooth surfaces.
— Alternative Variations & Tips :
Info :
To make a shorter runner, work 3 motifs instead of 5. To make a longer runner, add motifs in odd numbers to maintain a balanced central focal point. Substitute colors: use blush and cream for subtle looks or bright jewel tones for a bold contemporary piece.
Info :
For a lighter, airier runner use sport weight cotton and a 3.0mm hook; expect smaller motif diameters and adjust counts by working fewer increase rounds in the base. For a sturdier look, use heavier cotton thread and a smaller hook to create a crisp lace appearance.
This floral table runner brings vintage charm to any dining or console table with its dimensional flowers, delicate vines, and lace scallops. Each motif is a tiny work of art that joins together into a long, elegant centerpiece you can be proud to display. The layered petals and embroidered leaves give tactile interest and a handcrafted touch that invites compliments. Enjoy blocking and assembling each motif — the payoff is a stunning runner that feels truly special. 🧶🌸