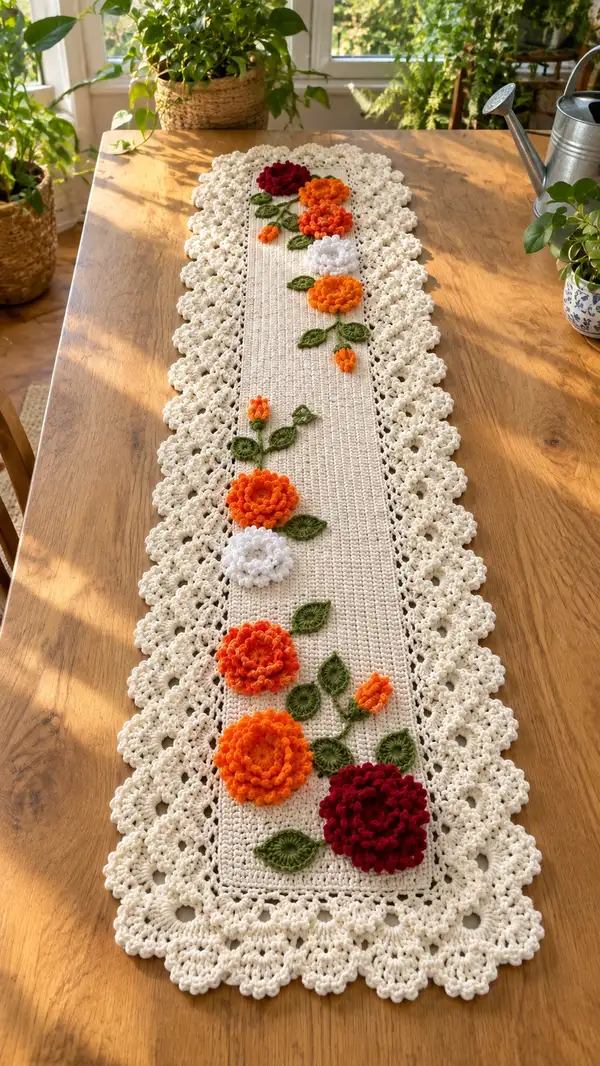
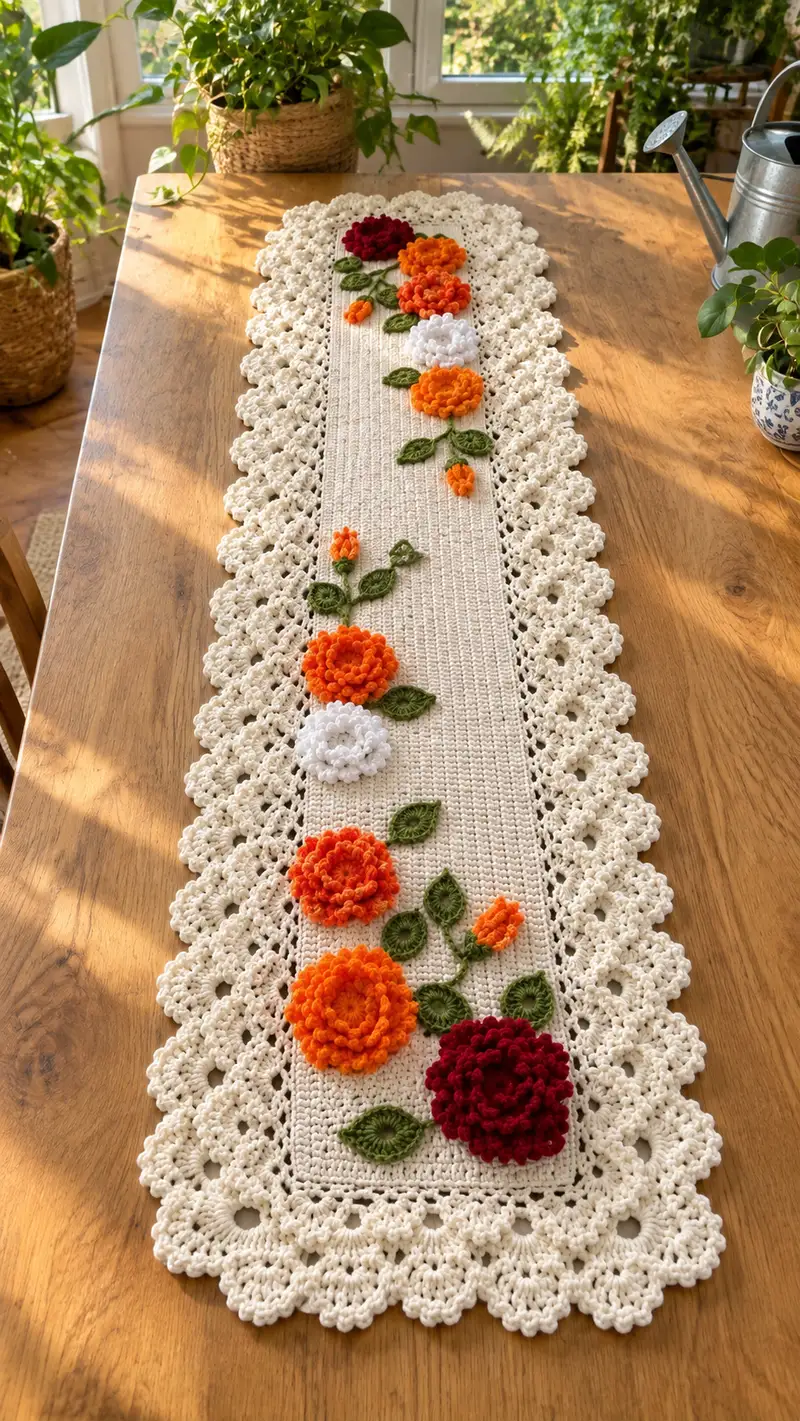
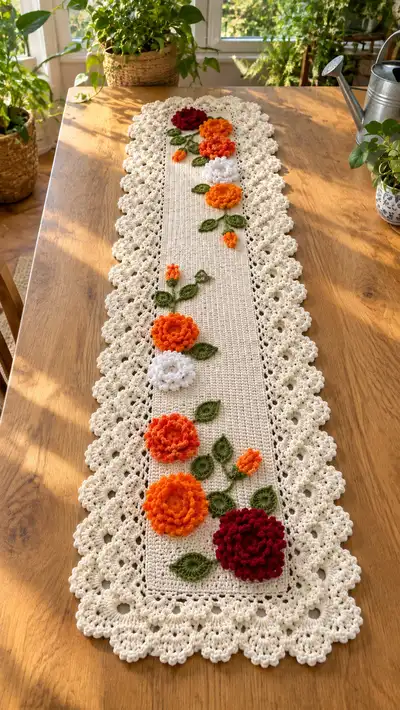
A long, elegant crochet table runner featuring a textured ribbed center, scalloped lace border, and three-dimensional floral appliques. The runner shows warm cream base tones with poppy-orange, deep red and crisp white layered flowers and olive-green leaves. Designed to sit along a dining table as a charming centerpiece, it combines simple stitchwork with decorative applique details for a classic handmade look. Clear step-by-step instructions guide you through each panel, lace edge and individual flower so you can recreate this cozy accent for your home.
Progress Tracker
0% Complete
— Center Panel :
Round 1 :
Foundation chain 122 (or chain to desired width; final ch count must be even for edge symmetry)
Round 2 :
Row 1: Starting in 2nd ch from hook, 1 sc in each ch across. Turn. (121 sc)
Round 3 :
Row 2: ch1, 1 sc in BLO of each st across. Turn. (121 sc) — this creates the vertical rib texture visible in the photo
Round 4-12 :
Rows 3-11: Repeat Row 2, maintaining tension and straight edges. (121 sc each row)
Info :
Place a stitch marker in the first stitch of each row to help maintain a neat edge. Working in BLO on each row creates raised ridges on the front, which is the texture featured on the runner.
Round 13-22 :
Rows 12-21: Continue 1 sc in each st BLO across. Check width; all rows should measure consistent width. (121 sc)
Info :
Measure length every 20 rows. This runner was made approximately 120cm total length with 130 rows; adjust the number of rows to reach your desired runner length.
Round 23-42 :
Rows 22-41: Continue 1 sc in each st BLO across. If you would like a slightly softer rib, alternate 2 rows BLO then 1 row worked in both loops for a subtle flat line. (121 sc)
Round 43-52 :
Rows 42-51: Maintain 1 sc in each st BLO across. Check for any dropped stitches or uneven edges and correct immediately. (121 sc)
Info :
Use a row counter or mark every 10th row to avoid losing track on long projects. If your stitch count begins to drift, recount across several rows and frog back to the last even point.
Round 53-72 :
Rows 52-71: Continue 1 sc in each st BLO across. If you prefer a slightly wider runner, add multiples of 2 chains to the foundation chain and repeat rows accordingly. (121 sc)
Round 73-92 :
Rows 72-91: Continue 1 sc in each st BLO across. Keep tension even; the ribbed texture depends on consistent tension. (121 sc)
Info :
When you reach approximately 10-15 rows from desired final length, check placement of appliques: lay the panel flat and arrange flowers and leaves to judge spacing. This helps ensure balanced decoration before edging.
Round 93-112 :
Rows 92-111: Continue 1 sc in each st BLO across until panel reaches your desired length minus the border allowance (we used 130 total rows including border attachment). (121 sc)
Round 113-120 :
Rows 112-119: Finish final straight rows in BLO. Fasten off at end of last row and weave in ends on the wrong side. Block panel flat, pinning edges straight for 12 hours or wet-block as preferred.
Info :
Blocking before edging ensures the lace border sits evenly. Use rust-proof pins and a blocking mat; allow to dry completely before proceeding to border rounds.
— Lace Border (Worked around panel) :
Round 1 :
With cream color and 3.5mm hook, join with sl st at a corner. ch1, evenly sc around the entire panel working 3 sc into each corner area (you may work 3 sc, ch1, 3 sc into each corner to allow smooth turn). Place 1 sc in each row-end along sides. Total st count will vary with panel length; aim for even spacing so shells fit evenly.
Round 2 :
Working along edge sts: *ch3, skip 1 st, sc in next st* repeat to create small picot-like spacing along entire edge. At corners, work ch5 and sc in corner base to curve the corner. This sets the spacing for shell placement.
Round 3 :
*Shell cluster: (2 dc, ch2, 2 dc) all in same sp (shell made of 4 dc separated by ch2). Skip next 2 ch sps, sc in next sp.* Repeat along each side. At corners, work (3 dc, ch3, 3 dc) to produce a fuller corner shell.
Round 4 :
In each shell sp work 1 sc, ch3, 1 sc to create small arches between shells. This adds airiness to the lace. Maintain 3-dc corner clusters across corners.
Round 5 :
*In each ch3 arch: (1 sc, ch2, 4 dc, ch2, 1 sc) — this creates a raised petal cluster. Repeat across. At corners, work (1 sc, ch4, 6 dc, ch4, 1 sc) for a rounded corner motif.*
Info :
Work the border tension slightly looser than the center so the lace sits softly, but not so loose that scallops droop. If necessary, use a 3.0mm hook for tighter borders or 3.75mm for more open lace.
Round 6 :
Round of trimming: In each 4-dc petal set work (sl st, ch1, 3 sc) across the top to add a popcorn-like texture to scallop edges. At corners, mirror with (sl st, ch1, 5 sc).
Round 7 :
Final edging round: *ch2, slip stitch across the back loop of the topmost sc clusters to give a neat finished ridge. Finish with a tidy sl st join and weave in ends on the backside.*
Info :
The pictured lace has two rows of shells making a dense scallop. If you prefer a lighter look, stop after Round 4. Make sure shell counts distribute evenly along the long edges; adjust spacing by adding or removing small ch sps from Round 2.
— Large Layered Rose (Make 3 large flowers) :
Round 1 :
With Bright Orange (or Deep Red), make a magic ring, ch1. 6 sc in ring. (6)
Round 2 :
Inc in each st around. (12)
Round 3 :
(1 sc, inc) x6. (18)
Round 4 :
(2 sc, inc) x6. (24)
Round 5 :
(3 sc, inc) x6. (30)
Info :
These rounds build a flat disc as the flower base—keep tension relaxed so the disc can sit flat and accept the petal rounds without puckering.
Round 6 :
ch3, *in next st work: (dc, tr, tr, dc) to form a tall petal; sl st in next st to anchor*. Repeat around to create 10 tall petals (work petals in every other stitch). (10 petals)
Round 7 :
Switch to 3.0mm hook if you want tighter petals. In each tall petal sp from Round 6 work: sc in base, (ch2, 3 dc, ch2) all in same sp to create a ruffly layer. Slip stitch to join between petals.
Round 8 :
Work a second ruffle: In the space created behind each previous petal, work (sl st, ch1, 5 sc) across the top edge of each petal to build volume. This gives the layered 3D effect shown in the image.
Round 9 :
Round to finish: Work a final edge of picot loops around the topmost row to soften the petal edges: *ch3, sl st in base of next sc* repeat. Fasten off leaving 25-30 cm tail for sewing. Flatten flower slightly and tack the layers together with a few hasty stitches through the center so the layers don’t rotate later.
Info :
To create the dense ruffled look seen in the photo, make the 2 ruffle rounds close together and use slightly shorter stitches (sc and dc) for the outer ruffle. Changing hook size between rounds can enhance dimensionality.
— Medium Layered Flower (Make 3 medium flowers) :
Round 1 :
Magic ring, ch1. 6 sc in ring. (6)
Round 3 :
(1 sc, inc) x6. (18)
Round 4 :
For petals: *in each st: ch4, sl st in same st to form a small loop petal.* Repeat 18 times around. Finish with a round of sc in each base stitch to anchor petals.
Round 5 :
Second petal round: In the gap behind each small loop, work (dc, ch1, dc) to make fuller petals. Fasten off with long tail. (18 petals)
Info :
Medium flowers sit between large flowers and add variety. Use white or alternate orange to create contrast. Sew a small flat center with a few sc to keep the petal layers secured.
— Small Rosette (Make 4-6 small flowers and buds) :
Round 1 :
ch6, join with sl st to form a ring. ch1, 12 sc into ring. (12)
Round 2 :
(1 sc, inc) x4, (2 sc, inc) x2 — arrange to make a slightly oval rosette if you want buds. (18)
Round 3 :
Fold disc in half and work sc along open edge to gather into a bud shape, fasten off with long tail for sewing. (approx 9 sc to gather)
Info :
Small rosettes and buds provide contrast and fill gaps. Use a darker center yarn for extra depth or introduce a tiny French-knot style center with embroidery thread if desired.
— Leaves (Make 12-16 leaves) :
Round 1 :
With olive green, ch10. Row 1: Starting in 2nd ch from hook: sc, hdc, dc, hdc, sc, sl st in last ch (tip shaping). This forms one side of leaf. Turn to work along other side of foundation chain: sl st in next ch (following the original chain toward start), sc in next, hdc, dc, hdc, sc, sl st to finish and join at base. (leaf measures approx 3.5-4 cm)
Round 2 :
Edge: With right side facing, sc around leaf working 2 sc in widest stitch at center to create slight fullness. sl st to base and fasten off leaving long tail. (approx 18 sc)
Round 3 :
Alternatively for more pronounced vein work: ch10, sc along with FLO on one side and BLO returning to base to create a slightly ribbed leaf; finish with a single line of surface slip stitch down the center to simulate a vein.
Info :
Make leaves in two sizes by varying the foundation chain length: ch8 for small leaves (approx 2.5 cm) and ch12 for larger leaves (approx 5 cm). Leaves should be flat and slightly cupped to sit naturally under flowers.
— Bud Stems and Connecting Sprigs (Make several) :
Round 1 :
With leaf green, ch20 for a stem sprig. Row: sc in 2nd ch from hook to end (19 sc). Fasten off leaving long tail for sewing. Create small buds at intervals by sewing small rosettes or chain loops and gathering them onto the stem before sewing to the panel.
Round 2 :
For a tiny closed bud: ch6, sc in second ch through to form a short tube, gather base with 6 sc and pull tight. Leave a 20 cm tail for sewing to stems.
Info :
Arrange several stems with varied lengths and attach buds and leaves at staggered points for a natural look. Use a few stitches to cradle the stem against the panel for secure attachment.
— Assembly & Placement :
Info :
Before sewing, lay your blocked center panel flat and arrange flowers, leaves and buds; take photos or mark positions with pins to ensure symmetry down the runner. The sample image places clusters spaced roughly 20-25 cm apart along the runner's center with single leaves and a few buds filling in gaps.
Round 1 :
Using long tails from flowers, sew large flowers first. Position the base of the flower so its back touches the panel and use a yarn needle to stitch through the base disc and panel several times to anchor. For extra security use three rounds of whip stitches in an invisible ladder style around the underside of the flower.
Round 2 :
Sew medium flowers next, then small rosettes and buds. Use matching thread and take care to keep the bottom of appliques flat against the panel to avoid lumps when the runner is used under plates or vases.
Round 3 :
Sew leaves last, tucking leaf bases slightly under flower edges and stitching only through the base of the leaf and panel for a clean look. For stems, stitch every 1 cm along the stem length to prevent the stem from lifting.
Info :
Stitching technique: use a small running stitch hidden in the underside of the appliques and knot securely. Weave tail ends through the underside of the panel for a tidy finish. If you want appliques removable, sew only through a few anchor points and use small snap fasteners or a few discreet buttons on the panel underside.
Round 4 :
Final blocking: Re-block the runner after all appliques are sewn on to set shapes and allow shells to relax into place. Steam lightly or wet-block as appropriate for your yarn fiber, then dry flat. Trim any stray ends and secure them inside lace shells or beneath appliques.
Info :
To avoid stretching the runner during transport, roll it with acid-free tissue or hang folded over a padded hanger. For washing, hand wash cold and lay flat to dry. Spot clean appliques with a damp cloth as needed.
This floral lace table runner brings classic charm to any table — a perfect mix of textured crochet and bright 3D flowers! Each carefully crocheted element, from the ribbed central panel to the scalloped lace edge and layered blossoms, combines to create a cozy, handmade centerpiece you’ll be proud to display. I hope stitching it fills your home with warmth and color. 🧶🌸✨