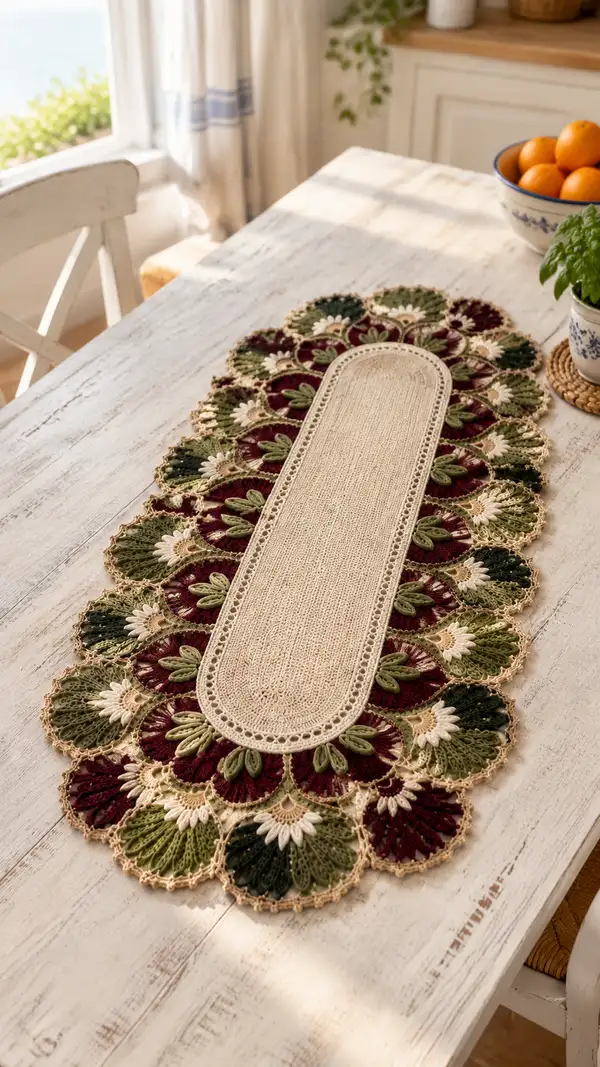
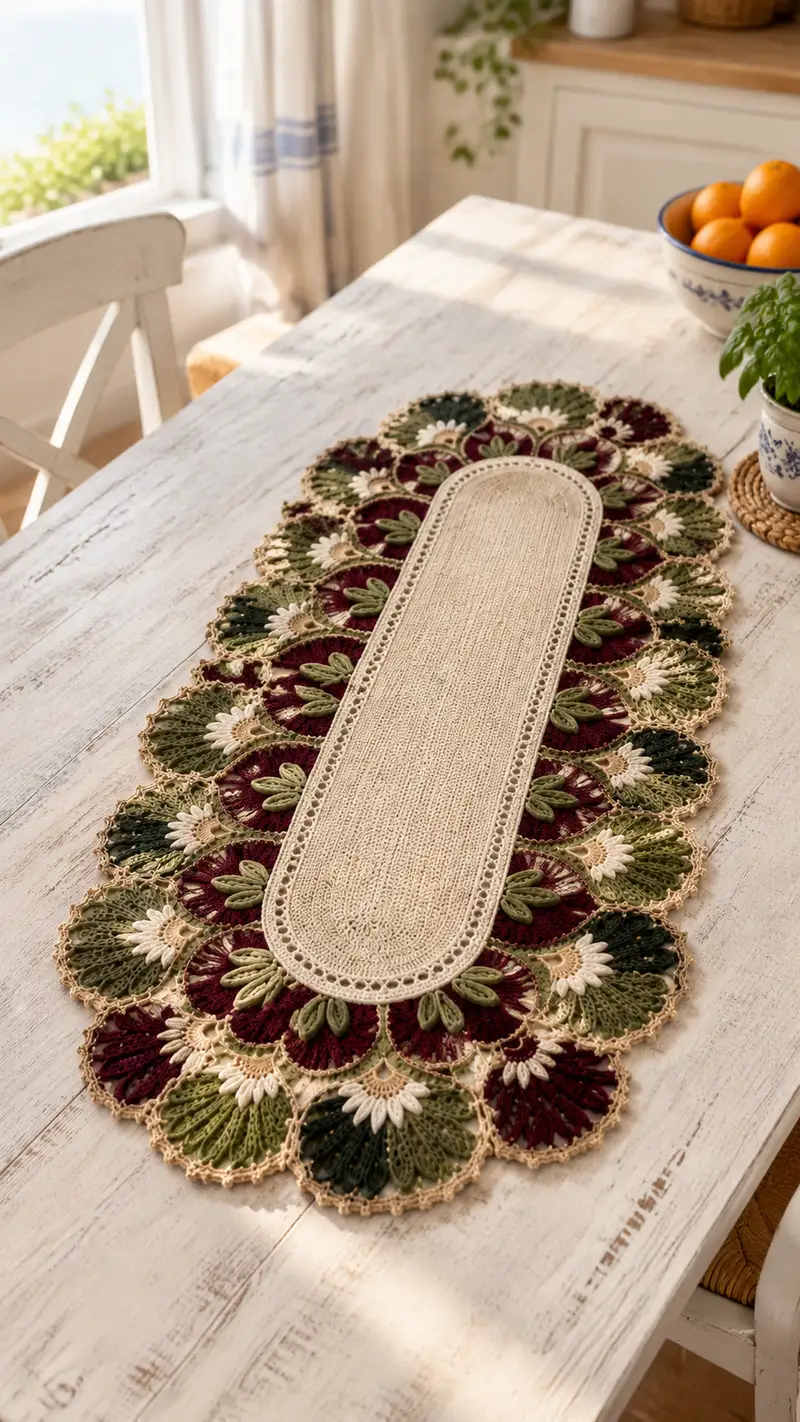
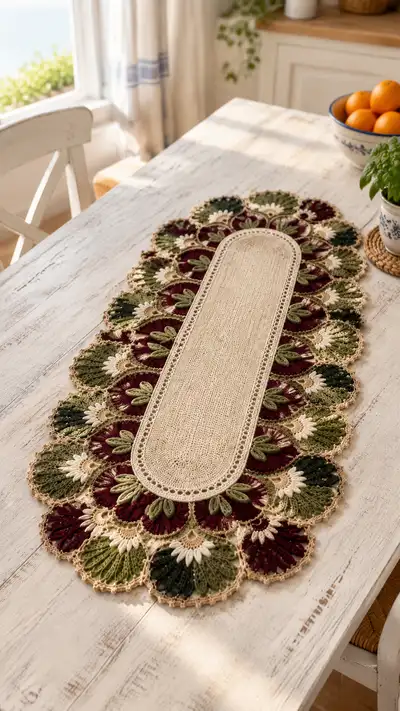
Create a stunning oval table runner with layered floral scallops in warm cream, burgundy and shades of green. This pattern features a long, tightly worked central panel surrounded by decorative fan motifs, raised daisy centers and sculpted leaves for a vintage-inspired lace effect. Detailed color-change notes and finishing instructions guide you step-by-step to recreate the refined look shown.
Progress Tracker
0% Complete
— Materials and Gauge :
Info :
Gauge is flexible for a table runner but recommended swatch: 10cm x 10cm = 20 sc x 22 rows in sc worked in the round with 3.25mm hook using main cream yarn. Adjust hook size if your stitches are larger to preserve lace definition.
— Center Oval Panel (worked first) :
Foundation :
Ch 104, join with sl st to first ch to form a loop (do not twist). Mark the beginning of the round with a stitch marker. This creates the foundation for an oval; counts below include all stitches in each round.
Round 1 :
Ch 1, 1 sc in same ch as joining and in each ch across to last ch, 3 sc in last ch, continue to work across opposite side of chain in each ch, 3 sc in last ch (212)
Round 2 :
1 sc in each st around (212)
Round 3 :
1 sc in each st around (212) — maintain even tension and place marker at start of round each time
Round 4-8 :
1 sc in each st around (212). Work 5 rounds even to build central height (Rounds 4,5,6,7,8)
Info :
These early rounds create a firm, stable rectangle with rounded ends. Keep tension slightly firm to prevent later distortion when motifs are joined. If your runner width feels too narrow, add two chains to the foundation and repeat Round 1 math accordingly (+2 stitches both sides = +4 total).
Round 9 :
*1 sc in next 28 sts, 1 hdc in next 10 sts, 1 dc in next 8 sts, 1 hdc in next 10 sts, 1 sc in next 28 sts, 3 sc in next 3 sts of rounded end*, continue mirrored on opposite side (212)
Round 10 :
1 sc in each st around (212) — this round evens the differing heights created in Round 9
Round 11-14 :
1 sc in each st around (212) — work 4 rounds even to build a flat field for decorative edgework
Info :
Check the length of the center at this point; the photographed runner shows approximately 85-95cm center length before motifs are attached. Adjust number of even rounds before motif attachment to lengthen or shorten.
Round 15 :
1 sc in each st around, but every 26th st replace sc with ch 1, sk 1 st, 1 sc in next st to create small eyelet series along both long edges (212)
Round 16 :
1 sc in each st around (212) — work into ch-1 spaces created previous round with sc as needed
Round 17 :
FLO: 1 sc in each st BLO for the round to create a neat ridge for motif join (212)
Info :
Working the ridge in BLO provides a small lip to which motifs will be pinned and joined. Do not break yarn after Round 17 unless you prefer to join motifs as you go.
Round 18-22 :
1 sc in each st around (212) — 5 rounds even. Use these rounds to block your center if desired before joining motifs
Round 23 :
Change to warm tan for a subtle border that harmonizes with motif edges. Ch 1, 1 sc in each st around (212)
Round 24 :
1 sc in each st around (212)
Round 25 :
(*1 sc, picot (ch 3, sl st to base of ch3), 1 sc*) repeat around to create a shallow decorative edge on the center panel (212)
Info :
Leave the center prepared with the tan ridge and picots. These picots will act as visual anchor points when you join the outer floral motifs. Fasten off and weave in ends to prepare for motif joining, or leave attached if you will join motifs directly after making them.
— Floral Fan Motif (worked modularly, make 16–18 motifs depending on runner length) :
Info :
Each scallop motif is worked in multiple colors: a base circular fan in burgundy or olive, a raised off-white daisy center, sculpted green leaves, and a warm-tan outer edging. Make individual motifs and block them flat before joining. The pattern below describes a single motif; repeat and alternate colorways as pictured.
Round 1 :
Using burgundy (or green for alternate motif) yarn: mr, 6 sc in mr (6)
Round 3 :
(1 sc, 1 inc) x 6 (18)
Round 4 :
(2 sc, 1 inc) x 6 (24)
Round 5 :
(3 sc, 1 inc) x 6 (30)
Info :
Rounds 1–5 create a small circular base you will later flatten and convert into the fan cup. Maintain slight tension so the base is not ruffled.
Round 6 :
Change to main motif color (burgundy or olive). 1 sc in each st around (30)
Round 7 :
*(1 sc in next st, ch 2, 3 dc in next st, ch 2, 1 sc in next st) repeat around* — creates small arches that will be foundation for fans (30 small arches)
Round 8 :
Work into each arch: (sl st to center, ch 1, 1 sc, ch 3, 5 dc, ch 3, 1 sc in same arch) x 30 forming the fan ribs (each arch becomes an elongated fan section)
Round 9 :
1 sc in each st across the base of fans to tidy edges (approx 210 sts total when counting tall stitches across all fans). For clarity: count across: (fan bases are worked as 7 stitches per arch on average: 30 x 7 = 210). Work 1 sc in each of those base posts (210)
Info :
Round 8 creates the large fan shape that will be later embellished with raised petals. Blocking now will open the fan and help with later decorative stitches.
Round 10 :
Change to burgundy contrast if starting in olive (or vice versa) for variegated look. In each fan 'spoke' work: ch 2, (1 tr, ch 2, 1 dtr) in alternate stitches across the fan to create a feathered texture. Work a tidy sc row at the base to maintain count (210)
Round 11 :
1 sc in each st around (210)
Round 12 :
Switch to off-white for daisy center: Into selected spaces across the base of the fan place 10 small petal clusters: *(sl st to space, ch 2, (dc2tog, ch1) x 3 across a short span) rep 10 times* producing raised daisy-like clusters spaced evenly across the nearest half of the fan. This is decorative and will create 5–6 small off-white petals per fan crest depending on spacing.
Info :
These daisy clusters are worked on the fan edge nearest the center of the runner so they'll show as white star shapes between the colored scallops. Use a stitch marker to evenly space clusters when working the first motif so you can repeat placement on all motifs.
Round 13 :
Return to motif base color. Around the fan edge work: *ch 1, 7 dc shell, ch 1, sl st in next st* across each fan crest to deepen the scallop outline. Count shells to ensure even distribution; target 30 shells around (210 base / 7 ~ 30 shells)
Round 14 :
Work BLO 1 sc in each stitch around to create a ridge for leaf mounting (210)
Round 15 :
Change to green for leaf section. Identify 10 evenly spaced points around inner fan base (closest to center) and create leaf mounts: *At mount point: ch 2, 1 sc, ch 2, attach with sl st; repeat across chosen mounts* — this produces small loops to house sculpted leaves later
Round 16 :
Using green, work 10 sculpted leaves directly on the mounts: *Into loop: (sc, hdc, dc, tr, dc, hdc, sc) - fasten off leaving tail for weaving* Repeat for each leaf. Leaves are worked in rows, not rounds; treat each leaf as counted groups rather than affecting global stitch count.
Info :
Sculpted leaves are intentionally three-dimensional; work them firmly but do not pull tight so they keep a slight curl. Leave an 8–12 cm tail for sewing the leaf to the center panel later.
Round 17 :
Rejoin warm tan yarn around fan outer edge. Work *1 sc, ch 3, picot* into each shell scallop (approx 30 picots). This creates the delicate lace outline that shows in the final runner photo (210)
Round 18 :
Sl st evenly into shell base to smooth transitions, then fasten off and block motif flat. Weave ends and leave attaching tails as needed.
Info :
Make 16–18 motifs alternating colorways (burgundy, olive, dark green) to match the photograph. Blocking each motif to exact same width and height makes joining much easier. Label motifs if necessary to keep your alternating pattern correct when assembling.
— Daisy Embellishment (worked for each motif) :
Round 1 :
Using off-white: mr, 6 sc in mr (6)
Round 3 :
(1 sc, 1 inc) x 6 (18)
Round 4 :
Sl st into each st around to flatten, then create 10 tiny petals: *(ch 3, sl st in base) repeat 10 times* or until you reach desired petal count. Fasten off leaving a long tail to sew into the center of the fan motif.
Info :
Sew each small daisy into the inner notch of the fan motif where the off-white clusters were made, aligning center for consistent look. Use buttonhole stitch or whip stitch to secure daisies flat onto fan face.
— Sculpted Leaf (detailed single-leaf instructions) :
Round 1 :
With green yarn: ch 8, 1 sc in 2nd ch from hook, 1 hdc, 1 dc, 2 tr in next ch (center), then reverse along other side: 1 dc, 1 hdc, 1 sc in last ch, sl st to base (approx 9 stitches)
Round 2 :
Fold leaf in half lengthwise and work along edge in sc: 1 sc evenly around both edges to make a tiny raised ridge, then sl st to join at base. Fasten off leaving a long tail for sewing (9)
Info :
Gently steam-block leaves to encourage curl outward if desired. Leave tails long for sewing them to the motif and the center panel; this will give the layered, overlapping leaf look seen in the photo.
— Motif Assembly and Joining to Center :
Info :
Place the center panel flat and arrange motifs along the long edges and both ends forming an even scalloped border. The runner in the photo uses 8 motifs on each long side and 1 motif at each end (total 18). Space motifs evenly using the picot row as a guide.
Step :
Pin motifs in place with blocking pins. Ensure alternating colorway order is correct before any sewing.
Round 1 (joining) :
With tan yarn and the center panel in hand, working from center panel side: sl st through picot on center and corresponding picot on motif outer edge to join. Work sl st every 2–3 picots around each motif to secure (this is not a round count dependent instruction; count joins: approx 20–25 slip stitches per motif). Fasten off and weave in ends after each motif is attached.
Info :
Use small, even slip stitches for a nearly invisible join. Alternatively, you can sew motifs to the center using yarn needle with mattress stitch for a stronger hold. Keep stitches shallow to maintain lace look.
Round 2 (secure inner edge) :
Once all motifs are joined to the center, turn entire piece and with cream yarn work 1 sc in each st along the inner edge of motifs into the ridge created on the center panel, working evenly to even out any small gaps (approx 400–420 sts depending on motif count)
Round 3 :
Work 1 sc in each st around the join (count will vary; ensure evenness). If gaps remain, use single crochet increases strategically in small groups to close them.
Info :
Blocking the entire runner after joining will allow the final edging to lie flat and the motif scallops to open and align. Use moderate steam and pins to shape each fan edge evenly.
— Outer Decorative Border (worked after all motifs attached) :
Round 1 :
With warm tan yarn rejoin at a visible, center point. Ch 1, *1 sc in next 2 sts, ch 3, 1 dc in next shell crest, ch 3, 1 sc in next 2 sts* repeat around to create larger scallop-lace looped border (approx 560 sts in repeated pattern)
Round 2 :
Into each ch-3 loop: (1 sc, 5 dc, 1 sc) making a series of larger shells that follow the motifs' outline. Keep shells proportionate to fan size; aim for 30–32 larger shells around each long side and 12–14 at each semicircular end as necessary (global count changes dependent on motif count)
Round 3 :
Return to cream or tan for final picot edge: *sc, picot (ch 3 sl st to base), sc in next 2 sts* repeat around entire runner edge to finish (final decorative count will follow the number of shells; expect 300–380 picots total)
Info :
This picot finish gives the elegant frilly border shown. If you prefer a simpler edge, work a single round of sc followed by a round of scallops (5 dc shells) instead. Weave in ends and block the piece fully to shape.
Final Finishing :
Check all joins and reinforce with a few hidden whip stitches on the back side if motifs feel loose. Trim any remaining loose tails after threading them through 6–8 stitches to secure. Final steam block and allow to dry thoroughly before use.
Info :
Keep the runner flat during blocking and use curved pins if pinning shell edges to maintain scallop curves. If storing, fold gently along the cream center, not through scallops, to preserve shape.
This elegant runner is a rewarding project that blends structured central crochet with delicate scalloped motifs for a truly timeless look. Each motif is a small work of art and the joined effect creates a beautiful table centerpiece that feels handmade and heirloom-quality. I hope you enjoy the slow, satisfying work of assembling petals, leaves and lace into one refined piece. 🧶🌿✨