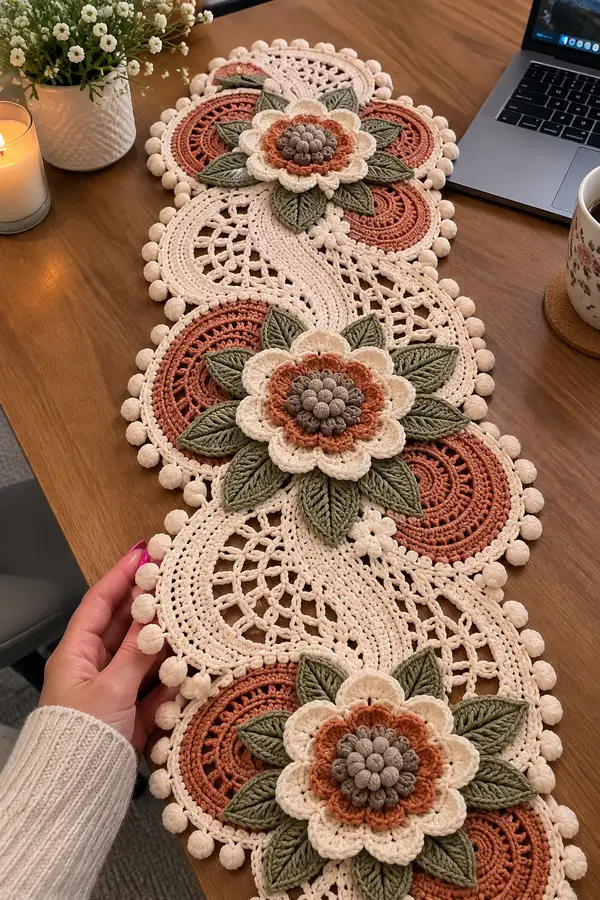
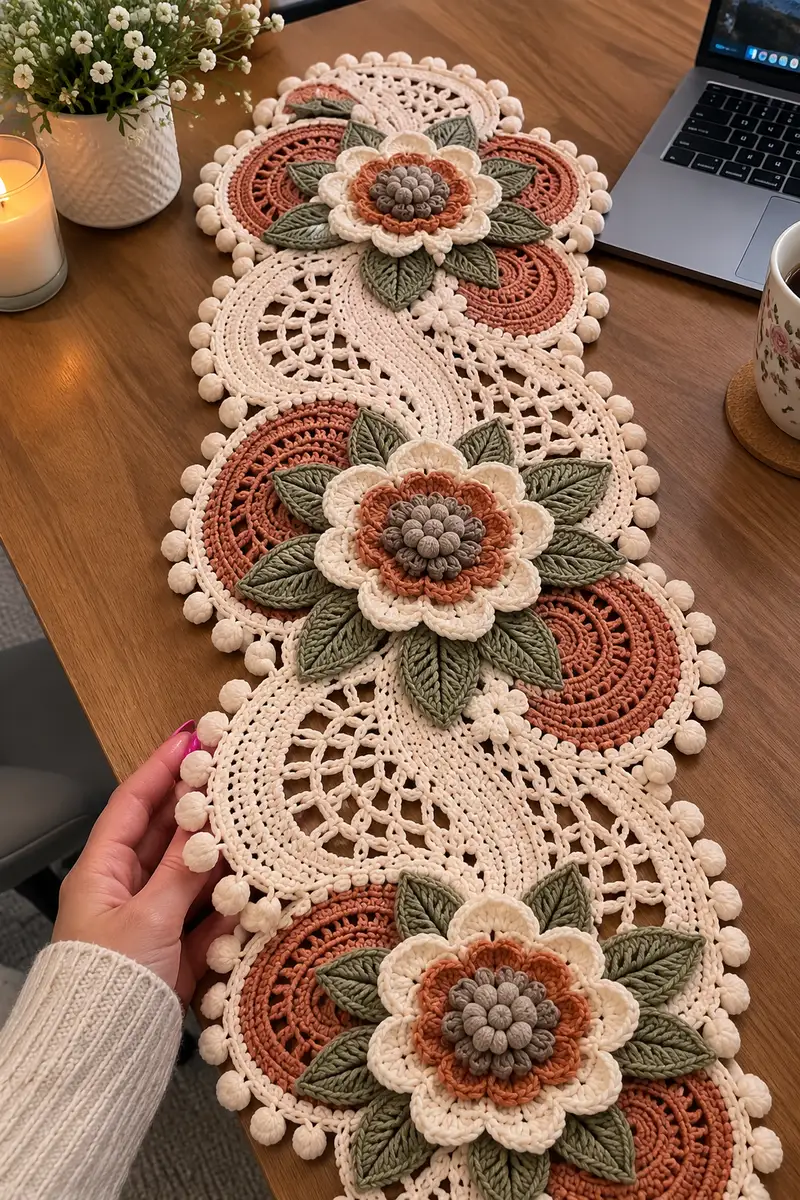
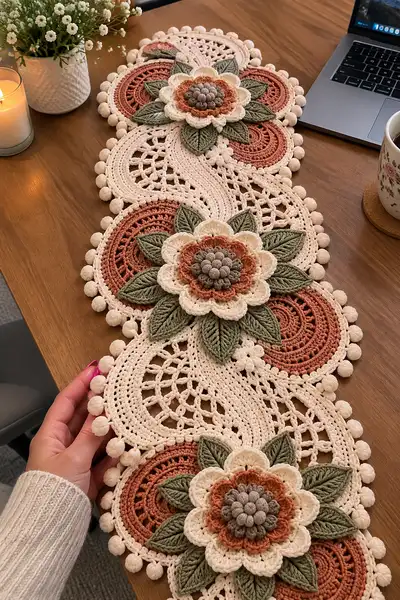
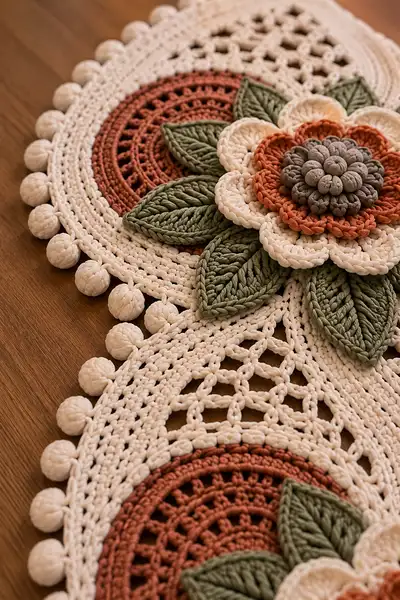
Create a stunning, textured table runner featuring layered 3D flowers, raised leaves, and a scalloped bobble edge in warm cream, terracotta and sage. This pattern uses cotton or cotton-blend bulky yarn for plush texture and crisp stitch definition. The runner is built from repeating circular medallions joined with a lacy S-shaped lattice and finished with a charming bobble trim. Follow the step-by-step rounds, tips and assembly notes to recreate this heirloom-quality centerpiece.
Progress Tracker
0% Complete
— Notes & Techniques :
Info :
This runner is created from repeating circular medallions joined by a lacy S-shaped lattice. Work motifs flat and block before joining. Use consistent tension; cotton yarn benefits from a small amount of blocking to flatten and even stitches. Puff stitches are made by yarn over, insert hook, pull up loop, repeat to create 5 loops, yarn over and pull through all loops then ch1 to close (or follow your puff stitch method). Bobbles are 5-dc bobbles worked into same st, close with sl st. For durability, use a 6.0 mm hook with bulky cotton; adjust if your fabric is too tight or loose.
— Circular Medallion (Make 3 identical) :
Round 1 :
mr, 6 sc into ring (6)
Round 3 :
(1 sc, inc) x 6 (18)
Round 4 :
(2 sc, inc) x 6 (24)
Round 5 :
(3 sc, inc) x 6 (30)
Round 6 :
(4 sc, inc) x 6 (36)
Round 7 :
(5 sc, inc) x 6 (42)
Round 8 :
(6 sc, inc) x 6 (48)
Round 9 :
1 sc in each st (48)
Info :
Switch to terracotta yarn now if making the terracotta disc seen under the flower. Secure color with invisible join and carry tail to back. Use stitch marker to mark the beginning of round for ease.
Round 10 :
(1 hdc, 1 dc) alternating each stitch around (48)
Round 11 :
(3 sc, ch1, skip 1) repeat around to create small eyelet round. Work 12 repeats of (3 sc, ch1, skip1) (48 maintaining 48 sc equivalents)
Round 12 :
Into each ch-1 space: (sc, hdc, 3 dc, hdc, sc) - 12 shells total (the shell counts as 6 stitches but maintain visual spacing)
Info :
Adjust tension on shells so the medallion lies flat; if it ruffles, increase hook size 0.5 mm. The stitch count remains visually 48 reference points for placement of later rounds.
Round 13 :
1 sc in top of each shell and in remaining rounds between shells (48)
Round 14 :
(2 sc, inc) x 12 around to add gentle increase and create room for next decorative round (72)
Round 15 :
1 sc in each st around (72)
Round 16 :
(3 sc, inc) x 18 (90)
Round 17 :
1 sc in each st around (90)
Round 18 :
Work a decorative ring: *(ch3, sl st in 4th st back) repeat across to create small arches over 90 sts - make 30 arches* (30 arches)
Info :
The medallion pictured has deep terracotta central area with lacy outer ring that the petals and leaves sit on. If you prefer a smaller medallion, stop after round 12 and proceed to flower attachment.
Round 19 :
Working into arches: (sl st, ch3, 5 dc cluster, ch3, sl st) into each arch to create 30 raised lobes (these provide a textured border for petal placement)
Round 20 :
1 sc in each st around working evenly to tidy cluster bases and prepare for flower join (approx 180 sc equivalents visually)
Info :
Fasten off terracotta if using separate color for medallions. Block medallion flat to required diameter (sample medallion ~13 cm/5 in across). Make 3 medallions for the runner shown.
— Center Puff Flower Core (Make 3 centers) :
Round 1 :
Using grey yarn: mr, ch1, 10 sc into ring (10)
Round 3 :
1 sc in each st around (20)
Round 4 :
Make puff stitches around: *puff in next st (see notes), sl st next* repeat 10 x; finish sl st to base. (10 puffs)
Info :
Make puff stitches small and dense; these will be slightly stuffed or left firm by manipulating loops. Insert a small pinch of polyester fiberfill into each puff before closing if you want the raised berry look shown.
Round 5 :
Round the puffs with a row of sc around the outer base to anchor them: 1 sc between each puff and 2 sc around puff base as needed (approx 20 sc)
Round 6 :
Fasten off leaving long tail for sewing to petal base. Make 3 of these centers and shape puffs to cluster tightly for the layered look.
— Inner Petal Layer (Make 3 inner petal rosettes; each rosette has 8 petals) :
Round 1 :
Using terracotta (or inner petal color): join to medallion center or to separate circle: mr, ch1, 8 sc in ring (8)
Round 3 :
1 sc in each st (16)
Round 4 :
*ch3, skip 1, sl st in next* repeat to make 8 tiny arches for petal bases (8 arches)
Round 5 :
Work petals into arches: into each arch: (sl st, ch2, 5 dc cluster, ch2, sl st) - create 8 small petals
Info :
Keep petals uniform by counting loops and using stitch marker on first petal for alignment. These inner petals sit below the larger cream petals and should be slightly smaller in height.
Round 6 :
1 sc around petal bases to anchor (approx 32 sc)
Round 7 :
Fasten off, leaving tail for sewing. Slightly block petals forward so they cup outward from center.
— Outer Petal Layer (Make 3 outer petal rosettes; 8 large petals each) :
Round 1 :
Using cream yarn: join to top of inner rosette base, ch1, 8 sc in ring or pick up 8 evenly spaced points around inner rosette (8)
Round 3 :
1 sc in each st (16)
Round 4 :
*ch4, sl st next* around to create 8 larger arches for outer petal bases (8 arches)
Round 5 :
Work tall petals into arches: into each arch: (sl st, ch3, fpdc around next 3 posts to create tall ridge, 7 dc cluster, fpdc to mirror, ch3, sl st) - 8 large petals
Round 6 :
1 sc around petal bases to tidy and create attachment edge (approx 48 sc)
Info :
For tall textured petals on the sample, front post double crochets are used to make deep ridges. Work fpdc into the sides of the petal base to build height and crisp definition.
Round 7 :
Optional decorative picot edge: *(sc, ch3, sl st into ch3) around petal edges evenly to create small scolloped trim (approx 48 sc base)
Round 8 :
Fasten off cream, weave in ends. Position outer petal rosette atop terracotta medallion and baste with short whipstitches through petal bases and medallion surface.
— Leaves (Make 12 or as needed per runner) :
Round 1 :
Using sage yarn: ch10, sc in 2nd ch from hook and next 3 (9 sc along), hdc in next, dc in next 2, tr in next, tr2tog over last two chs to form tip, then work down the other side of chain: tr in next, dc next2, hdc next, sc next4, sl st to join at base. (approx 24 sts outline)
Round 2 :
Working around leaf edge: *(sc, hdc, dc) up the outer edge and mirror down inner edge to shape and bulk slightly (approx 48 sc equivalents)
Round 3 :
Work central ridge: on WS, using bpdc or back post dc along central chain row to make a raised midrib (work 10 bpdc evenly centered)
Round 4 :
1 sc around to tidy; fasten off leaving long tail for sewing. Make 12 leaves; block gently to flatten midrib ridge so leaves sit turned out.
Info :
Leaves in sample are long and slightly curved; when sewing under petals, curve them so tips point outward. Slight steam blocking helps set curve. Make at least 12 leaves to place symmetrically under each flower (six per flower cluster as in sample).
— S-shaped Lattice Panel (Make 2 long panels to join medallions) :
Round 1 :
Using cream yarn: ch80 (this is foundation for S-panel width - adjust to length desired) then join to form a large ovoid base by slip-st stitching across to form chain ring; instead of simple round, work foundation single crochet (or chain-based rounds) to form a flat band approx 5 cm wide
Round 2 :
Work 1 sc in each foundation stitch (80) around to create base rectangle band (80)
Round 3 :
Work popcorn/bobble anchors every 8 sts: *(7 sc, bobble in next) repeat across (approx 10 bobble anchors per band length)
Round 4 :
Turn and work lacy eyelets: *ch4, skip 3, sc in next* repeat creating even mesh across band length (approx 10 eyelet groups)
Round 5 :
On next round, into each ch4 space: (sc, ch3, sc) to create arches (approx 10 arches)
Round 6 :
Continue building height by working (1 sc in each st) for 6 rounds, maintaining width; this produces the solid strips connecting medallions (80 per round)
Info :
The S-shaped lattice is created by alternating mesh and solid rounds, then curving the band in an S when joining medallions (use shaping decreases or slight gathers at join points to produce S flow). Make two identical lattice strips for each side of the runner.
Round 7 :
Work decorative open motif: *into next group of 8 sts: (ch3, skip 3, sc4)* repeat to create airy spaces that echo medallion arches (80 sts equivalent)
Round 8 :
Finish lattice band by working 4 rounds of 1 sc in each st to create sturdy join edge and tidy the band (80 each round)
Round 9 :
Fasten off leaving long tails for sewing to medallions. Block lattice bands flat and steam to set the S curves slightly so they curve naturally between medallions when assembled.
— Decorative Round Over Medallion Edge (to prepare join) :
Round 1 :
With cream yarn, join at medallion outer round base where petals end. Work sc around the outer rim evenly, placing 1 sc in each visual reference stitch (approx 180 sc around medallion depending on your earlier work)
Round 2 :
*(sc4, ch3, sc4) into grouped spaces around to create evenly spaced small arches to which lattice will join later. Count 30 small arches around medallion.
Info :
These small arches create neat join points for slip-stitch assembly of the lattice. Pin lattice and medallion together before sewing to ensure proper S curvature between medallions.
— Bobble Scallop Border (Work last, around entire runner perimeter) :
Round 1 :
Join cream at the runner outermost edge; work 1 sc in each st around along entire assembled runner to create base row (work continuous rounds across medallion and lattice joins; approximate count depends on assembly but expect 700-900 sc total)
Round 2 :
Work 2 rounds of sc to thicken edge and prepare for bobbles (1 sc in each st) - maintain evenness
Round 3 :
*Sc2, bobble in next st, sc2* repeat around. Bobble = (yarn over, insert hook, pull up loop) x5 times, yarn over and pull through all loops, ch1 to secure. Repeat so scallops sit evenly. Expected bobble count around runner approx 40-60 depending on final perimeter
Round 4 :
Work 1 sc in each st around, placing 2 sc between bobbles to anchor. Fasten off and weave ends. Block again to allow bobbles to relax outward.
Info :
For large bobbles like the sample, maintain consistent yarn tension and use the same hook size for bobble rounds. If bobbles flatten, lightly steam and reshape or add tiny stuffing by inserting a small amount of fiberfill with a darning needle before securing with final sc rounds.
— Assembly & Joining Motifs :
Round 1 :
Lay out the three medallions spaced evenly along desired runner length. Position lattice strips between medallions to create S curves that weave under and between medallions. Pin in place with T-pins while on blocking mat.
Round 2 :
Using cream yarn and a 6.0 mm hook, join lattice to medallion by working sl st through the medallion arch (the small arches created earlier) and through corresponding lattice arch: *(sl st into medallion arch, sl st into lattice arch) repeat across each join point* (approx 30 join points per medallion)
Info :
Work joins with slightly looser tension to avoid pulling medallions inward. Pin every few inches and check S curve while working. If you prefer an invisible join, sew with a tapestry needle through the back loops of both pieces.
Round 3 :
Sew flower rosettes to medallions: place center puff directly in medallion center and baste with long tail using mattress stitch. Then sew inner terracotta petals around puff base; finally sew outer cream petals over terracotta and tack leaves underneath in symmetrical placement. Use overlapping whipstitches to secure petal bases to medallion skim, catching only front loops for neat seams.
Round 4 :
Check runner flatness; if edges ripple, insert slight gathering stitches at lattice join points to even curvature. Press gentle steam if necessary and pin until fully dry.
Info :
Thread tails should be woven into the nearest sc rounds and cut. Reinforce high-traffic joins with a second pass of tiny whipstitches from WS if making a runner for frequent use.
— Finishing Touches :
Round 1 :
Weave in ends using tapestry needle with duplicated stitching back through motifs to secure. Weave at least 6-8 cm of tail inside fabric before trimming.
Round 2 :
Block entire runner flat with T-pins and a steam iron or blocking spray. Ensure bobbles are open and petals are slightly lifted. Allow to dry completely.
Round 3 :
Attach optional backing felt if protecting delicate surfaces by sewing or gluing discreetly to underside. Test in an inconspicuous area if gluing.
Info :
For machine-washable results, keep loose fibers trimmed and test colorfastness of your yarn. Cotton may shrink slightly after first wash — reblock if needed.
This floral table runner brings tactile elegance to any table with its layered blooms, sculpted leaves and playful bobble edge. The warm palette and luxurious cotton texture make it a beautiful heirloom piece and a perfect conversation starter at gatherings. Each medallion and petal is a chance to savor the process and add your personal touch. 🧶🌸 I hope creating this runner fills your space with handmade warmth and pride! ✨