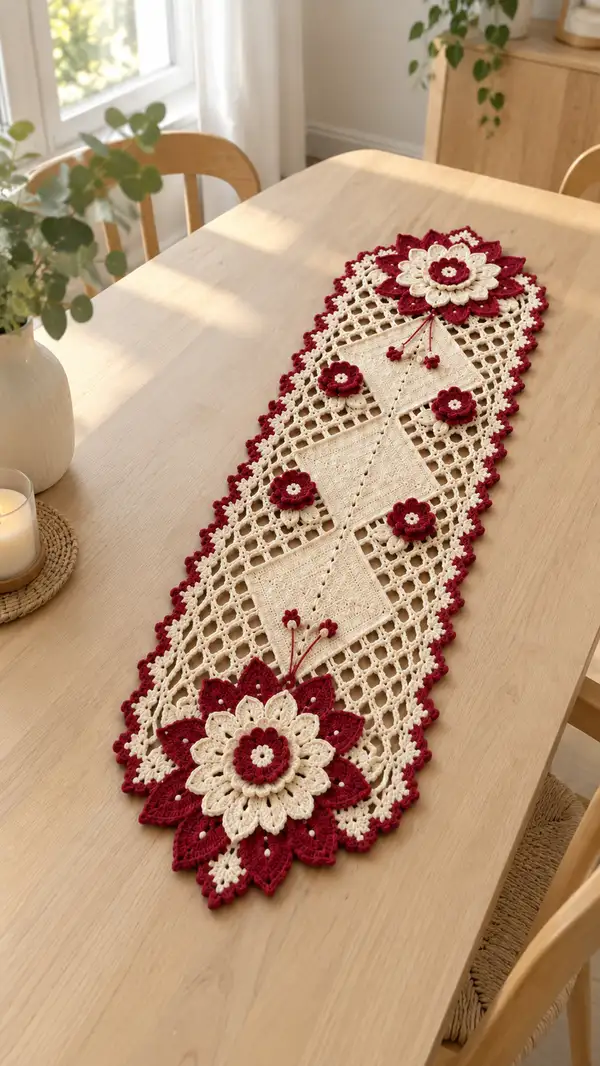
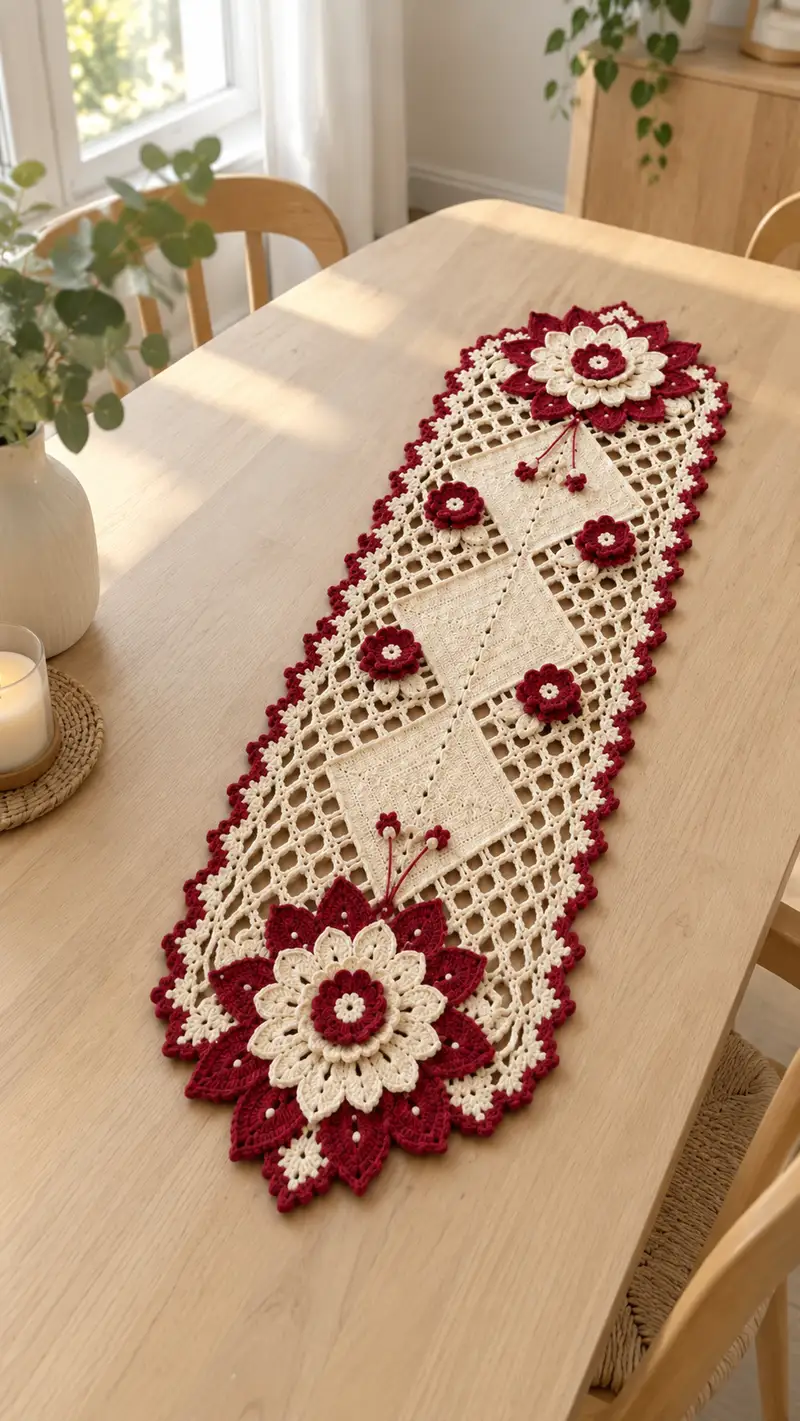
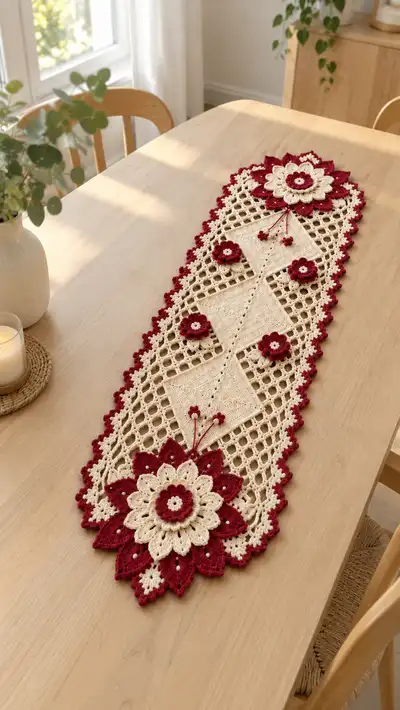
Create a stunning, heirloom-style crochet table runner with layered floral motifs, open mesh lattice panels and a scalloped border. This pattern uses two contrasting colors (deep berry and cream) for a striking vintage look. Detailed step-by-step instructions guide you through each motif, the joining process, and the decorative edging so you can assemble a polished runner perfect for a dining table or sideboard.
Progress Tracker
0% Complete
— Notions & Gauge :
Info :
Gauge is flexible for a table runner, but for consistent motif sizing: 12 dc x 6 rows in worsted cotton equals approximately 4"x4" using 3.5mm hook. Adjust hook if your motifs deviate significantly.
— Motif Overview :
Info :
This runner is constructed from four central diamond-square motifs joined by a mesh lattice, with two layered floral medallions at the ends and four small floral appliques placed on the mesh. Make motifs flat and block before joining. Color A = Cream, Color B = Deep Berry (red).
— Square Diamond Motif (Make 4 identical) :
Round 1 :
6 sc in magic ring (6)
Round 3 :
(1 sc, 1 inc) x 6 (18)
Round 4 :
(2 sc, 1 inc) x 6 (24)
Round 5 :
(3 sc, 1 inc) x 6 (30)
Round 6 :
1 sc in each st (30)
Info :
Change to Color B for a subtle inner contrast now if you want a framed diamond; this pattern keeps Color A for all square rounds unless customizing.
Round 7 :
BLO 1 sc in each st (30) to create a defined ridge (30)
Round 8 :
Ch3 (counts as dc), 1 dc in next 2 sts, ch2, sk 2 sts, 1 dc in next 3 sts, ch2, sk 2 sts; repeat evenly to form 6 small 'window' arches around (30 dc equivalent)
Info :
This round establishes the diamond 'open' pattern later; keep consistent tension on ch2 spaces for neat mesh alignment.
Round 9 :
1 sc in each dc and ch space (use 1 sc in each st and 1 sc in each ch2) (30)
Round 10 :
(3 sc, ch4, sk 2 sts) x 6 creating corner chain spaces that will be drawn out into a diamond shape (30 plus 6 ch4 spaces)
Info :
At end of Round 10 you should have 6 corner ch4 spaces; these will be the points of the diamond. Mark centers of each side for later joining with mesh panels.
Round 11 :
Work into ch4 spaces: (sc, ch3, 3 dc, ch3, sc) in each ch4 space to create raised diamond corners and start flattening the motif; sc between corner shells across sides (approx stitch count variable by shells but maintain symmetry).
Round 12 :
1 sc around entire motif, placing 2 sc in top of each shell to maintain flat shape; count should be roughly 48 sc after placing 2 sc in each corner shell top (48)
Round 13 :
Switch to an openwork round to prepare for join-as-you-go: *sc 2, ch5, sk 3* around, placing 1 sc between corner shells; aim to end evenly with corner marked (16 sc and 6 ch5 loops overall)
Info :
Block motif flat now or after assembly. Repeat to make four identical squares. Use stitch marker at one corner to orient when joining to mesh panels later.
— Mesh Lattice Panels (Make 2 long panels to sit between squares) :
Info :
Mesh panels are worked flat as long strips that will be joined to the squares to form the runner center. Each panel is created in rows; width is measured in 'mesh diamonds' to align with square motif ch5 loops.
Row 1 :
With Color A, ch 54 + 3 (turning ch) (this creates 27 mesh diamonds; adjust multiple of 2 to match motif placement)
Row 2 :
Dc in 4th ch from hook (counts as 1st dc), *ch2, sk 2 ch, dc in next ch* across to end. Turn (approx 27 dc with 26 ch2 spaces)
Row 3 :
Ch3, dc in same st, *ch2, dc in next dc* repeat across turning at end (maintain mesh columns) (27 dc)
Row 4-18 :
Repeat Row 3 for a total of 15 mesh rows (27 dc per row) to get a long, airy panel approximately the length needed to span between squares and medallions. Keep rows consistent to match square heights.
Info :
Check width by laying panel next to a square motif; the ch5 loops on the squares should align with mesh ch2 columns for tidy joins. Adjust number of starting chains if necessary.
Row 19 :
Work a finishing row: sc across putting 1 sc in each dc and 1 sc in each ch2 space to create a sturdy edge (approx 54 sc)
Info :
Make two identical panels. Block panels flat to square motifs dimensions for even joining.
— Small Flower Appliques (Make 4) :
Round 1 :
With Color B, 6 sc in magic ring (6)
Round 3 :
*(1 sc, ch3, 1 sc) in next st* around to create 6 petal bases (12 sc equivalent plus 6 ch3 loops)
Round 4 :
In each ch3 loop: (sc, hdc, 3 dc, hdc, sc) to form a small petal; sl st to join to first petal (6 petals)
Round 5 :
With Color A, join in center and work 6 sc around the central hole for contrast (6)
Info :
Sew appliques to mesh panels at planned placements (one applique per mesh diamond center). Place 4 evenly spaced along the runner center.
— Large Layered Floral Medallion (Make 2; front and back layers assembled) :
Round 1 :
With Color B, 8 sc in magic ring (8)
Round 3 :
(1 sc, 1 inc) x 8 (24)
Round 4 :
(2 sc, 1 inc) x 8 (32)
Round 5 :
Change to Color A. Ch1, 1 sc in each st around (32)
Info :
This creates a solid center disk which the first petal layer will attach to. Keep tension even to avoid doming.
Round 6 :
*Ch4, sk 2 sts, sc in next st* around to form 8 loop spaces for petals; adjust so 8 loops are evenly spaced (32 sc baseline, 8 ch4 loops)
Round 7 :
In each ch4 loop: (sc, ch3, 2 dc, ch3, sc) to create elongated petal bases (8 petals)
Round 8 :
Sl st into base to even row then 1 sc in each st and in petal bases across to make uniform round (approx 48 sc)
Info :
Change to Color B for the next petal layer to produce alternating color petals. Keep petals consistent in height for a balanced layered look.
Round 9 :
In each petal base around: (sc, hdc, 5 dc, hdc, sc) making 8 full petals in Color B (8 large petals)
Round 10 :
Working behind the large petals (join worn edge), create second row of smaller petals with Color A: *in space between petals work (sc, ch3, 3 dc, ch3, sc)* to create offset petals (8 offset petals)
Round 11 :
1 sc around entire medallion in Color A, placing 2 sc at petal tips to maintain flatness (approx 72 sc)
Round 12 :
Decorative round: *ch5, sl st into base at intervals between petals* around to form 8 decorative loops (for beaded string or tassel attachments later)
Info :
Make two identical medallion layers for a slightly 3D look: one slightly smaller inner disk (Rounds 1-6) and one larger outer petal disk (Rounds 7-11). Sew smaller disk centered on larger disk for depth, or attach directly to runner ends after blocking.
Round 13 :
Optional beading round in Color B: *sc across placing picot at every petal tip (sc, picot, sc)* to add delicate points (approx 72 sc with 8 picots)
Round 14 :
Fasten off leaving 12" tail for sewing. Weave tail through back to secure center and hide end.
— Flower Center Rosette (Make 2 small rosettes for medallion center) :
Round 1 :
With Color A, 6 sc in magic ring (6)
Round 3 :
*(sc, ch3, sc) in next st* around to form 6 ch3 loops for tiny petals (12 sc equivalent)
Round 4 :
In each ch3 loop: (sc, 3 dc, sc) to create small decorative petals; sl st to finish (6 petals)
Info :
Sew rosette into center of large medallion with whip stitch, creating a layered focal center for each medallion.
— Assembly: Joining Squares to Mesh and Placement of Flowers :
Info :
Layout order from one end to the other: Large medallion end, mesh panel, square motif 1, mesh panel, square motif 2, mesh panel, square motif 3, mesh panel, square motif 4, mesh panel, Large medallion end. Visual spacing should be equal between squares. Use pins to hold pieces before joining.
Round 1 (Join-as-you-go for square to mesh) :
With Color A, place square RS facing you; join at one side ch5 loop with sl st to corresponding mesh ch2 space; sc across edge, joining each ch5 loop to a ch2 mesh column by sl st as you work the round. Aim to place 1 sl st join in each mesh column across the side, finishing corner with 3 sc into corner loop (counts depend on mesh width).
Info :
Work slow on the first join-as-you-go round to line up ch5 loops of square and ch2 columns of mesh. This ensures the squares are neatly framed by the mesh and prevents twisting.
Round 2 (Secure join) :
Once sides are joined, work 1 sc around entire join area to stabilize seam: 1 sc in each stitch and 1 sc in every sl st join, placing 2 sc in corner shells to maintain flatness (approximate stitch count will vary by join length).
Round 3 :
Repeat join process for remaining three sides of each square until each square is fully integrated into the mesh panel, creating a continuous runner center.
Info :
When joining second square, make sure spacings between squares are equal. Use tail lengths to baste pieces temporarily before permanent joins if preferred.
Round 4 :
After all squares are joined into the mesh, work a sc round around the entire center strip: 1 sc in every dc and 1 sc in each ch space to make the body uniform and prepare for edge rounds (stitch count variable; work evenly to avoid ruffles).
Info :
Lay the assembled runner flat and check for distortions. If small gaps remain between squares and mesh, use matching color yarn and mattress stitch to close them slightly for a flat join.
— Attaching Small Appliques :
Step :
Position four small flower appliques evenly across the mesh between squares (one per mesh diamond center). Sew each applique through the back petals into the mesh with 6-8 tiny whip stitches, ensuring secure attachment without puckering the mesh.
Info :
Place appliques offset from the seam lines so they appear as floating decorations across the runner surface. Pin then sew to avoid movement.
— Attaching Large Floral Medallions to Ends :
Step 1 :
Place layered medallion at each runner end overlapping the mesh and the terminal square by approximately 1/2" to 1" for stability. Use pins and check symmetry with the opposite end.
Step 2 :
Sew medallion in place using the long tail from the medallion outer round: take small, even stitches through the outermost round of the medallion and into the mesh/square edge, securing multiple anchor points per petal (8-12 anchor stitches).
Info :
For a clean finish, flatten the medallion during sewing and avoid pulling stitches too tight. If desired, add a few securing stitches across the medallion center to the square beneath to prevent flopping.
— Decorative Tassel Stems (Optional) :
Step :
Create 3 stem cords per medallion using 30-35" lengths of Color B yarn folded to make a bundle. Braid or twist the bundle, knotting at each end. Add 3 small buds (3 sc magic ring, round 2: 6 sc, close and sew) to the ends and attach beneath the medallion center with a few stitches.
Info :
This gives a delicate trailing element reminiscent of floral stamens in the photo. Use matching color tails for neatness and tuck knots under medallion for a tidy look.
— Edging and Scalloped Border :
Round 1 :
With Color B, join at a midpoint and work 1 sc evenly around entire runner edge, placing 2 sc in each corner/petal junction to prevent curling (stitch count variable; work evenly)
Round 2 :
*Ch3, sk 2 sc, sc in next sc* around to create small picot-friendly loops along the edge; place 2 sc at points where petals meet to maintain shape (approx 160 loops depending on runner size)
Round 3 :
Work scallops: *in loop: (sc, hdc, 5 dc, hdc, sc), sl st into next loop* repeat around to create full scallop shells (approx 40 scallops)
Info :
Ensure each scallop sits centered around a mesh diamond or a medallion petal tip for a balanced decorative border. Add a picot at the tip of every second scallop to mimic the photo's decorative bumps.
Round 4 :
*At every scallop tip: sc, picot, sc* to form small raised points (approx 20 picots). Fasten off and weave ends on WS.
Info :
Blocking the entire runner after edging is essential to set scallops and find a final flat shape. Pin scallop tips evenly and steam/block according to yarn manufacturer's instructions for best results.
— Final Finishing Touches :
Step :
Weave in all loose ends with a yarn needle, burying tails into the nearest seam or row. Trim excess. Re-block the runner with pins across the scalloped edge and medallion petals to open and flatten details.
Info :
If desired, lightly starch cotton runner for a crisper tabletop presentation. Use a removable backing pad under the runner to protect surfaces and preserve shape when storing.
— Pattern Notes & Sizing :
Info :
The pictured runner measures approximately 34" long x 9" wide with worsted cotton and a 3.5mm hook. To lengthen the runner, add additional mesh panels and square motifs in pairs to maintain symmetry. To shorten, remove a mesh+square repeat and re-edge accordingly.
Info :
All stitch counts in motif rounds that create shells and petals are written to keep motifs flat and circular; where counts are described as 'approximate' this is due to decorative shells which use multiple stitches per earlier base stitch—maintain even placement rather than strict numerical precision if slight variation occurs.
This elegant table runner combines vintage floral charm with modern openwork for a beautiful, usable centerpiece. Each layered flower and scalloped edge is designed to catch the light and invite touch. Whether for special occasions or everyday warmth, you’ll be proud to display this handmade accent on your table. 🧶🌸 Take your time to block and finish carefully — the results are worth the patience. Happy crafting and enjoy every stitch! ✨