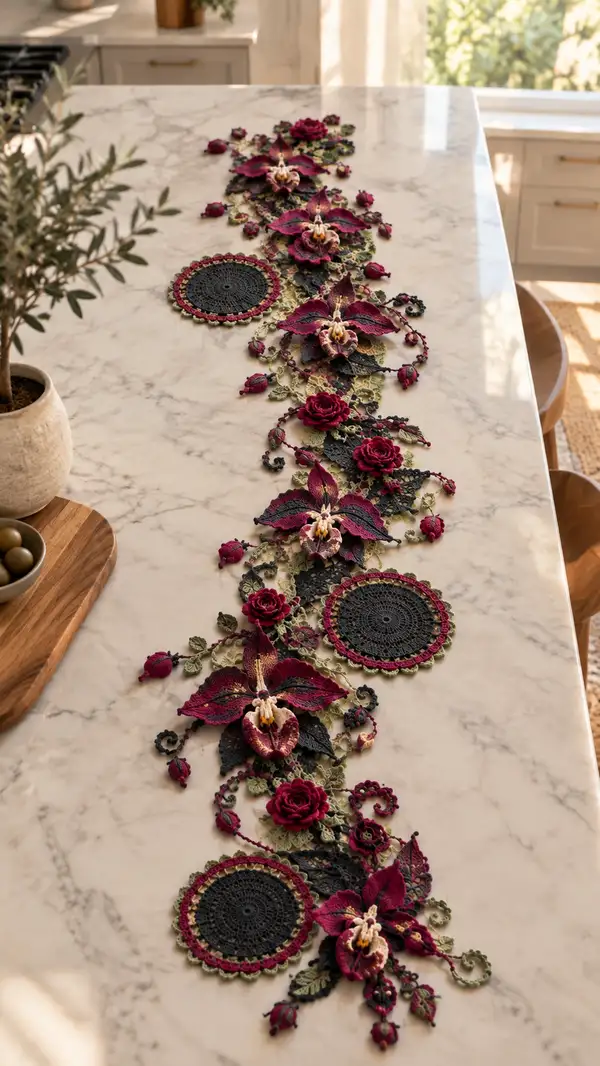
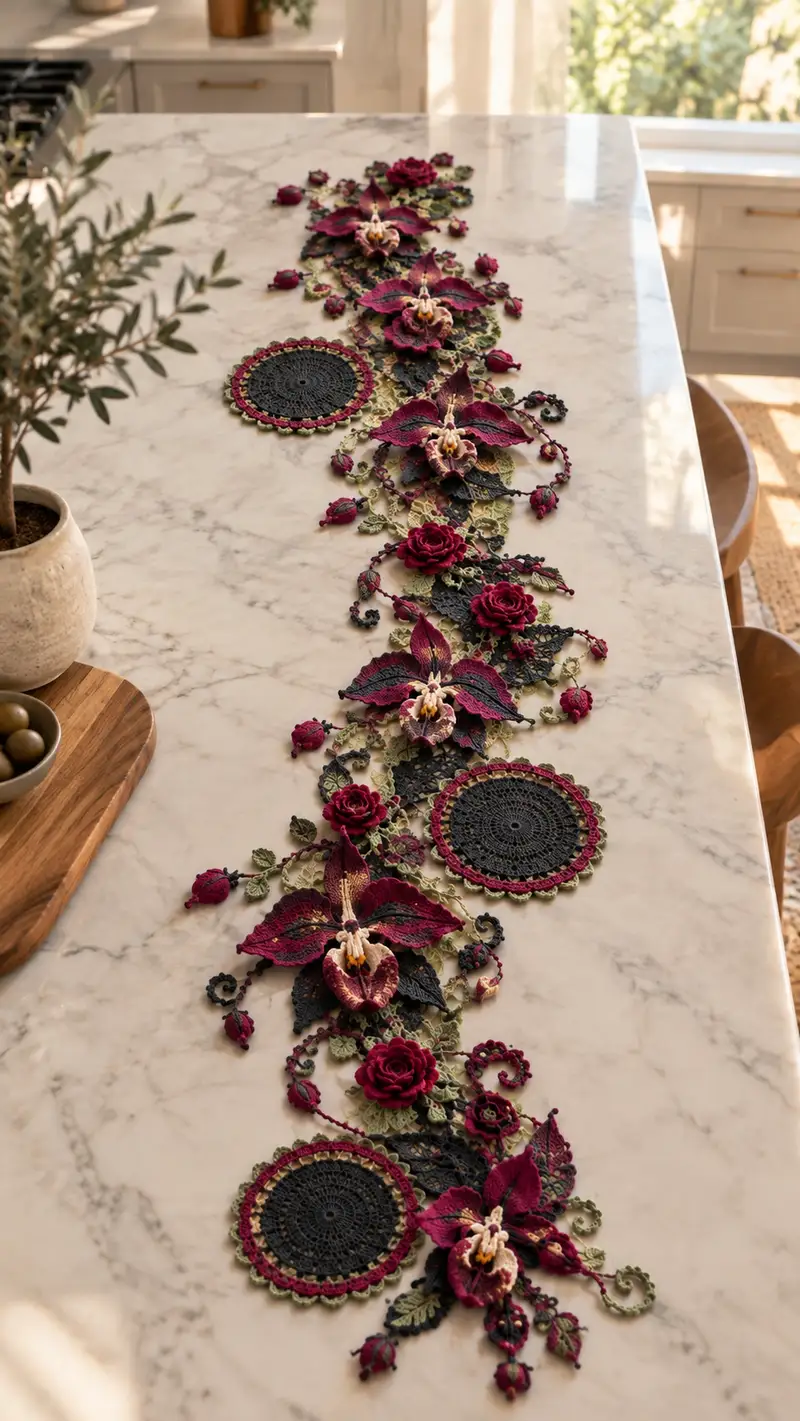
Create an elegant floral table runner composed of lace doilies, sculpted orchids, roses, leaves and delicate vines. This pattern uses fine yarn and textured stitches to build layered botanical motifs that join into a long, romantic centerpiece. Finished piece showcases deep burgundy blossoms, mossy olive leaves and charcoal round doilies for a dramatic contrast. Ideal for a dining table, island or sideboard as a lasting handmade accent.
Progress Tracker
0% Complete
— Circular Doily Motif (Make 4) :
Round 1 :
With charcoal yarn, ch4, join to form ring, ch3 (counts as first dc), 11 dc into ring, join with sl st to top of ch3 (12)
Round 2 :
Ch3, dc in same st, 2 dc in each st around, join (24)
Round 3 :
Ch1, sc in first st, (ch4, sk1, sc in next) repeat around to form 12 ch4 loops, join (12 loops)
Round 4 :
Into each ch4 loop: (sc, hdc, 3 dc, hdc, sc) to create petal arches; join (12 petals)
Info :
Keep tension even and use small hook if petals ruffle. Block lightly after completing rounds to open petals.
Round 5 :
Change to burgundy. Ch1, sc in each st and in top of each petal across to create a solid ring (approx 72 sc). Join (72)
Round 6 :
Ch2, (2 dc in next, ch1) around into designated places across top of petals to form decorative scallops; join (24 scallops)
Round 7 :
Ch1, sc in each st and ch1 spaces; maintain stitch count to create a flat disc (approx 96 sc), join (96)
Round 8 :
Change to olive green. Ch3, (dc, ch1, dc) in every 8th st to create small arch points for later joining; fill remaining sts with sc to keep round flat. Join (96)
Round 9 :
Ch1, sc in each st (96). Join and fasten off leaving long tail for assembly. Block round to 10-11cm diameter and pin evenly to open scallops.
Info :
When changing colors, leave a 6-8cm tail to help hide while sewing or to weave in inside the petals. Use blocking wires if available for a perfect circle.
— Doily Edge Variation (Make 3) :
Round 1 :
With charcoal yarn and starting from center of round if adding additional edge: ch1, sc evenly around existing outer edge, placing 1 sc in each st and 3 sc in each scallop apex. Join (approx 110)
Round 2 :
Ch4 (counts as tr), tr in next st, sk1, *(tr, ch1, tr) in next st, sk1* repeat around to form openwork arches. Join (approx 36 arches)
Round 3 :
Change to burgundy. Into each arch: (sc, picot, sc) to create tiny points. Join and fasten off. Block firmly to set edge.
Info :
Edge variation is optional for the doilies that are placed directly on the runner. Use this on alternating circles for visual rhythm.
— Small Lace Medallion (Make 6) :
Round 1 :
With charcoal yarn, mr, 6 sc (6)
Round 3 :
(1 sc, inc) x6 (18)
Round 4 :
(2 sc, inc) x6 (24)
Round 5 :
Ch3, *sk1, dc in next, ch1* repeat around forming 12 dc separated by ch1 spaces; join (12 dc)
Round 6 :
Change to olive. Into each ch1 space: sc, ch3, sc to create small picot loops; join and fasten off leaving tail for joining.
Info :
These small medallions work as filler motifs between flowers and circles. Make extra so you can adjust spacing when assembling runner.
— Orchid Flower Base (Make 4 large orchids) :
Round 1 :
With burgundy yarn, mr, 6 sc (6)
Round 3 :
(1 sc, inc) x6 (18)
Round 4 :
(2 sc, inc) x6 (24)
Round 5 :
Ch1, sc in each st around to create short rim (24)
Info :
This small disc forms the hidden center base of the sculpted orchid; all petal sets and pistil will be worked around or sewn to this base.
Round 6 :
Change to cream. Ch3, (dc, ch2, dc) in every 3rd st to create small cream arches (8 arches). Join (8)
Round 7 :
With burgundy, sc around and in top of each arch to stabilize (approx 48 sc). Join and fasten off base; reserve for assembly.
Info :
Make four bases total. Keep them slightly cupped by blocking on a small bowl or darning mushroom to shape for petal attachment.
— Orchid Petal (Make 18 per orchid; 72 total) :
Round 1 :
With burgundy yarn, ch8, sc in 2nd ch from hook, sc across to last ch, 3 sc in last ch, continue along opposite chain, sc across back to first ch (approx 16 sc total forming an oval). Join to first sc with sl st and do not turn. (16)
Round 2 :
Ch3 (counts as dc), dc in same st, dc across next 6, (2 dc, ch1, 2 dc) in center apex, dc across next 6, dc in final st, join. (approx 22 dc)
Round 3 :
Ch1, sc in same st, (sc, hdc, dc, tr, dc, hdc, sc) across to create raised rib with a pointed tip, sl st to close. Keep stitches symmetrical.
Round 4 :
Change to olive for veining: Using surface slip stitch or tapestry needle, work thin veins from base to tip by taking small sl st loops in contrasting color following the center line and radiating slightly outward. Fasten off and leave long tail for sewing.
Info :
Petal shape is slightly cupped. Block each petal over a small mold or shape with your fingers while damp to achieve natural curve. Make petals in three sizes: large (6 petals), medium (6 petals), small (6 petals) per orchid. For large petals, increase initial chain to ch10 and add two more dc in round 2 for width.
— Orchid Lip / Pouch (Make 4) :
Round 1 :
With cream yarn, ch6, join to form ring, ch1, 8 sc into ring (8)
Round 2 :
Inc in each st around (16)
Round 3 :
(1 sc, inc) x8 (24)
Round 4 :
Ch3, dc in next 2, (dc, ch1, dc) across center front to form opening while working sc along sides to keep pouch cupped. Fasten off leaving long tail for sewing.
Info :
Shape the pouch by folding edges inward slightly and attaching to orchid base. The pouch should sit slightly forward of the petal cluster to mimic a real orchid lip.
— Orchid Pistil & Filaments (Make 4 sets) :
Round 1 :
With cream, ch10, sc in 2nd ch from hook then sc across creating thin cord (approx 9 sc). Fasten off leaving long tail.
Round 2 :
With burgundy, wrap the cream cord with tiny embroidered stitches to create a variegated filament look, or work a spiral with sl st/seed stitches. Add small beads if desired to mimic pollen.
Info :
Sew the pistil securely into the pouch center then anchor into the base. Use a drop of fabric glue on knots for security if this runner will be transported frequently.
— Rose Spiral (Make 6) :
Round 1 :
With burgundy yarn, ch51 (or ch41 for a smaller rose). Turn and sc in 2nd ch from hook and across the chain, creating a single strip (50 sc). Do not join; work a continuous spiral strip.
Round 2 :
Ch1, *in next 3 sc work (sc, hdc, dc) to create the first petal cluster, in next 2 sc work (hdc, dc), repeat across the strip creating alternating petal heights. End the strip with a sl st to last st. Fasten off leaving long tail for coiling.
Round 3 :
Coil the strip from one end into a spiral, sewing the base together with a yarn needle as you go to secure each turn. Shape petals by pulling edges slightly outward to form a natural rose. Secure final end underneath and weave in tails.
Info :
Vary the number of chain stitches and petal clusters to create roses of slightly different sizes for a more organic look. Lightly stuff the center with a pinch of fiberfill for roundness if desired.
— Small Bud (Make 12) :
Round 1 :
With burgundy, mr, 6 sc (6)
Round 3 :
Ch1, 1 sc in each st around (12) - make cup slightly taller by adding an extra round of sc if you want elongated buds. Fasten off leaving tail for sewing and insert a small amount of stuffing to make them plump.
Info :
Sew buds to vine ends or tuck them into leaf clusters. For partially opened buds, stitch a few small petals (chain 5-7, sc along chain) and attach around the top.
— Leaf (Make 30) :
Round 1 :
With olive yarn, ch12, sc in 2nd ch from hook across to last ch, 3 sc in last ch, continue along opposite side of chain sc across back to starting ch (approx 22 sc). Join.
Round 2 :
Ch3, dc across center half toward tip, then dc across returning side to create center ridge; sl st to base. (Use symmetrical increases to maintain balance)
Round 3 :
FLO only: 1 sc in each st around to create a defined edge that will hold shape when blocked. Change to a darker olive for vein accent by embroidering a central line with small sl st stitches.
Info :
Vary leaf sizes by starting chains of ch8 (small), ch12 (medium), ch16 (large). Block leaves slightly cupped for natural look.
— Curled Vine & Connecting Chain (Make multiple lengths to join motifs) :
Round 1 :
With olive, ch60 (or desired length connecting two motifs). Turn, sc in 2nd ch and across to create sturdy thin cord (59 sc). Fasten off with long tail for sewing.
Round 2 :
Optional: Add little picot curls: *ch6, sc in 2nd ch from hook, then sl st into vine at regular intervals to create curl loops.* Repeat along vine every 6-8 sts for decorative spirals.
Info :
Curl the picots around a small dowel and steam-block or shape with fingers while damp to hold spirals. These vines are the organic connectors between main motifs so vary lengths as you lay out the runner.
— Decorative Tiny Filler (Make many) :
Round 1 :
With burgundy or olive, ch4, join, ch1, 6 sc in ring (6). Fasten off. These tiny rounds or single crochet knots are used to create clusters and add weight to vine ends.
Info :
Make an abundance of these small elements; they are essential to visually tie the negative spaces together when assembling the runner.
— Assembly & Join-as-you-Go Motifs :
Info :
Layout: Arrange motifs as shown in reference photo: circular doilies staggered and partially overlapped with orchid clusters positioned between circles and roses and leaves filling in edges and negative spaces. Pin into place on blocking board or table with a protective sheet.
Step 1 :
Using a contrasting tail (charcoal or olive), join two adjacent motifs by whip stitching through outer loops of both edges at spaced intervals (approx every 6-8 sts). Keep stitches small and tight for invisible joins.
Step 2 :
Use the connecting vines to bridge larger gaps: place vine ends under outermost edges and sew through one vine stitch and corresponding mesh hole on motif with small neat stitches. Tension should be slight so join lies flat.
Info :
When joining flower petals to a base, sew each petal at the base to the central disc using mattress stitch, arranging petals so they slightly overlap and form a natural open bloom. Anchor each petal with 2-3 stitches and hide tails inside the base.
Step 3 :
Sew orchid pouch and pistil to the front center of petal cluster; weave the pistil tail through the base and tack to the underside to secure. Add a few hidden stitches between pouch edges and the base disc for stability.
Step 4 :
Attach roses: position spiral roses into leaf clusters or near doily edges. Sew through the coil base into the motif base several times to lock them so they do not rotate.
Step 5 :
Anchor filler medallions and buds with single neat stitches; tuck small filler pieces into spaces and secure them with short stitches rather than long running stitches to avoid sagging.
Info :
Periodically flip the runner and check the back for long loose tails; weave them through several stitches and bury them inside layers of petals or motif backs for a clean finish.
— Final Edge and Stabilizing Round :
Round 1 :
With olive, sc around entire outer edge of joined runner, placing 1 sc in each outermost stitch and 3 sc in each high point or petal apex to maintain shape. Continue until entire perimeter is covered (st count will vary depending on final layout).
Round 2 :
Ch3, *sk1, (tr, ch1, tr) in next st, sk1* around to create decorative openwork arches in olive; join and fasten off.
Round 3 :
Change to burgundy. Into each arch: (sc, picot, sc) to form scalloped points. Fasten off and weave in all tails.
Info :
Blocking: Block the entire assembled runner on a flat board, pinning each motif and vine into the desired position. Spray lightly with water and allow to dry fully. This sets joins and flattens motifs to a uniform thickness and helps the runner lay perfectly flat on your table.
— Optional Stabilizing Stitching and Weighting :
Info :
If the runner is too floppy on a surface, you can stitch a few discreet anchoring threads across underlapping motif points or add small flat washers sewn inside larger motifs for weight. Always protect table surfaces with a thin felt backing patch glued or stitched under heavier motifs to prevent abrasion.
Info :
Care: Hand wash gently in cool water, reshape while damp and lay flat to dry. Avoid hot water or spinning cycles that can distort delicate lacework.
As you finish the final stitch, this floral table runner becomes a piece of table-top poetry—dramatic, romantic and endlessly photogenic. Each doily and bloom tells a story of time and detail, and the layered textures invite close inspection and admiration. Whether used for special occasions or everyday elegance, this runner becomes an heirloom centerpiece that elevates any table. 🧶🌸✨