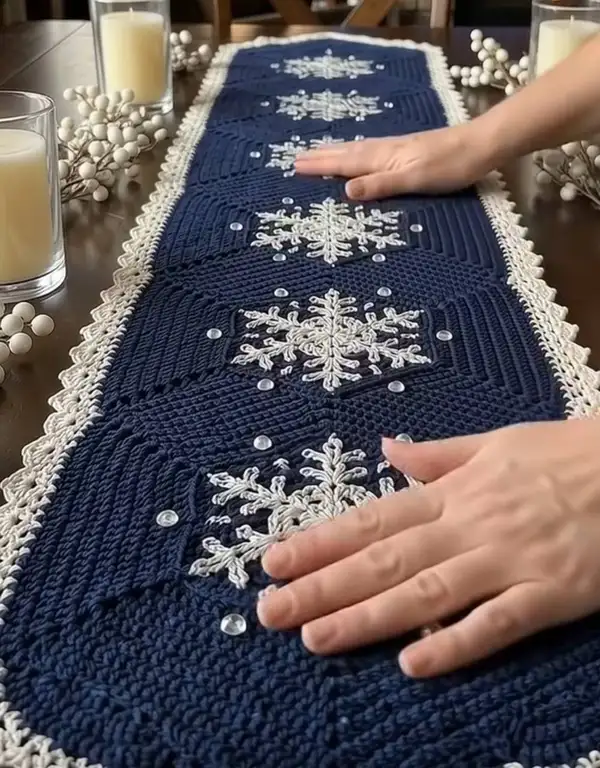
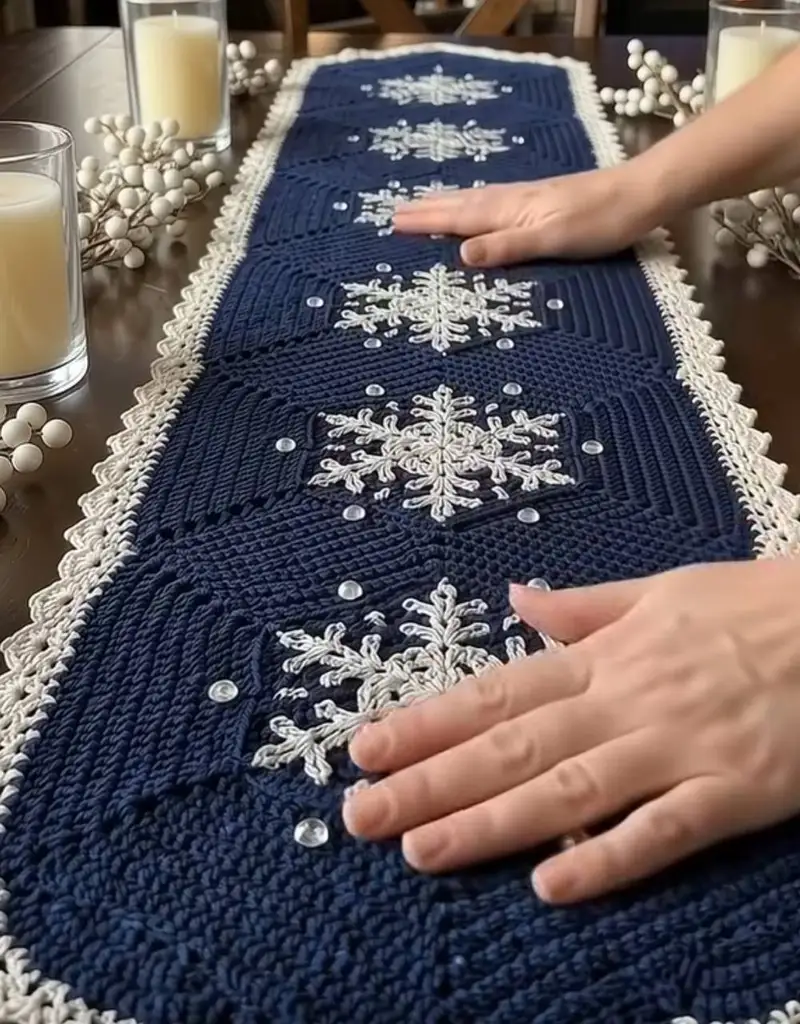
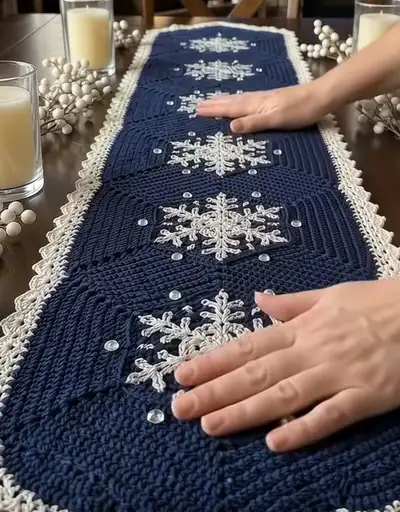
Create an elegant navy table runner featuring ivory snowflake motifs, delicate scalloped edging, and sparkling sequin accents. This pattern builds six textured panels joined into a long runner, finished with a lacy cream border for a refined holiday or winter table centerpiece. The design uses simple stitch textures, surface ridges, and a separate crochet snowflake overlay that is sewn on and embellished. Detailed step-by-step instructions guide you through panel construction, snowflake motifs, joining, and finishing.
Progress Tracker
0% Complete
— Overview :
Info :
This pattern builds a long runner assembled from six identical rectangular panels. Each panel is worked flat in rows in navy yarn, given concentric ribbed texture by alternating FLO/BLO and post stitch rows. A separate ivory snowflake motif is crocheted and appliqued to the center of each panel and finished with a cream scalloped edging around the entire joined runner. Work panels blocked to measurements before joining for best results.
— Gauge & Finished Size :
Info :
Gauge: 18 sc = 4 inches in single crochet using 4.0 mm hook. Each panel measures approximately 6.5" wide by 9.5" tall (16.5 cm x 24 cm) after blocking. Finished runner with six panels and border is approximately 40-44" long by 10-11" wide (100-112 cm x 25-28 cm) — adjust number of panels for longer runners.
— Preparation :
Info :
Make a gauge swatch in sc for accuracy. Use stitch markers at the beginning of each row when working long, repetitive rows to avoid losing the row edge. Block each panel flat to exact measurements before seaming. Sew sequins and beads on after snowflakes are attached.
— Panel 1 (Make 6 identical panels) :
Row 1 :
With navy yarn, ch 51. Sc in 2nd ch from hook and in each ch across. (50 sc)
Info :
Chain 51 gives a 50-stitch foundation; this width produces a final panel of ~6.5" after blocking. If you need a wider runner, adjust chains by increments of 2 to keep symmetry for ribbing patterns.
Row 2 :
Ch 1, turn. Sc in each st across. (50 sc)
Row 3 :
Ch 1, turn. Sc in BLO in each st across. (50 sc)
Info :
Working BLO on Row 3 creates the first horizontal rib line. Keep tension even; use a marker on the first st of each row to mark row start.
Row 4 :
Ch 1, turn. Sc in each st across. (50 sc)
Row 5 :
Ch 2, turn. Hdc in each st across. (50 hdc)
Info :
Switching to hdc makes the central field slightly taller and creates a subtle rectangular rib when combined with sc rows. Maintain consistent stitch height to keep straight edges.
Row 6 :
Ch 1, turn. Sc in FLO in each st across. (50 sc)
Row 7 :
Ch 1, turn. Sc in each st across. (50 sc)
Info :
Alternate FLO and BLO rows every 3-4 rows to build the concentric rib effect seen in the photo. The center area will become a stacked rectangle when you work post stitches later.
Row 8 :
Ch 2, turn. Hdc in each st across. (50 hdc)
Row 9 :
Ch 1, turn. Sc in BLO in each st across. (50 sc)
Row 10 :
Ch 1, turn. Sc in each st across. (50 sc)
Info :
At approximately Row 10 you will have a stable base for the inset textured rectangle in the center. Place a removable stitch marker at the vertical center stitch (st 25/26) to help center the snowflake later.
Row 11 :
Ch 2, turn. Hdc in each st across. (50 hdc)
Row 12 :
Ch 1, turn. 1 sc in first 4 sts, *1 fpdc around next 6 sts, 1 sc in next 6 sts; rep from * to last 4 sts, 1 sc in final 4 sts. (50 sts total; fpdc count included)
Info :
Front post double crochet (fpdc) ridges create the raised concentric ribs. Work fpdc evenly centered across the width leaving 4 sc on each edge to keep crisp borders.
Row 13 :
Ch 1, turn. Sc in each st across working over tops of fpdc where present. (50 sc)
Row 14 :
Ch 1, turn. Sc in BLO in each st across. (50 sc)
Row 15 :
Ch 2, turn. Hdc in each st across. (50 hdc)
Info :
Repeat a landscaping of textured rows (fpdc row, sc rows, hdc rows) to build up the concentric rectangle. Keep the outer 4 stitches on each side worked in plain sc to form a narrow border where panels will be joined.
Row 16 :
Ch 1, turn. 1 sc in first 4 sts, *1 fpdc around next 8 sts, 1 sc in next 6 sts; rep from * to last 4 sts, 1 sc in final 4 sts. (50 sts)
Row 17 :
Ch 1, turn. Sc in each st across. (50 sc)
Row 18 :
Ch 1, turn. Sc in FLO in each st across. (50 sc)
Info :
As the rib pattern widens, you are creating a rectangular concentric texture; alternate the width of fpdc panels between Row 12 and Row 16 to produce multiple rectangle 'rings'. The counts above ensure the total stitch number stays constant.
Row 19 :
Ch 2, turn. Hdc in each st across. (50 hdc)
Row 20 :
Ch 1, turn. Sc in each st across. (50 sc)
Row 21 :
Ch 1, turn. 1 sc in first 4 sts, *1 fpdc around next 10 sts, 1 sc in next 6 sts; rep from * to last 4 sts, 1 sc in final 4 sts. (50 sts)
Info :
Use stitch markers at the outer 4-st borders to ensure those edge sc remain consistent and straight across rows when working long fpdc sections.
Row 22 :
Ch 1, turn. Sc in each st across. (50 sc)
Row 23 :
Ch 2, turn. Hdc in next 50 sts. (50 hdc)
Row 24 :
Ch 1, turn. Sc in BLO next 50 sts. (50 sc)
Info :
At this stage the panel has multiple concentric fpdc ridges. Continue repeating Sets of Rows 12-16-21 with incremental fpdc width increases if you want a deeper piled rectangle. For this runner, repeat the established pattern until Row 30 for a consistent panel height.
Row 25 :
Ch 1, turn. Sc in each st across. (50 sc)
Row 26 :
Ch 1, turn. Sc in FLO in each st across to get a raised texture on this row. (50 sc)
Row 27 :
Ch 2, turn. Hdc in each st across. (50 hdc)
Row 28 :
Ch 1, turn. Sc in each st across. (50 sc)
Info :
Row 28 is your pre-finishing row. Fasten off with a long tail for sewing if you will join panels by slip-stitching, or leave ends long for whip-stitch seaming. Weave in the tail later after blocking for a neat finish.
Row 29 :
Ch 1, turn. Sc in each st across. (50 sc)
Row 30 :
Ch 1, turn. Sc in each st across. (50 sc). Fasten off. Make 5 more identical panels following Rows 1-30.
Info :
Make six panels total. After completing each panel, block flat to 6.5" x 9.5" (16.5 x 24 cm) before joining. Blocking ensures the concentric ribs lay flat and that panels are uniform in size.
— Panel 2 (Repeat of Panel 1) :
Info :
Make Panel 2 by repeating Rows 1-30 exactly as for Panel 1. Keep stitch markers and blocking consistent so all panels match precisely.
— Panel 3 (Repeat of Panel 1) :
Info :
Make Panel 3 by repeating Rows 1-30. Consistency is key for flat joins and clean outer borders.
— Panel 4 (Repeat of Panel 1) :
Info :
Make Panel 4 by repeating Rows 1-30.
— Panel 5 (Repeat of Panel 1) :
Info :
Make Panel 5 by repeating Rows 1-30.
— Panel 6 (Repeat of Panel 1) :
Info :
Make Panel 6 by repeating Rows 1-30.
— Ivory Snowflake Motif (Make 6 - one per panel) :
Round 1 :
With cream yarn and 3.5 mm hook, make a magic ring. Ch 3 (counts as dc), work 11 dc into ring. Join with sl st to top of ch3. (12 dc)
Round 2 :
Ch 3, *dc in next st, ch 2, sk 1 st; rep from * around to create 6 ch-2 loops. Join with sl st to top of ch3. (6 ch-2 loops)
Info :
These ch-2 loops form the base points for the six main arms of the snowflake. Keep tension consistent to ensure points are even.
Round 3 :
Work into each ch-2 loop: (sc, ch 3, tr, ch 3, sc) into each loop. Join with sl st. (6 arms)
Round 4 :
Ch 1, *in the ch-3 on arm: (sc, ch 3, sc) then work sc at base between arms; rep from * around. Join. (creates small branch points on each arm)
Info :
Round 4 adds the first set of branches. Keep your arms symmetrical by using a stitch marker at the beginning of each arm when you start Round 3 to maintain placement.
Round 5 :
In each arm center chain (ch-3 from Round 3), work: sl st to center, ch 1, (dc, ch 2, dc) into center; then return to outer ch-3 branch and sl st into base. Repeat for each arm to build mid-branches. Join. (adds 6 mid-branches)
Round 6 :
Ch 1. Working along each arm between mid-branches, place picot accents: *(sc, ch 3, sl st into 3rd ch as picot), sc* across the outer arm details; repeat on each arm. Join. (subtle picot tips)
Info :
If you prefer no picots, replace each (sc, ch3, sl st) with 3 sc for a blunter tip. Blocking will help spread arms evenly.
Round 7 :
Using a 3.5 mm hook, work a final decorative round of sl st and sc to tidy the inner center: *sl st to next base stitch, sc in next stitch; rep around. Join and fasten off leaving a 10" tail for sewing. (12-18 small stitches depending on center)
Info :
Weave the long tail through the back of the center to the WS and knot so you can sew the snowflake flat onto the panel. Block snowflakes lightly with pins for perfect arm symmetry.
— Snowflake 2 :
Info :
Make 5 more identical snowflake motifs following Rounds 1-7. Keep cream yarn and blocking consistent so that each snowflake matches in size and shape.
— Snowflake Attachment & Embellishment :
Info :
Pin each dried, blocked snowflake to the center of each panel (center is between sts 25 and 26 and around Row 15-17 vertically based on the 30-row panel). Using the long tail, sew the snowflake to the panel by passing the needle from the WS up into strategic central stitches, then through the snowflake center. Sew through several center rounds to anchor. Fasten off and weave ends to back.
Info :
Attach 6 clear flat sequins around each snowflake as pictured: one near each arm base and one at two opposite corners for gentle sparkle. Use clear thread and a small needle; secure each with a tiny knot at the WS and a dab of clear-drying glue if desired.
— Joining Panels (Assemble 6 panels in a straight row) :
Info :
After blocking, lay panels RS up in order. Whip stitch or mattress stitch panels together through the outer 4-st edge area to create a flat seam. Use matching navy yarn and a tapestry needle for invisible joins. Join panels in pairs then join pairs together to keep seams flat.
Join Step 1 :
Place Panel 1 and Panel 2 RS together aligning edges. Using yarn tail from Panel 1 or fresh yarn, whip stitch through corresponding edge sc across all 50 rows, spacing stitches evenly. Pull tension gently to create a flat seam. Fasten off. Repeat to join Panels 3 & 4, 5 & 6. Then join these three sets into a single runner.
Info :
If you prefer a decorative seam, use slip-stitch join by holding panels RS together and sl st through both loops across the seam using your hook; this creates a ridged seam which can be hidden later by the border.
— Prepare Runner for Border :
Info :
Once all panels are joined, check that the runner lays flat and that seams are centered and even. Block the entire joined runner lightly to remove small waves and set edges. Pin the joined runner to a flat surface while it dries.
— Scalloped Lace Border (worked in cream) :
Round 1 :
With cream yarn and 3.5 mm hook, join yarn at any seam. Ch 1, evenly sc around the entire runner edge, placing 1 sc in each sc and 3 sc in each corner area (approximate stitch counts will follow the runner perimeter). Continue around and join with sl st. (perimeter sc count varies by seam and is approximately 2 sc per cm)
Info :
When working around the joined seam between panels, work into the seam with gentle tension so the border hides the seam without bunching.
Round 2 :
Ch 3 (counts as dc), *skip 2 sc, 5 dc in next st (shell), skip 2 sc, dc in next sc; rep from * evenly around. Join with sl st. (shells spaced evenly around perimeter)
Round 3 :
Ch 1. In each shell from previous round work: *sc in center dc of shell, picot (ch 3, sl st in 3rd ch), sc in next dc; rep in each shell across. Join and fasten off. Weave ends. (creates delicate scalloped points)
Info :
If you want a fuller border, add an extra round of shells before Round 3: work shell in each space between previous shells, then proceed to picot round.
— Final Finishing Touches :
Info :
Weave in all ends on the WS of the runner. Check the placement of each snowflake; if any lift at edges, sew small tidy stitches under arm bases to secure. Sew sequins and any additional beads now, tying off on the WS and adding a small dab of clear glue for extra security if runner will be handled frequently.
Info :
Lightly steam-block the finished runner with a damp cloth; do not press lace flat with high heat. Allow to dry completely before use. Store flat or rolled to keep the scallop edges intact.
— Variations & Color Notes :
Info :
Use a tonal navy for a subtle look, switch snowflakes to metallic yarns for a festive sheen, or make the border in the main navy for a modern, tone-on-tone finish. If you prefer embroidered snowflakes rather than crocheted motifs, omit the overlay step and stitch delicate embroidered arms directly onto the panel center.
— Care & Storage :
Info :
Hand wash cold with a gentle detergent. Reshape and lay flat to dry. Avoid prolonged exposure to direct heat or sunlight which can fade colors. Fold gently under the scallop edges when storing for long periods.
Finishing this snowflake table runner will feel like gifting your table a little winter magic. The deep navy panels provide a dramatic backdrop for crisp cream snowflakes, and the scalloped border adds a soft, handmade finish. Every stitch contributes to a centerpiece that's both elegant and cozy — perfect for holiday dinners or quiet winter mornings. I hope you enjoy making and displaying this runner as much as I enjoyed designing it! ❄️🧶