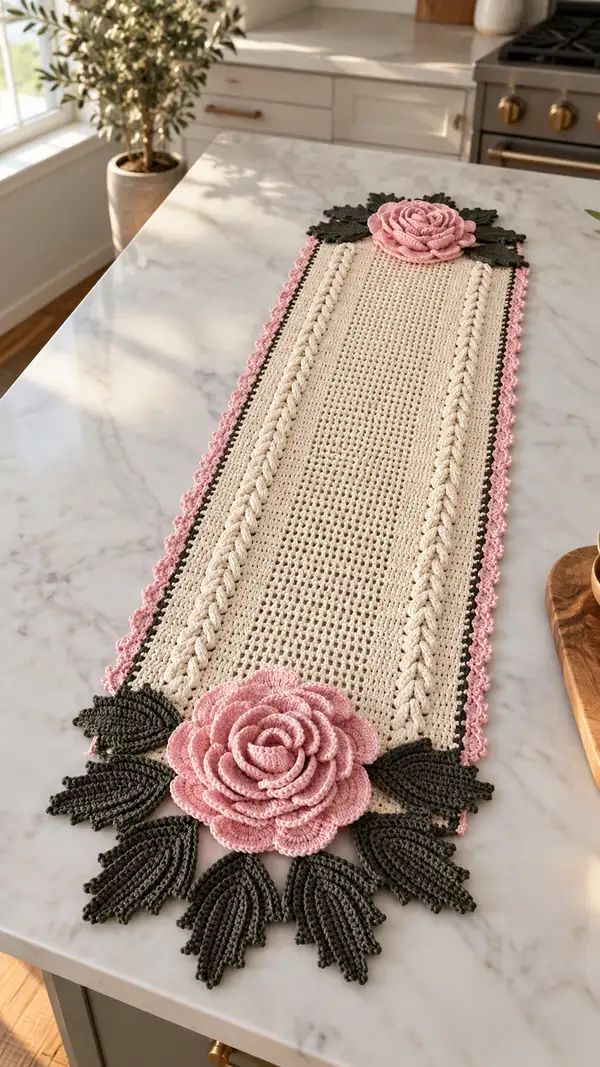
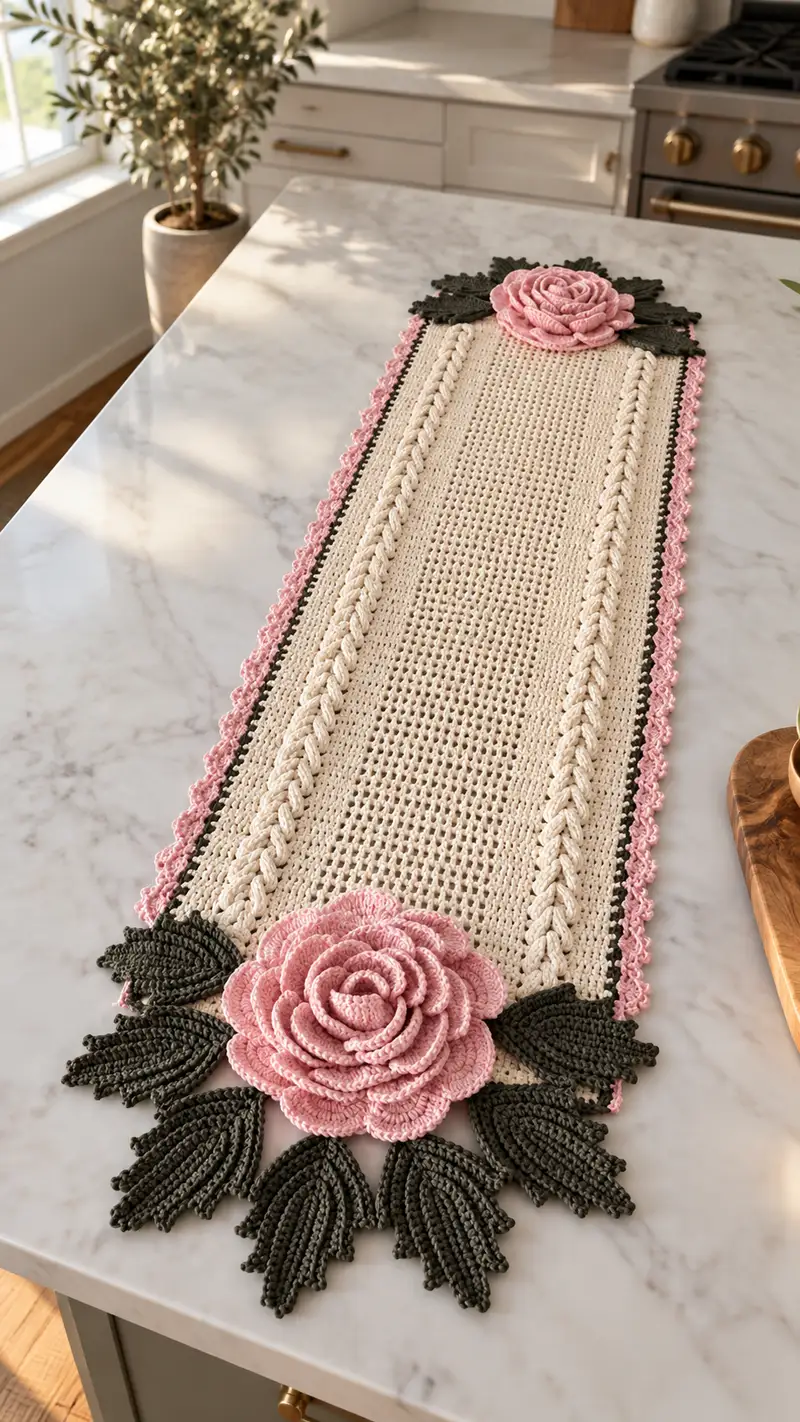
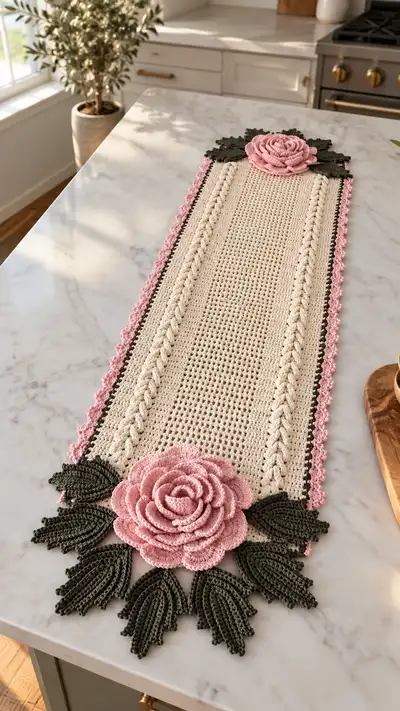
A charming, hand-crocheted table runner featuring a neutral cream mesh center, raised braided columns, a delicate pink scalloped edge and dramatic pink rose applique9s with deep green layered leaves. Perfect for dining tables or hall consoles, this design balances texture and floral romance for a timeless, feminine look.
Progress Tracker
0% Complete
— Materials & Gauge :
Info :
Gauge is not critical for length but affects density and final look. With worsted cotton and a 4.0mm hook: 20 sc = 10 cm (4") measured flat. Choose a slightly smaller hook for a tighter braid and flower detail if desired.
— Center Mesh Panel :
Round 1 :
Foundation chain 86. (86)
Round 2 :
Row 1: 1 sc in second ch from hook and in each across to end, turn. (85)
Round 3 :
Row 2: Ch1, 1 sc in each st across, turn. (85)
Round 4 :
Row 3: Repeat Row 2. (85)
Round 5 :
Row 4: Ch3 (counts as dc), *sk 1 st, dc in next st; ch1, sk 1 st, dc in next st* across to create airy mesh, end with dc in final st, turn. (approx 42 dc clusters / 85 active stitches)
Info :
These first five rows establish the foundation. The center panel is a simple alternating sc and open mesh pattern to create the light, lacy field seen in the photo. Counts remain consistent — each even-row is 85 sc equivalent. Adjust your chain length for desired final runner width.
Round 6 :
Row 5: Ch1, 1 sc in each st or in each dc/ch-1 space across following the mesh pattern, turn. (85)
Round 7 :
Row 6: Repeat Row 5. (85)
Round 8 :
Row 7: Repeat Row 5. (85)
Round 9-20 :
Rows 8-19: Continue alternating 1 row of sc (85) and 1 row of mesh (approx 42 clusters / 85 stitch positions) to build length. Work a total of 32 rows here so the center reaches a substantial length for the runner. (Each even-numbered row stays (85))
Info :
Measure frequently: the sample runner has approx 32 assembled center rows above plus additional rows for overlap under the braids and borders. Adjust number of rows to make the runner your desired length—our shown runner final length is about 120 cm (47") per center panel length before adding applique9s.
Round 21-40 :
Rows 20-39: Keep repeating the sc / mesh alternation pattern until you have 40 rows in total (including the initial rows listed). This yields a stable yet light center panel. (85)
Round 41 :
Row 40: Finish with a tidy sc row across (85). Fasten off and weave in ends. Block flat to measurements before assembly.
Info :
Blocking the panel now ensures the edge is square and the braid panels will line up neatly. Use a steam or wet block to even the mesh and set measurements.
— Braided Raised Columns (Make 2 identical strips) :
Round 2 :
Row 1: 1 sc in 2nd ch from hook and across to end, turn. (11)
Round 3 :
Row 2: Ch1, 1 sc in each st across (11). (11)
Round 4 :
Row 3: Ch2, dc in next 2 sts, fpdc around next 2 sts (front post double crochet) to create a raised ridge, *dc in next 2 sts, fpdc around next 2 sts* across finishing with dc, turn. (11)
Round 5 :
Row 4: Ch1, sc across into each st including across the post stitches to anchor them; this compresses and defines the ridge. (11)
Info :
Front post double crochet rows create the raised look of the braided column. Alternate a row of post stitches with a sc row to build definition. If you prefer a tighter braid, use 3.5mm hook for these strips.
Round 6-40 :
Rows 5-39: Repeat the sequence: 1 row of post stitches (creating crossing/rope feel) then 1 row sc to lock them. Work until the strip length matches the center panel length exactly (approx 40 rows to match center). Always end with a sc row. (11)
Round 41 :
Row 40: Fasten off leaving a long tail for sewing. Make second strip identical. Block both strips flat along their length so they maintain height and lie neatly against the center panel.
Info :
Stitch counts remain 11 across; when joining the braid to the center we will align one braid strip to each side inner edge. The visible sample shows a slightly raised, rope-like column about 2.5 cm wide—our 11-st strip approximates that width in worsted cotton.
— Inner Dark Green Border :
Round 1 :
With dark green, join at one long side edge: Ch1, sc evenly along edge of center panel across its 85 stitches, placing approx 85 sc to create a neat narrow band. (85)
Round 2 :
Continue sc around corner, work 3 sc in corner to turn smoothly, proceed across short end and other long side, finishing the perimeter with evenly spaced scs. Keep corners 3 sc each. (Perimeter count varies with length)
Round 3 :
Work one additional sc round maintaining corners 3 sc to keep runner square. Fasten off. (Perimeter count unchanged)
Info :
The dark green narrow border in the photo is a single or double round of tight stitches that frames and separates the cream center from the pink outer scallops. Keep your tension slightly tighter for crisp contrast.
— Outer Pink Scalloped Edge :
Round 1 :
With pink, join at any long side. Work *sc in next 3 sts, shell (5 dc) in next st, sc in next 3 sts* across the long edge until you reach a corner. Adjust spacing so shells fall nicely; if needed use sc 2-3 to space shells evenly. (Approximate shells per long side: 12-14 depending on length)
Round 2 :
At each corner, work 5 dc shell in the corner point to create rounded corners; continue shells and scs around the short end and second long side mirroring the first. Fasten off and weave in ends.
Info :
For a very delicate edge like the sample, alternate 5-dc shells with small sc spacing. If you prefer more pronounced scallops, do 7-dc shells. Blocking after stitching improves scallop symmetry.
— Big Rose Applique9 (Make 2 identical roses) :
Info :
The rose is constructed as a central base disk to which several layers of petals (worked as spirals and petal clusters) are attached. Make petals in progressively larger rounds for a full layered flower. Use pink yarn and a 3.5mm or 4.0mm hook depending on desired petal firmness.
Round 1 :
Make a magic ring. 6 sc in magic ring. (6)
Round 3 :
(1 sc, 1 inc) x 6 (18)
Round 4 :
(2 sc, 1 inc) x 6 (24)
Round 5 :
(3 sc, 1 inc) x 6 (30)
Round 6 :
1 sc in each st around (30)
Round 7 :
Change to spiral petal making: Ch 18, sl st into next st of base; rep this around base making 10-12 chain loops spaced evenly for inner petals. End with sl st into base and fasten off the chain loop round. (10-12 loops)
Info :
Each chain loop will become a petal. Space loops evenly so inner petals form a circle; the exact number depends on the base size—aim for 10-12 for a full center.
Round 8 :
Petal Round 1 (Inner Petals): Work into each chain loop: *sc, hdc, 3 dc, hdc, sc*, fasten off and join to next loop. This creates a fuller curled petal. Repeat for all inner loops. (Each petal: 7 sts in band formation)
Round 9 :
Create a second petal layer by making chain loops around the circumference: Attach yarn behind the first petal layer and ch 22, sl st into base between inner petals; repeat around spacing 10-12 loops. (10-12 loops)
Round 10-15 :
Petal Rounds 2-7 (Outer Petal Layers): For each chain loop, work the stitch group *sc, hdc, 4 dc, 4 dc, hdc, sc* increasing the number of dc at the center of each petal as you move outward to create fuller petals. Each outer layer should slightly overlap the previous. After 6 petal rows you will have a richly layered rose approximately 10-12 cm diameter. Adjust rounds if you want a larger or smaller flower.
Info :
Work petals tightly and steam-block them gently so they curl and sit like the real rose image. You can add a few extra petal rounds for a more dramatic flower—each added round increases diameter and requires more weight in yardage.
Round 16 :
Secure last round with sl st. Fasten off leaving long tail for sewing. Lightly shape petals with fingers and a steam iron (use low steam and keep distance) to coax petals into natural curvature.
— Leaves (Make 12 or as seen; cluster per rose) :
Info :
Each leaf is worked flat and features a central ridge created by post stitches to mimic the ribbed leaves in the image. Make six leaves for each rose cluster (12 total for two ends), varying sizes by changing foundation chains.
Round 1 :
Ch 22 (for large leaf) or ch 16 (for medium) or ch 12 (for small). (22/16/12)
Round 2 :
Row 1: 1 sc in 2nd ch from hook and across to end, work 3 sc in last ch to turn, then working along opposite side of foundation ch, 1 sc in each ch back to start. Fasten off the round; you will have a neat oval leaf base. (approx 40/30/22)
Round 3 :
Attach yarn at tip and work central ridge: Ch1, sc across first half until center, then work fpdc rows down the center for 3-5 sts to create raised midrib, then sc to end. (st count same as base)
Round 4 :
Edge shaping round: *sc, hdc, dc, hdc, sc* working symmetrical shaping along both long edges so the leaf narrows to the tip and broadens at the base. Repeat along opposite edge. (st count maintained but stitches change type)
Round 5 :
Final outline: Work BLO sc around edge to create a distinct rim: 1 sc in each st BLO around leaf. Fasten off leaving long tail for sewing. (same count)
Info :
Make leaves in three sizes to match the layered cluster look in the photograph. Block leaves lightly and pin veins with a little steam so they curve slightly toward the petal cluster.
Round 6 :
Repeat for each leaf until you have 12-14 leaves total (6-7 per rose cluster). Vary the number of hooded ridge fpdc rows to get narrower or fuller leaves.
— Small Tulip-like Leaf Detail (Optional accent leaves 6-8) :
Round 1 :
Ch 12. 1 sc in 2nd ch from hook and across, 3 sc in last ch, sc along opposite side back to start. Fasten off. (approx 22)
Round 2 :
Work 1 sc in BLO around to create a raised rim and small ridges using fpdc every 3 sts down center. Fasten off. Make 6-8 for extra layered texture. (22)
Info :
These smaller leaves live between the larger leaves and add a delicate layered base under the roses like in the sample image. Use the same deep olive green yarn to match tone and texture.
— Finishing & Assembly :
Info :
Before assembling, block all major elements (center panel, braids, scallops, roses, leaves) to final shape and size. This makes seaming neat and flat and helps petals and leaves hold their final curves.
Round 1 :
Position one braid strip along the inner edge of the dark green border on one long side: align so the braid ridge sits approx 4 sts in from the outer edge of the center panel. Pin with dressmaker pins every 2-3 cm. Repeat on opposite side with second braid. (Align length to match center)
Round 2 :
Sew braids to center using matching cream yarn and a yarn needle: whip stitch through back loops of braid and edge scs of center panel for invisible seam. Use approx 3-4 mm spacing to keep braid secure. Knot and weave in tails. (Seam length = panel length)
Round 3 :
Attach inner dark green border if you have not already done so; ensure it covers the seam edge of the braids and center panel so transition is neat.
Round 4 :
Pin pink scalloped outer edge around entire perimeter and hand-sew using mattress stitch or invisible whip stitch. Work carefully around corners and shell edges so scallops remain even. Fasten off and weave.
Round 5 :
Arrange roses at each short end: center the large rose over the short end of the runner so petals flow over the scalloped edge. Pin in place and hand-sew through the base disk using long tail. Make sure the rose is firmly attached to the runner by sewing through several loops of the base rounds. (Each rose requires 8-12 stitches through base to anchor securely)
Round 6 :
Arrange leaves around each rose in a radiating cluster: place larger leaves at back, medium leaves at sides, and small tulip-like leaves toward the petal edges. Pin and sew leaves by catching only the base of each leaf to the runner and a few stitches into the rose base so leaves radiate and overlap naturally. Use dark green yarn and a yarn needle to sew through edge stitches and leaf base loop. (Pin spacing: leaves approx 2-3 cm apart where they meet base)
Round 7 :
Secure any loose petals individually by tacking them down to the base disk with small hidden stitches if petals flare excessively; this keeps the rose stable in use and transport. Weave in all tails securely, trim close.
Info :
Test placement frequently before sewing. Use removable pins and take photographs of the pinned layout to compare symmetry at both ends. The sample shows six leaves per rose in a layered crescent; mirror this arrangement for both ends for a balanced look.
— Final Blocking & Care :
Round 1 :
After assembly, block entire runner flat on a blocking mat: pin scallops and braid edges so shell points are even; steam lightly and let dry completely to set shape. This gives the finished piece sharp edges and well-formed petals.
Round 2 :
Care instructions: Hand-wash gently in warm water with mild soap. Reshape while damp and dry flat. Avoid tumble drying. Cotton may soften and relax after repeated washing; re-block if needed to maintain scallops and braid definition.
Info :
Use matching spare yarn to reinforce seams after the first wash if you plan to launder the runner often. Consider adding a non-slip felt panel under the center if using on a very smooth surface to keep the runner secure and the applique9s from shifting.
This elegant table runner brings floral romance and quiet texture to any table—soft cream mesh paired with raised braids and bold roses creates a statement piece you'll love to display. Each section is worked separately and assembled, making the process rewarding and modular. The finished runner is a beautiful gift or heirloom addition to your home decor. 🧶🌸✨