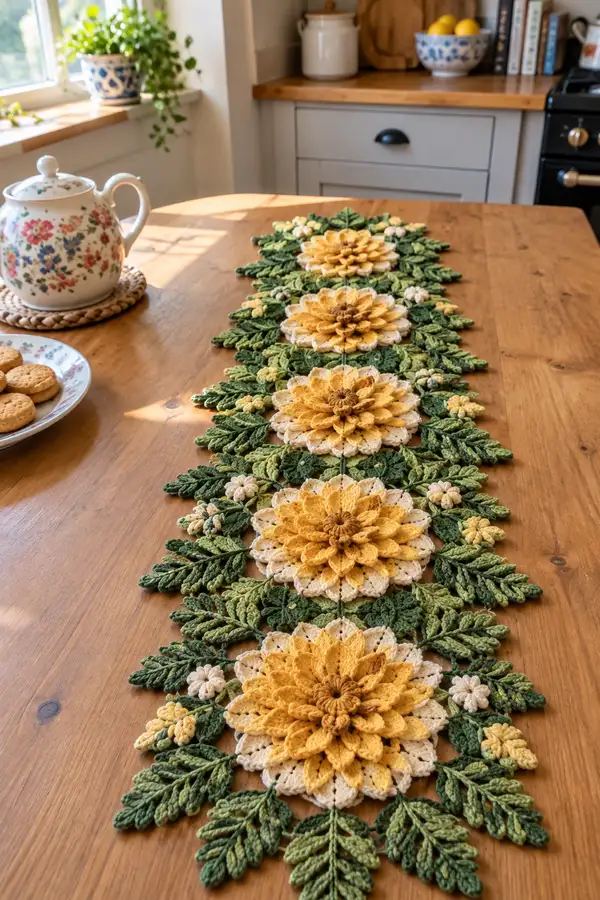
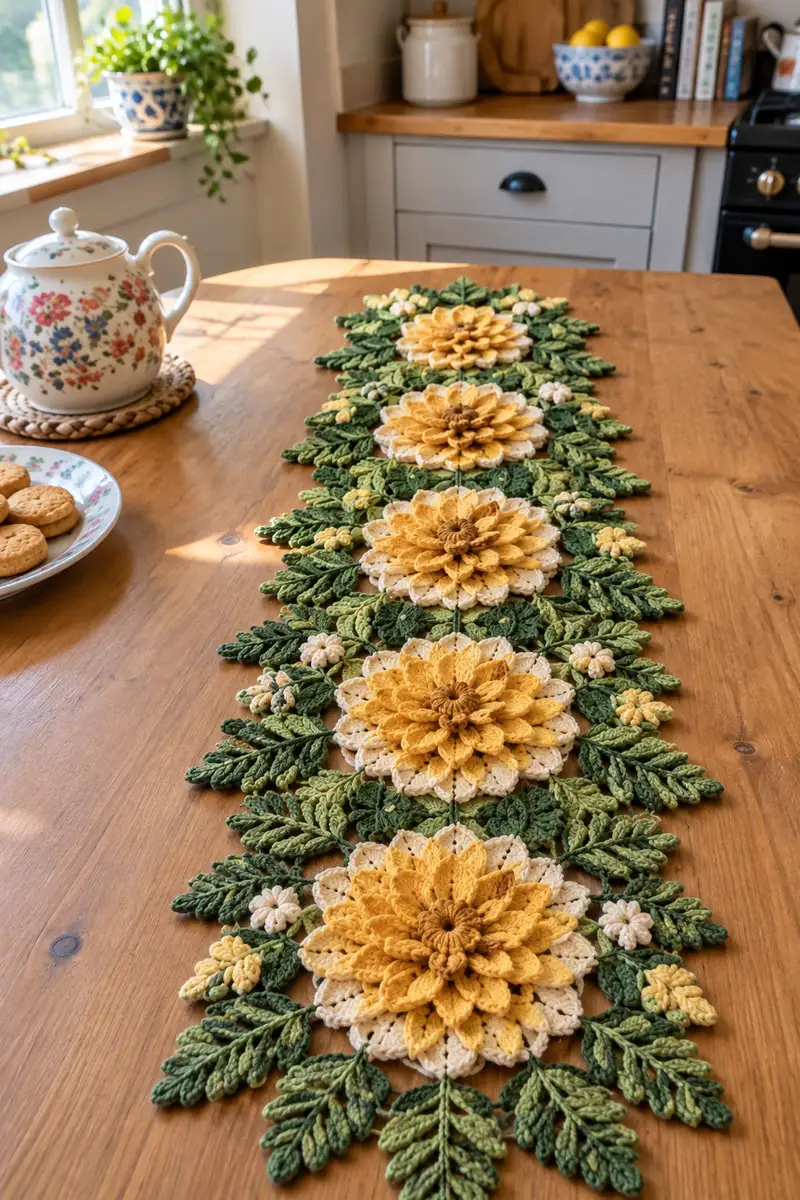
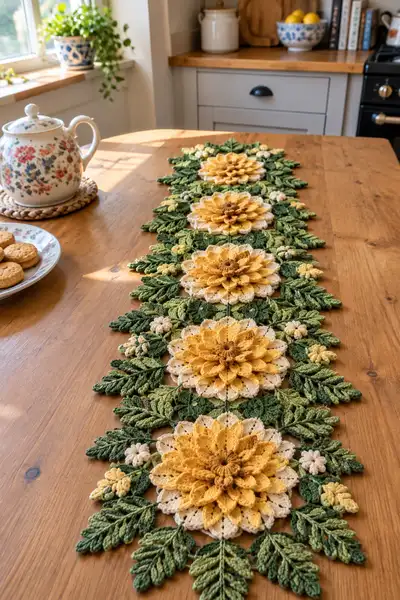
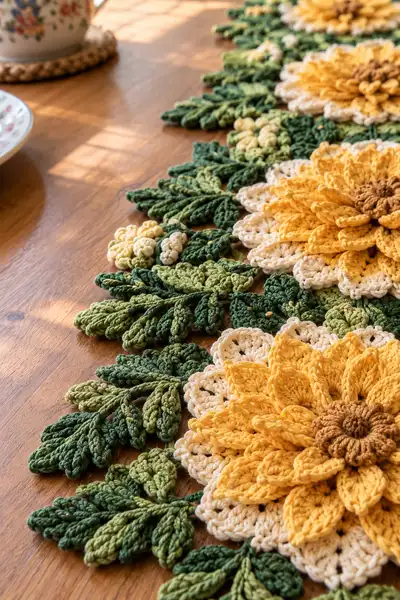
A stunning, modular sunflower table runner featuring layered 3D petals, cream backing petals, and a rich assortment of textured green leaves. Made in warm yellows, soft cream and mulled brown centers, this runner creates a hand-crafted centerpiece with depth and seasonal charm. The design is built from repeating floral motifs and joined leaf clusters for a flexible length — perfect for tabletops, consoles, or mantel displays.
Progress Tracker
0% Complete
— Flower Center (Make 5) :
Round 1 :
6 sc in magic ring (6)
Round 3 :
(1 sc, inc) x 6 (18)
Round 4 :
(2 sc, inc) x 6 (24)
Round 5 :
(3 sc, inc) x 6 (30)
Round 6 :
(4 sc, inc) x 6 (36)
Info :
Work the center in warm brown. Keep your tension slightly firmer than the petals because the center is the anchor for the three-dimensional petals. Place a stitch marker at beginning of each round to track rounds.
Round 7 :
1 sc in each st around (36)
Round 8 :
1 sc in each st around (36)
Info :
To create the raised center texture, we will work two rounds of tightly closed puff clusters next. If you want a slightly domed center, stuff a small amount of polyfill lightly inside before closing further rounds.
Round 9 :
*yo, insert hook, pull up loop (repeat 3 times), yo and pull through all 4 loops, ch1, sl st in same st*; rep around to make 12 puff clusters (12 clusters)
Round 10 :
Working between puff clusters, sc into each space around (36)
Round 11 :
sc dec around to slightly tighten center: (2 sc, dec) x 12 (24)
Round 12 :
1 sc in each st (24)
Info :
Fasten off and weave in ends once the center sits flat and slightly puffy. Make 5 identical centers. If you prefer a stiffer center, block lightly with a damp cloth and let dry on a rounded form.
— Petal Layer A: Base Petal Round (Cream backing, Make 5) :
Round 1 :
With cream, 6 sc in magic ring (6)
Round 3 :
(1 sc, inc) x 6 (18)
Round 4 :
(2 sc, inc) x 6 (24)
Round 5 :
(3 sc, inc) x 6 (30)
Round 6 :
1 sc in each st around (30)
Info :
This round builds a stable backing disc for the layered petals. Keep stitches even and do not tighten the center too much — petals will be worked into this round's top loops.
Round 7 :
(4 sc, inc) x 6 (36)
Round 8 :
1 sc in each st around (36)
Round 9 :
*ch4, skip next st, sc in next st* rep around forming 18 ch4 loops for petal anchors (36)
Info :
These ch4 loop spaces will be the anchors for the first, larger cream petals which give a lacey base under the yellow petals. Ensure ch4 loops are uniform in tension for consistent petal size.
Round 10 :
sl st to join and fasten off leaving tail to sew later (no stitch count)
— Petal Layer B: Inner Petals (Pale Yellow, Make 5) :
Round 1 :
Join pale yellow in one ch4 loop from previous round: *ch1, (sc, hdc, 3 dc, hdc, sc) all in same ch4 loop*, sl st to next ch4; rep around to make 18 petals (18 petals)
Info :
This is a shell-style petal made with increasing heights to create a pointed petal shape. Work petals into each ch4 loop space from the cream base. Keep petals upright by pulling the last dc loops slightly forward as you work.
Round 2 :
Fold each petal slightly and secure at base by working sc around the bases: 1 sc between each petal tip on the disc (36)
Round 3 :
*Into the body of each petal work 3 puff stitches across the full petal: puff (yo, insert, pull up) x3 close, ch1, sl st to secure at petal center; sl st to next petal base* rep 18 times (18 puff petals)
Info :
Puff stitches on petals add dimension. Keep the puff loops consistent (pull loops to similar height) and close each puff fully before moving on. If you want more pronounced petals, work 4-5 puff loops instead of 3.
Round 4 :
sc around the petal bases once more to tidy join: 1 sc between each petal base (36)
Round 5 :
fasten off and weave tails in on the underside
— Petal Layer C: Middle Petals (Golden Yellow, Make 5) :
Round 1 :
Join golden yellow to top of inner petal row, ch3 (counts as first dc), *in next petal work (2 dc, tr, 2 dc) leaving the center taller; sl st to join between petals* rep 18 times (54 dc + 18 tr counted as petal texture)
Info :
These petals are taller and layered above the pale yellow ones. The pattern places a taller tr in the center of each petal to create a peaked look. Keep anchor sl sts consistent to create even spacing.
Round 2 :
Fold each petal forward and secure with 1 sc at the base between petals (36)
Round 3 :
Make decorative surface stitches along each petal: *fpdc around 2nd dc of each petal, sl st to next base* rep 18 times to emphasize ribbing
Round 4 :
Fasten off, weave in ends. Check that petals sit above Layer B and create a full sunflower appearance.
— Petal Layer D: Outer Petals (Deep Yellow, Make 5) :
Round 1 :
With deep yellow, join at a sl st between mid petals, ch4 (counts as tr + ch1), *(tr, ch1, tr) in next base space*, sl st between petals to form 18 open outer petals (36 loops)
Round 2 :
Into each ch1 space work: (sc, hdc, 3 dc, hdc, sc) to create full rounded petals (18 petals)
Info :
Outer petals are the showpieces. Add slight steam-blocking to shape them if needed. If you want even fuller petals, increase dc to 5 in the center of each petal.
Round 3 :
For added texture, work sl st along petal tips forming gentle scallops: sl st into each top dc around (no st count change)
Round 4 :
Fasten off and weave ends. Arrange petals so inner petals nest inside outer petals neatly.
— Flower Base & Join Round (Make 5) :
Round 1 :
Rejoin cream to underside of motif at any sc on base disc, ch1, 1 sc in same st (24)
Round 2 :
*(2 sc, ch2, 2 sc) in next 6 groups around* rep to create 6 decorative picot bays (48 + chains)
Info :
These bays form the anchor points for the leaf clusters. You will join leaves and small bud motifs into these bays later for a continuous runner. Keep consistent bay spacing so leaves join evenly.
Round 3 :
1 sc in each st around the inner ring and work sl st to join; fasten off leaving long tail for sewing to adjacent modules (48)
— Large Leaf (Dark Green, Make 30) :
Round 1 :
6 sc in magic ring (6)
Round 3 :
(1 sc, inc) x 6 (18)
Info :
The large leaf is worked flat with a central spine and textured veins. Using a slightly smaller hook for the leaf will create a firmer, sculpted leaf that holds shape better.
Round 4 :
Work up one side of leaf by increasing: ch1, 1 sc in first 5 sts, hdc in next 3 sts, dc in next 4 sts, tr in next 2 sts (this builds the taper) then work along the outer edge back toward center with decreasing stitches to mirror (no count change, shape based)
Round 5 :
Working back along the opposite side: tr in 2 sts, dc in next 4 sts, hdc next 3, sc next 5; sl st to base to close (approximate 36 total edge stitches)
Info :
Now we will add veins using front post stitches: with the right side facing, work fpdc along the center of the leaf every 3rd stitch from base to tip creating 6 visible veins. This is worked into the body — expect to rep this across leaves to create texture.
Round 7 :
Fasten off leaving a tail for sewing. Block leaf by pinning to shape on blocking mat and spray lightly with water, allow to fully dry.
— Mid Leaf (Mid Green, Make 24) :
Round 1 :
ch10, sc in 2nd ch from hook, sc next 7, 3 sc in last ch, rotate and sc along opposite chain 7, sc last chain base (approx 20 st leaf)
Round 2 :
Edge row: *(sc, hdc, dc, hdc, sc) in each chain cluster across to create a slight ridge* (shape formed)
Info :
Mid leaves are faster to make and are worked from a small chain base. They nest between large leaves and fill space without adding bulk. Block lightly for shape consistency.
Round 3 :
Decorative: Work a chain stitch ridge down center: join yarn at base, ch1 then work sc into each central valley space to create a visual spine (no st count change)
Round 4 :
Fasten off leaving tail for sewing
— Small Leaf / Sprig (Sage Green, Make 40) :
Round 1 :
ch8, sc in 2nd ch from hook, hdc in next 3, dc in next 2, sl st in last chain; rotate and sl st back along chain to base (small sprig formed)
Round 2 :
Work small picot edging: *ch3, sl st into top dc* repeat along outer edge to create textured tips (approx 6 picots)
Info :
Small sprigs are used as filler between petals and larger leaves. Make several shades to give depth. They can be sewn flat or slightly folded with a running stitch to cup them for a 3D effect.
Round 3 :
Fasten off and weave in end
— Tiny Bud (Pale Yellow, Make 20) :
Round 1 :
6 sc in magic ring (6)
Round 2 :
(sc, inc) x 3 (9)
Round 3 :
sc in each st around (9)
Round 4 :
Fold slightly and sc across two stitches to close partially, fasten off leaving tail for sewing (approx 7 st when partially closed)
Info :
Tiny buds sit in clusters near petals to soften transitions between motifs. Use small amounts of stuffing if you want them to be plump; otherwise leave flat.
— Connector Chain & Join (Repeating sequence between motifs) :
Round 1 :
Decide desired runner spacing. For the photo spacing, attach leaf clusters between flower bays using the cream bay from Flower Base Round. Join mid leaf and large leaf clusters with a slip stitch at each bay: sl st through bay, ch6, sl st to next bay to create flexible connector loops (counts vary)
Info :
Connectors are worked to form the linear axis of the runner. Use a long tail from the flower base to whip-stitch leaf groups directly if you prefer a non-looped appearance. Pin groups in place before joining to ensure symmetry and even spacing.
Round 2 :
From each bay, sew 2 large leaves to sit diagonally outward and 2 mid leaves to sit inward; secure with mattress stitch or whip stitch through the base rounds. Repeat for each motif and join adjacent motif bays with ch6 loops and small sl st or sewn chain for a neat connection.
Round 3 :
When joining two floral modules, align their base bays so leaves interlock; hold edges with pins and use a yarn needle to sew the underside with matching cream or green yarn to create an almost invisible seam.
Info :
Always pin multiple leaves and buds around the bay before stitching. Sew through several rounds of the flower base to ensure stability. When joining, avoid pulling too tightly or petals will curl; tension should be firm but relaxed.
— Decorative Border & Finishing Rounds :
Round 1 :
Once all flower modules and leaf clusters are joined into the runner length you want, work a decorative edging from cream around the outer perimeter: attach to any outermost cream st, ch1 then sc evenly spaced around the entire runner perimeter to create a working edge (st count variable)
Round 2 :
Every 6 sc along the edge, work a shell: (sc, hdc, 3 dc, hdc, sc) in same st to form gentle scalloped outer edge; between shells keep 3 sc to keep shape (patterned)
Info :
The scalloped edge visually ties the runner together. If your assembled runner is wide, you may add a second row of shells staggered from the first to create a fuller edge. Keep stitch counts consistent to avoid waviness.
Round 3 :
For a more finished look, work reverse single crochet (crab stitch) into the edge (optional): 1 crab st in each st around to create a rope-like border; fasten off neatly and weave in ends (no st count change)
Round 4 :
Lightly steam-block the entire runner on a flat surface with pins to set petals and leaves in the desired position. Avoid direct contact with iron — use a damp cloth between iron and crochet where steaming is necessary.
Info :
Final blocking makes a big difference with cotton yarn. Pin petals to create uniform height and leaf veins to face the same direction. Allow to dry fully for best results.
— Extra Decorative Elements (Optional):
Round 1 :
Embroidered seed details: using brown yarn and a blunt tapestry needle, weave small French-knot-style wraps around the center puff clusters for added realism; 8-12 stitches per center depending on desired density
Round 2 :
Attach small cream lace loops between flower bays to create airy negative space using ch8 loops secured into bay stitches (repeat between each motif)
Info :
Small extras elevate the runner. Keep them subtle so they complement rather than overwhelm the petals and leaves.
— Final Quality Check :
Info :
Check all joins for security: tug gently on petals, leaves and connector seams. Weave in any loose ends and trim close. Ensure no floats run across open spaces; re-sew any shaky anchors. Give a final blocking and leave to dry completely before use.
Completing this sunflower table runner is such a rewarding, tactile journey — petals, puff stitches and lush leaves come together to make a truly special centerpiece! The layered 3D effect is perfect for brightening dining rooms or seasonal displays. I hope you enjoy every round of this piece and share the finished beauty with friends and family. 🧶🌻✨