About This Elephant Amigurumi Pattern
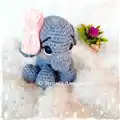
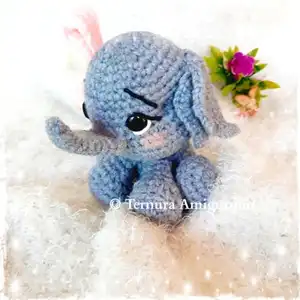
This pattern teaches you how to crochet a small, 10cm tall elephant amigurumi using simple rounds and shaping techniques. It includes full written rounds for the head + body, trunk, ears, legs, arms, tail and a cute ribbon accessory. The pattern is illustrated with step-by-step photos to guide placement of features and final shaping.
Designed for an intermediate crocheter comfortable with single crochet, increases and decreases. The instructions include assembly guidance, eye placement, and finishing touches to achieve a polished result.
Why You'll Love This Elephant Amigurumi Pattern
I absolutely love this pattern because it combines sweet character design with straightforward construction that still produces a professional-looking toy. I enjoy the small size and the way the trunk and ears give the elephant so much personality. The step-by-step photos make assembly and facial shaping easy, and I always find the ribbon adds a charming finishing touch. Making one of these is satisfying and quick enough to complete in a weekend.
Switch Things Up
I love how easy it is to customize this elephant by changing yarn colors; try pastel greys or a warm beige for a different look.
I sometimes swap the main yarn for a chunky weight and a larger hook to make a larger, cuddlier version of the elephant.
I add blush to the cheeks in different shades to create unique expressions—peach for a soft look or a deeper pink for a lively face.
You can replace safety eyes with embroidered eyes for a fully handmade, child-safe option that looks very sweet.
I enjoy making a set of elephants in coordinating colors and adding tiny accessories like scarves, hats, or tiny crocheted flowers.
Try different ribbon colors or materials—satin ribbon, crocheted ribbon, or a small bow tie can completely change the character.
I sometimes add a bit of wire to the trunk or limbs (carefully and securely) to make posable features for display pieces.
If you want a keychain or bag charm, make the pattern with thinner yarn and a smaller hook to create a miniaturized version.
For a textured finish, experiment with safety fur yarn or a boucle for the body while keeping the features in smooth yarn for contrast.
I recommend testing one feature placement (like eyes or trunk) with pins before sewing to ensure the expression matches your vision.
I also enjoy embroidering tiny details like lashes or freckles to give each elephant its own personality and charm.
Common Mistakes & How to Fix Them
✗ Placing safety eyes too high or too low will change the expression of the face; follow the instruction to place the eyes in Round Nº10 and double-check positioning before securing them.
✗ Forgetting to leave a long tail for sewing can make attachment difficult later; always leave the long yarn as instructed for the trunk, ears, legs and arms so you can sew pieces securely.
✗ Overstuffing the head or body causes distortion and makes sewing pieces together harder; stuff gradually and stop when the shape is firm but still slightly pliable for shaping.
✗ Skipping the instruction to take the back loops when directed will change the texture and fit of the limbs; pay attention to 'taking the back chain' or back loops only instructions for correct shaping.