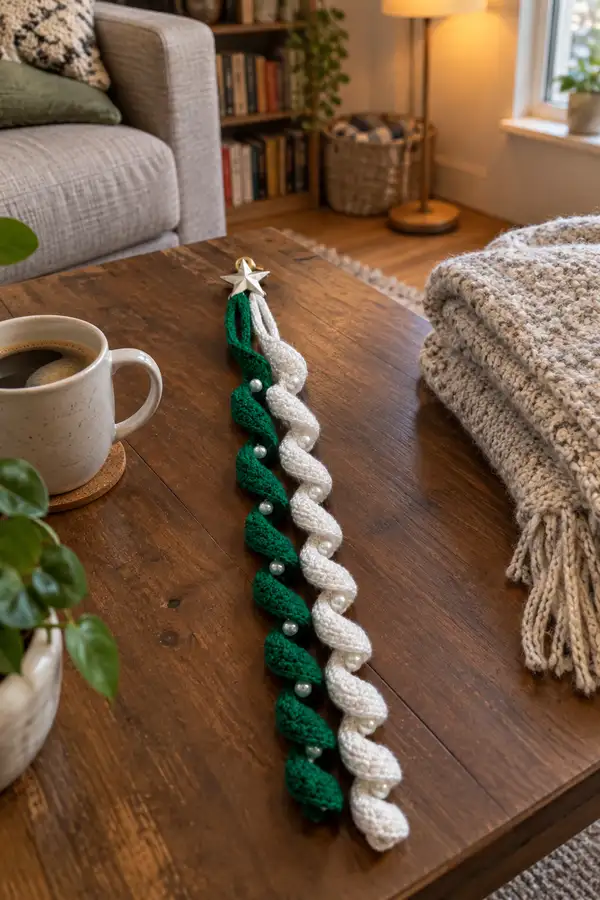
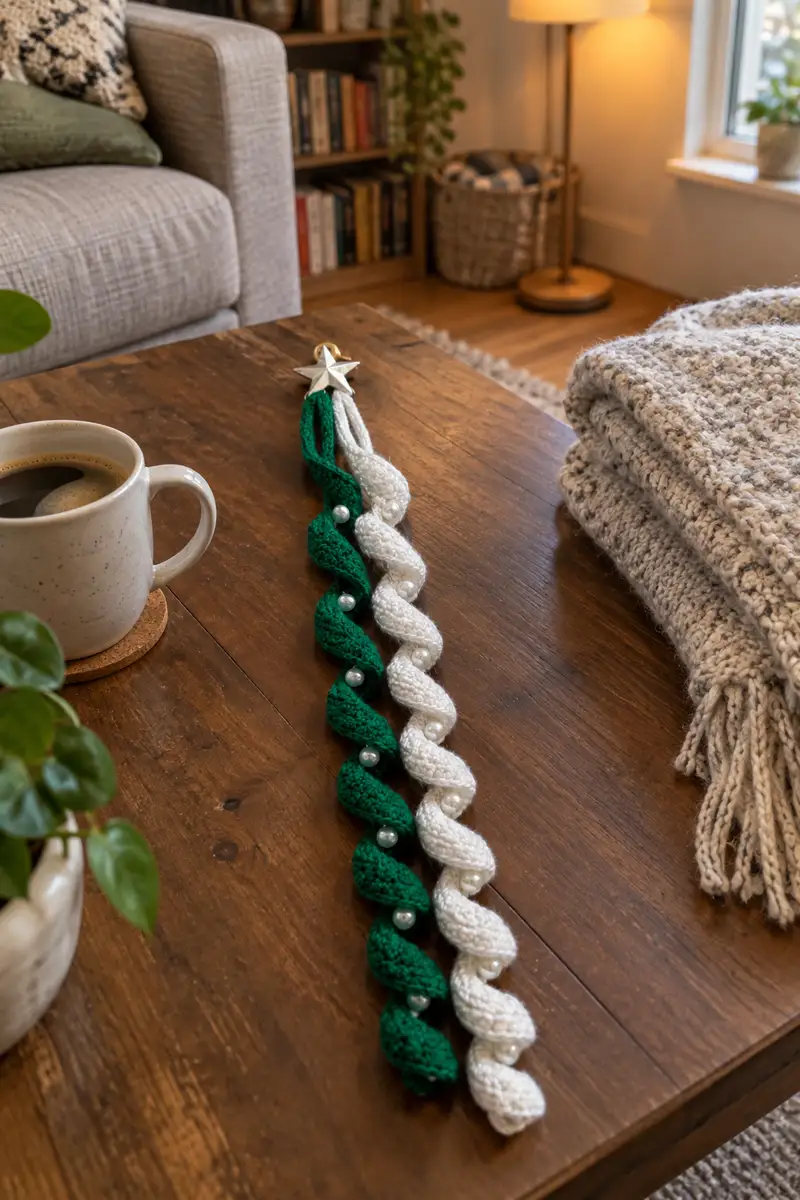
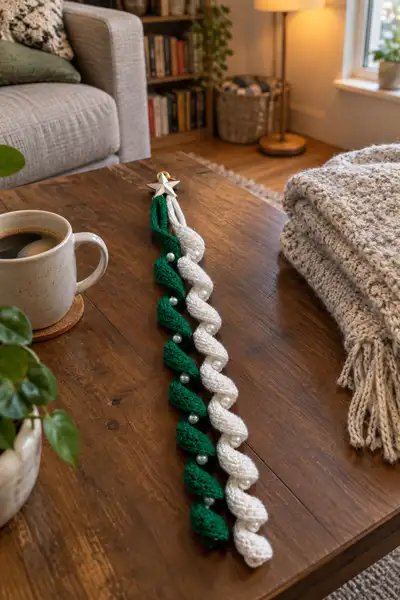
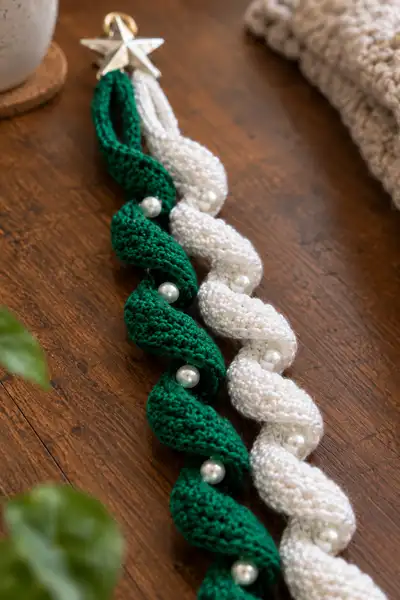
A festive pair of twisted spiral strands in deep emerald and shimmering pearl white, accented with pearl beads and finished with a star hanger. This elegant garland is perfect for mantels, doorways, or hanging on the tree. The pattern builds small crocheted spiral pods and strings them into two long twisted ropes for a classic, handcrafted holiday look. Detailed step-by-step instructions guide you through making each spiral pod, attaching pearls, and assembling the finished garland.
Progress Tracker
0% Complete
— Overview & Gauge :
Info :
This pattern is modular: you will crochet small stuffed spiral pods and string them into two separate strands (emerald and pearl-white) and then twist the two strands together. The sample garland uses 12 pods per strand (24 pods total) with faux pearls stitched between each pod. Gauge is not critical, but a tighter fabric (smaller hook than yarn label suggests) works best to prevent stuffing from showing. Each pod finished measures about 1.75"-2.25" (4.5-6 cm) long and about 1"-1.25" (2.5-3 cm) wide when lightly stuffed.
Info :
Finished length of the sample garland with 12 pods per strand: approximately 30"-36" (75-90 cm) before twisting; after twisting the two strands together the garland length is slightly shorter (approximately 26"-32"). Adjust number of pods to increase or decrease length.
— Spiral Pod (Make 24: 12 per strand) :
Round 1 :
6 sc in magic ring (6)
Round 3 :
(1 sc, 1 inc) x 6 (18)
Round 4 :
(2 sc, 1 inc) x 6 (24)
Round 5 :
(3 sc, 1 inc) x 6 (30)
Info :
Rounds 1-5 create a rounded base for the pod. Keep your tension consistent; these increases establish the maximum width of the pod. If you want a slimmer pod, stop increasing at Round 4 for a maximum of 24 sts instead of 30.
Round 6 :
1 sc in each st (30)
Round 7 :
1 sc in each st (30)
Round 8 :
1 sc in each st (30)
Info :
Work Rounds 6-8 evenly to build length of the pod. These even rounds form the bulbous middle of the teardrop. Start planning how much stuffing you want: you will stuff later after beginning decreases for better shaping.
Round 9 :
(3 sc, 1 dec) x 6 (24)
Round 10 :
(2 sc, 1 dec) x 6 (18)
Info :
Begin the decreases slowly to form the tapered tip of the pod. After Round 10 the pod will have an elongated teardrop shape — now is a good time to add a little stuffing near the tip if you want the pod to keep shape at the end.
Round 11 :
(1 sc, 1 dec) x 6 (12)
Info :
Fasten off leaving a 10-12" (25-30 cm) tail for sewing/attaching and threading. Stuff the pod lightly through the opening — polyester fill in small pinches is best. Close using yarn needle and the tail if you prefer a fully closed pod, or leave the tail long and use it to sew the pod to the hanging cord as you assemble.
Round 13 :
Optional: If you prefer a flatter pod, after Round 12 do 6 sc in each st (6) and fasten off leaving long tail. This will yield a small flat base instead of a pointed tip.
Round 14 :
Info: Repeat Rounds 1-12 to make the number of pods you need. For the sample garland make 12 pods in emerald and 12 pods in pearl white. Keep consistent stuffing and tension so pods match in size.
Info :
Tip: If you prefer a more elongated pod, add two more even rounds at the widest point (insert additional '1 sc in each st' rounds after Round 8). For a more compact pod, reduce the even rounds to Rounds 6-7 only.
— Cord & Hanging Loop (Make 2 - one per strand) :
Round 1 :
Ch 70 (or desired length of core cord) — this is not a round but a foundation chain that will act as the internal cord for stringing pods. For a longer garland, chain more — every 10 ch adds approximately 3" (7.5 cm).
Round 2 :
Working back along the chain, with the right side facing you, insert hook into second ch from hook and sc in each ch to the end (69 sc). Fasten off leaving long tail for joining to each pod as you sew them on. (If you'd like a thicker cord, work two chains and seam them together or make an i-cord by crocheting in the round around a 3-4 ch core.)
Info :
We will use this cord as a flat core. The pods will be sewn or tacked to this cord with their long tails. Pin pod positions before sewing to get an even spacing. The sample spacing is one pod every 2.25"-3" (6-7.5 cm), with a pearl bead between pods as a small spacer.
Round 3 :
Optional: For a small hanging loop at the top, fold the cord end back 1.5" (4 cm) and sew or slip-stitch through both layers, then continue along the cord. Alternatively make a separate loop from a short chain of 10 ch and attach to the star topper later.
— Bead Spacer Prep (12 beads per strand) :
Round 1 :
Beads used in the sample are 8-12mm faux pearls. You can purchase pre-drilled beads and simply sew them onto the cord between pods with strong thread. Alternatively crochet small little bead loops: ch 6, sl st into first ch to form small ring, leave tail for sewing. This ring will act as a decorative spacer for the pearl and to sew the pearl in place securely.
Info :
If using pre-drilled pearls, a beading needle or fine wire helps to thread the bead onto the cord before securing. If pearls are not dril led, sew them on top of the cord between pods with a small backstitch pattern through the bead holes (if present) or tack them firmly using strong nylon thread and glue if necessary.
— Star Topper (Make 1) :
Round 1 :
Ch 2, 5 sc in second ch from hook. Join with sl st to first sc (5)
Round 2 :
(Ch 3, sl st in next st) x 5 to create five little points around the base. This is the foundation for shaping points.
Round 3 :
To make each star point: in first ch-3 space work: (1 sc, 1 hdc, 2 dc, 1 hdc, 1 sc). Sl st into next base stitch to move to next point. Repeat for all five points. Fasten off and weave in ends. Use gold yarn or metallic embroidery thread for a shiny star.
Info :
Alternative: Instead of crocheting a star you can use a small metal star ornament as in the photo. Attach cord loop to the star with a knot or small jump ring and secure with stitching so the star acts as the hanger and decorative top of the garland.
— Assembly: Sewing Pods & Beads to Cord :
Round 1 :
Lay the cord flat and mark the placement of pods with pins or removable markers. Sample spacing: measure 2.25" (6 cm) between pod centers for a tight, continuous spiral. For a looser twist increase spacing to 3" (7.5 cm).
Round 2 :
Thread a yarn needle with the long tail left on each pod. Fold the cord slightly under the pod and tack the pod in place with 3-4 passes of the needle through the pod base and around the cord, pulling gently to secure. Repeat for all pods along one cord.
Info :
When sewing pod to cord, orient the pod in the same direction each time so when the two cords are later twisted they create consistent spiraling. If pods are sewn alternating directions they can counteract the desired twist.
Round 3 :
After sewing a pod in place, sew the faux pearl bead next to it (between pods) by bringing the beading thread up through the cord, through the bead, down through cord again, and repeat 2-3 times to secure. Knot and weave tail into the cord. If you used bead rings or loops, slip the pearl onto the loop and sew the loop to the cord.
Round 4 :
Repeat the attachment process for all pods on both the emerald and pearl-white cords. Be sure to attach beads on both cords at matched intervals so the twist looks balanced.
Info :
Tip: Use pins and a flat surface to line both cords up parallel and mirror the positions of pods and beads so that when twisted each pod pairs with a pod from the other strand (like in the photo, pods roughly opposite each other in a mirrored arrangement).
— Twisting & Final Join :
Round 1 :
Pin both completed cord strands flat and parallel on your work surface. Starting at the top near the star topper, hold both cords side-by-side and twist them together by turning one end away from you repeatedly; the cords will naturally form a spiral. Twist evenly until you reach the desired tightness — the sample uses a medium-tight twist so pods nest into the spirals without too much strain.
Round 2 :
Once happy with the twist, secure the bottom ends together with several passes of yarn, wrapping and tying the two cords together, then weaving in the ends for a clean finish. At the top, attach both cord loops to the star topper by sewing through both cords and around the star hanger. If using a metal star with a ring, use a small jump ring to attach and then stitch the cords to the ring for extra security.
Info :
When you sew the cords to the star, leave a small loop for hanging. You can also add an extra small chain-of-ch stitches for a more decorative hanger. If you want the garland to hang heavier, add a few more stitches and a small dab of fabric glue to the knot for increased durability.
Round 3 :
Trim any long tails and weave them well into the cords. Pinch each pod gently to shape and adjust stuffing if any look uneven. Give the garland a little steam from a distance (do not touch the yarn with the iron) if you want to relax any curls and even out the twist.
— Variation Notes & Troubleshooting :
Info :
To create a single-strand spiral like a ribbon, make pods and string them on one durable cord, then twist that single cord around itself after blocking. If you'd like a bigger, chunkier look, use bulky yarn and a larger hook; this will change the number of pods needed for the same length. For a daintier garland, use fingering/sport yarn and a smaller hook but add more pods for the same coverage.
Info :
If your pods are slightly different sizes, sort them by size and place the most similar pods opposite each other when assembling the two cords — this evens out the visual rhythm when twisted. Use matching beads or alternating bead sizes for a more dynamic look.
Info :
Cleaning and care: spot clean with a damp cloth. If using metallic or sparkly yarn, test for colorfastness first and avoid harsh detergents. Store flat or gently looped to maintain shape.
This Emerald Pearl Spiral Christmas Garland brings a little handcrafted elegance to any holiday display — each tiny pod crocheted with care and strung into a graceful spiral for a classic festive look. The pearly beads and star topper give it a refined finish that catches the eye. Whether you hang it on the mantle, drape it down a banister, or tuck it into a wreath, this garland makes a wonderful handmade gift or seasonal accent. 🎁✨🧶