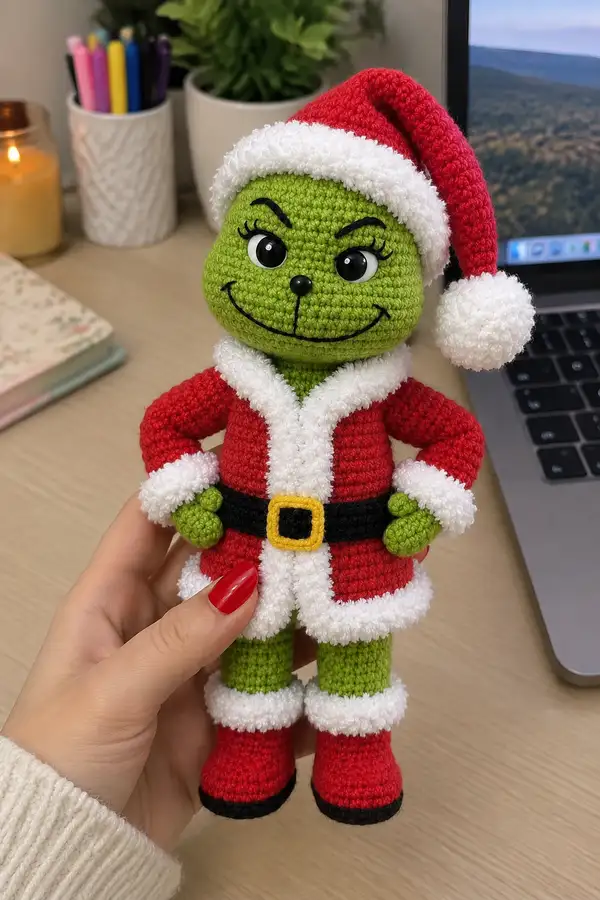
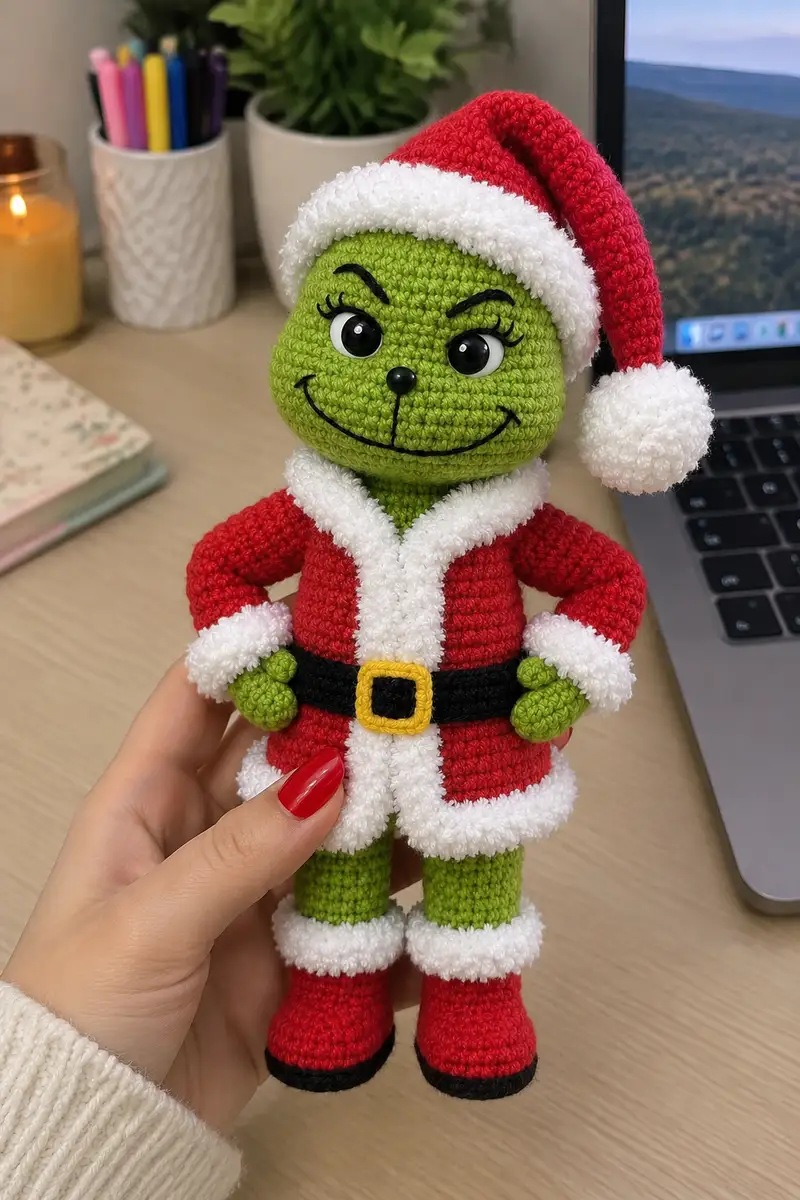
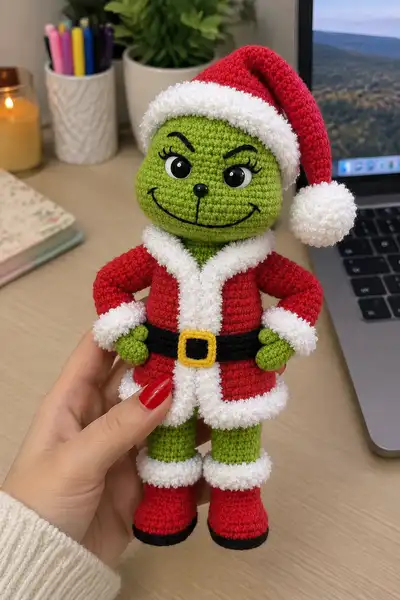
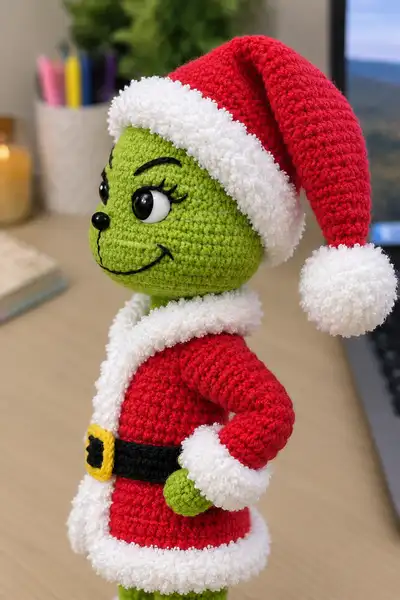
Bring holiday mischief to life with this Grinch-inspired Santa Doll Amigurumi Pattern. This plush character features a vivid green face, expressive embroidered grin, big glossy eyes, and a classic Santa outfit with fluffy white trim and a jaunty red hat. The pattern includes step-by-step, round-by-round instructions for head, body, arms, legs, boots, hat, coat, belt and accessories so you can recreate the exact look and posture shown in the photos. A fun intermediate project for gift-making and festive displays.
Progress Tracker
0% Complete
— Head :
Round 1 :
6 sc in magic ring (6)
Round 3 :
(1 sc, inc) x 6 (18)
Round 4 :
(2 sc, inc) x 6 (24)
Round 5 :
(3 sc, inc) x 6 (30)
Round 6 :
(4 sc, inc) x 6 (36)
Round 7 :
(5 sc, inc) x 6 (42)
Round 8 :
(6 sc, inc) x 6 (48)
Info :
Work tightly in continuous rounds. Use bright green worsted yarn. Place stitch marker at first stitch and move up each round. Head starts round and forms a slightly flattened sphere. Check tension to avoid holes showing stuffing later.
Round 9 :
1 sc in each st (48)
Round 10 :
1 sc in each st (48)
Round 11 :
1 sc in each st (48)
Round 12 :
1 sc in each st (48)
Round 13 :
1 sc in each st (48)
Info :
Eye placement: Insert safety eyes between rounds 13 and 14 approximately 10-12 stitches apart (measure center to center). For the character look, place them slightly lower and wider than center to preserve strong cheek shaping. Attach washer securely before stuffing further.
Round 14 :
1 sc in each st (48)
Round 15 :
1 sc in each st (48)
Round 16 :
(6 sc, inc) x 6 (54)
Round 17 :
1 sc in each st (54)
Round 18 :
1 sc in each st (54)
Round 19 :
1 sc in each st (54)
Info :
Start shaping the brow and cheek areas by observing where the face will protrude. If you prefer a subtler face, keep rounds 16-19 even. For a stronger cheek definition, gently stuff cheeks more in the next steps. Use small pieces of stuffing to focus under eye area.
Round 20 :
(6 sc, dec) x 6 (48)
Round 21 :
(5 sc, dec) x 6 (42)
Round 22 :
(4 sc, dec) x 6 (36)
Round 23 :
(3 sc, dec) x 6 (30)
Info :
Begin stuffing head fairly firmly now. Focus on the top of the head and cheeks first, then add smaller amounts into the face area so the eyes sit flush and the mouth area remains smooth. Add stuffing slowly as you decrease to avoid lumps.
Round 24 :
(2 sc, dec) x 6 (24)
Round 25 :
(1 sc, dec) x 6 (18)
Info :
At this point head has closed to a small hole. Fasten off leaving a long tail for sewing if closing by hand. Instead of fully closing, stop at 18 sts in the next step to form the neck opening that will be sewn to body. If you closed here, you can re-open or reattach when joining to body; many crocheters prefer leaving a small tube for neck for easier joining.
Round 27 :
Attach green yarn again and work (1 sc, inc) x 6 into a new round to bring back to 12 or instead make the neck tube. For this pattern we will recreate a neck of 12 sts: (1 sc, dec) x 6 (12)
Round 28 :
1 sc in each st (12)
Round 29 :
1 sc in each st (12)
Round 30 :
1 sc in each st (12)
Round 31 :
1 sc in each st (12)
Info :
Neck length can be adjusted: 3-5 rounds of 12 sts create a short neck. Stuff neck lightly to help it keep shape and make sewing to the body easier. Leave a long tail to sew to the body opening. Make sure the head is well shaped and eyes are secure before final assembly.
Round 32 :
Fasten off leaving a long tail for sewing. Weave in remaining yarn on the inside after attaching to body (12)
— Face Details & Embroidery :
Info :
Use black embroidery yarn or thin worsted weight held doubled for facial features. Mark placement before sewing: eyebrows sit across rounds 12-14 above the eyes, the nose centered between eyes on round 14, and the mouth curving across rounds 15-18. Use a yarn needle and backstitch technique for a smooth embroidered line.
Step :
Embroider eyebrows using 2 strands of black yarn. Work a gentle arch with tapered ends for expression. Start each eyebrow with a few small tiny stitches to taper, then work a single smooth satin/backstitch line across the marked placement.
Step :
Sew a small round safety nose or embroider a little 6mm ball nose using black yarn. Place nose approximately 6-8 stitches below eye center, so the mouth sits below it.
Step :
Embroider the wide smiling mouth using backstitch: begin from center under the nose and angle outwards to create a half-smile on both sides. Add a small upward curve at both ends for the mischievous grin. Reinforce stitches to keep lines flat and neat.
— Body (torso) :
Round 1 :
6 sc in magic ring (6)
Round 3 :
(1 sc, inc) x 6 (18)
Round 4 :
(2 sc, inc) x 6 (24)
Round 5 :
(3 sc, inc) x 6 (30)
Round 6 :
1 sc in each st (30)
Round 7 :
1 sc in each st (30)
Round 8 :
1 sc in each st (30)
Round 9 :
1 sc in each st (30)
Info :
Change to red yarn for coat starting round 10. Carry green yarn inside the body if you plan to join head later; otherwise fasten off green and join red cleanly. Work the next rounds in red to create the coat exterior. Using a smaller hook or tighter tension will give a firmer coat fabric.
Round 10 :
Join red yarn. 1 sc in each st (30)
Round 11 :
1 sc in each st (30)
Round 12 :
1 sc in each st (30)
Round 13 :
1 sc in each st (30)
Info :
If you want a defined waist, work two rounds where you do (3 sc, dec) x 6 to reduce to 24 sts. For the pictured silhouette the coat sits slightly flared at the bottom and slightly tapered towards the top; we’ll decrease later to form the neck opening for attaching the head.
Round 14 :
(3 sc, dec) x 6 (24)
Round 15 :
1 sc in each st (24)
Round 16 :
1 sc in each st (24)
Round 17 :
1 sc in each st (24)
Info :
Decide coat length: for this doll, stop increases/decreases around round 17 and then add a fluffy white trim later. Begin stuffing the body moderately around rounds 16-18 leaving the top opening unstuffed until head is attached. Stuff enough to give a gentle, stable torso that won't tip easily.
Round 18 :
(2 sc, dec) x 6 (18)
Round 19 :
(1 sc, dec) x 6 (12)
Round 20 :
1 sc in each st (12)
Round 21 :
1 sc in each st (12)
Info :
Top of body now has 12 stitches and will line up with neck tube of head. Keep top opening slightly wide and flat; adjust stuffing to make sewing easier. Leave a long tail for sewing the head on securely. Coat details will be worked separately (collar and trim using novelty yarn).
Round 22 :
Fasten off red leaving long tail for assembly (12)
— Coat Front & Collar (worked separately and sewn on) :
Info :
Coat front is two panels worked flat then sewn to the body. Use red worsted yarn and work both panels identically. The white trim is worked with eyelash/ boucle yarn using BLO on final rows to create the fluffy edge. Work panels slightly less wide than body circumference so they overlap at center front and allow for belt placement.
Panel - Row 1 :
Ch 18, sc in 2nd ch from hook and across, turn (17)
Panel - Row 2-18 :
Sc across each row, turn (17) - work 17 rows total to reach approx coat length
Info :
Make 2 panels. On the right-hand edges add a 2-to-3-row border in white boucle yarn to create a visible overlap seam when sewn. Sew panels to front of body aligning top edges with round 10-12 of torso for natural lapel placement.
Collar :
With red yarn sc a narrow band long enough to curve around neck opening (approx 30 sc long depending on tension). Attach to body top edges; then using white eyelash yarn crochet 2 rounds in BLO around the collar band to produce fluffy trim.
— Arms (Make 2) :
Round 1 :
6 sc in magic ring (6) - this is the hand/palm base
Round 3 :
1 sc in each st (12)
Round 4 :
1 sc in each st (12)
Info :
Hand is small rounded ball. Stuff hand firmly now to create a nice firm palm. You can add a tiny bit of poly pellets for weight if desired. Leave tail for attaching later or continue seamlessly into wrist.
Round 5 :
Change to red yarn for sleeve. 1 sc in each st (12)
Round 6 :
1 sc in each st (12)
Round 7 :
1 sc in each st (12)
Round 8 :
1 sc in each st (12)
Info :
Work a total of 6-8 rounds in red to form wrist and lower arm; then optionally add 2 rounds of white eyelash yarn in BLO to create a cuff. For pictured doll the cuff is fluffy white and folded over slightly, so plan cuff placement accordingly.
Round 9 :
1 sc in each st (12)
Round 10 :
1 sc in each st (12)
Round 11 :
1 sc in each st (12)
Round 12 :
1 sc in each st (12)
Info :
Stuff hand and lower arm area lightly, arms should be firm at palm and softer inside sleeves. For the pose with hands on hips, leave the upper arm empty to allow slight shaping and sewing angle. Optionally insert a short piece of wire or pipe cleaner in the upper arm for posability, fold ends and cover with stuffing.
Round 13 :
(1 sc, inc) x 4, 4 sc (16) - increase for upper arm width
Round 14 :
1 sc in each st (16)
Round 15 :
1 sc in each st (16)
Round 16 :
1 sc in each st (16)
Info :
Continue red rounds until the arm reaches desired length (approx 14-16 rounds of red including increases). The pictured arms are slightly bent and short; aim for total arm length of about 20 rounds including hand and sleeve combined. Stuff only as you finish the hand and lower sleeve; upper arm is lightly stuffed to remain pliable for sewing.
Round 17 :
1 sc in each st (16)
Round 18 :
1 sc in each st (16)
Round 19 :
1 sc in each st (16)
Round 20 :
Fasten off leaving long tail for sewing (16)
— Hands (Details) :
Info :
For the little green fingers peeking from cuffs, make two small nubs attached to palms or shape them as part of the hand before finishing. To simulate the pose (hands on hips) sew thumb nubs inwards to rest on the coat. Use green yarn and embroider or stitch small oval shapes of 6-8 stitches and attach.
— Legs (Make 2) :
Round 1 :
6 sc in magic ring (6)
Round 3 :
(1 sc, inc) x 6 (18)
Round 4 :
(2 sc, inc) x 6 (24)
Round 5 :
1 sc in each st (24) - begin foot shaping
Round 6 :
1 sc in each st (24)
Info :
At this point we will make a shallow sole/boot bottom later; the foot is short and boots are worked separately and slipped on. For shape, flatten foot slightly and add a small amount of stuffing focusing on the sole to help the doll stand. Change to boot color and work boot upward on top of foot or crochet boots separately as covers.
Round 7 :
Change to red yarn for boot upper. 1 sc in each st (24)
Round 8 :
1 sc in each st (24)
Round 9 :
1 sc in each st (24)
Round 10 :
1 sc in each st (24)
Round 11 :
(2 sc, dec) x 6 (18) - begin leg taper
Round 12 :
1 sc in each st (18)
Round 13 :
1 sc in each st (18)
Round 14 :
1 sc in each st (18)
Info :
Continue working the leg tube in green yarn above the boot to reach the body top. The pictured doll has short stockinette legs with white fuzzy cuffs at the knee area. We will leave the top of the leg slightly flared to sew into the body opening. Stuff legs firmly at the foot and moderately up the calf; leave the hip area lightly stuffed for shaping and easier sewing.
Round 15 :
Change to green yarn. 1 sc in each st (18)
Round 16 :
1 sc in each st (18)
Round 17 :
1 sc in each st (18)
Round 18 :
(2 sc, dec) x 4, 2 sc (14) - gentle shaping toward hip
Round 19 :
1 sc in each st (14)
Round 20 :
1 sc in each st (14)
Round 21 :
(1 sc, dec) x 4 (8) - final hip tunnel for body seam
Round 22 :
Fasten off leaving long tail for sewing (8)
— Boot Soles & Cuffs (Make 2) :
Round 1 :
With black yarn ch 8, sc in 2nd ch from hook and across (7) then continue around to create an oval sole: work 3 sc in last ch, sc along opposite side, 3 sc in end, join to make small sole about 12-14 sts total depending on gauge
Round 2 :
Sc around sole increasing at ends to maintain oval shape (approx 14)
Round 3 :
Change to red yarn and 1 sc in each st around (14)
Round 4 :
1 sc in each st around (14)
Round 5 :
1 sc in each st around (14)
Round 6 :
Attach white eyelash yarn and work 2 rounds in BLO to create fluffy cuff (14)
Info :
Slip the boots onto the feet or stitch them around the pre-formed foot. Alternatively, crochet boots directly onto the foot before finishing the leg tube. For a tighter sneaker-like fit, use a smaller hook for the sole rows.
— Hat (Main Cone) :
Round 1 :
6 sc in magic ring (6) - start hat tip
Round 3 :
(1 sc, inc) x 6 (18)
Round 4 :
(2 sc, inc) x 6 (24)
Round 5 :
(3 sc, inc) x 6 (30)
Round 6 :
(4 sc, inc) x 6 (36)
Round 7 :
1 sc in each st (36)
Round 8 :
1 sc in each st (36)
Round 9 :
1 sc in each st (36)
Round 10 :
1 sc in each st (36)
Info :
Hat should form a long cone that will slouch to one side. Work even rounds until hat reaches desired length (typically 12-16 rounds after shaping). For a floppy hat, decrease tension slightly or use a softer yarn. The brim is worked separately in white eyelash yarn to attach later.
Round 11 :
1 sc in each st (36)
Round 12 :
1 sc in each st (36)
Round 13 :
1 sc in each st (36)
Round 14 :
(4 sc, dec) x 6 (30) - slight taper toward tip
Round 15 :
1 sc in each st (30)
Round 16 :
1 sc in each st (30)
Round 17 :
(3 sc, dec) x 6 (24)
Round 18 :
1 sc in each st (24)
Round 19 :
(2 sc, dec) x 6 (18)
Round 20 :
1 sc in each st (18)
Info :
Fasten off and weave in tail if you prefer to attach a pompom instead of closing; optional: leave an opening to stuff the top slightly to give a curved slouch. Attach brim next before adding pompom for neat finish.
— Hat Brim & Pompom :
Round 1 :
With white eyelash yarn, join at hat opening and work 1 sc in each st around using BLO to create folded fluffy brim (18-24 depending on hat top size)
Round 2 :
Work 1-2 additional rounds in BLO with eyelash yarn to build up a thick brim (same st count)
Pompom :
Create a large pompom using the white eyelash yarn by wrapping around a large pompom maker or cardboard circle until very full. Tie tightly, trim and attach securely to hat tip. Alternatively make a small crochet ball in eyelash yarn: MR 6, inc to 12, 2 rounds even, stuff and close for a puff (6 rounds total).
Info :
Secure the pompom thoroughly with several passes of yarn through the hat tip to avoid detachment. For safety use glue under stitching if desired, but ensure it is neat and invisible from outside.
— Belt & Buckle :
Belt :
Using black yarn ch enough stitches to wrap around doll waist (approx 36 ch, adjust to fit). Sc in back loops only for 2-3 rounds to create a flat band. Fasten off and weave ends. Position and seam at center back with invisible whip stitch.
Buckle :
With yellow yarn ch 6 then sc across 5, sc around the rectangle with additional sc to form a framed buckle, join and stuff slightly if desired. Sew buckle to front center of belt, then use a small black square embroidered inside to simulate inner buckle hole.
Info :
Buckle can be made as one piece and sewn on, or crocheted flat and attached. For a tidy look, glue the buckle in position then secure with stitching through both buckle and belt for durability.
— Assembly & Final Finishing :
Info :
Before sewing pieces together, pin everything in place on the body to check symmetry. The head neck has 12 sts and the body opening has 12 sts — line them up so each stitch matches. Use the long tail from the head to sew, and finish with hidden whip stitch. Add extra reinforcement stitches at the back where stress is highest.
Step 1 :
Attach head to body by sewing the 12-st neck to the 12-st body opening. Use ladder stitch or whip stitch, working through both layers and pulling gently to close gaps. Ensure head sits centered and slightly forward for the posed look.
Step 2 :
Sew legs to bottom of body: position legs evenly spaced across lower rounds of the body. Sew through the hip stitches of the leg (8 sts) to the inside of the body with secure passes to prevent sagging when the doll stands.
Step 3 :
Pin arms to sides of torso in a hands-on-hips pose: insert arm seam at body rounds approximately 10-12 from top of body so palms rest on the coat waist. Sew arms with tight, neat whip stitches and add a couple of reinforcement passes at shoulder for stability.
Step 4 :
Sew coat panels to front of torso, tucking edges under and stitching along both sides and bottom. Add fluffy white trim along collar edges using eyelash yarn stitched in place or crocheted on. Make sure panels overlap and belt covers seam lines for a finished look.
Step 5 :
Slip boots on or stitch boots to feet. Add white fluffy cuffs at the top of boots by stitching eyelash yarn rounds or crocheting directly onto boot tops. Ensure boots are symmetrical by measuring rows from sole.
Step 6 :
Sew belt around waist and attach buckle centered on the front. Hide any visible tail ends inside coat by weaving them into the body seams. Embroider any final facial details such as lashes or mouth reinforcements using a smooth backstitch technique.
Info :
Weave in all ends by threading tails onto a yarn needle and passing through several parts of the sewn seams. Trim close to fabric. For extra stability on small parts (pompom or buckle), add a dab of fabric glue to tie-off knots but ensure glue dries completely before handling.
This Grinch-inspired Santa doll pairs classic amigurumi shaping with playful holiday details for a charming finished piece. The fluffy white trim and jaunty hat bring personality, while the embroidered grin gives the doll that unmistakable mischievous look. Each carefully-described round and Info tip will help you stitch confidently to the final toy. 🎄🧶 Enjoy making, gifting, and displaying this cheerful holiday character — and share your photos when you're done! 😊