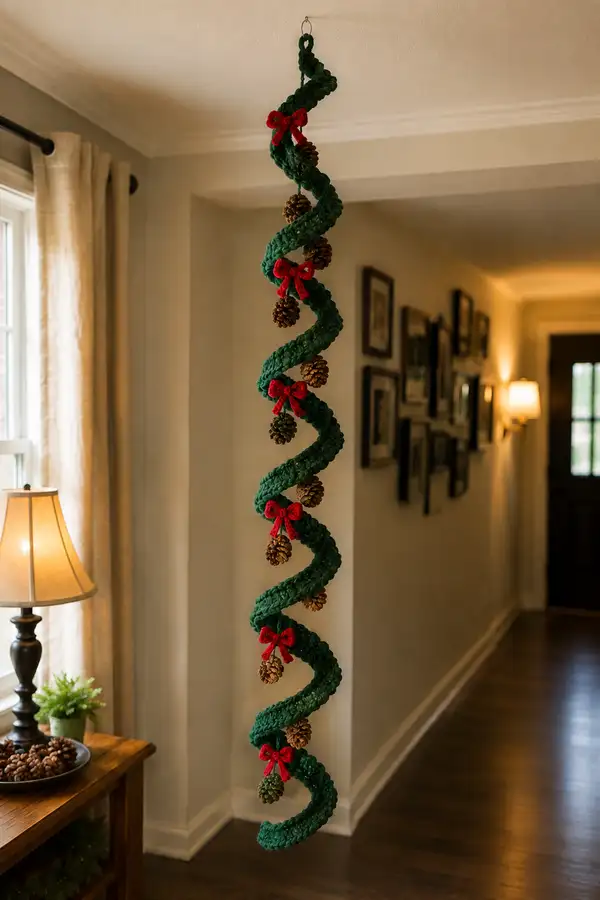
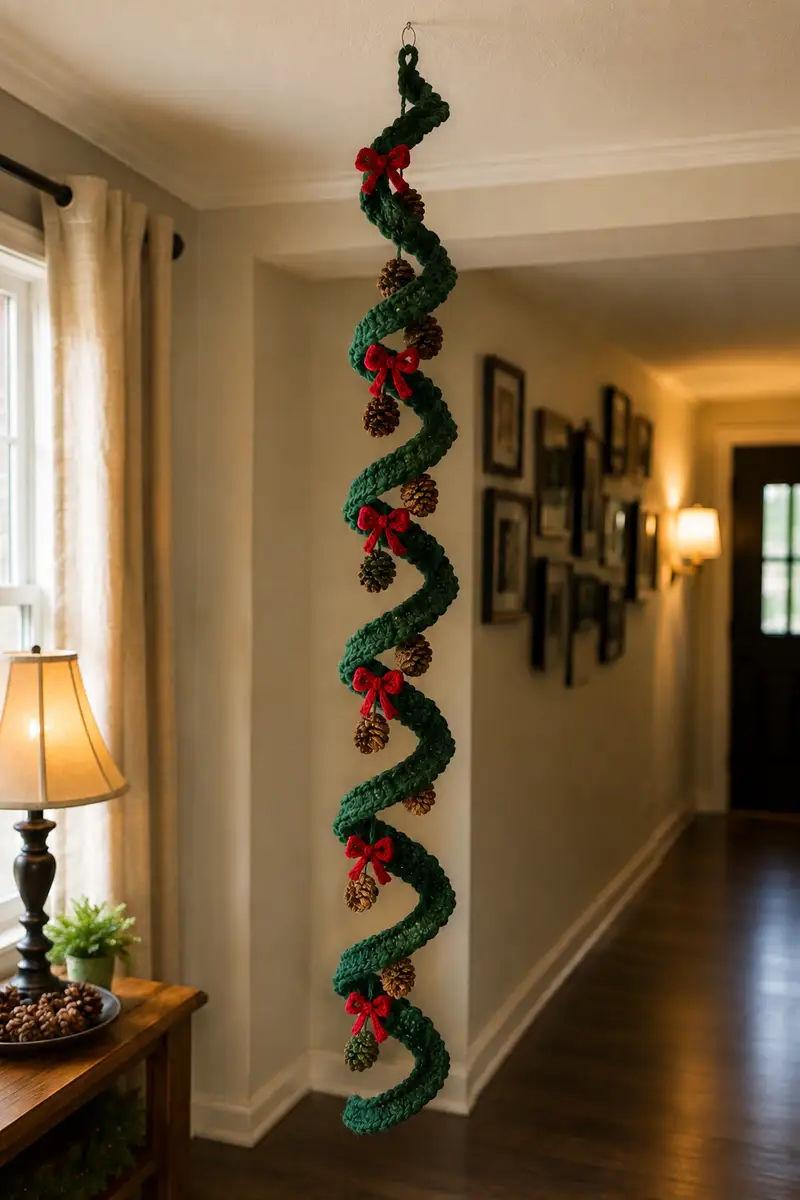
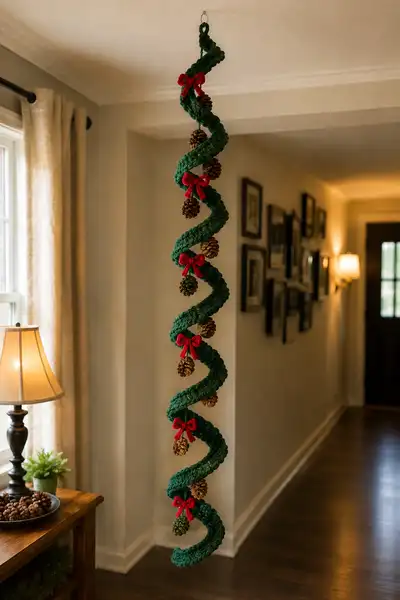
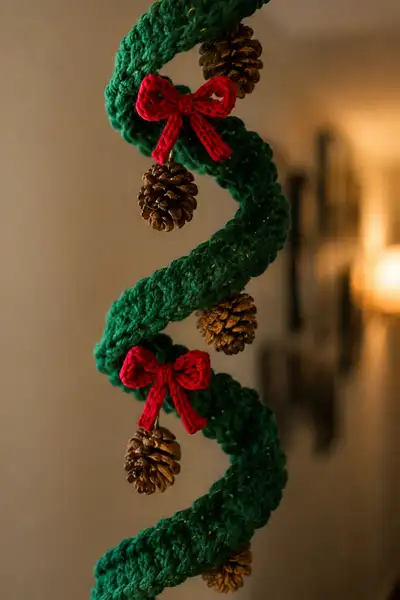
Create a long, spiraling evergreen garland that hangs beautifully from a ceiling or doorway. This pattern features a thick crocheted spiral tube in deep forest green, trimmed with hand-tied red crochet bows and dangling pinecone drops. The design is sturdy yet flexible thanks to an internal core, and it’s perfect for adding vintage holiday charm to hallways and entryways.
Progress Tracker
0% Complete
— Core Spiral Tube :
Info :
This section creates the long tubular body that will be twisted into a spiral. Work continuously in the round without joining. You can use a flexible cord or wire as an internal core (see Internal Core section) that you will insert as you go, or slip it inside after you have crocheted several inches. The tube circumference in this pattern is 36 stitches; adjust increases to reach a different diameter. Carry the sparkle thread with the main green yarn through the rounds if desired.
Round 1 :
6 sc in magic ring (6)
Round 3 :
(1 sc, 1 inc) x 6 (18)
Round 4 :
(2 sc, 1 inc) x 6 (24)
Round 5 :
(3 sc, 1 inc) x 6 (30)
Round 6 :
(4 sc, 1 inc) x 6 (36)
Info :
At this point you have a 36-stitch circumference tube. Insert a stitch marker to mark the start of the round. If using an internal core, slip the end of core inside and leave it trailing so you can continue working while the core sits inside. If not using a core, you can lightly stuff after round 12.
Round 7-12 :
1 sc in each st (36)
Info :
These first even rounds help the tube form a stable base. Keep tension even. If you're carrying sparkle thread, make sure it is lying alongside the main yarn and is caught in each stitch.
Round 13-20 :
1 sc in each st (36)
Info :
Check diameter: tube should be approximately 1.5-2 inches across with worsted yarn at this hook. If too wide, go down a hook size; if too narrow, go up. Start planning the finished length — each 10 rounds will give roughly 1-1.25 inches of length depending on yarn.
Round 21-30 :
1 sc in each st (36)
Info :
Begin to insert the internal core (cord or wire) now if you did not start with it. Insert a few inches and continue crocheting so the core sits inside the tube. If using wire, coat the wire with tape or thread to avoid sharp ends. Leave about 6 inches extra at the top for forming the hanger loop.
Round 31-40 :
1 sc in each st (36)
Info :
Mark attachment points for pinecone drops and bows now: every 12-14 rounds is a good spacing for a spiral. For a long garland like the sample, plan 7-9 ornament points. Use removable markers on the outside so you can see where to attach later.
Round 41-50 :
1 sc in each st (36)
Info :
To create a subtle ridge texture on the outer spiral, work rounds 45-50 in BLO (back loops only). This will let the outer ridge read visually when the spiral is shaped. If you prefer a smooth tube, continue in both loops.
Round 51-60 :
1 sc in each st (36)
Info :
Continue this even-stitch section until you reach the desired finished length. The photographed garland is approximately 5-6 feet long when hanging; for that length you'll work roughly 220-260 rounds total at this tube gauge. For a shorter hallway garland, stop earlier. This pattern will show rounds past 60 to explain method and finishing, but scale by repeating the even rounds until you reach the length you want.
Round 61-80 :
1 sc in each st (36)
Info :
Every 10-15 rounds check that the internal core is centered and not poking through. If you see a small opening, insert a yarn needle and pull the core further inside, then stitch across the opening to close any gap.
Round 81-100 :
1 sc in each st (36)
Info :
If you want a tapered end like the photo's lower tail, begin decreasing for tapering approximately 10-15 rounds before the intended end. The lower end in the photo tapers slightly but remains fairly round — decrease gently.
Round 101-110 :
1 sc in each st (36)
Round 111 :
(4 sc, 1 dec) x 6 (30)
Round 112 :
(3 sc, 1 dec) x 6 (24)
Info :
Start tapering the very bottom. Work decreases slowly so the spiral end remains rounded. Continue stuffing lightly if you used fiberfill earlier; otherwise the internal core will support the shape.
Round 113 :
(2 sc, 1 dec) x 6 (18)
Round 114 :
(1 sc, 1 dec) x 6 (12)
Info :
Fasten off leaving a long tail. Thread tail onto yarn needle and weave through remaining 6 sts; pull tight to close. Weave tail back inside tube and trim flush. If you plan to attach additional pieces at the very bottom, leave the tail long for sewing.
Info :
Shaping into Spiral: With the internal core in place, form the spiral by gently twisting the tube so it forms evenly spaced coils. Use pins and a level surface to set each coil and let the yarn relax. You can steam lightly with a garment steamer at a distance if using synthetic yarn—test first on a scrap to ensure it won’t flatten the texture.
— Internal Core (prepare) :
Info :
The internal core gives the garland its spiral form. You can use a flexible plastic-coated wire, a length of 3mm macrame cord, or a thin garden wire wrapped in tape. Cut to finished length + 6 inches so there is extra at top/ bottom. If using wire, bend the very tip into a small loop to avoid sharp edges before inserting into the tube.
Round 1 :
Cut core to length and, if desired, wrap in scraps of yarn to bulk it slightly. Insert one end of the core into the top opening of the tube, leaving about 6 inches protruding to make a hanging loop.
Info :
Slide the core gradually as you crochet so it sits inside the tube. If you didn’t start the core early, you can open an end by unpicking a few stitches and feed the core in, then restitch closed (use a needle and the long tail to whip the opening closed).
— Pinecone Drops (Make 8 or as many as you need) :
Info :
Each pinecone drop is a small crocheted cap and loop that secures a real or faux pinecone. You will create 8 identical attachments in this pattern; space them evenly along the tube. Adjust number depending on your garland length.
Round 1 :
Using worsted green or neutral yarn and a 4.5mm hook, ch 4, join with a sl st to form a ring (4)
Round 2 :
Work 8 sc into ring (8)
Round 3 :
(1 sc, inc) x 4 (12)
Round 4 :
1 sc in each st (12)
Info :
Round 4 forms a small cup that cups the top of a pinecone. Test fit frequently with the pinecone you have — real pinecones vary in size. Adjust by adding a round of hdc if extra coverage is needed.
Round 5 :
FLO: 1 sc in each st (12)
Round 6 :
Sl st into next st and ch 6 to create a hanging loop from the cap; sl st back into cap base to secure (loop length adjustable)
Round 7 :
Fasten off leaving a 12-inch tail for sewing. Use tail to sew the cap snugly to the top of a pinecone and tie a knot through the pinecone's top scales. Add a dab of hot glue inside the cap if extra hold is needed.
Info :
For added durability, wrap the loop with a short piece of extra yarn and knot below the cap; this reduces friction and hides the raw loop. Make 8 of these and set aside.
— Red Bows (Make 8) :
Info :
Small crocheted bows in bright red give the garland its cheerful accents. These bows are tiny and quick to make; each bow is formed of a central knot, two loops, and two tails. Using a slightly smaller hook gives crisp shaping.
Round 1 :
With red yarn and a 4.0mm hook, ch 12 (or ch 10 for smaller bows)
Round 2 :
Row work back along chain: sc in 2nd ch from hook and in each ch across (11) - do not join; fasten off leaving a long tail
Round 3 :
Fold strip to form bow loops by bringing ends to center; pinch center tightly and wrap the long tail around center several times to form the knot. Weave end through to the back and trim.
Round 4 :
Cut two short tails (each ch 6) and stitch them to the back center under the knot so they hang down. Secure knot with a few stitches at the back.
Info :
Make 8 bows. You can vary bow size slightly for visual interest by using ch10-14 for different bows. To attach, use the tail from the center wrapping to sew the bow onto the tube near the pinecone loops.
— Hanger Loop :
Info :
Create a sturdy hanger loop from the internal core or by crocheting a reinforced loop at the top of the tube. If your core has an extra 6 inches at the top, bend it into a loop and wrap with yarn to hide wire. Otherwise crochet a reinforced loop as below.
Round 1 :
At tube top, leave 6 inches of core protruding. Wrap core end with yarn by winding the yarn around the core and sewing into the top stitches several times to secure. Finish with a whiptail woven back inside the top few rounds.
Round 2 :
If not using core, ch 20, join to form loop, then sc around loop 2 rounds to thicken. Slip stitch to the top tube edge and sew into place securely.
Info :
Make sure the hanger loop is extremely secure; test by hanging from a hook and applying gentle downward pressure. Reinforce with a few additional stitches if necessary.
— Attaching Pinecones and Bows (Assembly Preparation) :
Info :
Plan your layout: mark the tube where you want each pinecone and bow. In the sample photo the sequence repeats: pinecone drop then bow directly above it, spaced roughly every 10-12 inches along the spiral. For even spacing measure along the tube rather than down the hanging drop to account for spiral length.
Round 1 :
Identify stitch number at each marked point by counting from top marker: e.g., mark at rounds ~18, 36, 54, 72, 90, 108, 126, 144 (adjust to your length and gauge)
Info :
To attach a pinecone: feed the cap loop through the outside of the tube by passing a yarn needle from inside to outside at the marked stitch, pull the cap loop through and tie or stitch the loop back to the tube. For extra security, stitch the cap base to the tube with the tail left from the cap. Hide knots inside tube when possible.
Round 2 :
To attach a bow: position it just above the pinecone. Use the remaining tail from bow center to sew through the tube wall and wrap the center of the bow securely. Tie off inside and weave the end in.
Info :
If you want dangling pinecones like the photo, let the loop between the cap and the tube be 1-2 inches long so the pinecone hangs freely beneath the bow. Ensure the knot is inside the tube for a neat exterior.
— Optional: Decorative Raised Ridge (Texture) :
Round 1 :
To create the raised outer ridge you see in the center of each coil, work every 10th round in BLO for about 6 rounds: 1 sc in each st BLO (36)
Round 2 :
Continue regular rounds for the next 8-12 rounds to allow the ridge to set before the next BLO section
Info :
The raised ridge becomes visible when the spiral is formed and adds a realistic evergreen texture. Alternate BLO sections with regular rounds as desired.
— Finishing Touches :
Round 1 :
After all attachments are in place, hang the garland and inspect for balance. Adjust spacing by moving a bow or tightening a pinecone loop if one coil looks heavier than the others.
Round 2 :
Secure all tails inside the tube by weaving them at least 2 inches through internal yarn and knotting if necessary. Tuck the knots and trim close to avoid lumps.
Round 3 :
Use a soft brush to fluff any visible yarn fuzz, and steam gently from distance for a neat finish. If gaps reveal the core, stitch across these gaps invisibly with matching yarn.
Info :
Store the garland loosely coiled and protected from crushing. If you used natural pinecones, dust them occasionally or treat them with a light spray if they will be stored for a long time.
This spiral evergreen garland is a festive statement piece full of texture and nostalgic charm. Each crochet stitch wraps around an internal core to create a sturdy, shimmery spiral that hangs beautifully in hallways and entryways. Tied red bows and dangling pinecones bring a classic holiday accent that’s both elegant and homey. 🧶🎀 Enjoy the process of assembling each little detail — the result is a handmade decoration you’ll be proud to display every season. Happy crafting and happy holidays! 🎄