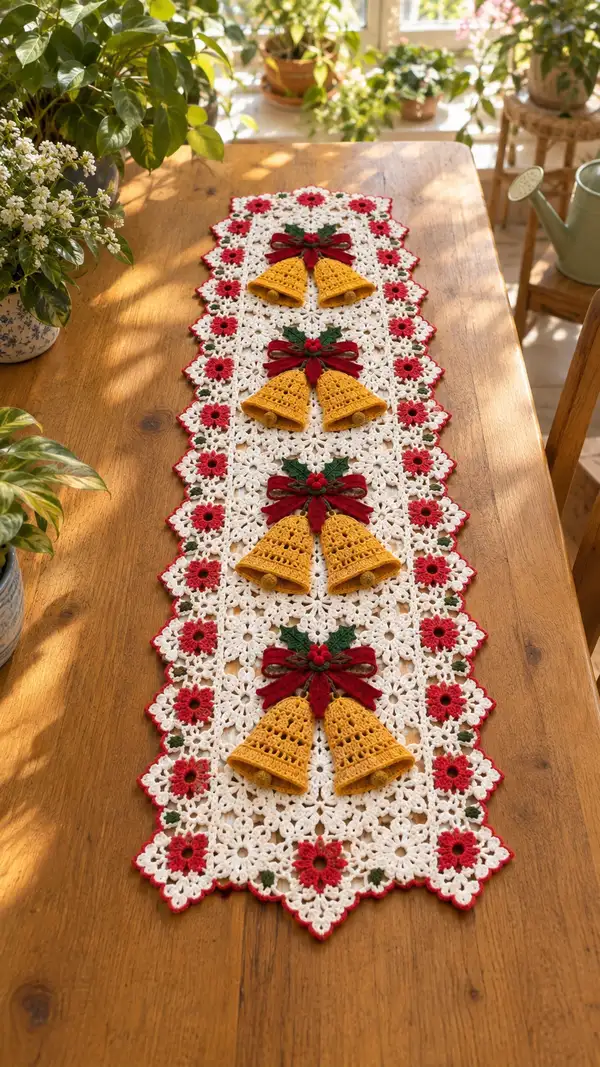
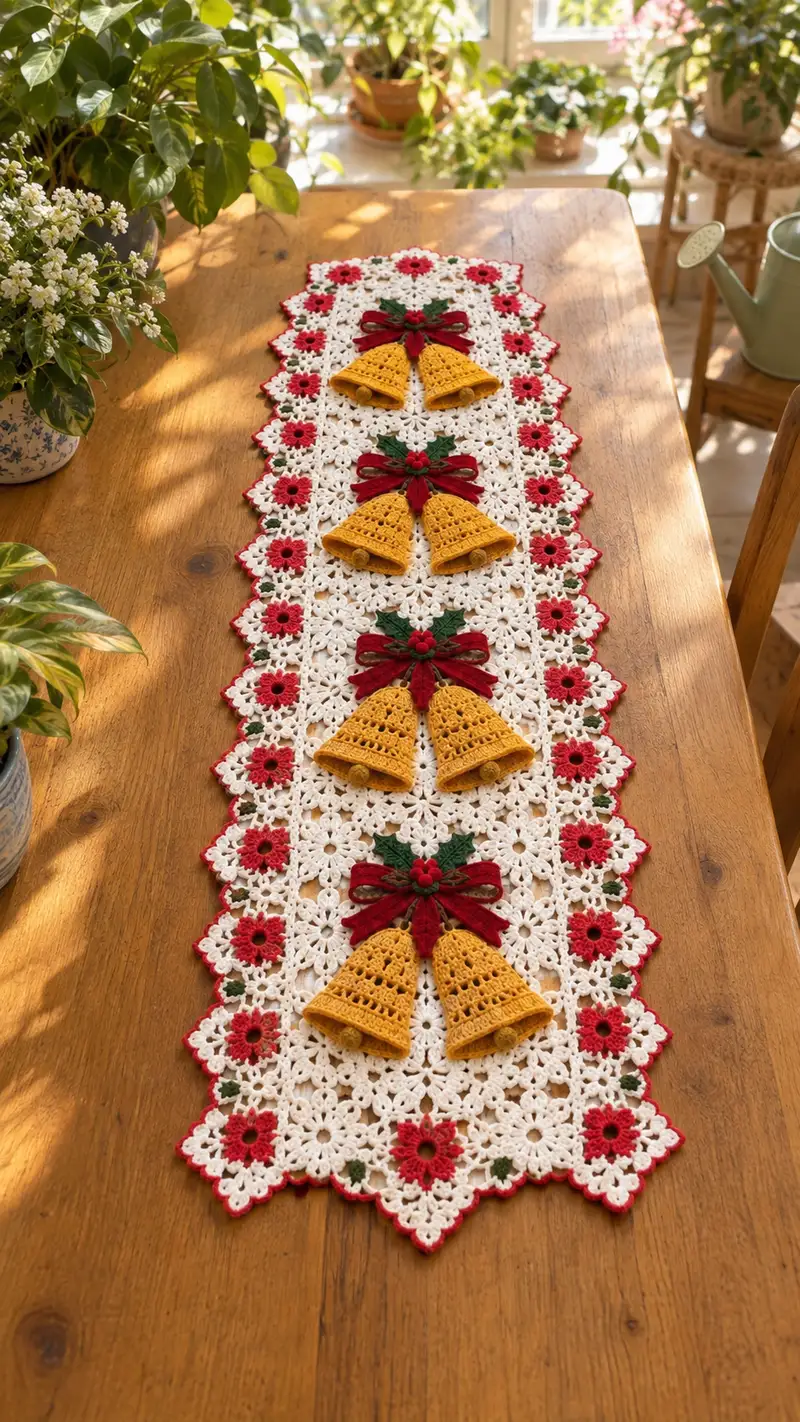
Create a charming holiday table runner featuring delicate white lace motifs, bright red floral accents, and three dimensional golden bells with ribbon bows. This pattern combines modular square motifs, elegant joins, and applique bells for a classic festive centerpiece. Perfect for decorating a dining table or adding handmade warmth to seasonal displays.
Progress Tracker
0% Complete
— Overview :
Info :
This runner is built from repeated 9-round lacy square motifs assembled in a single-file column with small connector motifs and a scalloped red border. Three bell appliques with bows and holly leaves are sewn along the center spacing. The pattern below details each motif and applique. Make a gauge swatch and adjust hook size if necessary to match motif size so runner length matches your table.
— Materials & Gauge :
Info :
Gauge per motif: approximately 7.5 cm (3 in) square when using thread size 10 and 1.75mm hook. Each motif uses a small central flower (red), then worked outward with white lace rounds to form a 9-round square. Runner pictured is 3 bell sections long with 3 sets of motifs in the center column and scalloped edges; adjust number of motifs to your desired length.
— Red Flower Center (make 30 for full runner) :
Round 1 :
Make a magic ring, ch1, 8 sc into mr, pull tight (8)
Round 2 :
(ch3, sl st in next st) x 8 to create 8 petals/ch-loops. Fasten off red or continue to round 3 if working petal picots (8 ch3 loops)
Info :
These small red centers are worked individually and sewn into the white motif centers later. Keep tension slightly firm so centers sit proud inside the white ring.
— Lacy Square Motif (white, make 30 motifs total and connector motifs as directed) :
Round 1 :
With white, mr, ch3 (counts as dc), 11 dc into mr, join with sl st to top of ch3 (12)
Round 2 :
Ch4 (counts as tr), *skip next dc, tr in next dc, ch1; rep from * around, ending ch1, join with sl st to top ch4. (6 tr clusters with ch1 spaces)
Round 3 :
Work into each ch1 sp: *(ch3, 2 dc, ch3) in ch1 sp, sl st in next tr cluster top; rep * around to create 6 petal arches. Join. (6 arches)
Info :
At this stage your motif looks like a 6-petal rosette. Keep stitches open but even; block lightly before continuing outer rounds if motifs begin to cup.
Round 4 :
Ch1, sc in same st, *ch5, skip to next arch, sc in top of arch; rep around to create 6 ch5 loops. Join. (6 ch5 loops)
Round 5 :
Into each ch5 loop: (sc, hdc, 3 dc, hdc, sc) in each loop to form scalloped petals (6 scallops). Join with sl st. (work is round but forming curved petals)
Info :
Sew the red flower center into the center ring now: align the red 8-sc center and tack down with matching red thread through a couple of stitches, then hide ends. This secures centers before outer rounds obscure the opening.
Round 6 :
Turn motif into square corners by making corner clusters: *ch3, (2 dc, ch3, 2 dc) in space between two petals, ch3, sl st to next petal top; rep around creating 6 corner-ish clusters. Join. (6 corner clusters)
Round 7 :
Ch1, sc evenly around petals placing additional scs into sides to begin squaring: work 4 sc across each petal side, into each ch3 corner work (sc, ch3, sc) to maintain corner. Continue around. (approx 48 sc - adjust to maintain shape)
Round 8 :
Ch3 (counts as dc), dc in next 3 sc, *(dc, ch1, dc) in ch3 corner, dc in next 4 sc; rep from * around. Join. (approx 54 dc & ch1 corners)
Info :
This round further squares the motif; count sts if needed. The numbers above are approximate; ensure symmetry and that each side retains equal stitch count. If a side ends short or long, add or remove single crochet across petal sides to balance.
Round 9 :
Ch1, sc in each st across side until corner, in corner (2 sc, ch3, 2 sc), continue; repeat around. (approx 60 sc)
Round 10 :
Ch4 (counts as tr), tr into each st across, in corner work (tr, ch2, tr) in ch3 loop, continue around. Join. (maintain approx 60-64 tr)
Round 11 :
Ch1, sc in each st, in corner (sc, ch5, sc) to create a small decorative corner loop. Join. (approx 64 sc)
Round 12 :
Ch3, skip next st, *5 dc cluster (shell) in next st, skip next st, ch1; rep along each side, in corner work shell then ch1; rep around. Join. (creates lacy side shells)
Info :
If you prefer a tighter motif, use smaller hook or drop to hdc in outer shells. Block each motif flat and square before joining for best final assembly. Make the pictured quantity of motifs depending on runner length.
Round 13 :
With white, sc around working 3 sc into each corner ch5 or ch3 loop to maintain shape. Join. (approx 72 sc)
Round 14 :
Edging round: *ch3, sl st into next st to make small picot points across edge; in corners work (ch3, sl st in base) to form pointed corner. Fasten off leaving tails for joining. (decorative edge)
Info :
Weave in the ends from the red centers and trim. Block motif precisely to get uniform squares. You will make enough motifs to form a narrow column that equals the length you want; pictured runner uses 30 motifs in total (3 bell groupings with spacer motifs between).
— Small Connector Motif (green accent, make 28) :
Round 1 :
With green, mr, ch1, 6 sc into ring, pull tight (6)
Round 2 :
Ch4, *sl st in next st, ch4; rep around to create 6 ch4 loops. Join. (6 loops)
Round 3 :
Into each loop: (sc, 3 dc, sc) then sl st to next base. Fasten off. These small connectors are used on the motif edges to create the green 'holly' dots between larger red flowers when joining the white motifs.
Info :
Make connector motifs as small accents placed between outer motif corners during assembly. They add green pops along the scalloped edge.
— Bell Applique (make 3) :
Round 1 :
With golden yellow, ch2, 6 sc in 2nd ch from hook or mr, join (6)
Round 3 :
(1 sc, inc) x 6 (18)
Round 4 :
(2 sc, inc) x 6 (24)
Info :
These early increases form the bell crown. Keep rounds tight and even. Start shaping into a bell in coming rounds by working partial shells and openwork.
Round 5 :
Ch3 (counts as dc), *skip next st, (2 dc, ch1, 2 dc) into next st (small shell), skip next st, dc in next st; rep around. Join. (creates openwork pattern around bell)
Round 6 :
Ch1, sc in each st and ch-space around, in ch1 spaces work (sc, ch3, sc) to maintain airy holes. Join. (approx 36 sc)
Round 7 :
Ch3, 2 dc in next 2 sts, ch2, skip 2 sts, *(3 dc in next st, ch2, skip 2), rep around. Join. (work shell bands)
Info :
At this point you have a bell-shaped cup starting to form. For a deeper bell, continue adding rounds of shells and spacing. Keep an even number of shells per round for symmetry.
Round 8 :
Ch1, sc around working 2 sc into ch2 corners to keep shape. Join. (approx 44 sc)
Round 9 :
Switch to pattern round: *(ch4, sl st to create small loop), skip 1 st, dc in next 3; rep; join. This produces a lacy band near bell rim.
Round 10 :
Ch1, sc in each st, in small ch4 loops work (sc, hdc, 3 dc, hdc, sc) to create small scallops around bell rim. Join. (creates decorative rim)
Round 11 :
Ch1, sc evenly across scallops, decreasing slightly to taper rim inward: work (sc2tog) every 6th st to begin slight taper. (approx 40 sc)
Info :
Make bell clapper: using a small leftover of golden thread, form a 6-sc magic ring ball: mr, 6 sc, fill lightly with polyfill, close with sl st, secure. Sew clapper inside bell with a couple of stitches so it peeks out beneath the rim.
Round 12 :
Ch1, sc around to tidy rim and enclose clapper attaching point. Fasten off leaving a long tail for sewing to runner. (approx 40 sc)
Info :
Make two bells per position. Slightly stuff bell interior only if you want fuller shape, but keep stuffing minimal to preserve lace texture. Block lightly to shape bell curve if needed.
— Bell Detailing: Clapper & Rim (per bell) :
Round 1 :
Using small amount of brown or darker gold, mr, 6 sc, join, stuff lightly, close with sl st and leave tail. Sew into center bottom of bell so it hangs slightly below rim. Fasten securely.
Info :
Note :
Sew clapper to bell from inside so the visible seam is minimal. Make sure to hide the ends into the inner rows and weave thoroughly.
— Bow Applique (make 3 large bows and 3 small center knots) :
Round 1 :
With red, ch16, sl st to first to form a small ring or work foundation chain back and forth: Row 1: sc in 2nd ch from hook across (15 sc).
Round 2 :
Turn, ch1, sc across (15). Fasten off. Make 2 identical strips for loops. Fold each strip into a loop and sew center seams to create bow 'ears'.
Round 3 :
Make center knot: ch6, join to ring, sc across 6, fold around bow center and sew closed, wrap additional yarn around knot and back through to hide ends. Fasten off.
Info :
Bow tails: ch20, sc back across to make a flat tail strip, fold and stitch base under bow. You may also use ribbon instead of crocheted tails for a polished look.
— Holly Leaves (make 6 small leaves per bow set) :
Round 1 :
With green, ch8, sc in 2nd ch from hook, hdc, dc, tr, hdc, sc across (7 sts). Fasten off leaving tail for sewing. Shape with small running stitches along center to curve leaf slightly.
Info :
Make 2 or 3 leaves per bow cluster. Use short running stitches with a needle and green thread to add veins if desired. Block leaves lightly if needed.
— Assembling Applique Sets (per bell pair) :
Info :
Each set on the runner consists of two bells paired together, a red bow with tails and 2-3 holly leaves arranged behind the bow. Position the bells so rims slightly overlap and sew bow across the top where bells meet. Arrange and tack leaves behind bow so green peeks evenly.
Step :
Sew bells to runner after motifs are joined, using long tails from bell rims to stitch securely through motif centers to the backing motif. Attach bow by sewing the wrapped knot through motif center behind bells. Add small red bead or 3 tiny red french knots at bow center to imitate berries.
— Joining Motifs (as-you-go method) :
Info :
Join motifs together in a single-file column by slip-stitch or whip-stitch joining in the last round. The runner pictured uses motifs joined edge-to-edge along their sides to create a scalloped border and a continuous white field where bell sets are sewn on top.
Round 1 (Joining) :
Start with first motif completed and blocked. On final motif round use contrasting red picot edge only after joining. To join, hold motif 1 and motif 2 right sides together aligning corners. Sl st through both motifs' edge stitches across one side: *insert hook through next outer stitch of motif A and corresponding stitch of motif B, yo, pull through and sl st. Continue across side until corner. Repeat for each subsequent motif making a strip of connected motifs.
Info :
Work joins consistently in the same direction. Use slip stitch join for a flat seam or whip stitch with matching white yarn for a less visible seam. Place small green connector motifs at alternating outer corners when you reach the edges to recreate pictured green dots between red flowers.
Round 2 :
After joining motifs into a column, work one round of white sc across joins on both sides to tidy seam: join white at first seam st, ch1, sc evenly across seam edge working through both motif edges; in corner work (sc, ch3, sc) and continue around column to the end. Fasten off.
Info :
Block the entire joined strip flat and square again to relax joins and align scallops. This makes applique placement easier and the final edging neater.
— Scalloped Red Border (Edge Round) :
Round 1 :
Attach red to outermost stitch on one side. Ch1, sc in same st, *skip 1 st, (5 dc, ch2, 5 dc) in next st to create scallop, skip 1 st, sc in next st; rep along side. In corners work a slightly larger scallop (7 dc, ch3, 7 dc) to keep runner edges even. Continue around entire perimeter. Fasten off.
Info :
Work this round evenly on both long sides for symmetry. If scallops appear too large or small, adjust dc counts (use 3-5 dc shells) so scallops align with white motif points beneath.
Round 2 :
Attach red again and work a picot binding: *ch3, sl st into 3rd chain to form picot, sl st into top of next scallop shell space to create delicate pointed edge. Repeat around. Fasten off and weave ends invisibly into underside.
Info :
If you prefer a double border, repeat an additional white round before the red scallop to create a layered look. The pictured runner has a single red scallop border that emphasizes the red floral centers.
— Optional Decorative Row (center stabilization) :
Round 1 :
To stabilize center where bells are sewn, work a narrow decorative ladder row of white connecting stitches up the center of motifs: with white, join at center side seam and ch1, sc across seam between motifs through available loops, creating a narrow band. This gives extra anchoring points for sewing heavy applique bells.
Info :
This extra stabilization prevents heavy appliques from pulling out or distorting the lace. Stitch ladder invisibly through inner ch-spaces of motif seams so it does not show from front.
— Final Touches & Finishing :
Info :
Arrange bell sets evenly along runner length. On pictured runner spacing is three equal sections: top, middle, bottom with 9 motifs between bell centers. Center bells horizontally across the motif center squares and sew through several foundation rounds to secure. Add small red beads or French knots at the bow center to simulate holly berries.
Info :
After sewing all appliques, lightly steam block the runner on a flat surface with pins to shape scallops and ensure bells sit flat and symmetrical. Use a low heat setting and a pressing cloth to protect thread. Let cool completely before removing pins.
Info :
Weave all tails to the backside and trim close. For extra security on heavy-use tables, consider sewing a thin cotton backing fabric to the underside of the runner to protect lace from wear and stabilize appliques long-term.
— Quantity & Layout Suggestions :
Info :
Pictured runner uses 30 white motifs plus 28 small green connectors, 3 bell pairs (6 bells), 3 bows and accompanying leaves. To shorten runner, remove motif pairs evenly from center. To extend, add matched pairs of motifs and space bells accordingly. Keep motif count odd for a centered applique arrangement if desired.
Info :
When replicating the pictured runner, assemble motifs into a single vertical column and attach small red flower centers before joining. Attach bells after assembly and before final blocking for easiest placement.
Finishing this Festive Bell Table Runner brings a lovely mix of texture and holiday cheer together! Each blocked and joined motif forms an elegant lace pathway down your table, punctuated by cheerful golden bells and ribbon bows. The modular approach makes it easy to adapt length or swap colors for seasonal variations. Enjoy the satisfaction of handmade decor that will be admired every holiday season. 🎄🧶