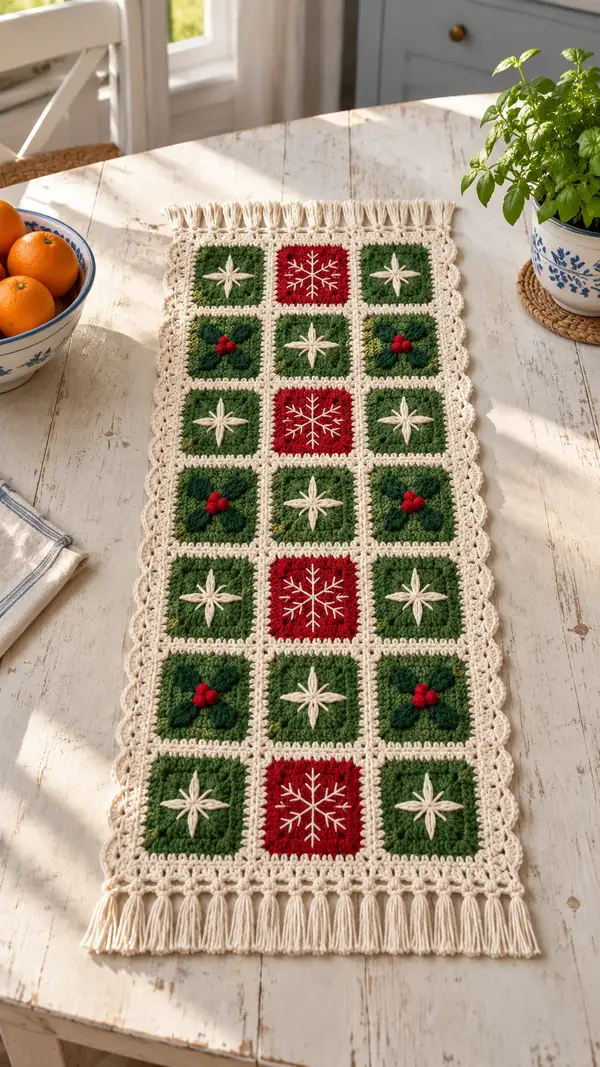
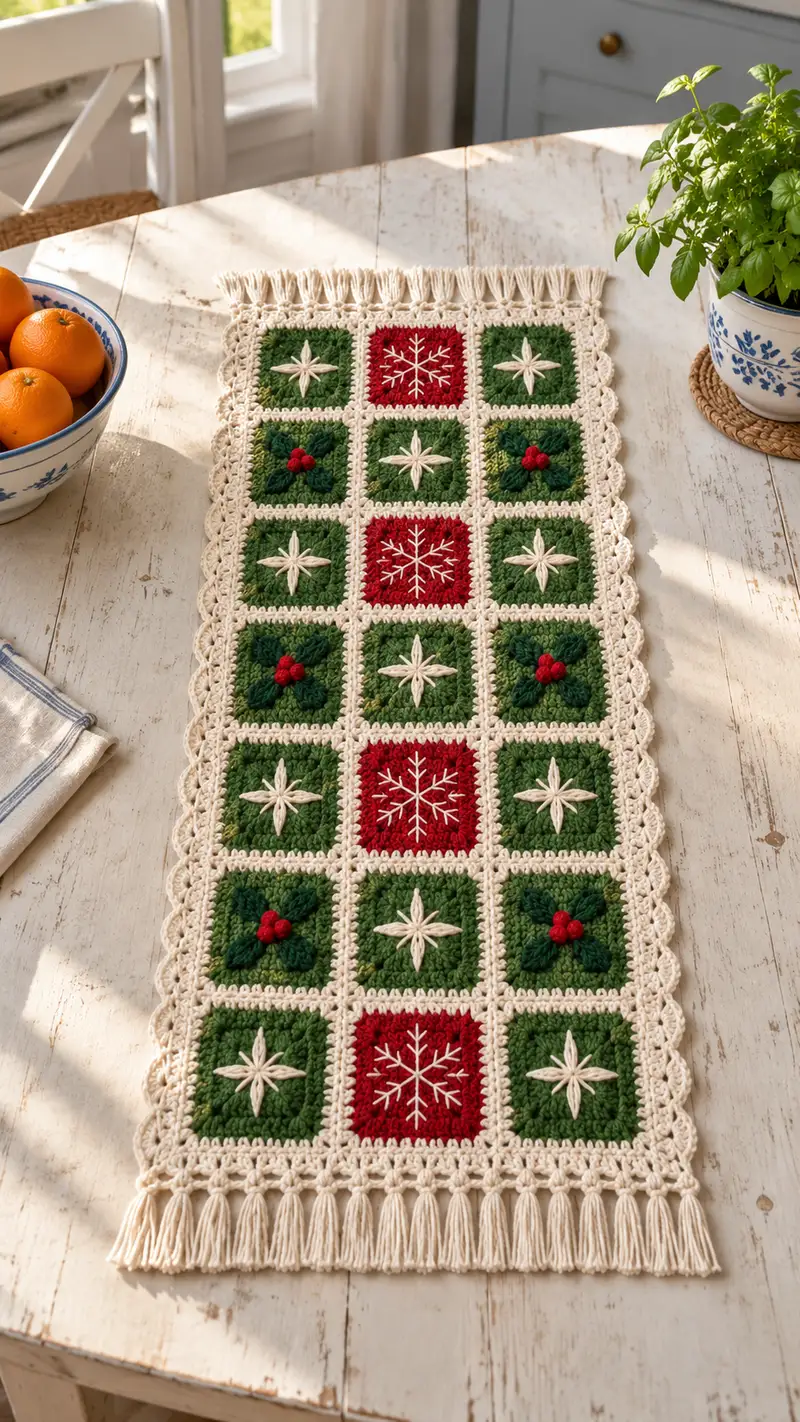
Create a cozy, holiday-inspired table runner made from 18 textured granny-style squares in rich greens and cheerful red accents, joined with a warm cream border and finished with a scalloped edge and fringe. Each square features one of three embroidered motifs — star, holly with berries, or snowflake — giving the runner charming seasonal detail. This pattern uses worsted weight yarn and classic stitches to produce a sophisticated handmade accent for your dining table or console.
Progress Tracker
0% Complete
— Overview & Gauge :
Info :
Finished layout: 3 columns × 6 rows = 18 squares. Approximate finished size: 12" (30 cm) wide × 30–34" (76–86 cm) long including border and fringe, depending on personal tension and exact yarn. Gauge for one motif (unblocked): approx 3.5–4" (9–10 cm) square. Use this to adjust hook size if needed to match the finished measurements.
Info :
Throughout the pattern we use a textured solid-granny-inspired square built from a tight circular base that is squared up with corner shaping and finished with a neat cream joining round. Stitch counts are calculated to ensure consistent edges for joining.
— Motif Base (make 18) :
Round 1 :
With green or red (as applicable) yarn, start with a magic ring. 6 sc in magic ring (6)
Round 2 :
Inc in each stitch around — 6 inc (12)
Round 3 :
(1 sc, inc) x 6 (18)
Round 4 :
(2 sc, inc) x 6 (24)
Round 5 :
(3 sc, inc) x 6 (30)
Info :
This initial 5-round spiral creates a dense, even circle that will become the body of the square. Keep tension even — this is the structural base for the textured stitches to follow.
Round 6 :
(4 sc, inc) x 6 (36)
Round 7 :
(5 sc, inc) x 6 (42)
Round 8 :
(6 sc, inc) x 6 (48)
Round 9-10 :
1 sc in each st (48)
Info :
Rounds 9–10 help the motif expand to a size suitable for squaring up. If you wish for a slightly smaller square, stop at Round 9; for a slightly larger, you can add an extra even round maintaining 48 sc then adjust later rounds in the squaring-up method.
Round 11 :
Now begin the squaring-up transition: Work across first quarter of the stitches (12 sc), then create the first corner by working 3 sc in the next stitch (corner cluster). Repeat: (12 sc, 3 sc in next st) x 4 — total stitches at end (60)
Info :
Dividing the 48 stitches into quarters of 12 lets us place corner clusters evenly; each corner cluster (3 sc worked in the same stitch) builds outward to create square corners. After Round 11 the motif will be roughly square-shaped with a stitch count of 60.
Round 12 :
1 sc in each st across (60)
Round 13 :
To define a shallow ridge and even edges: 1 sc in each of next 3 sts, (hdc, dc, hdc) in next st (a textured post stack), then 1 sc in each of next 13 sts; repeat this concept four times evenly to create subtle side ridges — final count (60)
Info :
Round 13 uses a short post-stitch stack to add texture to the center of each side. This gives the green squares a fuller, dimensional look under the embroidery. Keep all stitches tight to avoid gap between the stitches and embroidery later.
Round 14 :
1 sc in each st BLO (60)
Round 15 :
Change color if making a red square now (Info below). 1 sc in each st (60)
Info :
For all green motif variations, use the variegated green here. For red snowflake bases switch to holiday red. Carry color only if you will be doing multiple squares in the same color and prefer fewer ends; otherwise fasten off and weave ends.
Round 16 :
Work an outer decorative round to prepare for joining: *1 sc in each of next 7 sts, (skip 1 st, sl st in next st)* repeat to distribute small slip-stitch gaps that will help the joining round sit flat. 1 sc evenly across remaining stitches and sl st to join (count remains 60)
Info :
Fasten off leaving a 10-12" (25-30 cm) tail for weaving if you plan to sew squares together later. If joining right away with join-as-you-go (JAYG) method, keep yarn connected and follow the JAYG joining instructions instead of fastening off.
— Placement & Color Plan :
Info :
The pictured runner is arranged with 3 columns and 6 rows, alternating green and red motif placement: columns 1–3 top to bottom show repeating patterns so the red snowflake squares appear in a vertical center line (center column) at rows 2 and 5 (and row 3 depending on your layout). When you place your motifs out on a blocking board, arrange them in the final layout and check patterns align as desired.
— Embroidery — Raised Star (on green squares) :
Info :
Embroider this raised star centered on selected green squares using cream/ivory. Embroidery is done after blocking and before joining for easier handling. Use a long tapestry needle and stranded yarn (folded doubled for thickness) or use a worsted-weight yarn strand for a bold effect.
Round 1 :
Thread yarn doubled. From the center of the motif (approx center of Round 9 disc), bring the needle up through the center, then insert the needle opposite approximately 8–10 mm away to make a single long stitch; repeat to make 8 evenly spaced radiating spokes (this is not a crochet round but an embroidery step).
Round 2 :
For each spoke, create a thicker raised stitch by making a large satin stitch: bring needle up beside the center, go down beyond the tip of the spoke, and come up slightly offset and repeat until the spoke is filled and raised. Repeat for all 8 spokes.
Info :
Spacing: aim for spokes about 8–10 mm from the center to each tip for a star ~1.25" across. Check symmetry by rotating the square while embroidering. Secure all ends at the back with neat weaving.
— Embroidery — Holly Leaves & Berries (on green squares) :
Info :
Three-dimensional holly uses raised leaf stitches and clustered bobble berries. Work on blocked square using dark green for leaves and bright red for berries.
Round 1 :
Mark the center. Working one leaf at a time: insert needle at base point, bring out at the tip location, then make 6–8 short satin stitches side-by-side to create a raised leaf teardrop shape (approx 12–15 mm long). Repeat to create 3 leaves arranged as a trifoliate cluster.
Round 2 :
To create berries: using red yarn and a length of yarn doubled, make three small French knots or very small crochet bobbles sewn on top of the leaf cluster, spaced slightly apart to resemble holly berries. Secure well at the back.
Info :
If you prefer crocheted berries: make a small bobble by making 3 dc in a magic ring, pull tight, fasten off leaving tail and sew to motif. These give a popcorn-like raised berry similar to the photo.
— Embroidery — Snowflake (on red squares) :
Info :
White snowflake is delicate surface embroidery worked after blocking. Use single strand of cream/white yarn or stranded cotton; a finer yarn will give a crisp look. Stitch over the central point to create a six-arm snowflake with small branch details.
Round 1 :
Bring needle up at center, create 6 long straight stitches radiating outwards approx 8–10 mm; space them evenly every 60 degrees like a hexagon star.
Round 2 :
On each arm, add two short crossing stitches near the tip to suggest branches — small straight stitches crossing each arm at two points. Finish each arm with a tiny perpendicular stitch near the outer end for detail.
Round 3 :
Outline each arm lightly with backstitch if desired to sharpen contrast. Secure ends at back and weave in cleanly.
Info :
Work snowflake last on each red square. Keep the embroidery level shallow — too much bulk can distort the red square. Use blocking to flatten motifs before embroidering.
— Blocking & Preparation :
Info :
Block each finished motif to exact square size (target 3.75–4"/9.5–10 cm). Pin each motif on a blocking mat, stretching gently to true square edges. Spray lightly with water or steam-block according to yarn instructions; allow to dry fully. Blocking ensures even joins and tidy embroidery placement.
— Joining the Squares (Join-as-You-Go or Sew) :
Info :
There are two recommended methods: join-as-you-go (JAYG) for a clean integrated seam, or sewing each square together with a whip stitch or mattress stitch. The instructions below cover both; choose the method you prefer. We will explain a JAYG seam round and a sewing alternative.
Joining Round (JAYG) :
With cream yarn attached to the outer round of a finished square, align it to an already placed square with right sides facing up. Work 1 sc into the next st of working square, then sl st into the adjacent square's corresponding stitch; repeat across the side producing an even ladder of sl st joins. Repeat on other sides to assemble entire grid in rows.
Info :
For a 3×6 layout, assemble each row of 3 squares first: join square 1 to square 2, then 2 to 3. Once rows are complete, join row seams vertically column by column. Use pins to align motifs and ensure center red squares line up vertically in the center column.
Sewing Alternative :
If sewing: leave long tails on each square. Place squares right sides together, matching stitch edges, and use a mattress or whip stitch through the outermost rounds only to create an invisible seam. Weave tails across the seam and back into the fabric for security.
Info :
When joining, keep tension even so seams lie flat — neither pulled tight nor loose. For a more framed look, join with a chain bridge (chain 3, skip one stitch) to let cream show as a delicate lattice between squares.
— Grid Border & Inner Frame :
Round 1 :
With cream yarn and a 4.0 mm hook, attach to any seam junction and work 1 sc evenly around the entire assembled rectangle, placing 3 sc in each corner to round corners — count will vary by your overall join; this creates a uniform base for the scalloped edge (work tightly to create a neat frame).
Round 2 :
1 sc in each st around (this evens the border and covers join tails). Keep corners with 3 sc in corner stitches for a tidy mitered corner effect.
Info :
If your layout measured smaller or larger than intended, this is a good time to correct slight asymmetry by adding or subtracting stitches along the long edges only; maintain the corner triple-sc rule to keep corners neat.
Round 3 :
1 sc in each st in BLO to create a slight ridge for the scallop to sit on (this gives a framed look and lifts the scallops slightly) — count remains the same as Round 2.
Round 4 :
Even round: 1 sc in each st (same count). Turn runner so you are comfortable working the scalloped edge on the long sides and short ends.
Info :
This inner frame defines each square visually and provides a clean edge for the scalloped outer border. Take time to keep edges even; use blocking pins to square the runner before scalloping.
— Scalloped Outer Edge :
Round 1 :
Working into the top of the inner frame with cream: *skip 1 st, 5 dc in next st (shell), skip 1 st, sl st* across the long sides. On corners work (3 dc, ch 2, 3 dc) into the corner to maintain a rounded corner shell. Repeat around short ends accordingly so scallops appear evenly spaced (shell count varies with circumference).
Round 2 :
Work 1 sc in each st across the backside to tidy shell bases and ensure scallops lie flat. Where shells meet at the corners, place 1 sc in the chain-2 corner space to anchor shells neatly.
Round 3 :
To accent scallops, work a picot-trim round: *sl st into first dc of shell, ch 3, sl st into third dc of same shell, sl st into base between shells* across. This yields small decorative loops between scallops and a vintage look like the runner in the photo.
Info :
For very regular scallops, count stitches across one long side, divide by the number of shells you wish, and adjust spacing so scallops are evenly distributed. Use stitch markers to map shell centers before working.
— Short-End Fringe & Finishing :
Round 1 :
At each short end, prepare fringe by cutting cream yarn lengths twice the desired finished fringe length (for 2" finished fringe, cut 4" lengths). Make groups of 4 strands to form each tassel/bundle.
Round 2 :
Fold a 4-strand group in half to form a loop; pull the loop through a base stitch at the border edge with a crochet hook, pass the loose ends through the loop and pull tight (lark's head knot). Repeat across the short edge spacing tassels approx 8–10 mm apart, aligning with scallop centers if desired.
Info :
Trim fringe ends evenly and lightly steam if needed to help fibers relax. For a fuller fringe, double strands per knot or reduce spacing between tassels. Secure fringe bases with a small dab of fabric glue if the runner will be frequently laundered.
— Final Weaving & Blocking :
Info :
Weave in all loose ends on the wrong side with a tapestry needle, following yarn strands for neatness. Lay the finished runner flat and pin to final measurements, spritz lightly and allow to dry to set she scallops and fringe. Give final trims to any stray threads and inspect embroidery for loose ends.
Info :
Optional: Add a light fabric starch spray if you desire a crisper tabletop piece. Avoid over-starching which can make yarn feel stiff and may reduce pleasant drape.
— Variations & Scaling :
Info :
To scale up, add additional rows maintaining the 3-column width, or add columns for a wider runner. For smaller placement mats, make fewer rows/columns. Change colors seasonally (soft pastels for spring, jewel tones for autumn) using the same embroidery motifs for seasonal flexibility.
Info :
Want a non-fringed finish? Omit tassels and finish with an extra round of single crochet in contrast color or a crocheted picot edge.
This festive table runner blends classic crochet comfort with joyful holiday motifs to brighten any tabletop. Each square tells a tiny story — stars for quiet nights, holly for winter cheer, and snowflakes for frosty delights. Working the runner is a meditative project that rewards you with a beautiful practical heirloom. 🧶✨ Add personal color choices for a one-of-a-kind piece that's perfect for gifting or keeping. Happy hooking and be proud of every stitch! 🎄