🧶 Beautiful ✨ Detailed 💝 Adorable

Christmas Spiral Garland Pattern

Christmas Spiral Garland Pattern
4.6★ Rating
8-10 Hours Time Needed
3.2K Made This
✂️

Advanced Level

Designed for experienced crocheters, these patterns involve intricate designs and complex techniques to challenge and inspire.

⏱️

All-Day Adventure

Requires 8-10 hours, ideal for a full day of immersive crocheting.

🎄

Holiday Cheer 🎄

Festive fun for the season, bringing handmade magic to celebrations and creating new family traditions.

🧶 Jump to Pattern ↓

About This Christmas Spiral Garland Pattern

This pattern creates a long spiraled winter-village garland featuring a textured navy band trimmed in snowy white, peppered with tiny houses, miniature evergreen trees, embroidered snowflakes, and beaded tassel houses that can hold micro LED lights. The band uses a dense bobble texture to read like a night-sky fabric, while the white scalloped edge and tiny applique pieces provide a cozy, storybook look. The pattern covers the base band construction, multiple small house modules (two hanging, four attached), several tree motifs, snowflake embroidery, and assembly with beads and LED options. Suitable for making as a dramatic tabletop spiral decoration, stair garland, or wall-hung display.
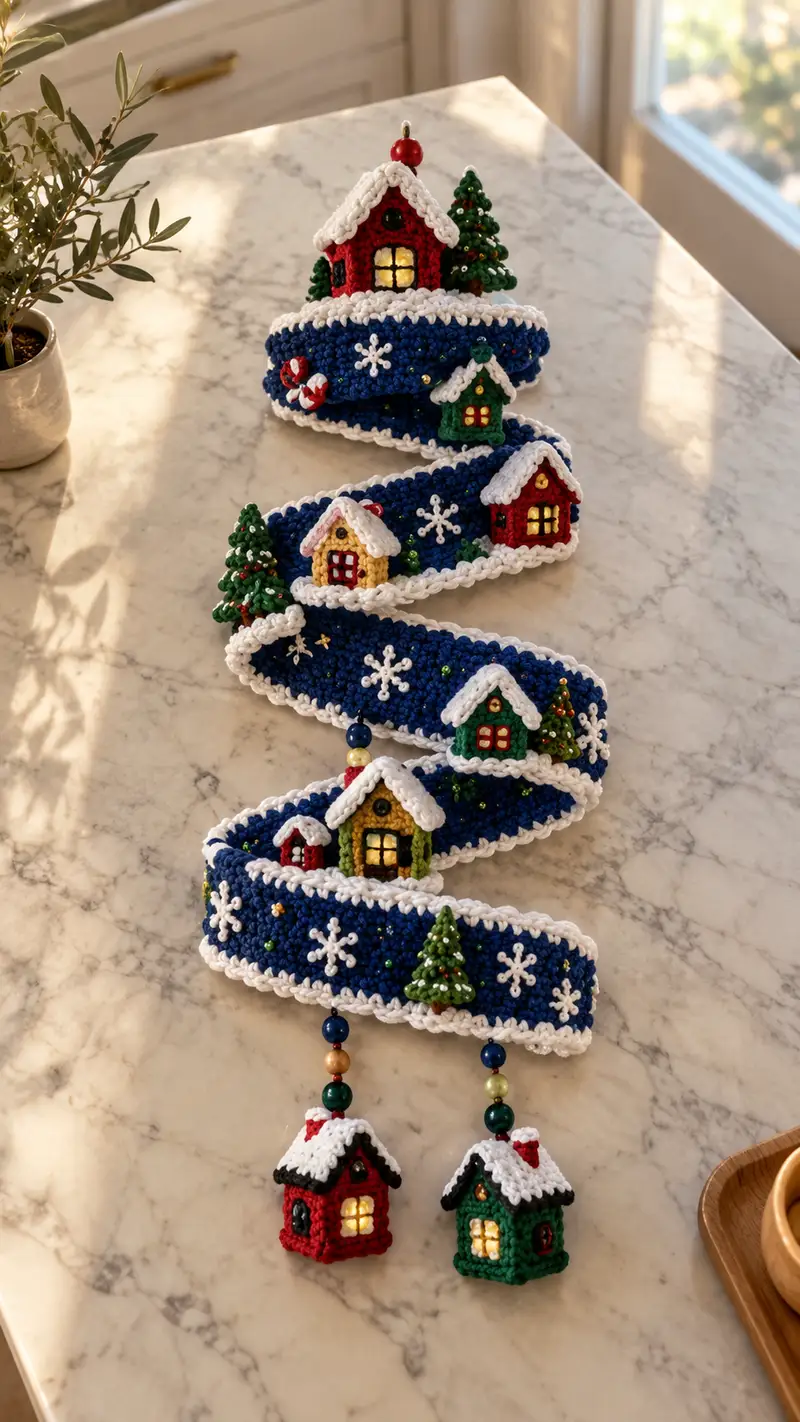
Christmas Spiral Garland Pattern crochet pattern - detailed view of completed project

This design emphasizes modular construction — you make repeating tiny houses and trees and stitch them to the long band, so you can choose how many repeats and how long to make the spiral. The pattern includes bead and wire placement suggestions to keep the spiral shape stable and to create two illuminated dangles.

Why You'll Love This Christmas Spiral Garland Pattern

I love this pattern because it transforms simple stitches into a tiny winter village that feels magical and nostalgic. The deep navy textured band paired with crisp white scallops instantly evokes a snowy night. I especially enjoy the little illuminated houses — tucking in a micro LED makes the garland glow like a miniature holiday scene. The modular approach lets me add or subtract houses to suit any space, and the beaded endings give the whole piece a finished, heirloom feel.

Christmas Spiral Garland Pattern step 1 - construction progress Christmas Spiral Garland Pattern step 2 - assembly progress Christmas Spiral Garland Pattern step 3 - details and accessories Christmas Spiral Garland Pattern step 4 - final assembly and finishing

Switch Things Up

I love how modular this pattern is — you can shorten or lengthen the band easily by changing the foundation chain and simply repeating the texture rows. If you want a slimmer garland, reduce the number of texture rows; for a chunkier look, add extra bobble rows and bigger scallops.

I often customize the village by swapping one or two house colors and adding metallic yarn strands into the scallop edge to catch light. You could also create a woodland version by using brown and cream for houses and adding more tree motifs. For a child's room, replace LEDs with small battery fairy lights and use brighter, pastel yarns.

When I make this pattern again I plan to try a monochrome palette — all-white houses on a pale blue band — for a snowy minimalist look. I also recommend experimenting with placement: cluster houses closer together for a denser town or space them out for a long garland with breathing room between scenes.

Common Mistakes & How to Fix Them

✗ Skipping stitch markers at the beginning of each round can cause misaligned motifs along the band; mark round starts for consistent placement. ✗ Inconsistent tension between rows causes the band to wave or curl; maintain steady tension and slightly tighten at the end of each row if needed. ✗ Not blocking or stretching the band lightly before attaching motifs can make houses sit unevenly; press gently and pin pieces to preview placement. ✗ Attaching houses without stuffing or stabilizing creates flat motifs; lightly stuff and reinforce bases for a consistent 3D appearance. ✗ Not securing bead strings or LED wires before final sewing can lead to accidental slippage; tack beads in place and knot cords securely inside the band. ✗ Working snowflake embroidery with too large a needle can pierce the band yarn and leave holes; use a fine tapestry needle and small stitches. ✗ Forgetting to check beaded tassel symmetry on both ends leads to lopsided hanging houses; assemble both tassels together and compare lengths during making. ✗ Overstuffing tiny houses makes seams bulky and hard to sew; stuff in small increments for shape control and neat joins.
Christmas Spiral Garland Pattern

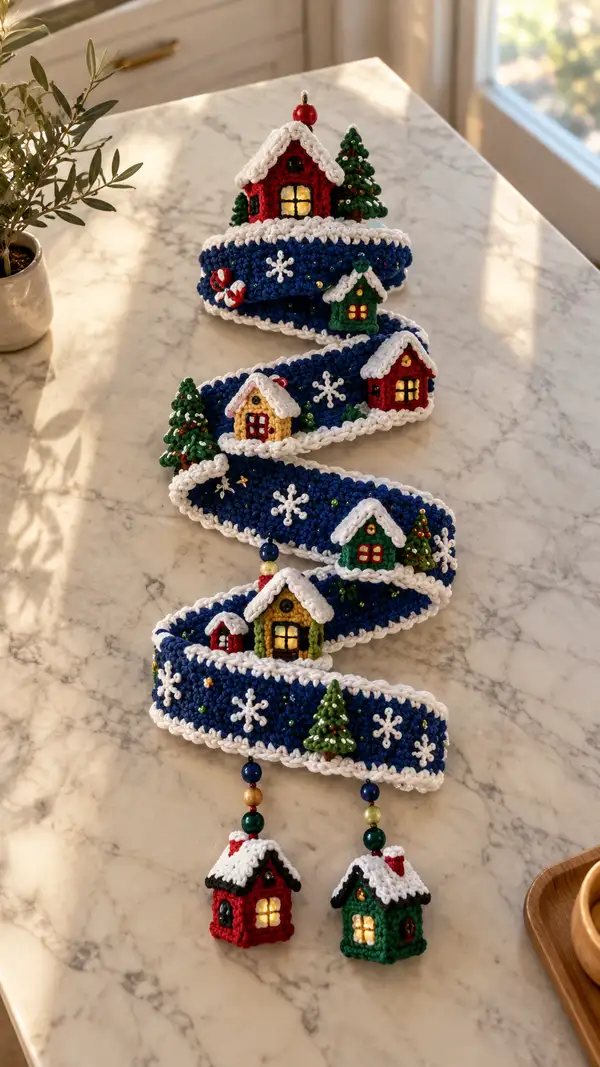
A festive, richly detailed spiral garland inspired by winter village scenes — deep navy textured band edged in snowy white, dotted with tiny crocheted houses, beaded trees, and delicate snowflakes. The long spiral can be wrapped or hung as a cascading decoration, with two illuminated mini houses dangling on beaded strings at the ends. This pattern includes step-by-step instructions for the long textured band, multiple tiny houses, trees, snowflakes, beaded tassels and optional battery LED insertion.

Advanced 8-10 Hours

Materials Needed for Christmas Spiral Garland Pattern

— Main Fabric

  • 01
    Worsted weight yarn (#4), approximately 200-240g in navy blue (main band)
  • 02
    120-140g in white for edging, scallops and snowcaps
  • 03
    40-60g in red for houses and roof details
  • 04
    30-40g in green for evergreen trees and green houses
  • 05
    30-40g in mustard/gold for one house and window frames
  • 06
    Small amounts (10-15g each) in black for roof trim, brown for tree trunks and accent, and pale yellow for window light

— Tools Required

  • 01
    3.5mm (E) crochet hook for main work (recommended for worsted weight for tight fabric)
  • 02
    3.25mm (D) hook for tighter details and small houses
  • 03
    2.75mm (C) hook for very small trims and roof edging (optional)
  • 04
    Small LED micro tea lights (2) or battery micro string lights (optional)
  • 05
    Small round wooden beads and painted beads (approx 12-16 beads in mixed sizes)
  • 06
    Polyester fiberfill stuffing (small amount for each tiny house)
  • 07
    Fine sewing needle / tapestry needle for sewing pieces and embroidery
  • 08
    Stitch markers (at least 6-8) to mark motif placement
  • 09
    Scissors
  • 10
    Pins for assembly and blocking
  • 11
    Fine floral wire (optional) or twist tie for structural shaping in band coils
  • 12
    Beading needle (optional) or thin cord for threading beads
  • 13
    Fabric glue (optional) for extra security for LEDs/beads

Progress Tracker

0% Complete

— Materials & Gauge :

Info :

Gauge is not crucial for this decorative piece, but for consistency make a small swatch: 10 sc x 10 rows = approx 3.5 cm x 3.5 cm using 3.5mm hook and worsted yarn. This helps ensure the tiny houses and trees proportion correctly to the band.

Info :

Make decisions before beginning: decide full band length (pattern sample uses a 230 cm band made of a 200-st foundation chain; adjust chain length proportionally). The band width in sample equals 10 rows of bobble-texture (approx 3.5 cm) plus two rows white scallop edge.

— Spiral Band (Main) :

Info :

This creates the long navy textured band that coils into the spiral. Work flat in rows to desired length then join ends to create a continuous ribbon. We use a staggered bobble cluster to simulate snowfall texture and keep fabric dense.

Foundation :

Ch 200 (or ch desired even number to reach your target length; sample uses ch 200 to produce about 230 cm finished length when blocked and relaxed) (200)

Row 1 :

Working in 2nd ch from hook, 1 sc in each ch across, turn. (199 sc)

Row 2 :

Ch1, 1 sc in each st across (199 sc). Turn. (Work these two rows as tidy base rows to remove stretch.)

Info :

Carry yarn evenly. Keep turning chain ends neat; avoid twisting. Use stitch markers every 20 stitches for counting in later motif placement.

Row 3 (Texture start) :

Ch1, *sc in next 3 sts, bobble in next st; rep from * across, ending with sc in remaining sts, turn. (Approx 159 sc + 40 bobble positions = still 199 sts total but worked as 199 stitch positions)

Row 4 :

Ch1, sc in each st across (199 sc). Turn.

Row 5 :

Repeat Row 3. (199 stitch positions)

Row 6 :

Repeat Row 4. (199 sc)

Info :

Continue alternating bobble texture (Row 3 pattern) with a plain sc row for a dense textured surface. The sample uses a total of 10 texture rows (five bobble rows and five sc rows) to reach the width of the garland band. Adjust width by adding or subtracting texture row repeats in pairs.

Rows 7-12 :

Work Rows 3-6 twice more to reach a total of 12 rows overall including foundation rows (continue pattern: bobble row, sc row, bobble, sc etc.). Maintain 199 stitches each row. (199 st positions)

Row 13 :

Ch1, 1 sc in each st across. Fasten off navy. (199 sc)

Info :

Blocking tip: pin the band flat and gently steam or wet-block to even out stitches before adding white scallop edge. Keep the band slightly tapered if desired so the spiral stacks neatly.

White Scalloped Edge (Make 2 long strips: one for each long edge) :

Join white yarn at one short end corner and work along long edge.

Round 1 :

Attach white yarn with sl st to first side row edge, ch1, sc evenly along long edge placing approx 1 sc for every 2 navy rows along the edge (about 100 sc total per long edge in sample); sl st to first sc to join. (Approx 100 sc)

Round 2 :

Ch1, *skip 1 st, 5 dc in next st (shell), skip 1 st, sl st in next st; rep across to end. Fasten off and repeat on the opposite long edge. This creates scallops that read as snowy trim. (Approx 20-25 shells depending on length)

Info :

If your chain length was different, adjust the scallop frequency: shells spaced evenly to create a consistent look. If shells appear too large, use 4 dc instead of 5 dc per shell.

Edge Join :

Lay band flat with wrong side out and fold in half lengthwise to make a slightly thicker ribbon (optional). Sew a running stitch along the inner length to stabilize if desired, or leave flat if you prefer a single-layer band. For a firm spiral, a light line of floral wire can be slipped or stitched into the inner fold, then covered by sewing through the edges intermittently to trap wire in place.

— Tiny Village House (Make 4 for band; 2 for hanging dangles with small modification) :

Info :

Each tiny house is worked in the round from the base up. Use 3.25mm hook for tighter stitches. The house is small (approx 2.5-3.5 cm tall before roof) and light stuffing is used. We include an interior opening for placing a micro LED in the hanging houses (final dangles) — the houses affixed to band are closed bases with flat backs for gluing/sewing.

Round 1 :

With house base color (sample red/green/mustard), mr, 6 sc in mr. (6)

Round 2 :

6 inc (12)

Round 3 :

(1 sc, inc) x 6 (18)

Round 4 :

(2 sc, inc) x 6 (24)

Round 5 :

(3 sc, inc) x 6 (30)

Round 6 :

(4 sc, inc) x 6 (36)

Info :

These initial increases create a roughly circular footprint. For houses sewn to the band, you want the back slightly flattened—later we'll fold and stitch the back flat for a good glued surface.

Round 7-10 :

1 sc in each st around for 4 rounds to build wall height (36)

Round 11 :

(4 sc, dec) x 6 (30)

Round 12 :

1 sc in each st around (30)

Info :

Window & Door Frame Placement :

Mark a 6-8 stitch wide opening centered on one side for the front window. At Round 8-9 (mid-wall), embroider or surface crochet the window cross using pale yellow for 'glass' panes and a darker color for mullions. For simplicity, embroider small square windows 4 stitches wide by 4 rows high (see embroidery section later). For the small band-houses, you may also crochet a small attached square window separately and sew in place.

Round 13 :

(3 sc, dec) x 6 (24)

Round 14 :

(2 sc, dec) x 6 (18)

Round 15 :

(1 sc, dec) x 6 (12)

Info :

Start stuffing through the top opening as you decrease; stuff firmly but in small amounts to preserve shape. For band-attached houses, stuff lightly so they sit flush against the band.

Round 16 :

6 dec (6)

Round 17 :

Fasten off leaving 15-20 cm tail for sewing base closed and attaching roof. For band houses, flatten the back by folding the last couple of rounds and whip stitch closed so it sits flat against the band; for hanging houses, leave a small opening for LEDs and finish later with removable plug stitch.

— House Roof :

Info :

Roofs are worked separately and sewn on. Use contrasting color (white for snowcap + black for eaves, or white as snow over colored roof). The roof uses short rounds to build a peaked shape with an overhang.

Round 1 :

With roof main color (dark or matching), mr, 6 sc in mr (6)

Round 2 :

6 inc (12)

Round 3 :

(1 sc, inc) x 6 (18)

Round 4 :

1 sc in each st around (18)

Round 5 :

(1 sc, dec) x 6 (12)

Round 6 :

1 sc in each st around (12)

Round 7 :

(1 sc, dec) x 4 then 4 sc even (8) — this creates a tapered top

Info :

To create the overhang, after Round 4, work a row of sc back loops only around the base to create a ridge and then an extra row of sc in same stitches to produce a lip that overhangs the walls slightly. If you prefer a peaked gable roof, make two identical roof halves and sew together along the top seam to form a triangular peak.

Round 8 :

Fasten off leaving a long tail for sewing. Attach roof to top edge of house, centering and overlapping the wall by 2-3 stitches to create eaves. Sew roof to house with neat mattress stitch or whip stitch. For snowy cap, use white yarn and sc evenly along roof edge and work a quick scallop: *sl st, ch2, sl st in same st* to simulate snow drifts.

— House Windows & Embroidery :

Info :

Use pale yellow scrap yarn to create a square 'window light' by surface crochet or cross stitch through the wall rounds centered between Rounds 8-10. For mullions use a darker thin thread or embroidery floss and stitch a cross to divide the window into panes. Sew tiny seed beads as 'light bulbs' in window corners for sparkle.

Technique :

To embroider a 4x4 window: insert needle from inside to outside at lower-left corner, stitch horizontally across 3 stitches, return and stitch vertically up 3 rows to create the pane. Use duplicate stitch for a cleaner square. Secure ends inside and hide tail when sewing roof.

— Mini Hanging House (Dangle) (Make 2) :

Info :

These are slightly modified houses with an interior cavity to accept a tiny LED. Work base identical to tiny house but leave an opening at base for LED removal. Add bead-string loop at top for hanging and beaded segment above as decorative connection to the band.

Round 1 :

mr, 6 sc in mr (6)

Round 2 :

6 inc (12)

Round 3 :

(1 sc, inc) x 6 (18)

Round 4 :

(2 sc, inc) x 6 (24)

Round 5-9 :

1 sc in each st around for 5 rounds to build walls (24)

Info :

At Round 7-8 mark the spot for the front window. For hanging houses, keep top rounds open enough to seat an LED; we will close only partially so LED can be inserted with a removable plug of stitches or with a small button-style closure stitched inside.

Round 10 :

(2 sc, dec) x 6 (18)

Round 11 :

1 sc in each st around (18)

Round 12 :

(1 sc, dec) x 6 (12)

Round 13 :

6 dec (6)

Info :

Stuff lightly, but do not overstuff — the LED must fit. Fasten off leaving 20 cm tail. We will leave a small removable panel at the base: do not sew the final 6 st completely; instead, chain 6 and sl st back to create a loop for the LED power cord if using string lights. For battery micro lights, tuck battery inside the hollow and route wire through bead string to top of tassel.

— Evergreen Tree Motif (Make 6-8) :

Info :

Working in the round to create a small cone-shaped tree with layered branches. Small seed beads sewn on for ornaments. The tree is about 3 cm tall in sample.

Round 1 :

With green, mr, 6 sc in mr (6)

Round 2 :

6 inc (12)

Round 3 :

(1 sc, inc) x 6 (18)

Round 4 :

1 sc around (18)

Round 5 :

(3 sc, inc) x 4 then 2 sc even to shape cone (22) — or work (2 sc, inc) x 6 (24) depending on fullness desired

Round 6 :

Work 1 sc around BLO to create a ridge, then *ch2, sl st in same st* to create tiny branch loops around. (22-24 st positions depending)

Round 7 :

Decrease slightly to tip: (2 sc, dec) x 6 if using 24 sts (18)

Round 8 :

1 sc around (18)

Round 9 :

(1 sc, dec) x 6 (12)

Round 10 :

6 dec (6). Fasten off leaving tail for sewing. Sew small brown trunk as a 3-sc tube or embroider a small trunk on base.

Info :

Sew tiny seed beads onto branches after sewing tree to band. Use a thin beading needle and small stitches to secure beads in place without showing thread on the surface.

— Snowflake Applique (Make 8-10) :

Round 1 :

Ch6, sl st to form ring (6 ch). *Ch6, sl st in ring* three times to create 4 arms total then finish. (Simple picot snowflake)

Round 2 :

Into each ch6 arm: *(sc, ch3, picot (ch3 sl st to same st), sc)* to form decorative tips. Repeat on each arm and fasten off. Block gently and star-shape.

Info :

For a more complex snowflake use a 6-point crocheted motif: mr, ch3, (dc, ch2) x 6, join and then add picot tips. Keep snowflakes small (approx 2.5 cm) to match the band scale.

— Beaded Tassel & Hanging Assembly :

Info :

The two hanging mini houses at the bottom of the spiral hang on beaded tassels. Use mixed round beads (8 mm, 6 mm, 4 mm) to create a visually weighted tassel that pulls the spiral straight. Ensure beads have holes large enough for your beading needle or thin cord.

Step 1 :

Cut a 30 cm strong cord (nylon or thin waxed cotton). Thread beads in desired order, leaving 6-8 cm of cord free at the bottom to attach to the mini house loop. Knot securely between some beads to keep spacing. At top, tie loop for attaching to the band.

Step 2 :

Attach the beaded cord to a small metal eye pin or to a crocheted loop sewn to the band center. Sew a reinforced thread stitch through the top bead and the band to anchor it securely.

Info :

For extra security when inserting LED wires, slip a small length of heat-shrink tubing over the wire and bead string or use a bead with a metal inner core to avoid friction wearing the cord.

— Snowcap & Final White Embellishments :

Info :

Use white yarn to add repeating little snowcaps on houses and a running scallop along the band upper and lower edges as described previously. Also use white to embroider stitched snowflakes and star-like sparkles between motifs. Add small gold or green seed beads for extra sparkle.

Technique :

To add snowcap on a roof peak: sc evenly along roof lower edge in white (1 sc per 2 roof sts), then ch2 sl st in same st to form bubbly snow; repeat every 2 sts for an irregular snowy look.

— Attachment Placement & Spacing :

Info :

Sample placement across 230 cm band: divide band into 6 equal segments. Attach 4 small houses spaced along the upper edge (approx one house every 35-45 cm), add 6 trees between houses, and scatter 8 snowflakes evenly. Reserve the bottom 40-50 cm for two beaded tassels and hanging houses. Use pins to position before sewing.

Step :

Mark positions with removable pins or erasable fabric pen. For each house, pin flat-back to band, check visual spacing, then sew strongly through base and along a short seam to the band. Reinforce each join with 6-8 passes of sewing to withstand handling.

— LED Insertion for Hanging Houses :

Info :

Use small coin cell LED lights or micro battery tea lights sized to sit inside the hollow hanging houses. If using string micro lights, route thin wire up through bead string and anchor battery pack inside a small fabric pocket sewn to back of band or tucked into spiral base near the top.

Step :

Insert LED into the mini house through base opening, test light, then close a removable panel by threading a long tail through base loops to create a drawstring closure or stitch in a small button to fasten. If using single coin LED with a loop, ensure the loop can be removed to change batteries.

— Final Embellishments, Beads & Sequins :

Info :

Sew gold and green seed beads across band in scattered clusters to suggest lights, use metallic thread for extra glow. Apply small red-and-white candy-dot appliques by crocheting tiny 6-st magic ring discs and sewing them onto the band near houses for whimsical detail.

— Finishing Touches :

Info :

Weave in all yarn ends by threading tails through the inside of band rows to hide. Trim any excess. Block lightly once all pieces are sewn on to encourage the spiral to stack evenly. If the spiral needs help holding its shape, stitch a light line of thread or sew-in flexible wire along the inside curve of the band, securing every 4-6 cm.

Care :

Spot clean with damp cloth for minor dirt. Do not submerge if micro LEDs are installed. Remove LED batteries before storage. Store flat, not tightly folded, to preserve shell edging and bobbles.

Assembly Instructions

  • Lay the completed band flat on a large table. Using pins, mark positions for houses and trees ensuring symmetry; sample spacing: four houses spaced evenly along the top half, two beaded tassels at the bottom 40-50 cm.
  • Sew each house onto the band starting at the base: use the long tail and ladder stitch or whip stitch to sew through the band and the house base. Make 6-8 passes to secure each house and reinforce the join through the seam allowance inside the house.
  • Attach evergreen trees between houses using the tail left after fastening off. Sew through the base and a few stitches up the cone to anchor; weave the tail inside the band and knot securely. Add seed beads by stitching through bead holes and back through tree stitches for permanent hold.
  • Sew snowflakes and bead clusters onto the band using a fine tapestry needle and matching thread; keep stitches small and invisible on the front side of the band. Space snowflakes visually — typically 8-10 across the full length works well.
  • Assemble beaded tassels: thread beads onto a thin cord or wire, knot below the last bead, and stitch the cord into the top of a hanging house through its built-in loop. Test LED fit inside the hanging house and route wire through bead string to battery placement area, then anchor the battery pack inside the spiral or beneath a top house.
  • If using wire for structural support inside the band, slip the wire into a small internal channel or sew through the inner fold every 4-6 cm to anchor. Be careful to hide wire ends and wrap them in tape to avoid yarn abrasion.
  • Once all pieces are secured, assemble the spiral by coiling the band gently from one end, using the bead tassels to weigh the bottom. Pin each coil to itself with small hidden stitches if you want a permanent spiral, or leave free for adjustable display.
  • Weave in all loose ends, trim threads, and check each applique and bead for stability. Replace batteries in LED lights and verify illumination before final display.

Important Notes

  • 💡Use stitch markers consistently at the beginning of each row or round to avoid counting errors and maintain proper shaping.
  • 💡Stuff house pieces gradually in small amounts; overstuffing makes seams bulky and harder to sew to the band.
  • 💡When placing safety lights, test the lights before permanently closing a house opening; use a removable closure for easy battery access.
  • 💡Maintain consistent tension across large flat bands; slightly tighten the last stitch of long rows to prevent waving edges.
  • 💡Pin all motifs before sewing to ensure even spacing and visual balance along the band.
  • 💡For a stable spiral, consider inserting a flexible craft wire into an internal channel sewn along the inner edge to help hold circular coils.
  • 💡Use a smaller hook for tiny motifs and houses to ensure no stuffing shows and to create crisp stitches.
  • 💡When sewing beads or embellishments, knot and secure threads inside the band or motifs to prevent loosening during handling.

You did it — your miniature winter village spiral garland is complete and ready to glow. Each stitched house, snowy scallop and beaded tree brings a cozy storybook warmth to your holiday decor. Tucking micro LEDs into the hanging houses adds a magical nighttime glow that makes the garland feel like a tiny town tucked in fresh snow. 🎄✨ Display it on a table, hang it down a banister, or coil it as a seasonal centerpiece — this piece will charm for years. Happy stitching and warm holiday cheer! 🧶

You ask,

we answer.

FAQs

What is the finished size of this garland?

Using the sample chain length (ch 200) and recommended yarn/hook, the band measures about 220-240 cm long and about 3.5-4 cm wide. The spiral height depends on how tightly you coil it; sample photo shows about 90 cm stacked height when coiled loosely. Adjust chain length proportionally for a shorter or longer garland.

Can I use different yarn weights for this pattern?

Yes — lighter yarn with a smaller hook will create a more delicate garland while thicker yarn will make a chunkier, more substantial band. When switching weights, change hook size appropriately (often 1-2 sizes down from the yarn label for amigurumi-style firmness) and adjust motif counts if needed to maintain proportionality.

Do I need special beads or LEDs?

No specific brand is required, but ensure bead holes fit your cord and LED wires. For LEDs, choose micro coin tea lights or micro string lights that fit inside the mini houses. Test fit before permanently sewing any openings closed.

How much stuffing do I need for the tiny houses?

Just a small pinch — each tiny house uses only a few grams of fiberfill. Overall you will need approximately 30-50 g total for all houses combined; distribute stuffing gradually to keep shapes neat.

Can I make the spiral poseable?

Yes — insert flexible craft wire or thin floral wire along the inner edge of the band and stitch into place. This allows you to shape the spiral and helps it hold vertical coils. Make sure wire ends are wrapped to prevent yarn abrasion.

What if my stitch count is off?

Stop and unravel to the last correct row if stitch counts are off. Attempting to compensate in later rows usually creates irregular edges. Use stitch markers and row counters to help keep track.

Can I wash this garland?

Spot clean gently. If no LEDs are in place and beads are secured, you can hand-wash very gently in cool water. Air-dry flat and reshape scallops while damp. Avoid machine washing as beads and trims may be damaged.

How can I customize the color theme?

Easily! Swap navy for deep forest green for a different night-sky mood, or use more neutral greys and creams for a vintage look. Change house colors and bead choices to match your holiday palette.
