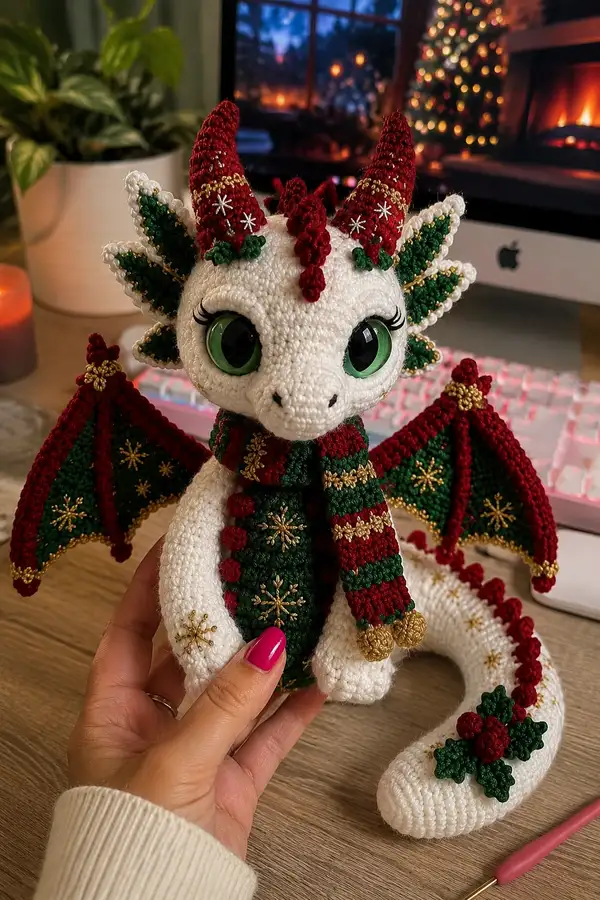
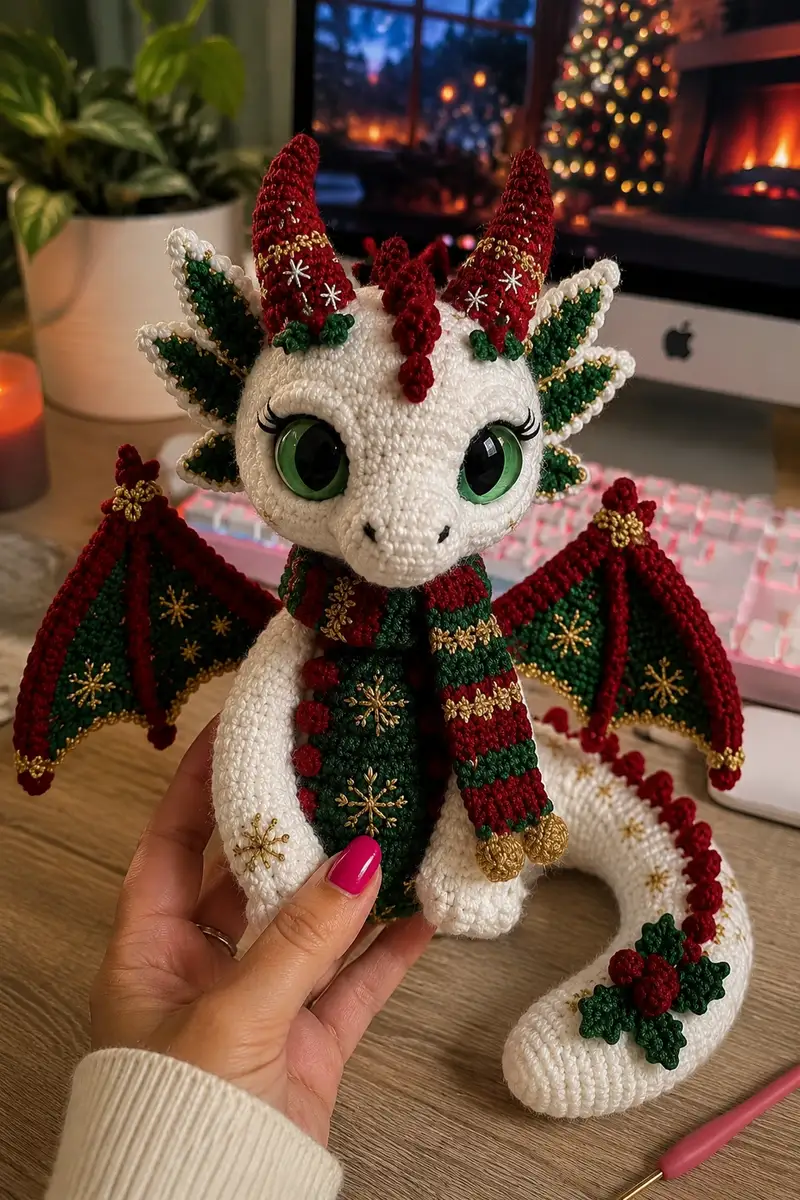
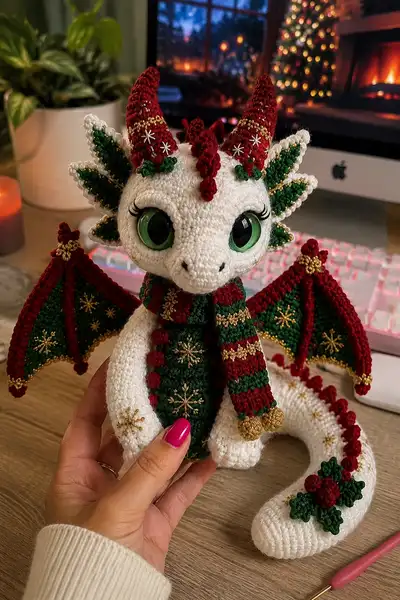
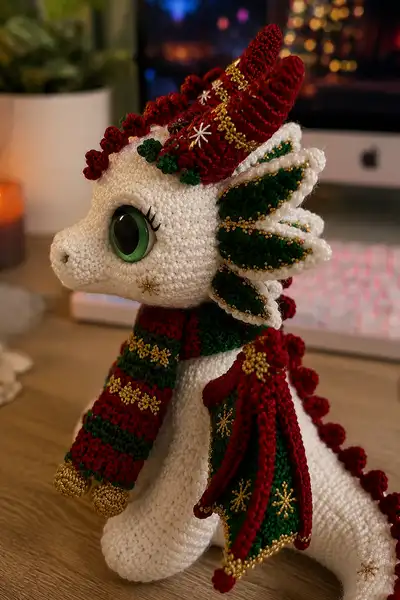
Create a charming holiday dragon plush with bright green eyes, layered white-and-green frilled fins, curled red horns, and a striped red/green scarf trimmed in gold. This pattern uses textured stitches, simple embroidery, and bead accents to recreate the elegant seasonal details shown in the photos. Designed to be poseable and richly detailed, this dragon makes a memorable gift or holiday decoration.
Progress Tracker
0% Complete
— Head :
Round 1 :
6 sc in magic ring (6)
Round 3 :
(1 sc, inc) x 6 (18)
Round 4 :
(2 sc, inc) x 6 (24)
Round 5 :
(3 sc, inc) x 6 (30)
Round 6 :
(4 sc, inc) x 6 (36)
Round 7 :
(5 sc, inc) x 6 (42)
Round 8 :
(6 sc, inc) x 6 (48)
Round 9-12 :
1 sc in each st (48) — build height and roundness
Info :
Place large safety eyes between rounds 13-14; measure horizontally ~12-14 stitches apart center-to-center depending on eye size (for 22mm eyes choose 12 sts between centers). Mark placement with pins before inserting eyes.
Round 13 :
1 sc in each st (48)
Round 14 :
1 sc in each st (48)
Info :
At this point add eyelashes or felt eyelids if desired. Insert safety eyes and backings now before continuing to stuff — you cannot reposition them later.
Round 15 :
(6 sc, dec) x 6 (42)
Round 16 :
1 sc in each st (42)
Round 17 :
(5 sc, dec) x 6 (36)
Round 18 :
1 sc in each st (36)
Info :
Start stuffing head firmly but evenly. Use small amounts of fiberfill and press into shape with a stuffing tool or blunt pencil. Continue stuffing more as you decrease.
Round 19 :
(4 sc, dec) x 6 (30)
Round 20 :
(3 sc, dec) x 6 (24)
Round 21 :
(2 sc, dec) x 6 (18)
Round 22 :
(1 sc, dec) x 6 (12)
Info :
Fasten off leaving a 20-25 cm tail for sewing. Finish stuffing through opening then close with invisible decrease or ladder stitch. The front snout is formed in a separate muzzle piece to preserve eye placement.
Round 24 :
Using white yarn, make a separate Muzzle (work flat in Rounds then sew): ch 2, 6 sc in 2nd ch from hook (6)
Round 26 :
(1 sc, inc) x 6 (18)
Round 27 :
(2 sc, inc) x 6 (24)
Round 28 :
1 sc in each st (24)
Info :
Sculpt snout by folding the flat muzzle piece in half, sewing the bottom seam to make a rounded nose shape. When attaching, align the muzzle under the eyes and sew securely using a mattress stitch for an invisible seam.
Round 29 :
Embroider nostrils with black yarn: run two 3-4 mm horizontal satin stitches on the muzzle top centered just under eye line. Secure tails and weave in.
Round 30 :
Add small face embroidery details: 5 mm gold snowflake to cheek using metallic thread (see embroidery Info below)
Info :
To make the gold snowflake, use metallic thread and a stranded star stitch: bring thread up through the fabric center, make six straight stitches radiating 6-7 mm, then add short cross stitches between to create the detailed snowflake. Tie and weave tail inside head.
— Neck and Collar :
Round 1 :
Join white yarn to bottom of head opening and pick up 12 stitches around opening to form neck ring (12)
Round 2 :
1 sc in each st (12)
Round 4-6 :
1 sc in each st (18)
Info :
If you plan to insert wire for a poseable neck, insert a wrapped and capped piece now and crochet around it so it is centered. Otherwise leave neck flexible for sewing into body.
Round 7 :
(2 sc, inc) x 6 (24)
Round 8 :
1 sc in each st (24) — finish neck height
Info :
Fasten off leaving long tail for sewing the head to the body later. We will attach horns, crest, and frills before final assembly for secure positioning.
— Horns (Make 2) :
Round 1 :
Using red yarn, 6 sc in magic ring (6)
Round 3 :
(1 sc, inc) x 6 (18)
Round 4 :
1 sc in each st (18)
Round 5 :
(2 sc, dec) x 6 (12) — beginning taper
Round 6-8 :
1 sc in each st (12) — work even to build horn length
Round 9 :
(1 sc, dec) x 4 (8)
Round 10 :
1 sc in each st (8)
Round 12 :
1 sc in each st (4)
Round 13 :
Fasten off leaving long tail. Sew onto top of head at symmetric positions. For a curled look stuff lightly and shape before final sewing.
Info :
To make the horn ridges visible like the photo, after finishing horn, work FLO single crochet rows in spiral: join to base and work 3-4 rows of sc in FLO only to give a ribbed texture. Then embroider gold bands where pictured using metallic thread.
— Crest (Row of small spikes down head) :
Round 1 :
Using red yarn, ch 12, sc in 2nd ch from hook and across (11)
Round 2 :
Turn work and sc across (11) — form a narrow strip
Round 3 :
Make bobble edging: (ch 2, bp in next st, sc next) across to end. Fasten off and sew strip down the head center between horns, overlapping slightly with horns' bases
Info :
Bobble stitch (bp): yarn over, insert, pull up loop 3 times (5 loops on hook), yarn over and pull through all loops, ch 1 to secure. Space bobbles at every second stitch to match reference photo density.
— Frilled Ears/Side Fins (Make 6 pieces: 3 per side layered) :
Round 1 :
Using green yarn, ch 6, sc in 2nd ch from hook and across (5)
Round 2 :
Turn, inc in first st, 1 sc in next 3 sts, inc in last st (7)
Round 3 :
Turn, (1 sc, inc) across to last st, 1 sc (10)
Round 4 :
1 sc in each st (10)
Round 5 :
Switch to white yarn — 1 sc in each st BLO to form a crisp edge (10)
Round 6 :
Work picot edge along outer edge for ruffled look: *(ch 3, sl st in top of last sc), sc next* across. Fasten off leaving tail to sew layers in staggered placement on head.
Info :
Make 3 sizes: small (rounds 1-6 as above), medium (add one extra even round before white edging), and large (add two extra even rounds). This creates the layered effect seen in the photo: three fins per side stacked largest at the back.
Round 7 :
Sew green center pieces into white edged layers, then pin them to the head sides starting behind the eyes. Space them approximately 6-8 stitches apart vertically and sew through head rounds 10-16 area.
Info :
Stitch gold beadwork down the center of each fin: using metallic thread and small seed beads, stitch a line of beads across the fin center then tack several star-shaped stitches to mimic the gold line detail visible in photos.
— Body :
Round 1 :
6 sc in magic ring (6)
Round 3 :
(1 sc, inc) x 6 (18)
Round 4 :
(2 sc, inc) x 6 (24)
Round 5 :
(3 sc, inc) x 6 (30)
Round 6 :
(4 sc, inc) x 6 (36)
Round 7-10 :
1 sc in each st (36)
Info :
If adding a striped chest panel or colorwork, change to green for a vertical or inset panel now. The sample uses a green chest with gold embroidery; plan the chest placement before stuffing.
Round 11 :
(5 sc, inc) x 6 (42)
Round 12-18 :
1 sc in each st (42) — work even to create torso height
Info :
Begin stuffing the body from the bottom slowly — aim for medium-firm stuffing so the dragon sits upright but remains soft. Stuff after about 5 even rounds to make shaping easier.
Round 19 :
(5 sc, dec) x 6 (36)
Round 20 :
(4 sc, dec) x 6 (30)
Round 21 :
(3 sc, dec) x 6 (24)
Round 22 :
(2 sc, dec) x 6 (18)
Round 23 :
1 sc in each st (18) — leave top opening large enough to sew the neck in later
Info :
Fasten off and leave long tail. Ensure body is firmly stuffed at the base so legs attach cleanly. If you prefer a weighted bottom, add a small bag of glass beads inside the lower rounds before closing, wrapped inside fabric to keep beads from shifting.
— Arms (Make 2) :
Round 1 :
6 sc in magic ring (6)
Round 3 :
(1 sc, inc) x 6 (18)
Round 4-6 :
1 sc in each st (18) — form hand/paw base
Round 7 :
(2 sc, dec) x 4 + 2 sc (14) — shape wrist
Round 8-12 :
1 sc in each st (14) — build forearm
Round 9-Info :
Stuff paw/hand firmly to give a rounded look; stuff further up the arm more lightly so it bends naturally when sewn to body.
Round 13 :
(1 sc, dec) x 4 + 2 sc (10) — taper to shoulder
Round 14-16 :
1 sc in each st (10)
Round 17 :
Fasten off leaving long tail for sewing. Repeat for second arm.
Info :
Optional: insert thin wire to the center of the arm before final stuffing if you want poseable arms. Bend wire ends and wrap in tape so they do not poke through stuffing.
— Legs (Make 2) :
Round 1 :
6 sc in magic ring (6)
Round 3 :
(1 sc, inc) x 6 (18)
Round 4 :
(2 sc, inc) x 6 (24)
Round 5-6 :
1 sc in each st (24)
Round 7 :
(3 sc, inc) x 6 (30) — build foot width
Round 8-12 :
1 sc in each st (30) — lengthen foot
Round 9 :
(3 sc, dec) x 6 (24) — curve heel
Round 10-16 :
1 sc in each st (24) — build lower leg
Round 11 :
(2 sc, dec) x 6 (18)
Round 12 :
1 sc in each st (18)
Round 13 :
(1 sc, dec) x 6 (12)
Round 14 :
1 sc in each st (12)
Round 15 :
Fasten off leaving long tail for sewing. Make second leg symmetrically. Stuff foot firmly and leg slightly less to allow a sitting pose.
Info :
Sew legs to the base of the body, spacing them roughly 10-12 stitches apart and aligning to the bottom rounds so the dragon sits with a slight forward lean. Reinforce seam with multiple passes if needed for stability.
— Tail :
Round 1 :
6 sc in magic ring (6)
Round 3 :
(1 sc, inc) x 6 (18)
Round 4-6 :
1 sc in each st (18)
Round 7 :
(2 sc, dec) x 4 + 2 sc (14) — begin taper
Round 8-12 :
1 sc in each st (14)
Round 9 :
(1 sc, dec) x 4 + 2 sc (10)
Round 10-18 :
1 sc in each st (10) — lengthen tail to desired curve
Round 19 :
(1 sc, dec) x 2 + 2 sc (8)
Round 20 :
1 sc in each st (8)
Round 21 :
Fasten off leaving long tail. Stuff tail firmly and shape a gentle curve. Sew tail to body back centered at lower rounds; position tip to curl over lap.
Info :
To get the pronounced curve like the photo, add a thin wire along the inner curve before stuffing and zip tie or tape the wire ends to prevent poking out. Then stuff around the wire for shape retention.
— Tail Spines (Make 10) :
Round 1 :
Using red yarn, ch 3, 3 sc in 2nd ch from hook and last ch (3)
Round 3 :
1 sc in each st (6)
Round 4 :
Fasten off leaving tail. Sew spines along tail top spaced about 6-8 sts apart. Add bobble edging in red along tail side to mimic photo's scalloped spine.
Info :
Alternate small and slightly larger spines near the tail base for a natural taper. Secure each spine with strong stitches and weave tails into surrounding stitches.
— Wings (Make 2) :
Wing Panel Round 1 :
With green yarn ch 15, sc in 2nd ch from hook and across (14)
Round 2 :
Turn and inc in first and last st, sc across (16)
Round 3 :
Turn, (2 sc, inc) across to last two sts, 2 sc (20)
Round 4-6 :
1 sc in each st (20) — build the curved membrane
Info :
Work both wing membranes the same; the green fabric will be bordered by red ribs. Add gold seed bead embroidery across the green panel now: stitch small starbursts using metallic thread, securing beads at the star centers.
Round 7 :
Change to red yarn. Join to outer edge and work sc in each st around to form border (approx 44 sts depending on increases) — this forms the wing edge.
Round 8 :
Work 2 more rows sc around in red to get a thick rim (44)
Round 9 :
Form wing ribs: join red at base and ch 16, sl st back along chain to create a rib. Make 3 ribs spaced across wing by distributing them evenly (3 ribs per wing). Fasten off but leave tails to sew ribs to both sides.
Round 10 :
Edge finishing: with gold thread, sc around edge in slip-stitch spaced pattern: *(sc, ch1, sl st) across edge* to create a beaded look. Add a gold bead every 6th st by pulling bead onto metallic thread before stitching and tacking in place.
Info :
Sew wing base to body at rounds 12-16 on the sides. Pin first and ensure wing orientation is slightly forward and curved to match the reference. Reinforce base with multiple passes of stitching.
Round 11 :
For the wing underside, join white and work sc in FLO around the inner curve to create a crisp white lining that matches head frills. Fasten off and weave ends.
Info :
Add the red scalloped trim along the outer wing edge by working shells: *(5 dc in next st, sl st in next)* to create triangles; tack each shell with a small gold bead for the center highlight seen in the photo.
— Scarf (worked flat then sewn) :
Row 1 :
With red yarn ch 60 (or desired scarf length), sc in 2nd ch from hook and across (59)
Row 2 :
Change to green yarn. Turn and sc across (59)
Rows 3-12 :
Alternate 2 rows red, 2 rows green to create stripe pattern until scarf width reaches approximately 10-12 rows. Work all rows in sc for dense fabric.
Info :
Add metallic gold embroidered snowflake patterns across the scarf using star stitches. Work a gold bobble at each end by winding metallic thread in rounds and tack down with thread to create the golden pom-poms seen in photo.
Row 13 :
Create fringe/pom-poms: at both ends, make small gold round bobbles: make 6 sc in magic ring, close and sew to scarf ends. Sew small red pom-pom loops on alternating rows for decorative bumps.
Info :
Wrap scarf around neck and tack discreetly to the neck base with a few stitches to keep it from sliding. Be careful not to distort the neck seam when stitching through multiple layers.
— Holly Applique (Make 2 leaf clusters) :
Leaf Round 1 :
With green yarn ch 6, sc in 2nd ch from hook, hdc next, dc next, hdc next, sc last (5) — form leaf shape
Round 2 :
Work picot edge along outer curve with white yarn (optional) to mimic frosty edging in photo. Make 3 leaves per cluster and sew together in a fan shape.
Berries :
Using red yarn, 6 sc in magic ring, tighten and fasten off leaving tail to sew to leaf cluster center. Make three berries and stitch them to the leaves with strong stitches.
Info :
Sew holly clusters to tail and near scarf shoulder. Add a small gold embroidered star over the holly cluster for a festive flourish.
— Decorative Embroidery and Beading :
Info :
Use metallic gold thread to stitch small snowflakes across the wings, chest panel and tail. Typical snowflake: stitch 6 spokes radiating from a center, then add small bar stitches between spokes and a bead in center. Secure thread with hidden knots and weave tails through inside of body before trimming.
Info :
Seed beads can be tacked in place with metallic thread for the wing edge. String bead on thin thread, pass through wing edge and back to secure, then catch thread inside wing and knot. Weave thread ends back inside wing before trimming.
— Final Assembly :
Info :
Pin all major pieces (head, arms, legs, wings, tail) before sewing. Check symmetry and orientation carefully and mark with pins where each piece will be attached (head centered, wings on side panels, legs evenly spaced).
Step :
Sew head to body using a strong ladder stitch through the neck rounds; use the head tail left earlier and make 20-30 small stitches evenly around the neck to distribute stress.
Step :
Sew arms to body sides at approximately rounds 14-16 of the torso. Use the arm tails and stitch through both arm and body fabric, then weave ends inside the body to hide them.
Step :
Attach wings to the upper side body at rounds 12-16; reinforce with extra passes and sew ribs to the wing base to hold shape. Add a hidden stitch through wing and body seam for longevity.
Step :
Sew tail to the rear lower center of the body so the tip curls around the side or front. Attach tail spines along top. Sew holly applique onto tail middle as shown in the photo.
Info :
Weave all loose yarn tails into the stuffed body and trim flush. If sewing beads or metallic thread, reinforce each knot and hide ends by tucking them inside the body for a neat finish.
Finishing :
Add small touches: a tiny stitched mouth in black, blush applied very lightly with pastel chalks sealed with fabric medium if desired, and final brushing of fuzzy edges to match the photograph's tidy surface.
Info :
Check eyes, beads and any small decorations to ensure they are secure for intended recipient — use embroidered eyes instead of safety eyes for a toy intended for small children.
This festive dragon brings whimsical holiday charm with every stitch — from gold-splashed wings to a candy-striped scarf and holly-trimmed tail. Each carefully placed bead and embroidered snowflake makes this plush feel like a tiny winter heirloom. I hope your finished dragon becomes a treasured seasonal keepsake and a joyful addition to your holiday decor. 🧶✨🎄