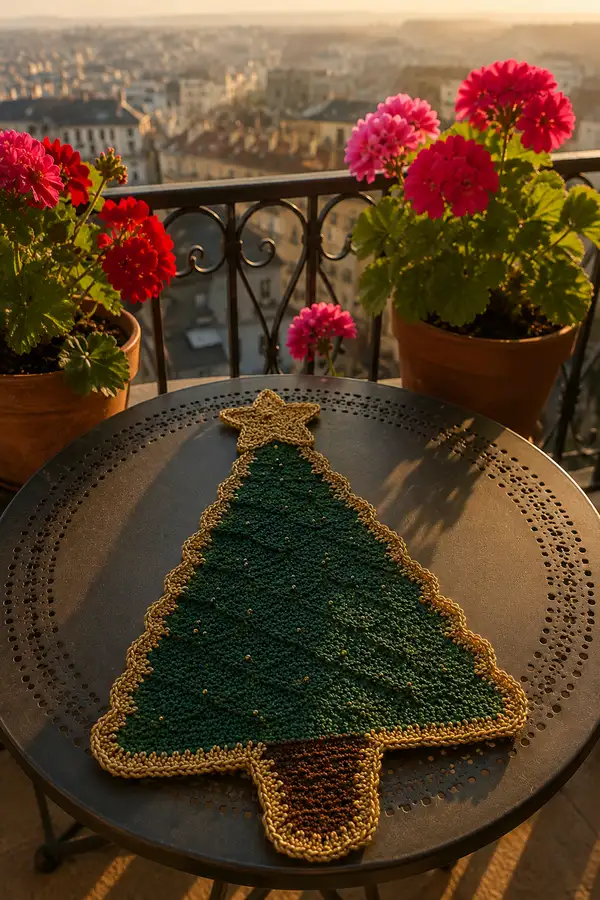
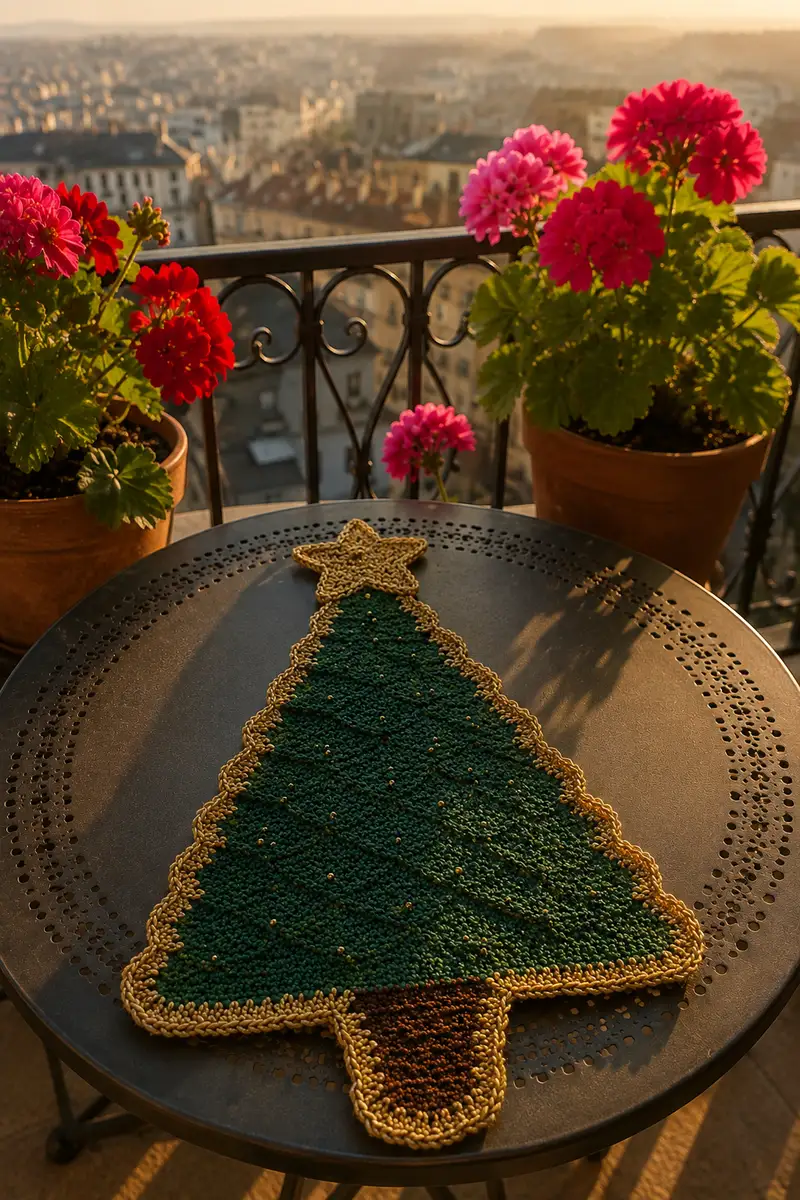
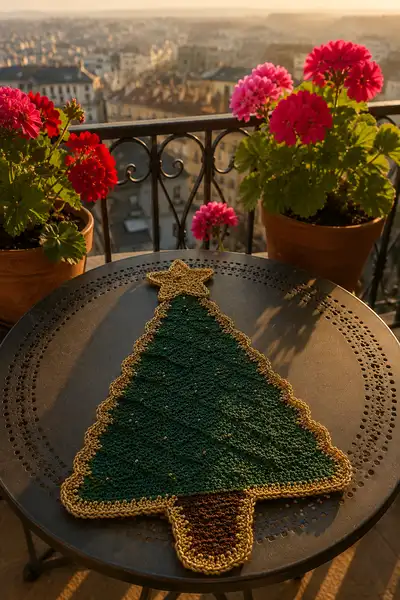
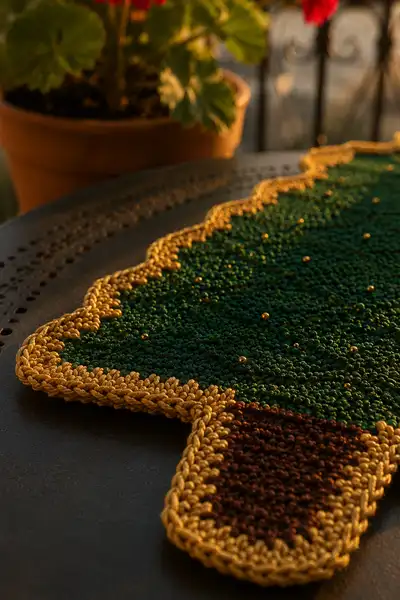
Create a festive, flat crochet table runner shaped like a classic Christmas tree topped with a golden star. This elegant runner features a deep green textured body, metallic-gold scalloped edging, a brown trunk, and tiny gold bead “ornaments” sewn into the surface for shimmer. Designed to lie flat on a table or shelf, this pattern uses simple stitches with careful shaping to create neat triangular form and decorative star topper. A warm seasonal accent to brighten any holiday display.
Progress Tracker
0% Complete
— Head (Golden Star Top) :
Round 1 :
5 sc in magic ring (5)
Round 2 :
Inc in each st around (10)
Round 3 :
(1 sc, inc) x 5 (15)
Round 4 :
(2 sc, inc) x 5 (20)
Info :
Switch to metallic gold yarn if not using it from start. Work the star in a slightly tighter gauge for crisp points. Keep stitches close together for a flat motif.
Round 5 :
(3 sc, inc) x 5 (25)
Round 6 :
1 sc in each st (25)
Round 7 :
(4 sc, inc) x 5 (30)
Round 8 :
1 sc in each st (30)
Info :
We will form the five points by working short shaped wedges off the pentagon base. Attach marker at the first stitch of the next round to identify the starting point for point 1.
Round 9 :
[Ch 1, turn work 90 degrees to the next wedge location] Join yarn with sl st to stitch 1 of wedge location, ch 3, 2 dc in same st, ch 2, sl st in same st to form a small picot-turn base (counts not added to main body)
Round 10 :
Working back into the round base only: sc around the pentagon edge for 30 sts
Round 11 :
Prepare for point 1: ch 1, work in the next 6 stitches: (sc, hdc, dc, dc, hdc, sc) stopping at the base point. Fasten off point with sl st back into pentagon base
Round 12 :
Move 6 sts along pentagon edge to next point position and repeat point shaping (sc, hdc, dc, dc, hdc, sc) — work this same point shaping five times total creating five identical points (no stitch count change for central pentagon)
Info :
Each point is worked over a 6-st wedge from the pentagon base. Points are worked in the same round pattern to preserve symmetry. Keep points lightly stuffed with a tiny bit of fiberfill as you finish each point for a gentle relief rather than full 3D padding.
Round 13 :
After completing five points, with metallic yarn, work 1 sc evenly around entire star edge (approx 60 sc depending on joins) to smooth edges
Round 14 :
(BLO) 1 sc in each st around to create a defined ridge (same count)
Round 15 :
Map decorative ridges: *(sl st in next st, ch 3, sl st in next st)* around to create small loops at points and along edges (approx 30 loops)
Round 16 :
1 sc in each st around to hide loops and flatten (same count)
Info :
Fasten off leaving a 20-25cm tail for sewing the star to the tree tip. Weave yarn tail through star back for neat finish. Lightly stuff each point as you sew the star closed; star should remain relatively flat.
Round 17 :
Trim any uneven loops and add a final round of sc in FLO to produce a slight raised edge across star surface (same count)
Round 18 :
Optional: Embellish star with small metallic thread embroidery lines from center to point tips (no stitch changes)
Round 19 :
Optional: Sew 5 small metallic beads at the tip of each point for extra sparkle
Round 20 :
Lightly block the star to open the points and flatten. Use pins and a low-heat steam if needed
Info :
Star total rounds reflect modular shaping rather than strict stitch-count arithmetic — concentrate on symmetry and flatness. Ends will be woven into the back for a tidy join later.
Round 21 :
With metallic yarn, make a finishing round of crab stitch (reverse sc) around the star edge for a braided look
Round 22 :
Fasten off; weave ends through the back of the star, leaving a long tail for sewing to the tree
Round 23 :
If desired, add a small backing circle worked in sc to stabilize a sewn join (approx 20 sc in magic ring, 2 rounds)
Round 24 :
Fasten off, weave ends
Round 25 :
Optional gold highlight round: surface slip-stitch in a contrasting gold shade along point edges (no stitch count)
Round 26 :
Final check for symmetry; block lightly to shape points flat
Round 27 :
Stitch a secure couching thread on the star back at the base center to create a neat sew-on point (no count)
Round 28 :
Star complete. Fasten off and secure all tails for sewing later
— Body (Tree Triangle) :
Round 1 :
3 sc in magic ring (3)
Round 2 :
Inc in each st around (6)
Round 3 :
(1 sc, inc) x 3 (9)
Round 4 :
(2 sc, inc) x 3 (12)
Info :
This triangular growth method creates three increases per round, producing a 3-sided triangular expansion ideal for a stylized tree. Keep stitch markers at the three increase points so you can see the triangle corners.
Round 5 :
(3 sc, inc) x 3 (15)
Round 6 :
1 sc in each st around (15)
Round 7 :
(4 sc, inc) x 3 (18)
Round 8 :
1 sc in each st around (18)
Round 9 :
(5 sc, inc) x 3 (21)
Info :
Attach small stitch markers at the three increase stitches (these mark the three triangle points). If you want a more rounded triangle, use hdc or alternate sc/hdc rounds for a gentler slope.
Round 10 :
1 sc in each st around (21)
Round 11 :
(6 sc, inc) x 3 (24)
Round 12 :
1 sc in each st around (24)
Round 13 :
(7 sc, inc) x 3 (27)
Round 14 :
1 sc in each st around (27)
Round 15 :
(8 sc, inc) x 3 (30)
Info :
After round 15 the piece is broad enough to start adding decorative diagonal ridges (ornament garlands). We'll create a textured lattice with front post stitches every 6 rounds to mimic garland lines.
Round 16 :
1 sc in each st around (30)
Round 17 :
(9 sc, inc) x 3 (33)
Round 18 :
1 sc in each st around (33)
Round 19 :
(10 sc, inc) x 3 (36)
Round 20 :
1 sc in each st around (36)
Info :
To create the small ornament placement nodes, we will add surface slip-stitch diagonal lines every 6 rounds. Mark the diagonal starting stitch on the fourth round and repeat every 6th round to keep even spacing.
Round 21 :
(11 sc, inc) x 3 (39)
Round 22 :
1 sc in each st around (39)
Round 23 :
(12 sc, inc) x 3 (42)
Round 24 :
1 sc in each st around (42)
Round 25 :
(13 sc, inc) x 3 (45)
Round 26 :
1 sc in each st around (45)
Info :
Begin carrying bead placement: plan small gold bead 'ornaments' roughly every 8-12 stitches along diagonal surface lines. Use a beading needle and thread to sew beads after tree body is finished and blocked.
Round 27 :
(14 sc, inc) x 3 (48)
Round 28 :
1 sc in each st around (48)
Round 29 :
(15 sc, inc) x 3 (51)
Round 30 :
1 sc in each st around (51)
Round 31 :
(16 sc, inc) x 3 (54)
Round 32 :
1 sc in each st around (54)
Info :
At this stage the tree is taking a recognisable triangle shape. If you want a larger or smaller tree, continue the same increase rhythm until reaching desired width. Count stitches at corners to ensure even growth.
Round 33 :
(17 sc, inc) x 3 (57)
Round 34 :
1 sc in each st around (57)
Round 35 :
(18 sc, inc) x 3 (60)
Round 36 :
1 sc in each st around (60)
Round 37 :
(19 sc, inc) x 3 (63)
Round 38 :
1 sc in each st around (63)
Info :
To create the subtle scalloped texture on the tree surface (seen as tiny bumps), alternate small bobble-like stitches by working single crochet clusters every 6th stitch in the body rounds (see the bobble instruction below).
Round 39 :
(20 sc, inc) x 3 (66)
Round 40 :
1 sc in each st around (66)
Round 41 :
(21 sc, inc) x 3 (69)
Round 42 :
1 sc in each st around (69)
Round 43 :
(22 sc, inc) x 3 (72)
Round 44 :
1 sc in each st around (72)
Info :
Bobble stitch (mini ornament texture): in chosen rounds work *yo, insert hook, pull up loop, yo, insert, pull up loop three times, yo and pull through all 7 loops, ch 1 to secure* — this creates a tiny raised bump on the flat fabric. Place bobbles at symmetrical intervals along row surfaces every 8-10 stitches.
Round 45 :
(23 sc, inc) x 3 (75)
Round 46 :
1 sc in each st around (75)
Round 47 :
(24 sc, inc) x 3 (78)
Round 48 :
1 sc in each st around (78)
Round 49 :
(25 sc, inc) x 3 (81)
Round 50 :
1 sc in each st around (81)
Info :
By round 50 the tree should be approaching the intended width for a small table runner. If you prefer a longer runner, continue increasing in the same rhythm. Keep the piece flat by checking the perimeter frequently and blocking if slight cupping appears.
Round 51 :
(26 sc, inc) x 3 (84)
Round 52 :
1 sc in each st around (84)
Round 53 :
(27 sc, inc) x 3 (87)
Round 54 :
1 sc in each st around (87)
Round 55 :
(28 sc, inc) x 3 (90)
Round 56 :
1 sc in each st around (90)
Info :
Before you reach the final size, plan where you want the trunk to join the bottom center. Place a removable marker at the intended trunk join area (center of one triangle edge) — we will leave this area unworked for an exact seam with the trunk later if desired.
Round 57 :
(29 sc, inc) x 3 (93)
Round 58 :
1 sc in each st around (93)
Round 59 :
(30 sc, inc) x 3 (96)
Round 60 :
1 sc in each st around (96)
Info :
Tree body complete at round 60. Fasten off leaving a 50cm tail for sewing the trunk and star. Block the flat tree on a blocking board to open the stitches and flatten the triangle before adding border and beads.
— Arms (Beaded Garlands — Make 2 long garlands) :
Round 1 :
Ch 21, sl st in 2nd ch from hook and each ch across to make a short chain rope (20 sl st)
Round 2 :
Join to a small cord: ch 1, 1 sc across 20 sts (20)
Round 3 :
1 sc in each st (20)
Round 4 :
1 sc in each st (20)
Info :
These short garlands mimic the diagonal ornament lines across the tree. You will make two and sew them on in gentle diagonals across the tree body before attaching beads.
Round 5 :
Work one round of hdc in each st for a slightly raised garland (20)
Round 6 :
Fasten off leaving long tail for sewing. Repeat to make a second garland. If you prefer longer garlands, chain more stitches initially.
Round 7 :
Optional: Add tiny picots along garland edge by adding *(sc, ch 3, sl st in same st)* every 4 sts (approx 5 picots)
Round 8 :
Fasten off and weave ends
Info :
When sewing garlands onto the tree body, position them in shallow diagonals and pin in place before sewing with mattress stitch to keep them flat.
— Legs (Trunk — Make 1) :
Round 1 :
6 sc in magic ring (6)
Round 2 :
Inc in each st around (12)
Round 3 :
(1 sc, inc) x 6 (18)
Round 4 :
1 sc in each st around (18)
Info :
We will shape a flat rectangular trunk by working short joined rounds. The trunk is worked in rows joined at short ends to make a rounded-rectangle look and then flattened by sewing. Keep the trunk in brown yarn.
Round 5 :
(2 sc, inc) x 6 (24)
Round 6 :
1 sc in each st around (24)
Round 7 :
Work in FLO: 1 sc in each st for 3 rounds to develop a firm texture (24)
Round 8 :
Change to BLO for one round to create a neat border transition (24)
Round 9 :
Fasten off leaving a 40cm tail. Folding trunk flat, sew short ends together so trunk becomes a flat oval-rectangle about 6cm long and 4cm wide (no stitch count)
Info :
When attaching the trunk to the base of the tree, align the trunk center with the tree base marker placed earlier. Sew with mattress stitch for an invisible seam and reinforce with additional passes if runner may be handled.
— Ears (Scallop Border/Edge — worked in gold) :
Round 1 :
With metallic gold yarn, join at any corner stitch of the blocked tree, ch 1, sc evenly around perimeter (approx 330 sc — count perimeter stitches and match)
Round 2 :
1 sc in each st around (same count)
Round 3 :
(*skip next st, 5 dc in next st, skip next st, sc in next st*) repeat around to form scallops — number of scallops will be approx 110 depending on perimeter
Round 4 :
1 sc in each st around to anchor scallops (same count)
Info :
Scallop count depends on your perimeter stitch count — place a stitch marker at each triangle corner and count stitches along edges to space scallops evenly. Use a smaller hook for metallic thread if it splits.
Round 5 :
Optional braided edge: *(sl st, ch 3, sl st in next sc)* around to create a tiny braided rope look (same count)
Round 6 :
Finish with one round of crab stitch (reverse sc) for a neat corded border (same count)
Round 7 :
Fasten off; weave ends into the back of the scallop row to hide metallic tails
Info :
If you prefer a heavier border, work two rounds of scallops before the crab stitch. Make sure border sits flat after blocking.
— Tail (Beads and Finishing Embellishments) :
Round 1 :
Plan bead placement first: using a washable fabric marker, mark small dots along diagonal lines every 8-12 stitches to mimic the photo's scattered gold beads (no stitch changes)
Round 2 :
Using a beading needle and gold sewing thread, sew beads to each marked point by bringing the thread through the back of the fabric, string one bead, then pass back through the fabric into the same hole; secure with small knot and weave thread back through several stitches
Round 3 :
Sew garlands in shallow diagonals across the tree body positioning them roughly two-thirds of the way down from tip to trunk. Use the long tails left on garlands to mattress stitch them to the body from underneath
Round 4 :
Sew trunk to the tree bottom with the long tail left on the trunk. Reinforce with 3-5 passes of mattress stitch and hide tails inside trunk for neat finish
Round 5 :
Sew the star to the tree top with the long star-tail anchored through the top three stitches of the tree tip; check that star sits flat and symmetrical
Round 6 :
Final blocking: pin the entire runner flat on a blocking board, adjust scallops and star placement, mist lightly and let dry to set shape
Info :
When adding beads, double-knot and secure with a dab of fabric glue on the knot (optional) for extra longevity on a frequently-used tabletop. Trim all loose ends and weave tails at least 4-5 cm into the piece.
This Christmas Tree and Golden Star runner is a small seasonal treasure that adds instant holiday warmth to any tabletop. The deep green, sparkling gold border, and tiny bead ornaments create an elegant, handcrafted statement piece you can be proud to display. I hope you enjoyed following the build-up from tiny triangular increases to the finished scalloped edge — every stitch brings the design to life. Happy holidays and enjoy making something beautiful for your home! 🎄✨