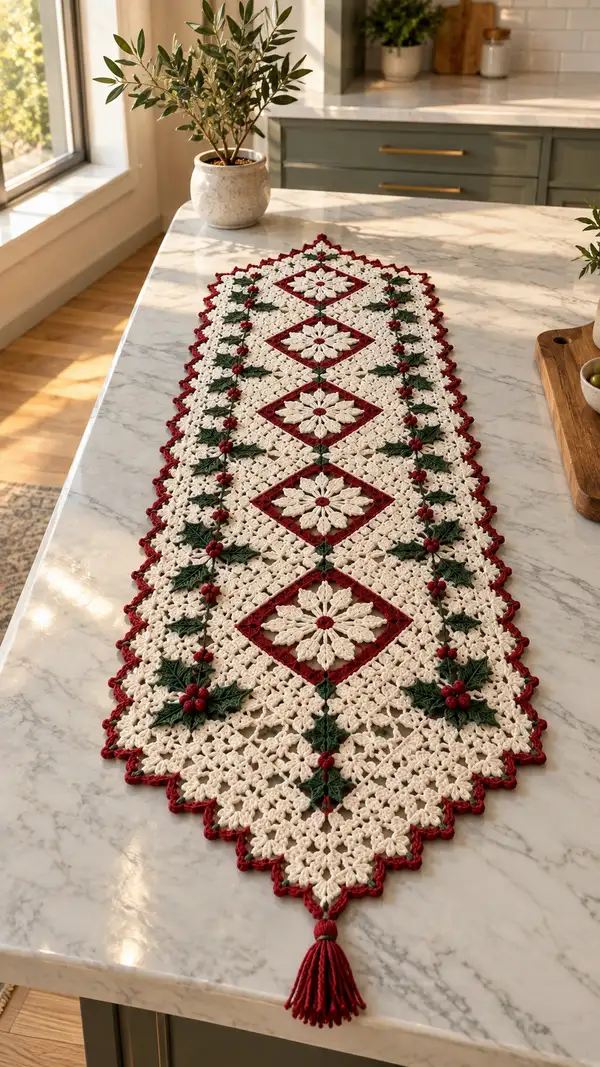
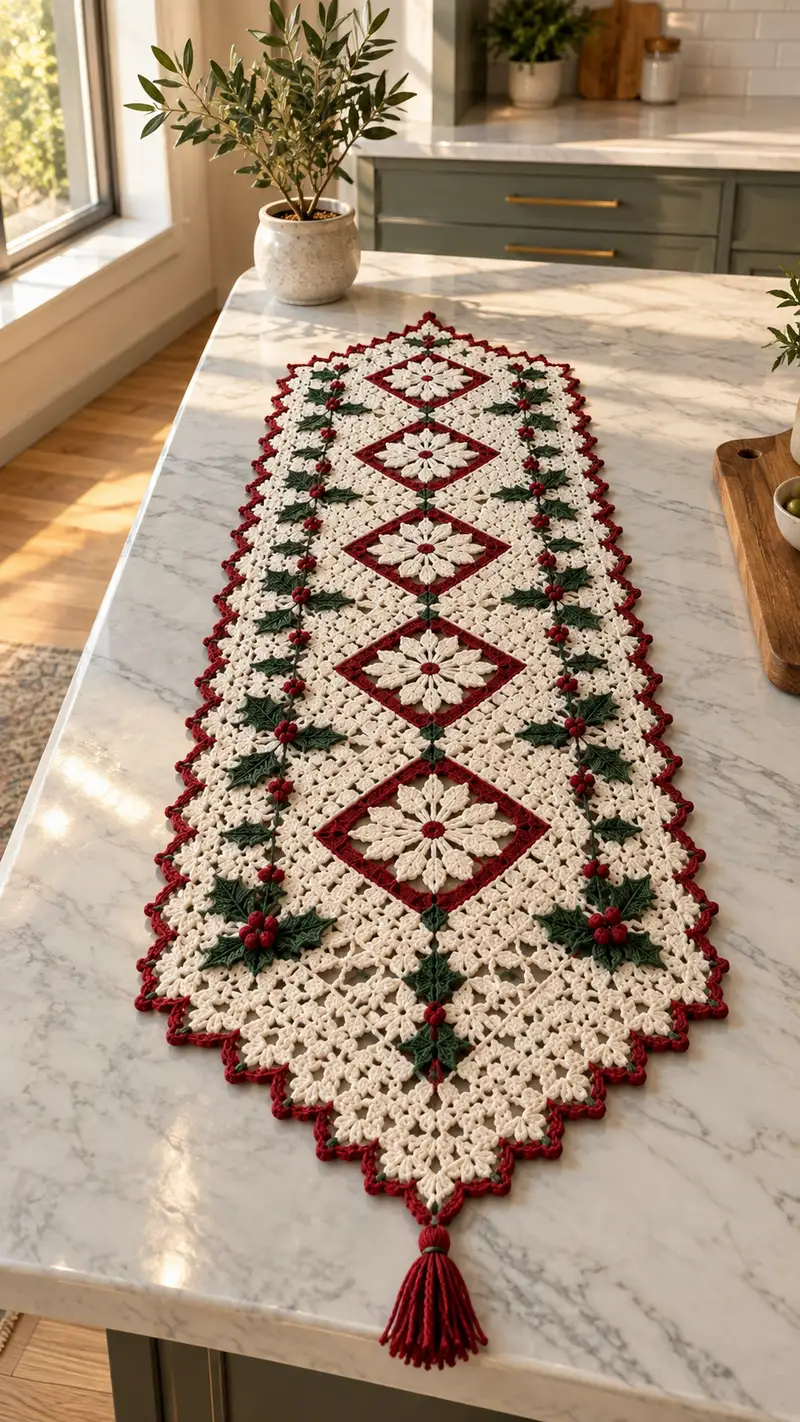
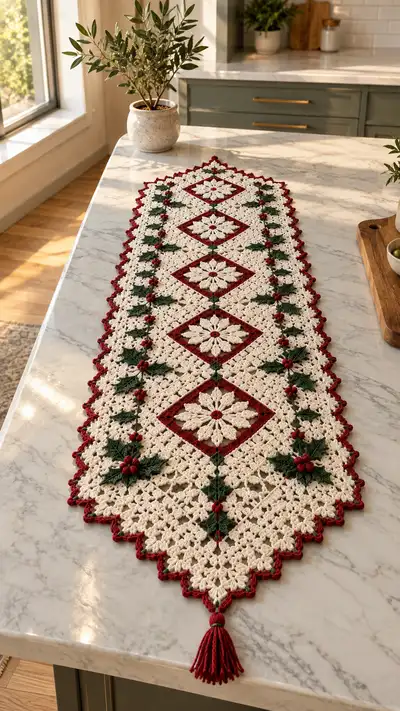
Create a stunning holiday table runner inspired by classic poinsettia motifs, holly leaves, and a lacy mesh background. This runner pairs cream, deep red, and evergreen to bring traditional Christmas charm to your table. The finished piece features diamond-set floral medallions, raised petals, layered holly clusters, scalloped edging and tassels for an elegant finishing touch.
Progress Tracker
0% Complete
— Notes & Gauge :
Info :
Gauge is not critical for overall composition but will affect final size and openwork density. Sample 10cm square of mesh (dc clusters) should measure approximately 14 sts x 8 rows with 3.5mm hook and worsted cotton. Block motifs for best results.
Info :
Pattern uses join-as-you-go methods for diamond medallions. Work poinsettia centers first, then frame and join into the running panel; add holly leaves and berries after the main join.
— Poinsettia Medallion (Make 5) :
Round 1 :
Make a magic ring. Ch1, 6 sc in ring. Pull tight. (6)
Round 2 :
Inc in each st around. (12)
Round 3 :
(1 sc, inc) x6. (18)
Round 4 :
(2 sc, inc) x6. (24)
Round 5 :
(3 sc, inc) x6. (30)
Info :
These rounds form a compact circular base to anchor petal clusters; keep tension even and do not over-tighten the magic ring to allow petals to lay flat.
Round 6 :
Ch2 (counts as first dc), dc in same st, *sk next st, (dc3 in next st)* repeat around forming 10 groups total, sl st to top of ch2. This creates 10 small lobes. (30 dc laid into 10 groups)
Round 7 :
Switch to cream/petal color if not already. Into each group: sl st to center, ch3, (puff(yo,insert,yo,pull up) x4, close puff with sl st) in the center of group to form first row of petal clusters. Space petals evenly to make 10 petal bases.
Round 8 :
Ch1, sc in same st and sc in next 2 sts, *sc in next puff center, ch2, sc in same center*, repeat around to create a small ring holding petals. (approx 40 sc counting across petals and base)
Round 9 :
Petal increase round: In each petal center: (ch3, 3 tr cluster, ch3, sl st to same center) to elongate petals. Space with 2 sc between petals. (10 petals)
Info :
Work puff stitches gently — the goal is raised petals, not bulky knots. Use consistent pulling on last loop to maintain uniform puff height.
Round 10 :
Ch1, sc around entire motif in each space and in each st, burying petal bases to form a neat circular ring. (approx 60 sc)
Round 11 :
Form second petal layer: Sk 2 sc between petals, in next sc ch4, (puff x5) in same sc to build larger petal, sl st to base. Repeat around to make 10 larger outer petals. (10 large petals)
Round 12 :
Ch1, sc in each sc and 2 sc in each base where petals are joined to form a wider round. (approx 80 sc)
Round 13 :
Surface picot center: switch to red for small center button; make ch3 and sl st into center to form small ring, then sl st into each ch3 to form decorative raised center. Fasten off red and weave in tail.
Info :
Block each medallion flat to ensure petals open evenly. Use a light misting and pin each petal gently with foam block until dry for best petal definition.
Round 14 :
Return to cream. Work a spaced cluster round to create a diamond-ready square anchor: *ch5, sl st into base between two petals* repeat around to create 10 loops. (10 loops)
Round 15 :
In each ch5 loop: join with (sc, ch3, sc) to make small corner points; repeat around. (10 corner points)
Round 16 :
Working evenly: sc across petals and into corner points to smooth edge. Aim for stable edge approx 90 sc total. (approx 90 sc)
Round 17 :
Begin forming diamond outline by marking the four points which will become the diamond corners. Identify top, bottom and two sides at roughly equidistant points on the medallion edge. Place stitch markers in those 4 spots. (Info: see placement)
Info :
Marking corner points now preserves symmetry during the framing rounds. Use contrasting yarn scraps to clip markers onto the outermost sc of chosen points.
Round 18 :
Ch1, sc around in each st for one round to firm the perimeter and even counts. (maintain approx 90 sc)
Round 19 :
Working toward square: at each marked corner, *sc, ch2, sc* to create corner chains; sc evenly between corners. (results in four corner ch2 spaces)
Round 20 :
In each corner ch2 work: (2 dc, ch2, 2 dc) to build corner wings; sc along sides between corners to maintain straight edges. (approx 4 corner shells)
Info :
At this stage you have the completed poinsettia medallion with a squared base suitable for framing with a diamond frame in contrasting red. Make five identical medallions and block them thoroughly before joining.
— Diamond Frame (Make 5, join-as-you-go) :
Round 1 :
With red yarn attach to one corner st of blocked medallion. Ch1, sc around entire square base in each st for one round, keeping corners in (sc, ch2, sc). (approx 100 sc)
Round 2 :
Now form diamond: At each corner shell, work (ch4, sl st to opposite side center) to start the diagonal frame; this is a layout round and does not change count drastically. Use stitch markers to note midpoints. (placement only)
Round 3 :
Ch3 (counts as dc), dc in next 3 sts, *ch2, sk 2, dc5 across side*, continue with dc clusters around to form broader framed side. (approx 110 sts including ch-spaces)
Round 4 :
In each ch2 sp between dc groups: (2 dc, ch2, 2 dc) to make decorative shell along frame. Maintain consistent counts on all four diagonals to form diamond effect. (approx 140 sts total across frame)
Info :
When making the first medallion and frame, leave one side partially unworked so you can attach the next framed diamond later using join-as-you-go technique; subsequent frames will be fully closed as you join to the running panel.
Round 5 :
Work a picot-round for inner border: *sc, ch3, sl st into sc* repeated along inner edge of red frame to accent the poinsettia center. (approx 140 picots)
Round 6 :
Edge smoothing round: sc in each st and picot to flatten, reducing stitch count to an even 120 sc by distributing sc evenly and working some sc2tog where needed to fit geometry. (120)
Info :
For the first framed medallion, leave one diagonal side open to connect next medallion with mesh units; subsequent diamonds are joined at their sides—see assembly section.
— Mesh Background Units (Make required to form runner rows) :
Round 1 :
Ch5, sl st to form a ring, ch3 (counts as first dc), 11 dc into ring (12 dc total). Sl st to top of ch3. (12)
Round 2 :
Ch3, dc in same st, ch2, *2 dc in next st, ch2* repeat around to form 12 dc groups separated by ch2 sps. Sl st to top of ch3. (12 groups)
Round 3 :
In each ch2 sp: (2 dc, ch2, 2 dc). Repeat around to make round of shells and ch2 corners. (12 shells)
Round 4 :
Ch1, sc in each st and in each ch2 space around to create a square-shaped mesh tile. (approx 48 sc)
Round 5 :
Ch3, *dc2tog over two double crochet of previous round, ch1* repeat to form lacy diagonal pattern. Work evenly to maintain size. (approx 40 clusters)
Info :
These mesh units will sit between and alongside diamonds to lengthen the runner. Make enough to create three columns of mesh alongside each diamond and to fill spaces between diamonds. Block each mesh tile to square dimensions for tidy joining.
Round 6 :
Ch1, sc around to reinforce edges and even counts to approx 52 sc making each tile align to diamond corners when joined. (52)
Round 7 :
Optional decorative ch-loop round: *ch4, sl st in next sc* repeat to create small looped edge helpful for join-as-you-go. (approx 26 loops)
Info :
Arrange mesh squares with diamonds in the layout pictured: diamond, mesh column, diamond, mesh column, diamond; adjust counts of mesh squares so the runner reaches desired length.
— Holly Leaf (Make many) :
Round 1 :
With green yarn ch8. In 2nd ch from hook: sc, hdc, dc, tr, dtr, (dtr, tr) on center, turn and mirror stitches back: dtr, tr, dc, hdc, sc in last. Sl st to first sc to close small leaf. (approx 12 sts)
Round 2 :
Working around leaf edge, sc evenly in each stitch and make three small picot points along each side: *sc3, picot (ch3 sl st to same st)* repeat to create serrated holly look. (approx 30 sc & 6 picots)
Round 3 :
Fasten off leaving long tail for sewing. Optionally embroider central vein with a few surface sl st using a darker green.
Info :
Make at least 20 holly leaves for both edges and small clusters between diamonds as shown. Leaves should be lightly starched or blocked to hold their serrated shape for mounting.
— Berry Cluster (Make many) :
Round 1 :
With red yarn make a magic ring, ch1, 6 sc in ring. Pull tight. (6)
Round 2 :
Inc in each st. (12)
Round 3 :
Sc around. Fasten off leaving long tail for sewing. Make clusters of 3-5 berries and sew them together to form little bouquets.
Info :
Sew berry clusters to runner by grouping 3-4 berries and attaching at intersections of mesh and diamond frames where pictured. Use extra thread to ensure clusters do not wobble.
— Joining Diamonds and Mesh (Join-as-you-go detailed) :
Info :
Layout your five diamond medallions in a straight line with mesh columns between. Join-as-you-go along the diamond sides where they touch mesh units: attach red frame to mesh loops using sc through both layers to form a flat, even join.
Round 1 :
With red yarn on an unjoined diamond: insert hook under the ch-loop of adjacent mesh tile, ch1, sc to join to mesh, continue sc around diamond edge joining to mesh at predetermined join points (approx join every 6-8 sts). Work until side is fully joined. (sc join count varies by side length)
Round 2 :
Turn runner and join the opposite side of the diamond to the other mesh column repeating join-as-you-go. Make sure the diamond centers line up in a straight central axis before firmly closing joins. (variable)
Info :
Use blocking pins to keep edges aligned as you join; spacing errors here will skew the runner. Keep joins flat by maintaining gentle, even tension and using the same number of joining sc on matching sides.
Round 3 :
When all diamonds and mesh tiles are joined into a complete panel, go around the entire panel with one round of sc in cream to even the surface and prepare for the holly placement. (approx total sc ~700-900 depending on layout)
Info :
If your runner is longer than desired, add additional mesh tiles between diamonds or extra diamonds until you reach target length. Conversely remove one mesh column for a narrower runner.
— Side Vine & Holly Placement :
Round 1 :
With green yarn at the start of runner edge, sl st into an edge sc of mesh near a diamond corner, ch6, sl st into edge 6 sts down to create a vine loop repeat along each side edge where pictured. (vine loops variable)
Round 2 :
Attach holly leaves with tapestry needle: position 2 leaves overlapping slightly along vine at each diamond corner. Sew leaves securely through the base with long tail woven into runner. Add berry clusters centered on leaf groups. Repeat down each side. (clusters per side ~8-12)
Info :
Vary leaf orientation slightly for natural look. Use small hidden stitches through outer edge and runner backing to avoid visible threads on front.
— Center Row Surface Embellishment :
Round 1 :
With cream yarn use surface slip stitch to outline each diamond center to enhance definition: surface sl st around framed red diagonal at approx every 2-3 sts to create continuous line. (decoration only)
Info :
This surface work is optional but gives a crisp visual separation between medallions and mesh background. Use same color as mesh for subtle look or light gold for a festive sheen.
— Outer Scalloped Border (All around) :
Round 1 :
With red yarn join at any outer corner. Ch1, sc evenly around entire outer edge through both mesh and diamond edges to create a stable foundation. Reduce or increase sc at concave spots to maintain flat edging. (approx 300-360 sc)
Round 2 :
*Ch3, sk 2 sc, sc in next sc* repeat around to create small scallops. Adjust repeats so there are an even number of scallops. (approx 100 scallops)
Round 3 :
Make larger scallops: in each ch3 space work (5 dc, ch2, 5 dc) to form pronounced shells. Sl st to close each shell. (approx 100 shells)
Round 4 :
Edge picot accent: sc across shells and make picot on each shell tip: *sc across to tip, ch3 sl st in same st* repeat around. (picots on each shell)
Info :
For a crisp edge, work the border while the panel is pinned to a blocking board to ensure shells are symmetrical. Adjust stitch counts to keep scallop tips evenly spaced.
Round 5 :
Work one final round of sc in red around scallops to secure picot tips and tidy edge. Fasten off and weave ends thoroughly for durability. (final tidy round)
— Final Finishing Rounds & Reinforcement :
Round 1 :
With cream yarn work a thin surface slip stitch grid on back of runner where leaves and berries will be sewn to provide reinforcement points; this prevents pull-through when pieces are handled. (reinforcement only)
Round 2 :
Sew holly leaves and berry clusters in place using long tails and mattress or whip stitch. Position each holly cluster in the center of three leaves and anchor through mesh foundation to hide knots. (secure clusters)
Info :
Weave all tails at least 5cm into fabric and double back when possible to ensure they do not work loose over time. Trim close to fabric after weaving.
— Tassel Finishing (Make 2) :
Round 1 :
Make two tassels with deep red yarn approximately 10-12cm long. Wind yarn around a 12cm cardboard 40 times, tie top firmly with short tail, fold and wrap tightly with contrasting yarn near loop. Trim ends evenly. Attach tassels to runner points at each narrow end using reinforced knot and several securing stitches. (2 tassels)
Info :
To attach tassel securely, pass working tail through runner tip and back through tassel knot multiple times and weave ends inside tassel wrap before trimming.
— Blocking & Final Care :
Info :
Pin the runner to shape on a blocking board, gently steam or mist until damp, shape scallops and petals, and allow to dry fully. Press lightly with iron through a damp cloth if needed. Hand wash cold and lay flat to dry to maintain shape.
Info :
Store folded flat with tissue paper between folds to avoid flattening raised petals; avoid heavy stacking that crushes embellishments.
Completing this runner is a joyful process — each medallion and holly cluster builds into a beautiful, heirloom-worthy centerpiece. You’ll love the way the raised petals and scalloped edge catch light and create a festive, hand-crafted statement. Wrap it as a special gift or display it proudly on your holiday table. Happy stitching and warm season’s greetings! 🎄🧶