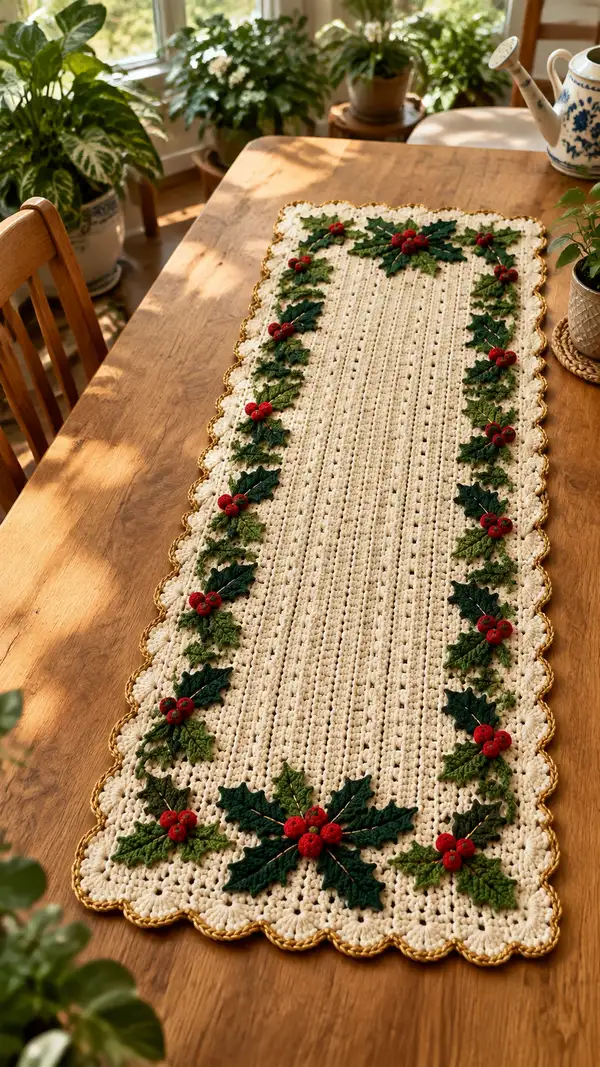
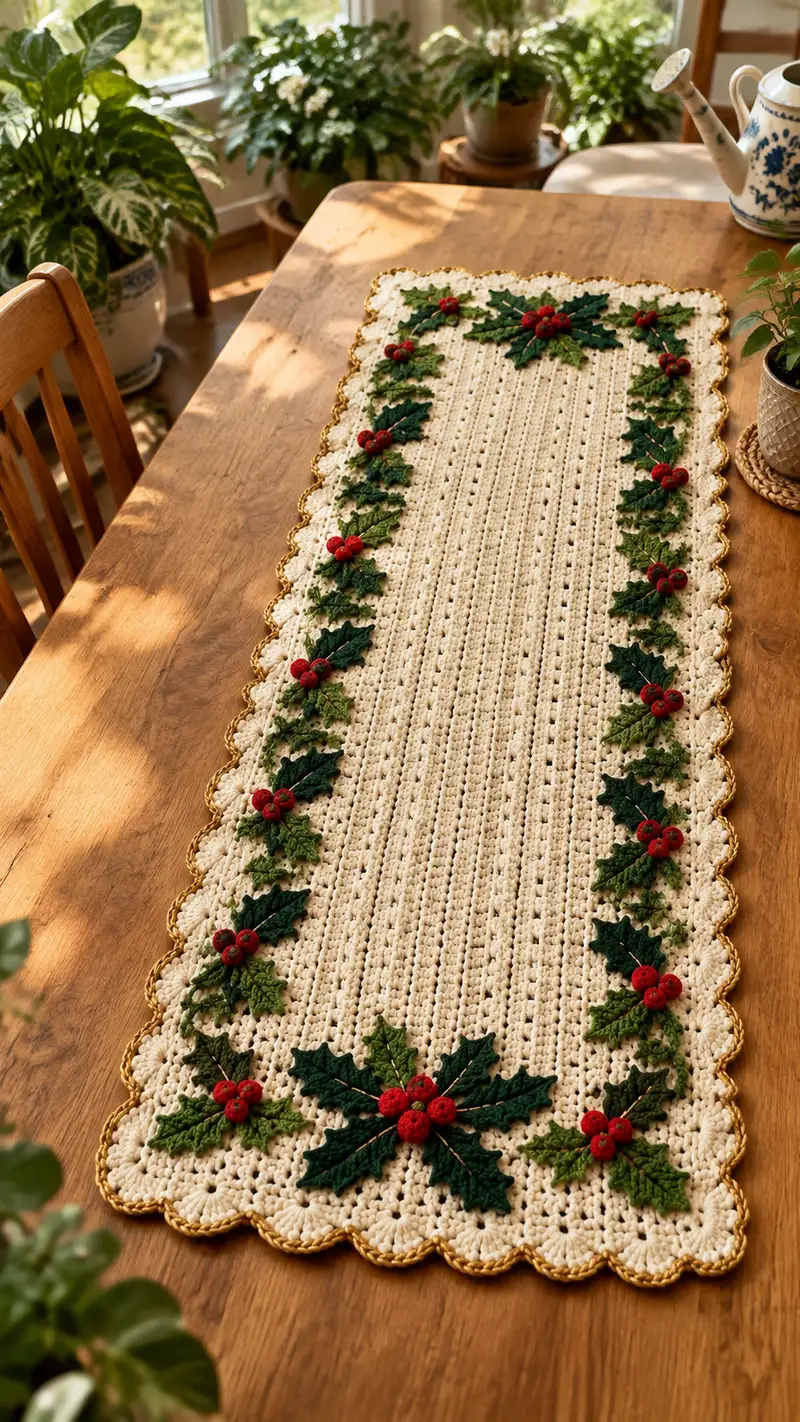
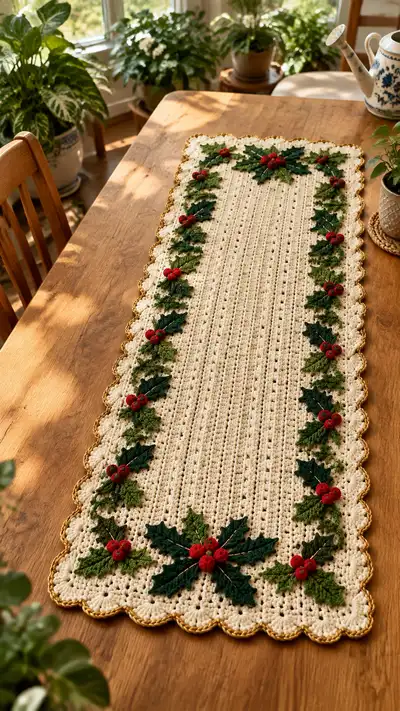
Create a festive holly-adorned table runner with scalloped gold edging and textured vertical ribs. This elegant runner features a creamy central panel, layered holly leaves in two greens and clusters of bright red berries. The pattern uses simple stitches with applique work to add holiday charm—perfect for dining tables, sideboards, or gifting to someone who loves handmade decor.
Progress Tracker
0% Complete
— Overview :
Info :
This pattern is worked flat for the center panel in rows, then the scalloped border is worked in rounds around the panel after seaming ends. Holly leaves and berry clusters are crocheted separately and sewn on. Exact measurements will vary by gauge; this sample is approximately 12" wide by 40" long. Use a 4.0mm hook for the base and a 3.5mm hook for appliques if you prefer crisper edges.
— Center Panel (work flat in rows) :
Row 0 :
Foundation chain 81 (or any multiple of 4 + 1 to maintain rib pattern). Turn—counts shown below reference stitches in each row: 80 base stitches after turning chain.
Row 1 :
1 sc in 2nd ch from hook and in each ch across (80 sc). Turn (80)
Info :
Place stitch marker in first stitch of each row to help maintain a tidy edge for later border joining. Keep tension even. This row creates a solid base for the ribbed texture.
Row 2 :
Ch 1. 1 sc in BLO in each st across (80 sc BLO). Turn (80)
Row 3 :
Ch 1. 1 sc in each st across (80 sc). Turn (80)
Row 4 :
Ch 1. 1 sc in BLO in each st across (80 sc BLO). Turn (80)
Row 5 :
Ch 1. 1 sc in each st across (80 sc). Turn (80)
Info :
Alternate sc and sc BLO rows for a total of 64 rows for a long runner. The BLO rows will create subtle vertical ridges seen in the photograph. Block gently at the end to flatten.
Row 6-64 :
Continue alternating: even-numbered rows in BLO (ch1, sc in BLO across), odd-numbered rows in regular sc (ch1, sc across). Maintain 80 stitches each row. After completing Row 64 you will have a rectangular panel approximately 40" long (depending on gauge).
Info :
If you want a shorter or longer runner, add or subtract sets of 8 rows (4 blo/4 regular) maintaining the stitch count. Always end after a regular sc row before beginning the border rounds for easiest join.
— Prepare Panel for Border :
Info :
Fasten off the working yarn leaving a 14" tail for joining if you will seam short ends; if you prefer to work border in joined rounds, align short edges and slip stitch them together to create a continuous oval; for this sample we will join ends and work border in rounds around the full perimeter.
Seam Ends Option :
Fold the rectangle by bringing the short ends together with right sides facing. Using the long tail or a new strand, seam across remaining open edge using mattress stitch, taking care to keep rib placement continuous at the seam. After seaming, block lightly to flatten seam.
— Border Round 1 (Even edging foundation) :
Round 1 :
With right side facing, join yarn at any corner seam with a sc. Work 1 sc in each edge st around the entire perimeter: top edge 80 sc, short side 64 sc, bottom edge 80 sc, other short side 64 sc. Total = 288 sc. Sl st to first sc to join. (288)
Info :
Place 4 stitch markers at corner points (after counting across each side) to divide the perimeter into four even sides for accurate shell placement later. This number (288) assumes you seamed the short ends; if you left the runner as a flat rectangle without seaming, count both short ends the same and adjust accordingly.
— Border Round 2 (Spacing for shells) :
Round 2 :
Ch 1. 1 sc in the same st, *ch 2, sk 2 sc, 1 sc in next sc*; rep from * to * around to create even little spaces for shell placement. Join with sl st. Stitch count will remain 288 but pockets are created for shells.
Info :
If the spacing ends slightly unevenly at the corner, use the extra sc to hide the change at the corner by making a ch2 before continuing the repeat so scallops will sit nicely around corners.
— Border Round 3 (Shell row foundation) :
Round 3 :
Ch 3 (counts as first dc). In the next ch-2 space work (2 dc, ch 2, 3 dc) to make a shell. Skip to next ch-2 sp, *shell in each ch-2 sp*. At corners work extra shell (3 dc, ch 2, 3 dc) in corner spaces as needed. Join with sl st to top of starting ch3. Number of shells will be approx 48 around entire perimeter depending on corner adjustments.
Info :
Shells create the scalloped effect. Keep shells consistent by making each shell in the ch-2 spaces created in Round 2. If working without seaming ends, place slightly larger shells in the center of each short end for a balanced look.
— Border Round 4 (Shell reinforcement) :
Round 4 :
Ch 1. 1 sc in each dc across shell peaks and 2 sc in each shell ch-2 gap to anchor shells snugly. Join with sl st (stitch count will vary slightly due to 2 sc placements across shell gaps).
Info :
This round makes the scalloped row sit flat and gives a solid base for the gold picot round. Make sure each shell is anchored at both sides to avoid flipping after blocking.
— Border Round 5 (Decorative gold picot edge) :
Info :
Change to metallic gold yarn or a gold sparkle held with cream for two-strand sheen now. Carry the cream yarn behind if you prefer a two-color twisted edge, or fasten off cream and join gold.
Round 5 :
With gold, join in first sc at scallop peak. *Ch 3, sl st in 3rd ch from hook (picot), sl st in next sc to secure; sl st to next shell peak.* Repeat around. Join with sl st and fasten off. Weave in ends carefully. This gives a neat twisted-gold picot finish around each scallop.
Info :
To make the gold pop, be consistent with picot size—ch3 is the standard size here. If your metallic yarn is thicker, use ch2 for a smaller picot.
— Large Holly Leaf (Make 12 for corners and larger clusters) :
Round 1 :
Using dark green and 3.5mm hook. Ch 6. 1 sc in 2nd ch from hook, 1 hdc in next, 1 dc in next, 1 tr in last ch. Turn and work down opposite side of foundation chain: 1 dc, 1 hdc, 1 sc into last st. Do not join; leave tail for sewing. (7 stitches along the chain, shaped leaf base)
Round 2 :
Working around the small oval you created, ch 1, sc in first st, 1 hdc in next, 2 dc in next 2 sts (creates point), 1 hdc, 1 sc, sl st in base to create a single pointed leaf. Fasten off. (approx 8–10 visible stitches)
Info :
This creates a basic small leaf. For the larger holly leaf we will build more pronounced serration and a center ridge with surface slip stitch veins in later steps.
Large Leaf Alternative (more detailed, rounds 1-11) :
For a fuller holly leaf follow the extended rounds below which produce a serrated edge and a pronounced shape.
Round 1 :
Ch 8. Sc in 2nd ch from hook, hdc in next, dc in next 2, tr in next, 2 tr in last ch; continue on opposite side of foundation ch: tr in next, dc in next 2, hdc in next, sc in last. Do not join. (approx 14 sts)
Round 2 :
Ch1, sc around working 2 sc in the tip to create fullness (increase), then *sc in next 3, 2 sc in next* along one side; mirror on return side. This will increase perimeter to ~18–20 sc. Fasten off or continue for serrations.
Round 3 :
Join yarn at base. Ch 2 (counts as hdc). *2 hdc in next st, 1 hdc in next 3 sts; rep across side; 2 hdc in tip*; repeat across other side. This shapes the leaf more and prepares for pointy edges. (approx 24 hdc)
Round 4 :
Ch1. Work sc around but in every 3rd stitch make a small picot: sc in st, ch 3, sl st in top ch to form a tiny serration point, continue. Fasten off and weave end. (creates serrated edge of holly)
Info :
For the holly leaf’s vein, use a contrasting lighter green cotton thread and surface slip stitch a line down the center of the leaf from base to tip. Use small, even stitches to mimic the vein lines shown in the photo.
Round 5 (Vein) :
With lighter green yarn and yarn needle, bring yarn up at leaf base and use surface sl st to run a single line to the tip. Make 2–3 short side veins by bringing yarn up and making 2–3 short sl st diagonals on each side. Secure and weave ends. Repeat for each large leaf.
Info :
Large leaves in the photo appear layered—place a medium and a small leaf slightly offset for depth. Block leaves lightly over a rounded form to set shape while drying.
— Small Holly Leaf / Sprig (Make 18) :
Round 1 :
Using medium green and 3.5mm hook. Ch 6. Sc in 2nd ch from hook, hdc, dc, hdc, sc across returning down opposite side of foundation chain to form a small almond shaped leaf. Fasten off. (approx 8–10 sts)
Round 2 :
Optional surface slip stitch vein: with contrasting lighter green, surface sl st a single center vein. Can add tiny picots at edge for serration if desired. Block lightly.
Info :
Small leaves are used as filler between large leaves in each cluster. Vary orientation for natural-looking clusters.
— Berry Sphere (Make 36 small berries; 3 per cluster) :
Round 1 :
With red and 3.5mm hook. 6 sc in a magic ring. (6)
Round 2 :
(1 sc, inc) x 6 (9)
Round 3 :
(2 sc, inc) x 6 (12)
Info :
Begin stuffing lightly at the end of Round 3. Berries should be lightly stuffed to remain plump but not hard.
Round 4 :
(2 sc, 1 dec) x 3 (9) — note: this is done across the opposite side to start closing; helpful to count and maintain symmetry. (9)
Round 5 :
(1 sc, 1 dec) x 3 (6)
Round 6 :
3 sc dec (sc3tog) or 3 dec across to close to a small hole. Fasten off leaving long tail for sewing. Weave tail into center to close and secure. (3–1 final closure)
Info :
Make the berries slightly variable in size by using 3.5mm hook for some and 3.25mm for others to create a hand-made feel. Group three and sew together at bases before attaching to the runner for a clustered look.
— Assembly of Appliques into Clusters :
Info :
Plan clusters before sewing by arranging on a blocked runner. Common arrangement: large leaf + medium leaf + three small leaves + 3 berries. Space clusters evenly around the perimeter inside the scalloped edge—photo shows 9 clusters per long side and three clusters at each short end (total approx 24 clusters), but you can choose 6–12 depending on size and spacing preference.
Step 1 :
Lay runner flat and pin cluster positions. Each cluster aligns with shell peaks; use the shell peaks as anchor points. Pin leaves so tips face outward slightly and layer medium leaf on top of large leaf offset by roughly 2–3 stitches for depth.
Step 2 :
Sew leaves to runner using yarn needle and matching green yarn. Use short whipstitches along the basal seam of the leaf (the base of the leaf around 3–4 stitches) and then a few stitches through the midrib for extra security. Avoid sewing through the scallop loops unless you want the applique to be anchored to the scallop itself—attach to the body just inside the scallop for a floating look.
Info :
For a clean finish, weave the ends to center of the leaf and knot on the underside of the runner. If you used two-tone veins, be sure the vein thread ends are also secured under the leaf before finishing the row.
Step 3 :
Group three berry spheres together and tack them with a few stitches at their bases into a tight triangle. Then sew the red cluster to the runner at the base of the leaf cluster, stitching through the berry base and a couple of leaf base stitches to lock them in place. Tie off and weave in tails to underside.
Info :
Place one larger cluster at each short end center (use two or three large leaves radiating from the center) and repeat smaller clusters evenly along each long side. Pin every cluster before sewing to ensure balanced spacing. Use a tape measure to keep even intervals (example: place clusters every 3.5" along each long side).
— Optional: Additional Greenery Sprigs (for delicate trailing effect) :
Round 1 :
With light green and 3.5mm hook. Ch 10. Sl st back along chain making tiny loops to create a feathery sprig: *sl st in 2nd ch from hook, ch 2, sl st back into next chain* across to create short picot-like sprigs. Fasten off and tack under leaf clusters to accent edges.
Info :
These sprigs add a natural, vine-like texture. Use them sparingly to avoid cluttering the clean scalloped frame.
— Final Finishing :
Info :
Weave in all tails, trim close to fabric but avoid cutting too near knots. Block the entire runner to square up scallops and flatten ribbing: pin edges gently to measured rectangle and mist with water or steam from a distance. Allow to dry completely.
Optional :
To prevent sliding and add weight, you can sew a very narrow cotton batting onto the backside of the runner before attaching appliques, but be cautious as bulk may distort scallops. For table protection, use a thin non-slip mat underneath instead.
Info :
For machine washing, use colorfast yarns and place runner inside a large mesh bag on delicate cycle and lay flat to dry. Spot clean appliques as needed. Metallic yarn edges may be delicate; hand wash recommended when in doubt.
Completing this holly scallop table runner is such a joyful project—each stitch builds a little more holiday magic! The layered leaves and clustered berries bring depth and warmth to the creamy ribbed center, while the gold picot edge adds a refined finishing touch. This runner makes a beautiful heirloom-style gift or centerpiece for your holiday table. I hope you enjoyed every stitch and the soothing rhythm of the ribs and scallops. Happy crafting! 🎄✨