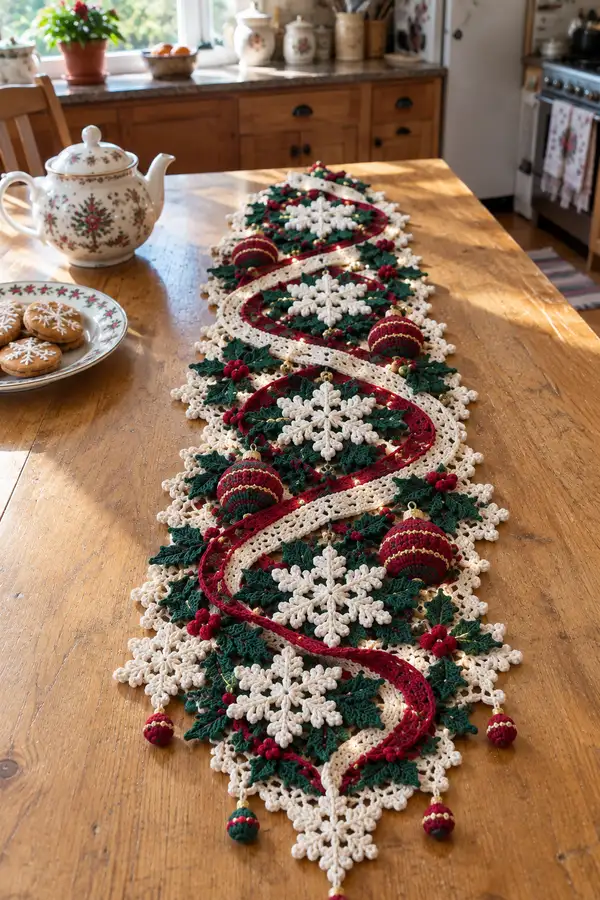
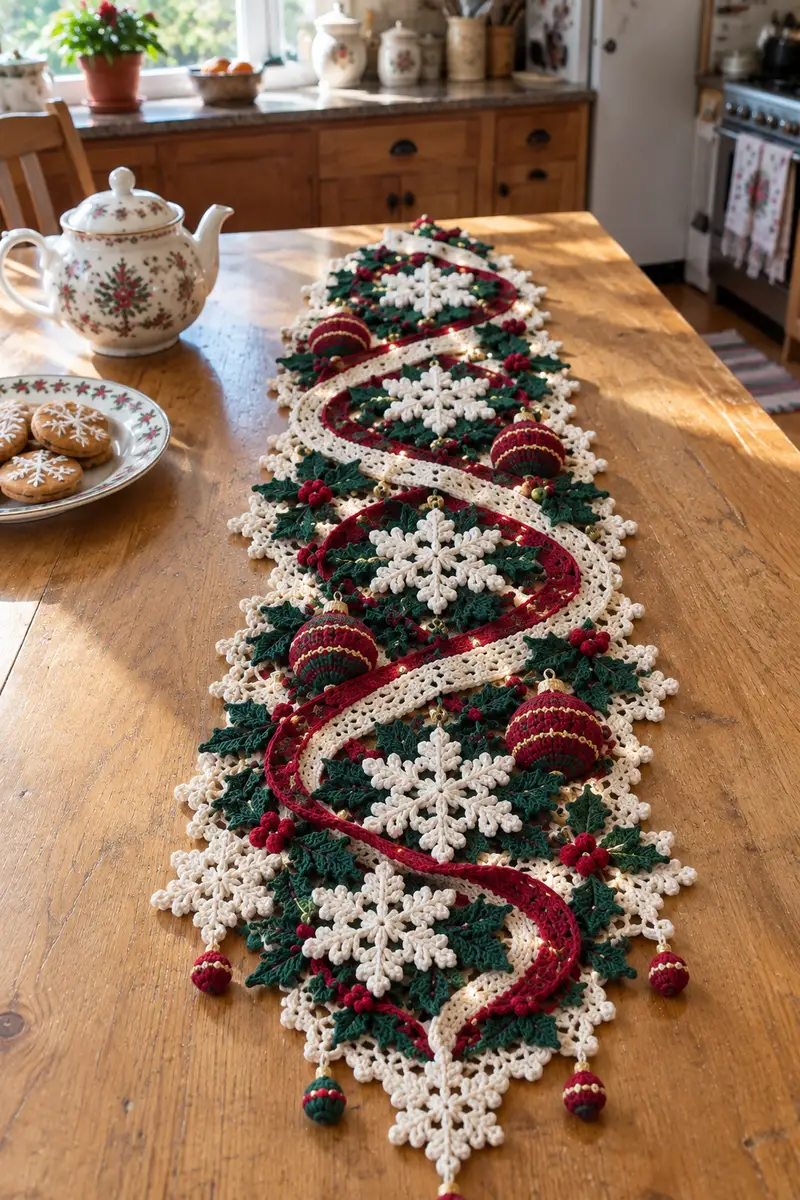
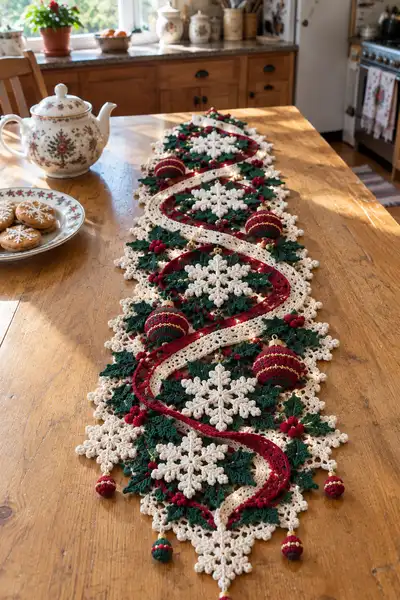
A richly detailed holiday table runner featuring lacy cream snowflakes, deep green holly leaves, ruby berry clusters and a sinuous red ribbon with decorative baubles. This pattern combines crochet lace motifs, 3D ornaments and delicate edging to create an heirloom centerpiece that lays beautifully along a dining table. Perfect for special-season decor or a handmade gift, with clear steps for motif construction, assembly and finishing.
Progress Tracker
0% Complete
— Overview & Tips :
Info :
This runner is assembled from repeating medallion units: a cream lacy medallion anchored by a large snowflake, layered with green holly leaves and red berry clusters. A long red ribbon strip is worked separately and sewn in a spiral across the medallions. Several small crocheted ornament balls and berry groups are made and attached as decorative tassels. Work motifs flat, block them to shape, then join using whip stitch and connecting slip-stitch joins where noted. Gauge is not critical but keep stitches firm for neat lace.
Info :
Suggested motif counts for a runner length similar to the photo: 6 large medallions with intervening leaf clusters and ribbon; adjust number of repeats to lengthen or shorten. The pattern below details each motif type individually, then explains assembly and edging.
— Large Cream Snowflake Medallion :
Round 1 :
6 sc in magic ring (6)
Round 3 :
(1 sc, 1 inc) x 6 (18)
Round 4 :
(2 sc, 1 inc) x 6 (24)
Round 5 :
(3 sc, 1 inc) x 6 (30)
Round 6 :
(4 sc, 1 inc) x 6 (36)
Info :
Work rounds 1-6 tightly to create a firm circle as the centre body of the medallion. Place a marker at round starts for later reference when attaching snowflake arms.
Round 7 :
1 sc in each st around (36)
Round 8 :
(5 sc, 1 inc) x 6 (42)
Round 9 :
1 sc in each st around (42)
Round 10 :
(6 sc, 1 inc) x 6 (48)
Round 11-12 :
1 sc in each st (48)
Info :
Round 11/12 create a wide flat disk as the medallion background. At the end of round 12, position markers for 6 evenly spaced points (every 8th stitch) where the snowflake arms will be built.
Round 13 :
*Ch 5, sl st in next marked st; repeat from * 6 times to create 6 chain loops as arm anchors (48 anchors unchanged)
Round 14 :
Work into each chain-5 loop: (sc, hdc, 3 dc, hdc, sc) in each loop to make a petal arm (6 petals). Maintain base round sl st anchors between petal groups (total base sts remain functionally 48)
Round 15 :
Working around the outer edge including petal bumps: *ch3, picot, ch3, sl st into next ch-space between petals* x 6 to give trimmed points (decorative picot edging)
Info :
If you prefer a more solid snowflake look, replace round 14 with 7 clusters of 5 puff or bobble stitches per loop, spaced to form star arms. Blocking here will flatten and open the arms beautifully.
Round 16 :
Create inner arms for snowflake: Sl st to center of petal, ch8, sl st back to mid-point of same petal to create a short loop; repeat 6 times. These inner loops will be decorated in round 17.
Round 17 :
Work into each ch-8 loop: (sc, 5 dc, sc) then sl st to base between loops to secure (decorative inner spikes), repeat x6
Round 18 :
Round of sc around entire medallion edge picking up base rim and petal tips: 1 sc evenly around (approx 72-78 depending on tension)
Info :
Block this medallion flat and pin each of the 6 arms to a crisp star shape. Use a fine mist steam blocking for cotton thread, or wet-block and allow to dry fully. Blocking is essential for tidy joins with holly leaves.
Round 19 :
Decorative outer scallop: *ch3, skip 1 base st, sl st* around each petal tip to create a scalloped outer lace (creates small loops; count will vary - aim for even scallops)
Round 20 :
Finishing round: 1 sc in each outer loop to define scallop (fasten off and weave ends)
— Lace Medallion Background (Cream Disk to Host Snowflake) :
Round 1 :
6 sc in magic ring (6)
Round 3 :
(1 sc, inc) x 6 (18)
Round 4 :
(2 sc, inc) x 6 (24)
Round 5 :
(3 sc, inc) x 6 (30)
Round 6-8 :
1 sc in each st (30)
Info :
This lace medallion will sit under the snowflake to give a cream background and skirt the holly leaves. Keep it slightly larger in diameter so the snowflake arms overlap the medallion edges attractively.
Round 9 :
(4 sc, inc) x 6 (36)
Round 10 :
1 sc in each st (36)
Round 11 :
*ch4, sk 2 st, sc in next st* repeat around to create chain-spaced lace (approx 12 loop spaces)
Round 12 :
Work into each chain-4 loop: (sc, hdc, 3 dc, hdc, sc) to form decorative loops around edge (this creates a lacy scalloped border)
Round 13 :
1 sc around to tidy edge and create an even joining surface (fasten off and block)
Info :
Make one lace medallion for each snowflake; when assembling, place the snowflake on top of this medallion and sew through both layers at selected anchor points only so the top remains slightly raised.
— Holly Leaf Motif (Make many) :
Round 1 :
Ch 7, sc in 2nd ch from hook, hdc, dc, tr, dc, hdc, sc in last ch (a tapered leaf worked in row rather than round - counts are shaping stitches rather than rounds)
Round 2 :
Turn and work along opposite edge: sc into base of last sc, hdc, dc, tr2tog over center, dc, hdc, sc to mirror the edge. Fasten off (one leaf completed)
Round 3 :
For textured veins: With same green yarn, embroider central vein: bring yarn up at base, chain 5 across center and anchor with sl st at tip, then secure and weave tail
Info :
Create two sizes of leaves, full-size and half-size; for half-size work ch5 start and mirror as above to produce smaller filler leaves. Block leaves lightly to sharpen points.
Round 4 :
Make scalloped serrations: Along each long edge, pick up every other stitch and work a small picot (ch3, sl st into first ch) to create holly-like serrations. Fasten off.
Info :
Make approx. 4-6 full leaves and 6-8 smaller leaves per medallion cluster as pictured. Arrange leaves to fan around snowflake center when assembling.
— Berry Cluster (Make many clusters of 3-5 berries) :
Round 1 :
With red, 6 sc in magic ring (6)
Round 2 :
(1 sc, inc) x 3 (9)
Round 3 :
1 sc in each st (9)
Round 4 :
Slip stitch in next st, fasten off leaving a 12 cm tail for sewing. Make 3 berries and sew them tightly together at bases to form a clustered trio. Repeat for clusters of 4 or 5 by making additional berries.
Info :
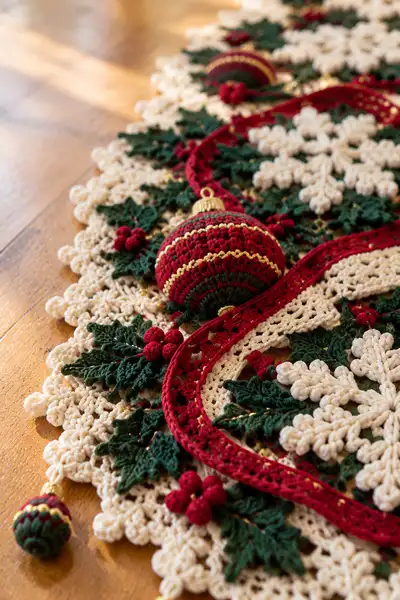
Sew berry clusters onto leaf junctions to achieve the three-dimensional clusters seen in the photo. Make berry clusters with tight stitches so they remain plump and rounded.
— Long Red Ribbon Strip (Sinuous Ribbon Worked Separate) :
Info :
The ribbon strip is a long narrow flat piece worked lengthwise, then lightly stuffed or stiffened and sewn in an S-curve across the runner. Work in deep red with occasional gold thread carried along the center as a decorative line.
Round 1 :
Ch 6, sc in 2nd ch from hook and across (5 sc)
Round 2 :
Ch1, turn, 1 sc in each st (5)
Round 3 :
Repeat round 2 for 4 rows to create a 5-row strip (5 sc x 5 rows)
Round 4 :
Change to gold metallic thread carried along center (Info: carry gold thread inside stitches, catching every few stitches so it lays flat without twisting)
Round 5-40 :
Continue working lengthwise: 1 sc in each st across, ch1 at end to turn and maintain strip. Work until strip measures desired length to snake across all medallions (approx 160-240 cm depending on runner length) - frequently block and measure against laid out medallions.
Info :
Optionally work one row in BLO to create a subtle ridge along one edge. For a slightly padded ribbon, after every 10 rows, add a narrow line of single crochet down center using a second strand, then fold and slip-stitch together to form a tube; stuff lightly with a few tufts of fiberfill before closing to give plumpness to the ribbon where it sits on medallions.
Round 41 :
Create a decorative edge along the ribbon by working: *sc in each st across, at edges work ch3 picot every 6 sts* fasten off and weave ends
Info :
Make ribbon slightly narrower than medallion spacing so it sits neatly in the troughs between snowflake arms. If you plan to fold and stuff the ribbon, make it double-width and fold to enclose stuffing.
— Crocheted Ornament Balls (Make 6-8) :
Round 1 :
Using red or alternate colors, 6 sc in magic ring (6)
Round 3 :
(1 sc, 1 inc) x 6 (18)
Round 4 :
(2 sc, 1 inc) x 6 (24)
Round 5 :
1 sc in each st (24)
Round 6 :
(2 sc, 1 dec) x 6 (18)
Round 7 :
1 sc in each st (18)
Round 8 :
(1 sc, 1 dec) x 6 (12)
Round 9 :
Begin stuffing firmly now with polyester fill, small amounts at a time to maintain roundness
Round 10 :
6 dec (6) - close opening leaving tail for sewing; fasten off and weave tail to secure. Add a small ornament cap or cover with a round crocheted cap and a sewn loop for hanging.
Info :
Ornament decoration: Use contrasting green and gold to work stripes or zigzags before closing completely. You can over-sew metallic thread in zigzag patterns for gold trim as seen in the photos.
— Scalloped Outer Edge (Runner Border) :
Round 1 :
Join cream yarn to outermost edge of assembled motifs. Work 1 sc evenly around runner perimeter to create a uniform working edge (count will depend on assembled shape).
Round 2 :
*Ch4, sl st back into base to form small loop, 3 sc into next base space; repeat across edges to create looped scallops* (repeat pattern around)
Round 3 :
Work into each ch4 loop: sc, hdc, 3 dc, hdc, sc to form larger scallop. Fasten off and block edge so scallops are even.
Info :
Be generous with blocking on the outer edge to make the scallops sit flat and crisp. Pin each scallop to exact same depth for a professional finish.
— Joining Units and Assembly :
Info :
Make all motif pieces first: 6 large medallions (snowflake + lace medallion), approx. 24 full leaves, 24 small leaves, 12 berry clusters, 6-8 ornament balls and the long ribbon. Block each piece and allow to dry thoroughly. Lay out pieces to match the photo before sewing to ensure correct placement and wave of ribbon.
Round 1 :
Position one cream medallion as base and place a snowflake centered on top. Pin through several anchor points around the center—approximately at each petal base (6 points). Using a matching thread and yarn needle, sew through both layers with small whip stitches at these anchors only (do not flatten the snowflake arms completely; let them sit slightly raised).
Round 2 :
Arrange 3-4 full holly leaves radiating from the side of the medallion where the ribbon will sit; tuck the leaf bases under snowflake edges slightly and baste through both leaf and medallion with a thread matching the leaves so stitches are invisible on the front.
Round 3 :
Sew small berry clusters at leaf junctions using the long tails left when making berries. Pull thread through medallion base and secure with several stitches; hide tails within stitches and trim.
Info :
Arrange medallions end-to-end with a small overlap of scalloped edging, joining by mattress stitch through outer rounds so joins lie flat. Use a fine crochet hook to slip-stitch join through aligned loops for reinforcement if desired.
Round 4 :
Lay ribbon strip across the medallions in desired spiral. Pin at several strategic points (at least 3 per medallion). Use small invisible stitches through ribbon underside into medallion center to anchor ribbon gently — avoid heavy pulling that will pucker medallions.
Round 5 :
Sew ornament balls to designated hanging points: add a small loop at top of each ball (a short crocheted ch loop) and slip a tiny jewelry eye pin or a crocheted loop through; sew the loop to the outside edge of the runner and secure with a few stitches and a dab of fabric glue in the cap area if using metallic caps.
Info :
For additional sparkle, sew small gold sequins or beads along the ribbon or medallion centers. Attach beads with fine thread so they sit securely without distorting lace. Add any gold metallic embroidery by couching the gold thread across the ribbon center with small tacking stitches every 10 cm.
— Final Finishing Touches :
Round 1 :
Weave in all tails with tapestry needle. Use tiny invisible stitches to tidy any joining seams. Re-block assembled runner after final sewing to coax any uneven pieces back into shape.
Round 2 :
Steam-press from the back (if fiber allows) or spray and dry flat to ensure the runner lays perfectly flat on the table.
Info :
Use a curtain or table pad under the runner if you want to create a slightly padded look and protect the runner. Remove pinned blocking wires carefully and inspect seams for any missed stitches.
Round 3 :
Optional: add small loops at each corner to tie the runner in place or hang as wall decor when not in use. Fasten off and give runner a final check for loose threads.
Info :
Because variation in stitch size and yarn weight will change final measurements, measure motifs as you go and make additional medallions or reduce them to match your preferred runner length. Keep photos or sketch layout for reassembly after blocking.
Completing this festive table runner is a truly satisfying experience — each snowflake medallion and holly cluster comes together like a little winter scene. The dimensional leaves, berry clusters and ornament baubles add a joyful tactile charm. Blocked and trimmed, it lays like a decorative ribbon of holiday cheer down any table. 🧶🎄 Make one for a family heirloom or as a thoughtful hostess gift — the time invested yields a stunning centerpiece. Happy stitching and enjoy the sparkle! ✨