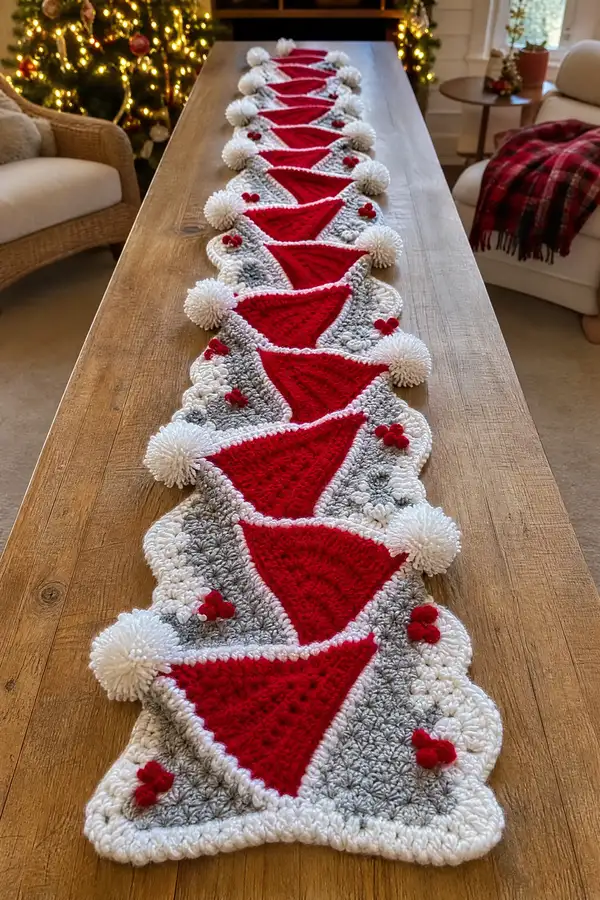
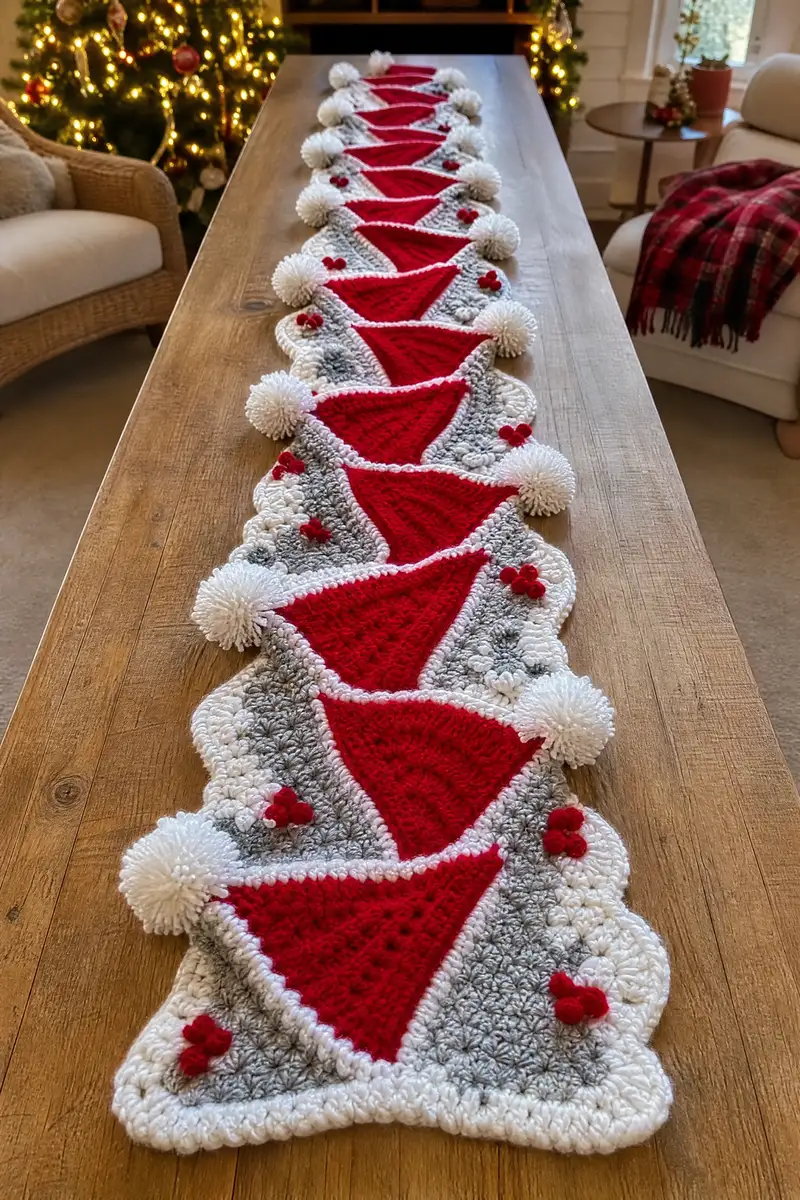
Create a festive table runner made of repeating Santa hat motifs edged with scalloped shells, fluffy white pompoms, and tiny holly berries. This pattern uses simple cluster stitches and layered borders to build a long, show-stopping runner perfect for holiday decorating. It features bold red hat triangles, a soft gray textured background, crisp white scallops and large white pompoms for a classic seasonal look. Detailed step-by-step rounds, joining and finishing instructions make this a relaxing, rewarding holiday project.
Progress Tracker
0% Complete
— Hat Motif (triangle) :
Info :
Each Santa hat triangle is worked flat in rows that we label as rounds for continuity in this pattern. Use worsted-weight red yarn and 5.0 mm hook. Ch3 at the beginning of each row counts as a dc unless otherwise noted. The stitch counts below are written as total dc-like tall stitches (dc equivalents) for clarity.
Round 1 :
Ch4, dc into 4th ch from hook, dc twice in same starting ch (this creates the hat tip cone foundation) – total 3 dc (3)
Round 2 :
Turn. Ch3 (counts as first dc), 2 dc in same st, 1 dc at the opposite end of previous row, 2 dc in last stitch (work increases at both edges) – total 7 (7)
Round 3 :
Turn. Ch3, dc in next 2 sts, 2 dc in center-most stitch (increase center for triangular shaping), dc in next 2 sts, 2 dc in last stitch – total 11 (11)
Round 4 :
Turn. Ch3, dc in next 4 sts, 2 dc in center stitch, dc in next 4 sts, 2 dc in last stitch – total 15 (15)
Round 5 :
Turn. Ch3, dc in next 6 sts, 2 dc in center stitch, dc in next 6 sts, 2 dc in last stitch – total 19 (19)
Info :
From now on each round increases the total by +4 stitches by adding two edge increases and one center increase of 2 dc. Keep your edge increases close to the edge to maintain straight sides. Use a stitch marker at the center increase stitch to help count on long rows.
Round 6 :
Turn. Ch3, dc in next 8 sts, 2 dc in center stitch, dc in next 8 sts, 2 dc in last stitch – total 23 (23)
Round 7 :
Turn. Ch3, dc in next 10 sts, 2 dc in center stitch, dc in next 10 sts, 2 dc in last stitch – total 27 (27)
Round 8 :
Turn. Ch3, dc in next 12 sts, 2 dc in center stitch, dc in next 12 sts, 2 dc in last stitch – total 31 (31)
Info :
Keep edges tidy by putting your last stitch close to the edge and turning without adding extra chains beyond the ch3. If your triangle begins to flare, slightly reduce tension or block later to even edges.
Round 9 :
Turn. Ch3, dc in next 14 sts, 2 dc in center stitch, dc in next 14 sts, 2 dc in last stitch – total 35 (35)
Round 10 :
Turn. Ch3, dc in next 16 sts, 2 dc in center stitch, dc in next 16 sts, 2 dc in last stitch – total 39 (39)
Round 11 :
Turn. Ch3, dc in next 18 sts, 2 dc in center stitch, dc in next 18 sts, 2 dc in last stitch – total 43 (43)
Round 12 :
Turn. Ch3, dc in next 20 sts, 2 dc in center stitch, dc in next 20 sts, 2 dc in last stitch – total 47 (47)
Info :
If you prefer a slightly narrower hat, stop when you reach Round 10 or 11. For the photo proportion keep between 11 and 14 rounds; here we build to Round 16 for a pronounced cone effect. Use a row counter to keep track of many tall rows.
Round 13 :
Turn. Ch3, dc in next 22 sts, 2 dc in center stitch, dc in next 22 sts, 2 dc in last stitch – total 51 (51)
Round 14 :
Turn. Ch3, dc in next 24 sts, 2 dc in center stitch, dc in next 24 sts, 2 dc in last stitch – total 55 (55)
Round 15 :
Turn. Ch3, dc in next 26 sts, 2 dc in center stitch, dc in next 26 sts, 2 dc in last stitch – total 59 (59)
Round 16 :
Turn. Ch3, dc in next 28 sts, 2 dc in center stitch, dc in next 28 sts, 2 dc in last stitch – total 63 (63)
Info :
Fasten off red yarn leaving a 12" tail for sewing later. This tail will be used to sew the white ridge edge around the hat and attach the hat motif to the background panel. Ensure each triangle is blocked flat with the tip slightly rounded as in the photo before adding the white ridge.
Round 17 :
Using white yarn join with sl st at lower left edge. Ch1, sc evenly around the entire triangle edge working 1 sc per dc, add 2 sc at each corner to keep shape flat — total approximately 67 sc depending on your gauge (approx 67)
Round 18 :
Ch2, hdc around the entire white ridge in FLO to create a slight raised ridge (1 hdc in each sc) — total approx (67)
Info :
The white ridge both frames the hat and gives a seam to join to the background. Work slowly and evenly so the white ridge sits centered over the red triangle edge. Carry the red tail under white ridge and use it to whipstitch the hat to the background panel when assembling.
Round 19 :
Fasten off white leaving a long tail for sewing. Weave in starting tail under ridge to hide. Block triangle and set aside. Repeat to make as many hat motifs as required for runner length (the pictured runner uses 8 hats).
— Background Cluster Panel (gray textured sections that sit between hats) :
Info :
The gray textured background is worked as a repeating scalloped/cluster panel that nests around the white ridge of the hat triangles. Use light gray worsted yarn and 5.0 mm hook. Each background panel is worked in rounds from a small magic loop center expanding into shells and star-like clusters for texture.
Round 1 :
Make a magic ring, ch2 (counts as hdc), work 11 hdc into ring, pull tight, join with sl st to top of ch2 — total 12 hdc (12)
Round 2 :
Ch1, *skip 1, (5 dc cluster) in next st, skip1, sc in next st* repeat around to create ridged nuggets and join with sl st — you will have 6 clusters and 6 sc spaces (6 clusters + 6 sc)
Round 3 :
Ch2, work 2 hdc into each sc space between clusters (12 hdc total evenly spaced), work 1 sc between each cluster and set up for shell placement — total approx 18 stitches (18)
Info :
The clusters create the bubbly texture seen in the gray areas. Keep your tension slightly looser than the red hat triangle to achieve a soft background that sits under the white scallops.
Round 4 :
Ch3, *2 dc + ch1 + 2 dc (shell) into top of each gray cluster from Round 2, sc in the middle of the hdc group between shells* repeat around — total 6 shells (6 shells + 6 sc)
Round 5 :
Ch1, sc in each st and in each ch1 space between shells (work evenly to prepare for expansion) — total approx 30 sc (30)
Round 6 :
Ch2, hdc in each sc around working 1 hdc in the front loop only (FLO) to create a subtle ridge — total approx 30 hdc (30)
Info :
To create the scalloped edge that frames two hats, we will expand this panel in increasing rounds adding clusters and shells so it extends into an oblong shape. Add extra clusters on two opposite sides intended to meet the adjacent hat's white ridge.
Round 7 :
Ch1, *sc in next 4 sts, 5 dc cluster in next st*, repeat around adding 2 extra 5-dc clusters opposite each other (these will form the rounded meeting points where hats join) — total approx 36 sts (36)
Round 8 :
Ch3, 2 dc in the space between clusters, dc into each of next 4 sc, (2 dc, ch1, 2 dc) in the center of each 5-dc cluster to accentuate shell, continue to work evenly around — total approx 44 (44)
Round 9 :
Ch1, sc around in each stitch and ch-space to tidy the row — total approx 44 sc (44)
Info :
Keep track of which side has the larger rounded cluster — this side will butt up against the white ridge of the next hat. Plan orientation so the hat triangles alternate pointing along the runner.
Round 10 :
Ch2, hdc in each sc around working 1 hdc in BLO to create a defined edge for the final white scallop join — total approx 44 hdc (44)
Round 11 :
Ch1, sc in next 3 sts, shell (3 dc, ch2, 3 dc) in next st, sc in next 3 sts; repeat around to create large scallops that will align with the white scalloped border used later — expect 11 scallops (approx)
Round 12 :
Ch1, sl st to center of first shell, make 7 sc evenly into shell center to puff it slightly and anchor it (this creates the pronounced rounded bump visible near each hat base), repeat for each shell — total approx 77 sc added across shells (77)
Info :
Fasten off gray leaving long tails for seaming. Make one background panel for each hat plus one extra end panel if finishing both ends with scallops. Block lightly to open shells and ensure consistent shape across panels.
— Joining and Continuous Border :
Info :
After making all hat triangles and background panels, you'll join them into a continuous runner. The joining uses white yarn to create a uniform ridge along each hat edge and to join panels together with sc and decorative picot-like loops. Work the continuous border from left to right joining as you go.
Round 1 (Joining start) :
With white yarn, place first hat and adjacent gray panel stacked as they will sit on the table. From the back of the gray panel, sl st to the white ridge area that touches the hat. Ch1, sc through both layers (white ridge and gray panel) every 4th stitch to match alignment (approx 16 stitches across the long seam) — continue joining along entire seam.
Round 2 :
Once seam is joined, ch3, *skip 1, 3 dc shell in next st, picot (ch3, sl st to same st) for decorative beading*, repeat along the seam to create a decorative beaded ridge seen along the hat edges — counts will vary by seam length (approx 16 shells)
Info :
Work slowly while joining; pin pieces together and use the stitch markers to keep seams evenly spaced. If joining multiple motifs, join the next hat’s white ridge to the next gray panel in the same manner, maintaining orientation of the hats so tips point alternately if desired.
Round 3 :
Ch1, sc across seam to tidy, then work 1 sc in each seam gap, sl st to the seam start to finish a continuous join. Repeat this for each subsequent hat + panel pair so you build a long strip.
Round 4 :
After all pairs are joined into a strip, with white yarn work 1 round of sc evenly around the entire runner edge (top and bottom) to create a uniform foundation for the final scalloped border — total stitches varies by runner width (approx 600+ for full runner pictured)
Info :
This foundation sc round evens the edge and hides tails from seaming. Keep counts consistent; if your runner flares in places, adjust sc counts slightly to even the edge but try to maintain consistent hook tension.
Round 5 :
Ch3, shell (3 dc, ch2, 3 dc) in every 4th sc around to make the large white scallops that define the runner border. Join with sl st. Expect approximately 2-3 shells per hat side depending on gauge — count across the whole runner for a final total (approx 40 shells for pictured length)
Round 6 :
Ch1, sl st to center of each shell, work 7 sc into shell center to puff (same technique used on the gray panel) then join — this creates the puffy scallop texture visible on each rounded flap connecting hats (approx 280 sc total across all scallops)
Info :
Placement of shells should align so large scallops sit beneath the hats and between them. If you need to adjust shell placement, frog back the sc foundation and reposition every few shells for correct alignment.
— Pom-Poms (Large White Pompoms) :
Info :
Pompoms are worked separately using white worsted yarn and a 2-3" diameter pom pom maker or cardboard template. Each pompom is densely wrapped and trimmed to create a fluffy ball like those shown at each hat tip. Make one pompom per hat plus one for each end if desired.
Round 1 :
Wrap white yarn around a 2.5" pom pom maker approximately 150-220 times depending on how full you want the pompom. For a very dense pompom wrap more times. Tie securely with strong yarn and then cut and trim evenly into a round shape.
Round 2 :
Use a long tail from pompom yarn to tie the pompom to the hat tip by passing the tail through the center of the white ridge and through the back of the triangle. Tie several tight knots and weave the tail back into the pompom body for security.
Info :
To get the neat photo look, trim the pompoms after attaching and comb or flick fiber to create a soft, even ball. If you want extra security add a dot of fabric glue at the attachment point on the ridge under the pompom.
— Holly Berry Clusters (small red clusters) :
Info :
Small clusters of three red mini-poms or tightly wrapped mini pom poms create the holly berries you see near each hat base. These are roughly 0.5"-0.75" diameter and are made by wrapping yarn around two fingers or a small template then tying off and trimming.
Round 1 :
Make mini pom poms by wrapping bright red yarn 20-40 times around two fingers or a 1/2" template. Tie tightly around the middle with a strong double knot. Cut loops and trim into tidy tiny balls (approx 3 per holly cluster).
Round 2 :
Sew three mini pom poms together in a triangular cluster using a tapestry needle and a short tail of red yarn then attach cluster near the outer edge of the gray scallop next to each hat base. Secure with multiple passes and weave ends in.
Info :
If you prefer embroidered berries, make French knot style puff stitches using a small hook and a short tail to tie off behind the work; either method gives the same visual pop.
— Finishing Border and Edge Tidying :
Round 1 :
With white yarn join at any seam, ch1, sc evenly around entire runner edge to tidy and close any gaps left from joining. Work 1 sc per visible loop or stitch, adjust counts at corners by placing 2 sc to flatten corners — total varies (approx 700 sc)
Round 2 :
Ch2, work 1 hdc in each sc around in BLO to create a defined finished ridge that gives a clean edge to the scallops and runner sides — total equals prior sc count (approx 700 hdc)
Round 3 :
To finish, sc into every other hdc and *picot (ch3, sl st into same st)* at regular intervals across the top edge of each scallop to create a delicate beaded effect shown in the photo. Repeat around runner. Fasten off and weave in all ends securely.
Info :
Block runner gently: lay flat on a blocking board, use pins to open scallops and shells to even shape, steam lightly using a damp cloth (do not press directly). Allow to dry completely before use; this helps scallops sit uniformly and gives a finished professional look.
— Optional: Make Runner Shorter or Longer :
Info :
You can scale this runner by making fewer or more hat-panel pairs. Each hat + gray panel pair measures approximately 7-9" along the runner depending on gauge and hat size. For the pictured long runner make 8 pairs; for a shorter runner make 4-6 pairs. To extend length, simply repeat the make-and-join sequence for additional hats and panels until you reach your desired size.
Info :
Check your gauge and measure one completed hat+panel pair before committing to how many repeats you need. Write down the width of one pair as you go to calculate total runner length quickly.
Completing this Santa Hat and Pompom Christmas Runner is a joyful, satisfying project that transforms yarn into a beautiful seasonal statement piece 🎄. Each hat motif, scallop and pompom adds personality and texture until you have a long, festive runner that brightens any table. The repeating units make the work meditative and easy to scale—perfect for gifting or decorating your own home. Enjoy the cozy rhythm of crochet and the proud moment of seeing the finished runner in place ✨🧶.