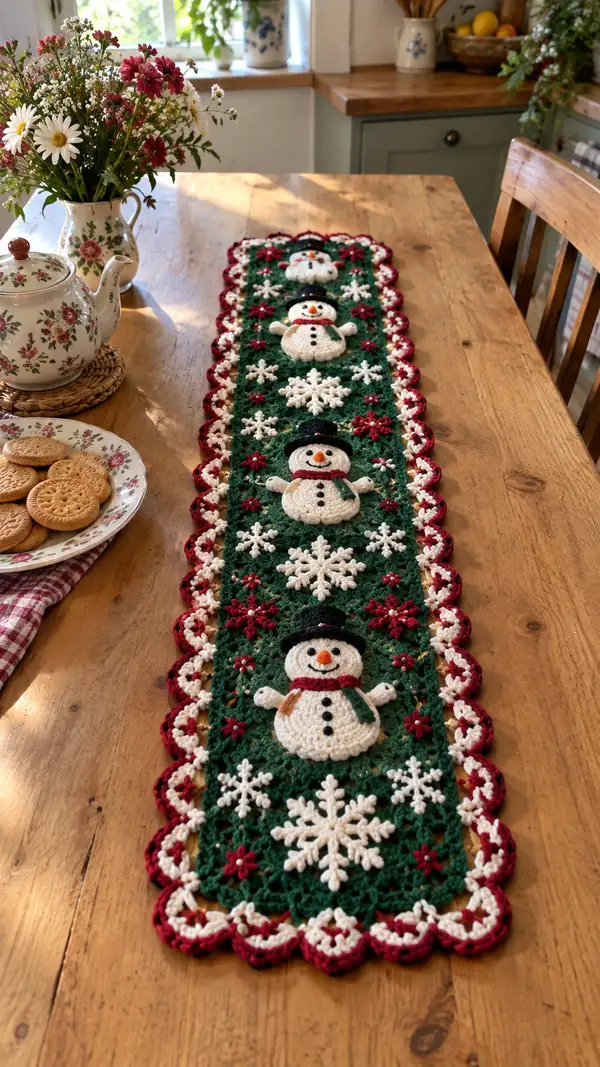
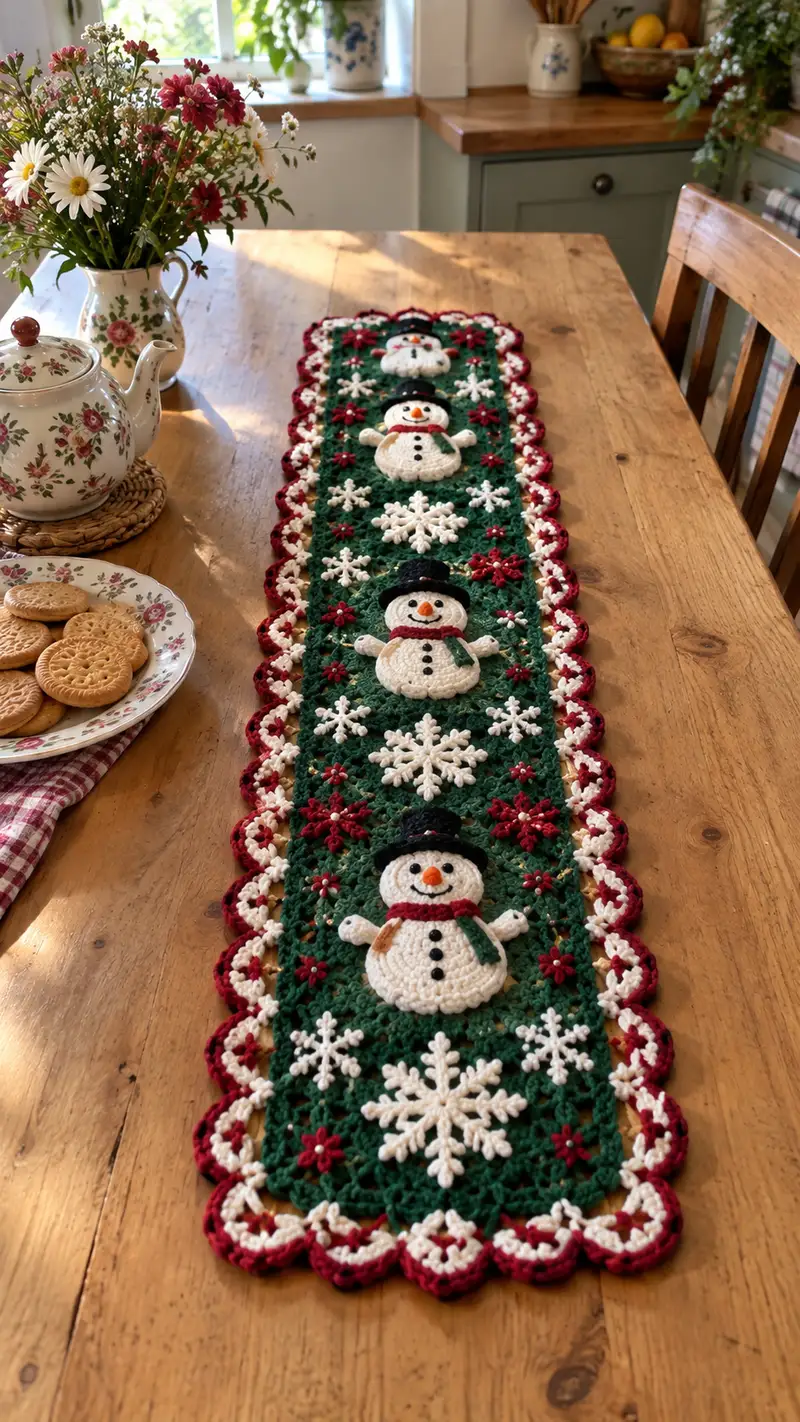
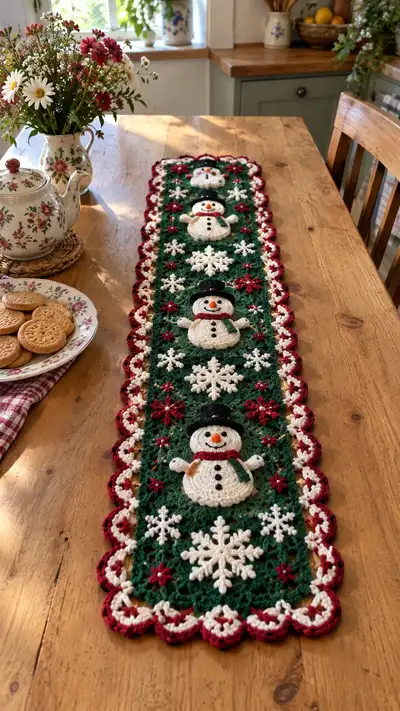
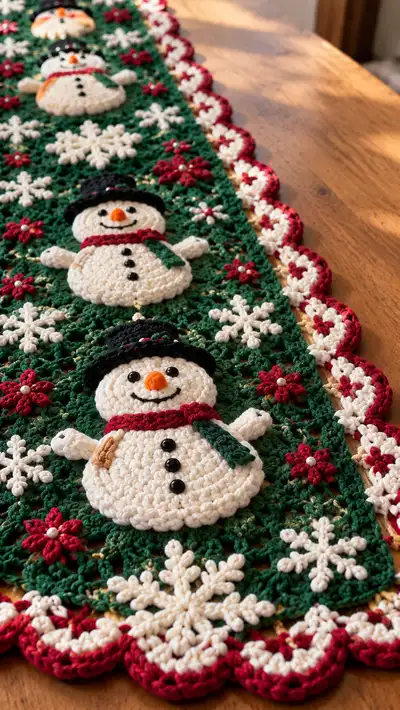
Create a long, festive table runner featuring a row of three cheerful 3D snowman appliques, layered snowflakes, tiny poinsettia flowers and a scalloped red-and-cream border. Worked in worsted-weight yarn, this elegant runner combines granny-style openwork panels in deep evergreen with raised, textured white snowmen and decorative accents for a classic Christmas look. The finished piece photographs beautifully on a wooden table and makes a lovely holiday centerpiece or gift.
Progress Tracker
0% Complete
— Base Panel (Rectangular Granny Lattice) :
Round 1 :
Using deep evergreen yarn and 4.0mm hook. ch 6, join with sl st to form ring, ch 3 (counts as dc), 11 dc into ring, join with sl st to top of ch-3 (12 dc) (12)
Round 2 :
ch 3, dc in same st, *ch 2, skip 1 st, 2 dc in next st; rep from * around, join (creates 12 two-dc groups separated by ch-2 spaces)
Round 3 :
Join new color if desired or continue evergreen. Work corners and side extension: in each ch-2 space work (2 dc, ch 2, 2 dc) to form square corners; between corners work 2 dc in each ch-2 space to enlarge rectangle. Continue laying out rectangle of granny-type clusters until panel length equals desired runner length in motifs — we are making panels that will accommodate three large snowman motifs with spacing: make 12 motif-width repeats long (detailed instructions follow).
Info :
This runner is constructed as a continuous rectangular panel of openwork granny clusters. Work evenly to keep the panel straight; you will later trim and block to exact measurements. The base panel will receive appliques — block it flat before sewing pieces on for best placement.
Round 4-10 :
Continue building the rectangular granny lattice by working rounds of (2 dc in each 2-dc group, ch 2 at corners) to increase the fabric evenly. After round 6 start measuring frequently; aim for panel width of approximately 18-20 cm (7-8 inches) and long enough to fit three snowmen spaced evenly - final rectangle before edging will be approximately 100-120 cm depending on gauge.
Info :
For a neater join later, use a multiple of 4 clusters across for the width; this makes scalloped edge layout symmetrical. Count your clusters and note positions where appliques will sit (we will mark these positions after blocking).
Round 11 :
To stabilize the openwork edge, sl st across and make a round of sc in each stitch around the entire rectangle. Work (sc, ch 2) in corner stitches to maintain corner points. This creates a solid frame to which we will join appliques and border.
Round 12-18 :
Optional: add a narrow decorative round of dc in BLO around the panel to create texture. Work 1 dc BLO in each st for 6 rounds to build a slightly raised field where appliques will be sewn, giving a shadow effect beneath the snowmen.
Info :
Block the base panel flat. Pin it square and spray lightly with water, then allow to dry. Mark the centerline and three equally spaced positions for the snowman centers with pins — this makes applique placement accurate.
— Snowman Head (Make 3 identical heads) :
Round 1 :
With cream yarn and 3.5mm hook. mr, 6 sc in mr (6)
Round 3 :
(1 sc, inc) x 6 (18)
Round 4 :
(2 sc, inc) x 6 (24)
Round 5 :
(3 sc, inc) x 6 (30)
Round 6 :
(4 sc, inc) x 6 (36)
Info :
Eye placement: place safety eyes or sew beads between Rounds 8-9, approximately 6-8 sts apart depending on desired expression. For this runner, we recommend 6 stitches apart measured across the head (use beads for secure, flat attachment).
Round 7-14 :
1 sc in each st (36). Work 8 rounds to create height for the head (Rounds 7-14 inclusive). If you prefer a slightly domed head, work the last two rounds in BLO to create a tiny ridge.
Info :
If using safety eyes, attach and secure washers before continuing. If sewing embroidered eyes, wait until the head is completely finished and sewn in place — embroidery lies flatter after blocking.
Round 15 :
(4 sc, dec) x 6 (30)
Round 16 :
(3 sc, dec) x 6 (24)
Info :
Do not stuff the snowman head — this is a flat applique. Instead, add a tiny amount of batting only if you want a slight puff. We recommend none so the head sits flat on the runner.
Round 17 :
(2 sc, dec) x 6 (18)
Round 18 :
(1 sc, dec) x 6 (12)
Round 20 :
Fasten off leaving long tail for sewing. Weave tail through remaining 6 sts and pull closed slightly to leave a small central dimple; this helps create the round shape when sewn onto the panel.
Info :
Make three identical heads and block them lightly flat. If you wish a puffier head, insert a small circle of craft batting between the head and the panel when sewing.
— Snowman Body (Make 3 identical bodies) :
Round 1 :
With cream yarn and 3.5mm hook. mr, 6 sc in mr (6)
Round 3 :
(1 sc, inc) x 6 (18)
Round 4 :
(2 sc, inc) x 6 (24)
Round 5 :
(3 sc, inc) x 6 (30)
Round 6 :
(4 sc, inc) x 6 (36)
Round 7 :
(5 sc, inc) x 6 (42)
Round 8 :
(6 sc, inc) x 6 (48)
Round 9-16 :
1 sc in each st (48) for 8 rounds to create the full, rounded lower body. These rounds provide the body width you see in the photographs.
Info :
The body is a shallow dome worked flat; leave it unstuffed for a flat applique look that sits nicely on the runner. If you prefer a slightly stuffed look, add a very thin layer of batting before sewing down.
Round 17 :
(6 sc, dec) x 6 (42)
Round 18 :
(5 sc, dec) x 6 (36)
Round 19 :
(4 sc, dec) x 6 (30)
Round 20 :
(3 sc, dec) x 6 (24)
Round 21 :
(2 sc, dec) x 6 (18)
Round 22 :
(1 sc, dec) x 6 (12)
Round 24 :
Fasten off leaving long tail for sewing. Flatten slightly and weave tail through remaining 6 sts to create small dimple at top center to accept the head seam. Block lightly if desired.
Info :
When placing the body on the panel, align centers exactly and pin before sewing. Sew through the dimple area to make a slight neck indentation for a natural snowman silhouette.
— Snowman Arms (Make 6: 2 per snowman — short curved arms) :
Round 1 :
With cream yarn and 3.5mm hook. ch 6, sc in 2nd ch from hook and across (5 sc) — this makes a small flat tube base
Round 2 :
Ch 1, turn, sc in each st across (5)
Round 3 :
Fold the strip in half widthwise and sl st along one short edge to create a short rounded arm. sl st to next position and fasten off leaving long tail for sewing.
Info :
For a slightly thicker arm, work two rounds and then fold and sl st to close. Position arms slightly lower than head on the body, curving outward for a welcoming pose.
Round 4-8 :
Repeat to make second arm for each snowman (total 6 arms for three snowmen). Optionally surface-slip-stitch to add thumb/hand indentations by making small sl st clusters at the tip.
— Snowman Hat (Make 3 hats) :
Brim Round 1 :
With black yarn and 3.5mm hook. mr, 6 sc in mr (6)
Brim Round 3 :
(1 sc, inc) x 6 (18)
Brim Round 4 :
(2 sc, inc) x 6 (24)
Info :
This round forms the brim. After finishing the brim you will build the crown of the hat as a small shallow cylinder. Optionally add a decorative band by changing to red for one round.
Crown Round 5 :
Ch 1, work 1 sc in BLO of each st around (24). This creates a slight ridge for the crown.
Crown Round 6-11 :
1 sc in each st around (24) for 6 rounds to build hat height. For a shorter top, work 4 rounds. For a slightly rounded crown, work last round in FLO.
Round 12 :
Fasten off leaving long tail for sewing. Block the hat gently and press flat. Optionally add tiny seed bead or embroidered band detail using red/green threads.
— Carrot Nose (Make 3) :
Round 1 :
With orange yarn and 3.5mm hook. ch 2, 3 sc in 2nd ch from hook (3)
Round 2 :
1 sc in each st around (3)
Round 3 :
(1 sc, inc) x 3 (6)
Round 4 :
1 sc in each st (6)
Round 5 :
Taper: (1 sc, dec) x 2 (4) - fasten off leaving tail for sewing. Thread tail through remaining sts and pull gently to shape a tapered nose. Secure with a few stitches to the head.
Info :
Sew the nose angled slightly downward and centered between the eyes; secure firmly so it does not rotate when the runner is moved.
— Scarf (Make 3 scarves) :
Round 1 :
With berry red yarn and 3.5mm hook. ch 30 (or long enough to wrap around the neck area once plus tails), join to form a loop with sl st (optional: do not join and leave as straight scarf tails)
Round 2 :
Ch 1, sc in each ch or around the loop (30). Fasten off leaving long tail to sew in place. Weave the scarf around the neck area (between head and body) and tack the scarf ends to the body with hidden stitches.
Info :
Work the scarf in hdc for a chunkier look (replace sc with hdc). Add fringe by cutting short lengths and knotting to scarf ends if desired, but keep flat to lie neatly on the base panel.
— Snowflake Motifs (Make 6 large and 6 small) :
Round 1 :
With cream yarn and 3.5mm hook. mr, ch 3 (counts as dc), 11 dc in ring (12)
Round 2 :
Ch 1, *dc in next st, ch 3; rep from * around, join (creates 12 ch-3 loops)
Round 3 :
*(sc, ch 4, sc) in ch-3 loop; rep around to make star points (12 points). Fasten off, weave ends and block each snowflake stiffly for a crisp shape.
Info :
For raised bobble-style snowflakes, use a cluster of puff stitches for each arm instead of simple scs. Spray lightly with starch and pin flat to dry to maintain shape.
Round 4-8 :
For extra-large snowflakes, add a further decorative round: join again and work picot clusters on each point (ch 5, sl st to 3rd ch for picot) then secure. Make 6 large and 6 small snowflakes to match spacing seen in photographs.
— Poinsettia Flowers (Make 12 small flowers) :
Round 1 :
With berry red yarn and 3.5mm hook. mr, ch 2, 10 hdc in ring, join (10)
Round 2 :
*ch 3, tr in same st, ch 3, sl st in next st; rep around to make 5 petals. Fasten off and attach a small pearl or bead in the center of each flower.
Info :
Sew each flower to the green base panel between snowmen and around larger snowflakes as in the picture. Use a small dot of fabric glue under the bead if sewing is difficult.
— Border Scallop (Two-color scalloped border) :
Round 1 :
With cream yarn. Join at edge and work 1 sc in each st all the way around the rectangle to create a baseline for scallops. Keep stitches evenly spaced.
Round 2 :
Switch to berry red yarn. Work scallops: *skip 2 sts, 7 dc in next st, skip 2 sts, sl st in next st; rep around to create large scallops. Adjust spacing so scallops are evenly placed.
Round 3 :
Switch to cream yarn. Work picot rounds on top of red scallops: sl st to center of scallop, *(ch 3, sl st in top of last dc) x 3; rep across scallop centers to form alternating cream flowers along the edge. Fasten off and weave ends.
Info :
Work scallops carefully; count clusters across the width to ensure scallops at both short ends are symmetrical. If necessary, add or subtract a sl st between scallops to space evenly.
— Assembly and Applique Placement :
Info :
After blocking and preparing all motifs, lay the base panel flat and mark centerline and three centers for snowmen: top third, center, bottom third — equal spacing. The distance between centers should correspond to the size of your panel; mark with pins where the center of each snowman will be.
Step 1 :
Position the body piece first; center it over the marked point and pin in place. Sew around the outermost rounds of the body using a yarn needle and matching cream yarn with small whip stitches through both layers to anchor it flat. Hide ends under the edge stitches.
Step 2 :
Center the head above the body, leaving a small overlap for the neck indentation. Sew the head in place using the long tail left when fastening off, taking small, invisible stitches so the seam sits flat. Repeat for all three snowmen.
Step 3 :
Sew arms to sides of each body using the long tail from the arm pieces. Tuck the arm ends slightly under the edge of the body and secure with several small stitches to ensure they do not flip up.
Step 4 :
Attach hats: align hat brim on top of head rounding slightly forward, tack down at 3 evenly spaced points and whip stitch around brim if desired. Add a tiny embroidered band or a red stitch for ribbon detail.
Step 5 :
Sew scarves around necks: wrap scarf around the seam between head and body and secure both ends to the body so the scarf appears wrapped. Lay one tail over the body to the side and tack in place.
Step 6 :
Arrange and sew snowflakes and poinsettia flowers: space three large snowflakes between the snowmen (one between each pair) and smaller snowflakes along the edges. Sew poinsettia clusters into the openwork green spaces to echo the border color.
Info :
Attach beads for eyes and buttons now: sew black beads for buttons in a vertical line down the center of the body (3 per snowman) and two small black beads for eyes on the head. Sew securely with several passes and knot inside the motif or use a tiny dab of fabric glue on the knot for extra security.
— Final Finishing Rounds and Edge Secure :
Round 1 :
Once all motifs are sewn, with evergreen yarn pick up along the border edge and work 1 round sc to even out any joins and to hide attachment stitches. Keep stitches uniform and keep corners neat with ch-2.
Round 2 :
With berry red yarn, re-emphasize scallops if any gaps appear by working 5 dc in the scallop centers, sl st to secure; this tightens the edge and makes scallops pop.
Info :
Weave all yarn tails thoroughly into the back of the work and trim. Give the runner a final light blocking to smooth everything and to secure motifs — pin motifs so they sit neatly and spray lightly with water; allow to dry completely before display.
Round 3 :
Optional decorative surface embroidery: with metallic thread or gold yarn, couch a thin accent line horizontally between snowmen to echo picture's thin golden lines. Use a blunt tapestry needle and couch every 6-8 stitches to avoid puckering.
Info :
Final inspection: check bead security, stitch reception under motifs and the flatness of snowflakes. If any motif lifts, tack down with an invisible stitch from the underside only.
This cheerful snowman table runner brings vintage holiday charm to any table and makes a lovely handmade gift! Each textured snowman, snowflake and poinsettia is created separately then arranged on a deep green openwork panel to create a beautiful, layered centerpiece. I hope this pattern inspires cozy holiday decorating and thoughtful gift-making. 🧶❄️🎁