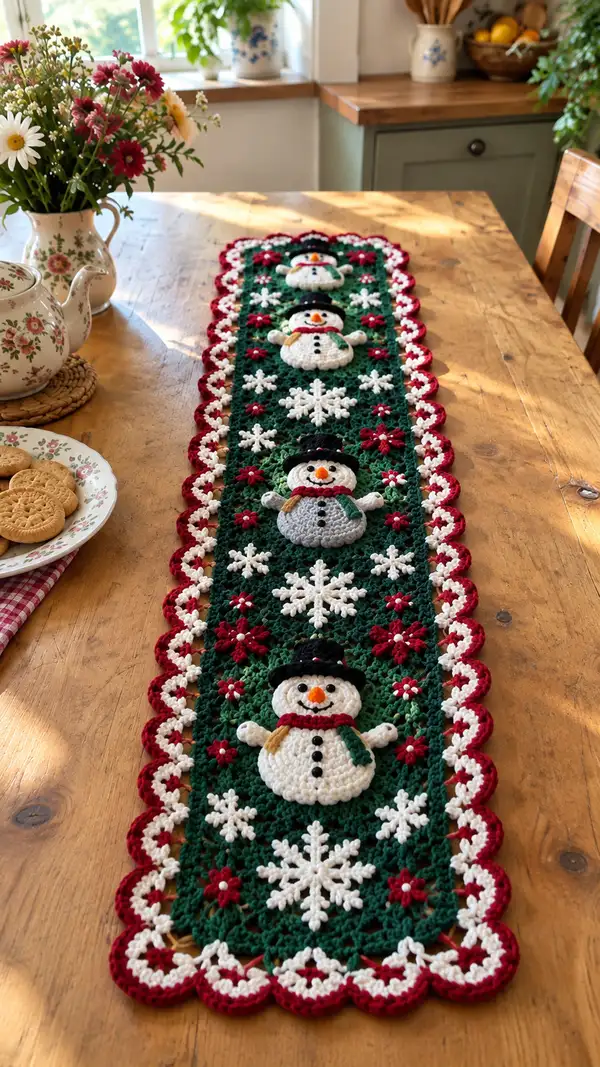
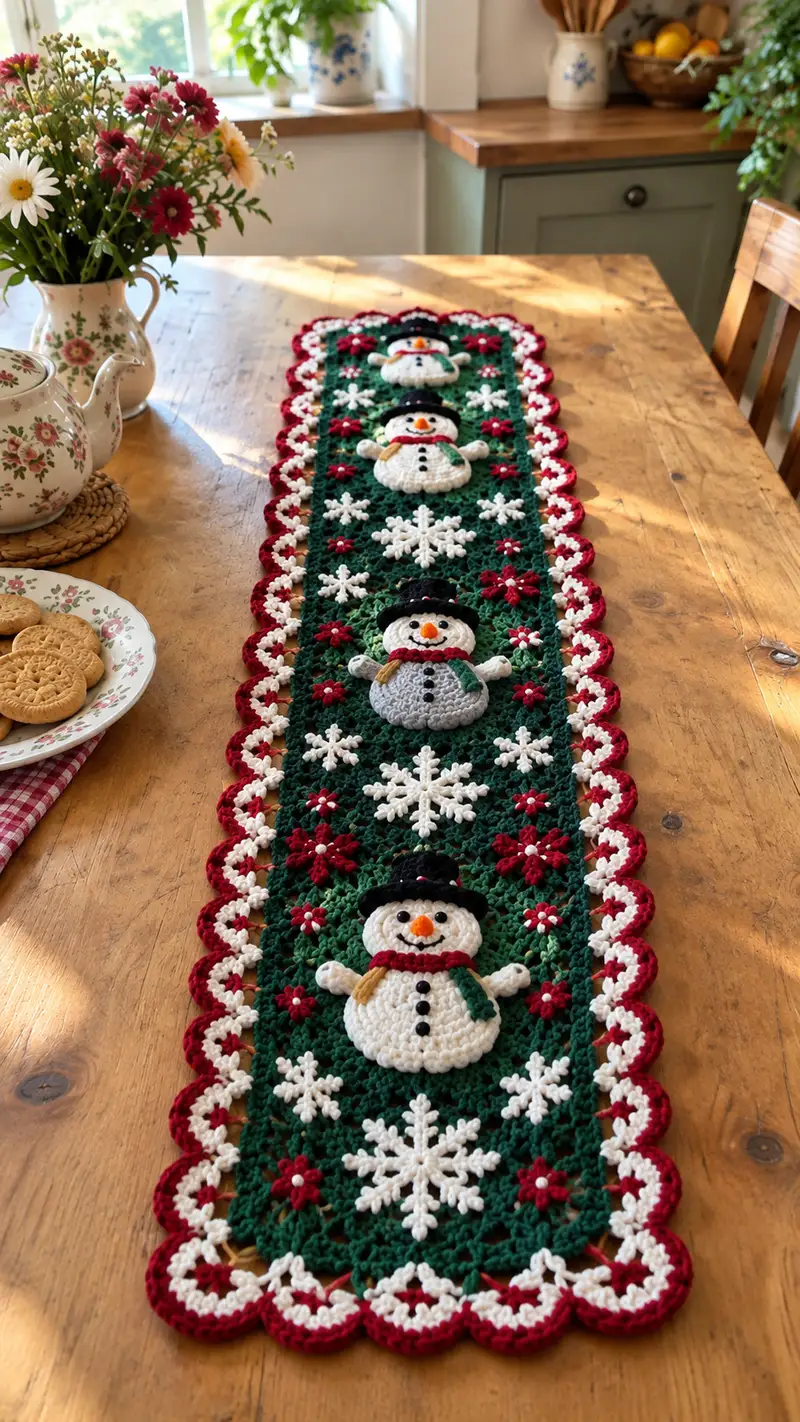
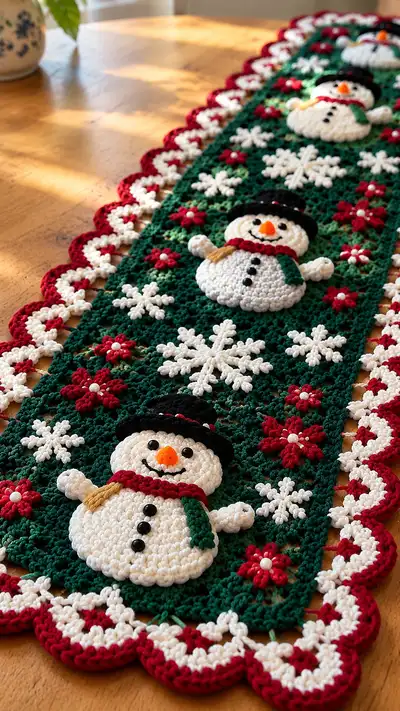
Create a charming holiday table runner featuring three dimensional snowman appliques, delicate white snowflakes and poppy red flowers on a deep green lattice background. This pattern uses basic stitches with layered appliques and a scalloped red-and-white border for a handmade heirloom look. Perfect for seasonal decor, it combines textured motifs and simple assembly to produce a show-stopping table centerpiece. Detailed instructions guide you through every round, color change and assembly step.
Progress Tracker
0% Complete
— Main Granny Lattice Panel :
Info :
This runner is built as a long rectangle formed by repeating granny clusters worked on a dense foundation. Use worsted weight yarn and a 4.0mm hook for the green lattice. Make a central strip 8 clusters wide and repeat rows until the runner is the desired length (recommendation: 44 clusters long to fit three snowmen with spacing shown).
Foundation Row 0 :
Create a foundation chain of 8 clusters wide: ch 8 clusters equivalent + turning chain. Example: ch 200 (adjust to your gauge; this pattern uses 8 cluster width across and 44 cluster length for pictured size).
Round 1 :
Row 1: With green, dc in 4th ch from hook (counts as dc+ch1), ch1, skip 2 ch, *(dc,ch1,skip2) across to last ch, dc in last ch to create first row of mesh; turn (establish a grid of dc-ch spaces).
Round 2 :
Row 2: ch3 (counts as dc), dc in next dc, *ch1, sk next ch1 space, dc in next 2 dc; repeat across to end; turn forming even lattice (maintain consistent tension) (width unchanged).
Round 3-44 :
Repeat Row 2 until the central panel reaches the length to accommodate three snowman appliques with spacing: for the reference piece, 44 repeats gave three evenly spaced snowmen and decorative snowflakes between them (maintain even stitch count each row).
Info :
If your gauge differs, measure spacing by placing a test snowman applique onto the panel; adjust number of rows to get even placement. Block panel flat before attaching appliques for clean joining.
— Snowman Head (make 3) :
Round 1 :
MR, 6 sc into ring (6)
Round 3 :
(1 sc, inc) x6 (18)
Round 4 :
(2 sc, inc) x6 (24)
Round 5 :
(3 sc, inc) x6 (30)
Info :
This snowman head sits slightly raised on the green background; work the first 5 rounds with white on a smaller 3.75mm or 3.5mm hook if you prefer a tighter, more sculptural head.
Round 6 :
(4 sc, inc) x6 (36)
Round 7 :
(5 sc, inc) x6 (42)
Round 8 :
(6 sc, inc) x6 (48)
Round 9-15 :
1 sc in each st (48) (continue even rounds to build head height; keep stitches relaxed so head will flatten slightly on panel)
Info :
Place black bead eyes or embroider eyes between rounds 11-12, approximately 8-10 sts apart depending on desired expression. If using beads, leave tails long to sew into position when attaching to panel.
Round 16 :
(6 sc, dec) x6 (42)
Round 17 :
(5 sc, dec) x6 (36)
Round 18 :
(4 sc, dec) x6 (30)
Info :
Begin very light stuffing now to keep the head slightly domed, but avoid overfilling to maintain a nice flat-on-panel look; use small bits of fiberfill and press evenly.
Round 19 :
(3 sc, dec) x6 (24)
Round 20 :
(2 sc, dec) x6 (18)
Round 21 :
(1 sc, dec) x6 (12)
Info :
Fasten off leaving a long tail (about 20-25cm) for sewing to the body applique and green panel. Finish stuffing and flatten the back slightly so it sits flush on the panel when sewn.
— Snowman Body / Belly (make 3) :
Round 1 :
MR, 6 sc into ring (6)
Round 3 :
(1 sc, inc) x6 (18)
Round 4 :
(2 sc, inc) x6 (24)
Round 5 :
(3 sc, inc) x6 (30)
Info :
The belly is slightly larger and more flattened than the head to give a pleasing snowman silhouette. Use the same white yarn and 3.75mm hook for a denser texture so belly holds shape when sewn over the green lattice.
Round 6 :
(4 sc, inc) x6 (36)
Round 7 :
(5 sc, inc) x6 (42)
Round 8 :
(6 sc, inc) x6 (48)
Round 9 :
(7 sc, inc) x6 (54)
Round 10-14 :
1 sc in each st (54) (work even rounds to create the bulk of the belly)
Info :
If you prefer a flatter applique belly, work rounds 10-14 in BLO to create a subtle ridge and slightly reduce fullness. Stuff lightly in the last even round so the belly keeps a soft puff.
Round 15 :
(7 sc, dec) x6 (48)
Round 16 :
(6 sc, dec) x6 (42)
Round 17 :
(5 sc, dec) x6 (36)
Round 18 :
(4 sc, dec) x6 (30)
Info :
Stuff the belly fairly firm but still plush; the belly is the main 3D element and should feel substantial so it sits proud on the runner. Fasten off leaving a long tail for sewing to the panel and for joining head to body.
Round 19 :
(3 sc, dec) x6 (24)
Round 20 :
(2 sc, dec) x6 (18)
Round 21 :
(1 sc, dec) x6 (12)
Info :
Use the long tail to sew the belly to the panel first, then attach the head on top of the belly so the seam is hidden behind the scarf. Alternatively sew the head to the belly first then attach as a unit.
— Snowman Arms (Make 6 for 3 snowmen, 2 each) :
Round 1 :
MR, 6 sc into ring (6)
Round 3 :
1 sc in each st (12)
Info :
Arms are small rounded puffs with a slight taper; they will be sewn into the side of the belly. Work in white and stuff lightly so they hold a rounded shape.
Round 4 :
(2 sc, dec) x3 (9)
Round 5 :
1 sc in each st (9)
Round 6 :
(1 sc, dec) x3 (6)
Round 7 :
1 sc in each st (6)
Round 8 :
Fasten off leaving long tail for sewing; lightly stuff; shape into a short arm and position on the side seams of the belly at rounds 10-12 when sewing to the panel.
— Hat (Make 3) :
Round 1 :
With black, MR, 6 sc into ring (6)
Round 3 :
(1 sc, inc) x6 (18)
Round 4 :
1 sc in each st (18)
Info :
Hat is shaped like a small dome with a broader brim. Work rounds 1-4 to form the top of the hat. Optionally add a red crocheted band after round 4 for decoration.
Round 5 :
FLO: (1 sc, inc) x6 (24) (work FLO to create a defined brim join)
Round 6 :
1 sc in each st (24)
Round 7 :
(3 sc, dec) x6 (18)
Round 8 :
Round 8: 1 sc in each st (18) Fasten off leaving tail for sewing; press the hat gently to flatten brim slightly and sew onto top of head between rounds 4-6.
— Carrot Nose (Make 3) :
Round 1 :
With orange, MR, 4 sc into ring (4)
Round 2 :
(1 sc, inc) x2 (6)
Round 3 :
1 sc in each st (6)
Round 4 :
(2 sc, dec) x2 (4)
Round 5 :
1 sc in each st (4)
Round 6 :
Fasten off leaving long tail for sewing. No stuffing required; pinch gently for a tapered look and sew to head between rounds 11-12.
— Scarf (Make 3) :
Info :
Scarves are crocheted flat and then sewn around the neck seam covering the junction of head and body. Use two colors (red/green) as seen in the photos; make one long strip and fringe or crochet end tassels.
Round 1 :
Using red, ch 30 (or length to fit snugly around neck overlapping slightly) Row 1: sc in 2nd ch from hook and across (29)
Round 2-6 :
1 sc in each st for 5 rows (29) Fasten off and join green yarn to create the hanging tail: ch 6, sc back along chain to join, fasten off and weave in ends. Add short mustard/gold fringe by looping a few strands at scarf ends.
Info :
When sewing scarves in place, wrap scarf around the neck seam and use hidden stitches through back loops to create a neat seam. Hide tails on the back of the runner so they are not visible from the top.
— Snowflake Motif (Make multiple) :
Round 1 :
With white, MR, 6 sc into ring (6)
Round 2 :
ch4, sl st in same st to create first arm; *ch4, sl st in next st repeat around 6 arms total; join (creates base spokes)
Round 3 :
Work into each ch4 loop: (sc, hdc, dc, tr, dc, hdc, sc) to form a pointed arm; repeat around for 6 arms. Fasten off leaving tail for sewing.
Round 4-6 :
To increase detailed snowflake size, add decorative picots along arms: attach yarn at arm base, *(ch3, sl st back in 2nd ch from hook) three times along each arm then fasten off. For larger snowflake, work an extra round of tiny chains with sl sts to make a lacy look.
Info :
These snowflakes are meant to be slightly raised; sew into the green lattice at strategic rows between snowmen. Press flat slightly or lightly steam-block for crisp points.
— Small Flower/Poinsettia Motif (Make many) :
Round 1 :
With red, MR, 6 sc into ring (6)
Round 2 :
(ch3, sl st in next st) x6 to create 6 petals (work ch3 petals around)
Round 3 :
Into each ch3 loop: (sc, hdc, dc, hdc, sc) to puff out each petal; finish and fasten off leaving tail for sewing. Add a small white or pearl bead sewn into center.
Info :
Position these small flowers between lattice openings; alternate with tiny white cluster stars for a balanced look. Use pearl beads for the center to match reference photo for elegant detail.
— Background Edge Join and Grid Finishing :
Info :
Once the main lattice panel is made and blocked, plan motif placement. Use a washable fabric marker to mark approximate positions for three snowmen and interspersed snowflakes and flowers. Test place motifs and pin securely before sewing.
Round 1 :
With green, work 1 round of sc evenly around the entire rectangle to tidy raw edges: sc in each st and 3 sc in each corner space to keep corners flat; do not fasten off.
Round 2 :
Switch color to white to prepare the inner border: *ch3, skip 2 sc, sl st in next sc to create open loops around border; repeat across sides to create spaces for scallop attachment (this establishes picot arches for red scallop to anchor to)
Info :
If your panel width/length differs, adjust the number of ch loops proportionally so that scallops sit evenly; mark loops with stitch markers every 10th loop to maintain even spacing during scallop work.
— Scalloped Border (White inner, Red outer) :
Round 1 (White Inner) :
With white, attach to one corner loop: ch1, *(sc, ch3, sc) into loop; sl st to next loop; repeat all around (this creates white inner loops that will be highlighted by red scallops)
Info :
Keep tension loose for scallops so they lie flat without pulling the panel edges inward. Work one side at a time and ensure scallops mirror on opposite side for symmetry.
Round 2 (Red Outer Scallop) :
With red, into each white loop work: (sl st into loop, ch1, 5 dc, ch1, sl st into same loop) to form a shell. Skip to next white loop and repeat shell across. Work 3 dc in corner loops to create rounded corners.
Round 3 :
Work a second row of red shells offset to fill gaps: sl st into center dc of first shell, ch1, (3 dc) into center, sl st into center of next shell; repeat around for a fuller scallop edge. Fasten off and weave ends.
Info :
For the double-color scallop effect shown, leaving a narrow white border visible behind the red shells creates a crisp two-tone edge. Block the runner again after border is attached for a neat finish.
— Decorative Beads and Buttons :
Info :
Sew on black beads for three buttons vertically aligned on the belly (use 3 beads per snowman), and small black beads for eyes. Use a tiny dab of fabric glue on bead underside if you plan to machine-wash occasionally; otherwise sew beads securely with multiple passes.
Round 1 :
Embroider smile with black yarn across the face: insert yarn needle at one cheek, bring out under nose, stitch a slight curve, and backstitch to secure; knot and hide tail on the back of the head applique.
Info :
For child-safe items or if you prefer no beads, embroider buttons and eyes with satin stitch using black yarn instead of beads.
— Finishing Touches :
Info :
Weave all tails at least 4-5 cm into the back of each applique. Trim excess. Lightly steam-block the assembled runner on a blocking board, pinning scallops to maintain shape. Allow to dry fully before use.
Final Check :
Inspect every sewn join for gaps; reinforce stitches where needed using a thin upholstery or yarn thread. Remove pins and display your runner centrally on a dining table or sideboard.
This Festive Snowman Table Runner brings warmth and charm to any holiday table! Each knitted detail — from the sculpted snowman faces to the scalloped red-and-white border — adds personality and handcrafted elegance. Enjoy the process of assembling the modular motifs, and relish seeing the runner come together as a cheerful centerpiece. 🧶❄️ Make one for yourself or gift it to someone who loves cozy seasonal decor. Happy stitching and may your holidays be merry and bright! 🎁