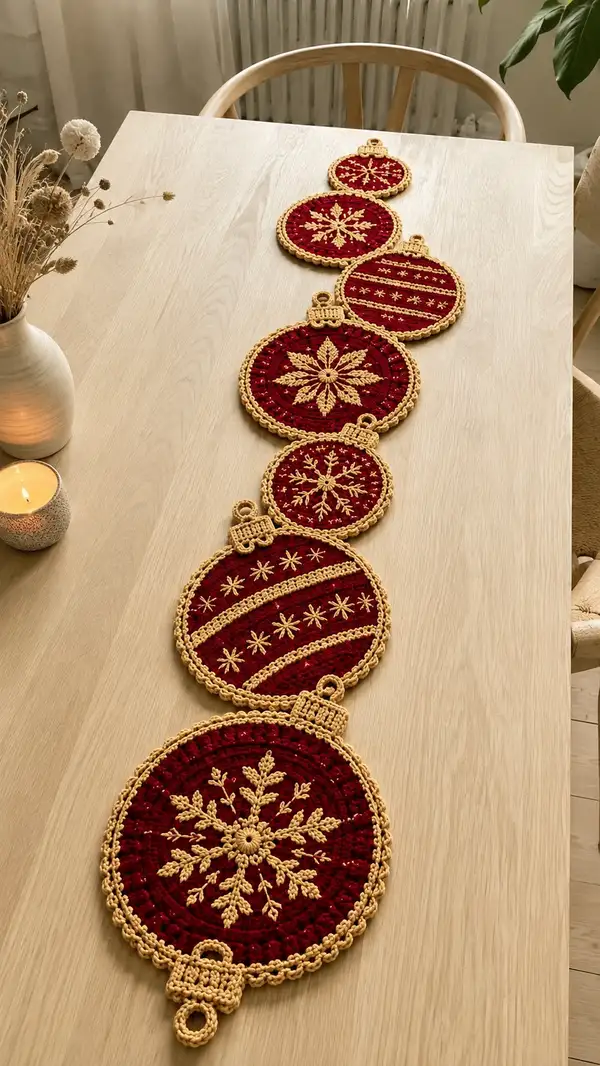
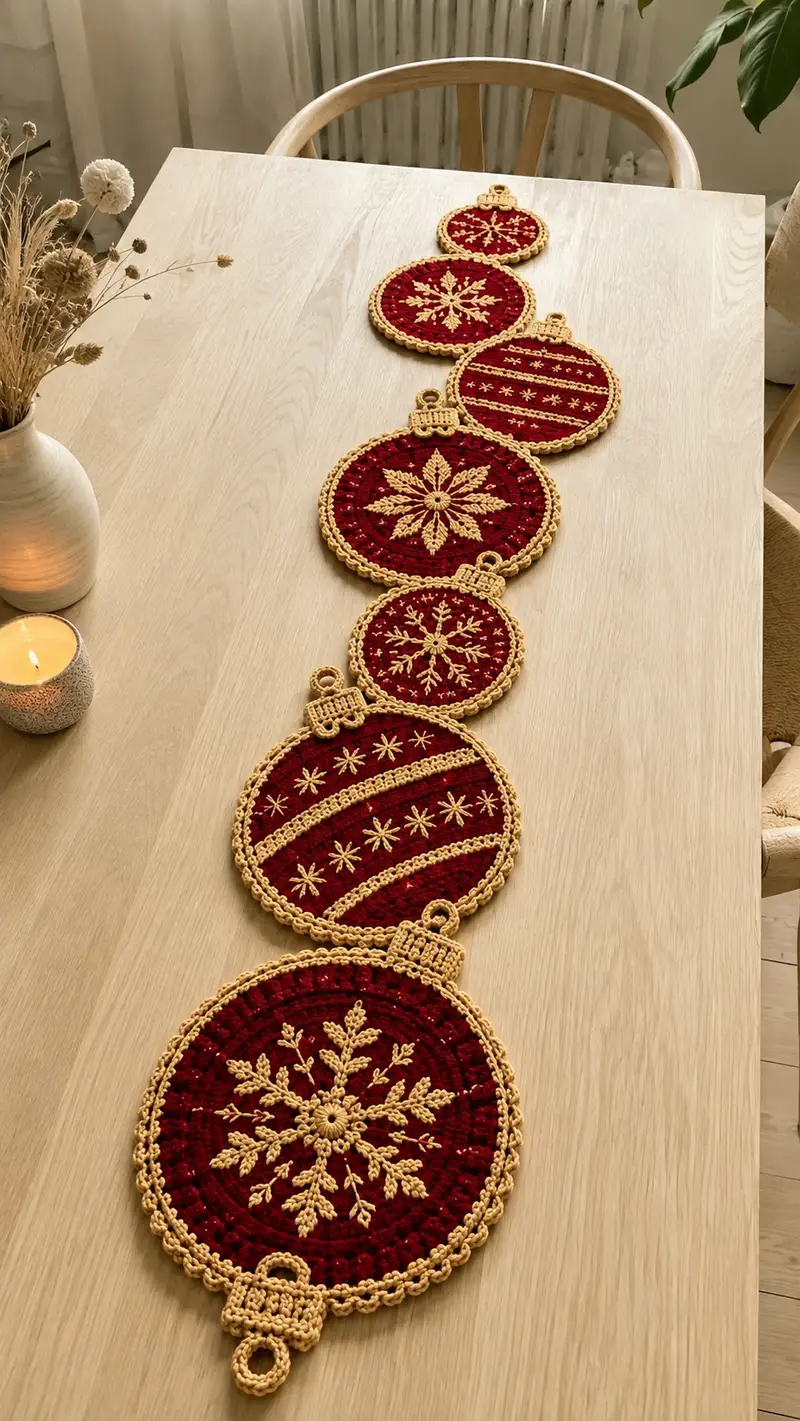
Create a stunning holiday table runner made of linked crochet ornament motifs in deep red with gilded gold accents. This pattern walks you through crocheting three sizes of flat ornament circles, crocheted caps and hanging loops, plus surface embroidery snowflakes and stripe details. The motifs are joined with a decorative chain border to form a long, elegant runner perfect for tables and sideboards.
Progress Tracker
0% Complete
— Overview & Notes :
Info :
This runner is composed of seven circular flat motifs in three sizes linked by a small crocheted cap and loop at their tops. The motifs are worked in deep red as the main field with metallic gold used for surface embroidery, caps and the decorative outer chain border. Work flat in rounds without joining to create a smooth face for embroidery. The pattern lists rounds per motif size; repeat counts are exact and consistent to keep each motif flat and the same size.
Info :
Gauge is not critical for this decorative runner, but to achieve a polished look and avoid holes showing through the embroidery, use a hook slightly smaller than the yarn label recommends. Block motifs flat before surface embroidery for even stitches. Make 2 large (approx 23 cm / 9 in), 2 medium (approx 18 cm / 7 in) and 3 small motifs (approx 13 cm / 5 in). You can adjust number and spacing to fit your table.
— Large Ornament Motif (Make 2) :
Round 1 :
6 sc in magic ring (6)
Round 3 :
(1 sc, inc) x 6 (18)
Round 4 :
(2 sc, inc) x 6 (24)
Round 5 :
(3 sc, inc) x 6 (30)
Round 6 :
(4 sc, inc) x 6 (36)
Info :
At this point your motif is forming a flat circle; keep tension even and avoid stretching stitches. Use a stitch marker to identify the start of rounds.
Round 7 :
(5 sc, inc) x 6 (42)
Round 8 :
(6 sc, inc) x 6 (48)
Round 9 :
(7 sc, inc) x 6 (54)
Round 10 :
(8 sc, inc) x 6 (60)
Info :
Rounds 1-10 expand the motif to a wide flat disc. From here we will build texture and surface for embroidery. If your circle cups slightly, block it flat before continuing.
Round 11 :
1 sc in each st (60)
Round 12 :
1 hdc in each st (60)
Round 13 :
1 sc in each st BLO (60)
Round 14 :
1 sc in each st FLO (60)
Info :
These alternating rounds add subtle ridges that catch the gold embroidery. Keep rounds 11-14 neat; use BLO/FLO to emphasize concentric texture which enhances the snowflake embroidery contrast.
Round 15 :
*(7 sc, dec)* x 6 (54)
Round 16 :
1 sc in each st (54)
Round 17 :
*(6 sc, dec)* x 6 (48)
Round 18 :
1 sc in each st (48)
Info :
Fasten off, leaving a 20-30 cm tail for sewing or weaving in later. Lightly block the motif flat with pins so embroidery lines are even. Repeat to make a second large motif.
— Medium Ornament Motif (Make 2) :
Round 1 :
6 sc in magic ring (6)
Round 3 :
(1 sc, inc) x 6 (18)
Round 4 :
(2 sc, inc) x 6 (24)
Round 5 :
(3 sc, inc) x 6 (30)
Round 6 :
(4 sc, inc) x 6 (36)
Info :
Medium motifs are scaled to keep proportion with large motifs; maintain consistent tension so sizes match across the pair.
Round 7 :
(5 sc, inc) x 6 (42)
Round 8 :
(6 sc, inc) x 6 (48)
Round 9 :
1 sc in each st (48)
Round 10 :
1 hdc in each st (48)
Round 11 :
1 sc in each st BLO (48)
Info :
If you plan to use stripe embroidery, mark the center and radial guideline with a removable stitch marker or basting thread so lines are straight when you add gold stripes.
Round 12 :
1 sc in each st FLO (48)
Round 13 :
*(6 sc, dec)* x 6 (42)
Round 14 :
1 sc in each st (42)
Round 15 :
*(5 sc, dec)* x 6 (36)
Round 16 :
1 sc in each st (36)
Info :
Fasten off leaving a long tail. Lightly block flat to make embroidery easier. Repeat to make a second medium motif.
— Small Ornament Motif (Make 3) :
Round 1 :
6 sc in magic ring (6)
Round 3 :
(1 sc, inc) x 6 (18)
Round 4 :
(2 sc, inc) x 6 (24)
Round 5 :
(3 sc, inc) x 6 (30)
Info :
Small motifs reach full size sooner; keep them flatter by working a few even rounds without further increases.
Round 6 :
1 sc in each st (30)
Round 7 :
1 hdc in each st (30)
Round 8 :
1 sc in each st BLO (30)
Round 9 :
1 sc in each st FLO (30)
Round 10 :
*(3 sc, dec)* x 6 (24)
Round 11 :
1 sc in each st (24)
Round 12 :
*(2 sc, dec)* x 6 (18)
Round 13 :
1 sc in each st (18)
Round 14 :
Fasten off leaving a long tail for finishing (18)
Info :
Make three small motifs and block them flat. These will act as narrow ornaments that span the runner to create rhythm between larger pieces.
— Decorative Cap & Loop for Each Motif (Make 7) :
Info :
Each ornament has a little cap and loop worked in gold. The cap is worked flat and then folded and sewn to form a textured top. The loop is a small chain attached to the cap so motifs look like hanging baubles.
Round 1 :
With gold, ch 7, sc in 2nd ch from hook and across (6) — this forms a small rectangle base
Round 2 :
Ch 1 turn, sc across both loops of each st, sc in each st (6)
Round 3 :
Ch 1, sc across (6)
Round 4 :
Fold rectangle so short edges meet; using gold yarn sew the short edges together with sl st or whip stitch, creating a small tube (6)
Info :
After folding and sewing you should have a little cap roughly 1.5 cm tall depending on yarn thickness. Adjust ch count if you prefer a taller cap. Make seven caps.
Round 5 :
Attach cap to top edge of motif by sewing through back loops of outer round; ensure cap covers roughly 10-12 stitches of motif top center. Secure firmly.
Round 6 :
For loop: with gold, ch 6, sl st in 2nd ch from hook and across to create a small chain loop. Attach both ends of loop to top of cap by sewing through cap and motif. Weave in ends.
Info :
Make final adjustments: if loop is too long, shorten chain to ch 4-5. You can make loops decorative by using a second chain and joining below the cap to create a double loop look as shown in the runner photo.
— Surface Embroidery: Snowflake (Large Motif) :
Info :
Use metallic gold yarn or mercerized thread and a yarn needle for fine embroidery. Work on the right side of the blocked motif. Begin by identifying the exact center of the motif (we recommend using the innermost circle created by initial rounds). Mark four cardinal points to keep the snowflake symmetrical.
Step 1 :
Find the center by pulling a contrasting thread through round 1 center or by counting. From the center, using gold thread, make a small satin-stitched dot (6-8 small satin stitches in a tight star) to form the central hub.
Step 2 :
Radial arms: working outward, make eight primary arms using long straight stitches: insert needle at center and bring up at a stitch approximately 12-14 stitches from center (for the large motif this is into Round 10 area). Each arm is a single long stitch; anchor ends with small backstitches to keep tension even.
Step 3 :
Add secondary branches: along each primary arm, make paired short straight stitches angled to form leaf-like branches. Each branch is two parallel stitches anchored at the arm and pointing outward at an angle. Repeat symmetrically around the arm to create a snowflake petal effect.
Info :
Work arms in pairs and check symmetry after each arm pair. Use a removable marker thread to ensure even spacing of eight arms. Keep embroidery stitches small and neat — the gold contrasts strongly with red so tension shows.
Step 4 :
Outline the outer tips of the snowflake with chain-stitch style loops: using embroidery chain stitch or a crochet chain stitched into place with a yarn needle, form tiny chain loops at each outermost leaf to create a raised look.
Step 5 :
Fill gaps with small French knots or tiny satin stitches to simulate frost specks. Make 12-16 knots around the arms, spread evenly. Secure ends by weaving under a few stitches on the wrong side.
Info :
Embroider slowly and step back frequently to evaluate balance. If using thicker gold yarn, use fewer stitches; with fine mercerized thread you can add more delicate detail.
— Surface Embroidery: Star and Stripe Motifs (Medium & Small) :
Info :
There are two common embroidery looks in the runner: striped bands with small star stitches (used on some medium motifs) and smaller snowflake/star bursts (used on small motifs). Use the same center-marking method to align stars and stripes.
Medium - Stripe Band Step 1 :
Identify two concentric rounds where stripe bands will sit (for medium motifs, use Rounds 6-9). Using gold yarn, whipstitch across the surface to create smooth horizontal bands following the round curvature.
Medium - Star Step 2 :
Between stripes, add star stitches: bring needle up at center point, create a short straight stitch radiating outward, repeat to form tiny 6-point stars. Anchor securely with a small stitch in the center.
Small - Starburst Step 1 :
For small motifs use 6 radial stitches to create a compact snowflake: from center make 6 straight stitches spaced evenly; add smaller angled branches along each for detail.
Info :
Keep embroidery tension gentle to avoid puckering the motif. Use the motif ridges as visual guides to align stripes and stars so they remain circular and symmetrical.
— Decorative Outer Edging for Each Motif :
Info :
The gold scalloped border gives the ornaments a framed look and helps when joining motifs. Work the edging after embroidery so stitches sit cleanly atop the outer round.
Round 1 :
With gold yarn attached to the last outer stitch, *sc in next 2 sts, ch 3, sl st in next st* around. Repeat until you circle the motif; adjust last repeat so spacing is even. (Sc count will match motif circumference; expect 36-48 sc depending on motif size.)
Round 2 :
In each ch-3 loop from previous round, work (sc, hdc, 3 dc, hdc, sc) to form a scallop. Sl st to join at the end and fasten off. Weave ends on reverse side.
Info :
For smaller motifs use smaller scallops (sc, 2 dc, sc) in ch-2 loops. Keep scallop sizes proportional to motif scale so the runner reads balanced.
— Joining Motifs with Gold Chain and Interlocking Loops :
Info :
In the runner image, motifs are connected by small chains and the caps overlap slightly. We will mimic this by crocheting a decorative chain join that attaches beneath the cap region of each motif and connects to the next motif's loop.
Step 1 :
Arrange motifs in the desired order on a flat surface, caps all pointing to the same side. Pin them lightly so centers align on a straight line with spacing matching the photo (caps overlapping the rim by ~1 cm).
Step 2 :
Starting at the top of the first (largest) motif, attach gold yarn to the back of the cap seam with a sl st. Ch 12, sc in 3rd ch from hook, sc across to form a chain strip of about 10 stitches. Secure to the cap of the next motif by sl st to a stitch at the bottom of its cap seam. Repeat connecting each adjacent motif with a chain strip; adjust ch count to control spacing.
Info :
If you want a more substantial join, work a row of hdc across each chain strip and then a decorative picot edge to echo the gold scallop rim. Ensure joins are centered so runner lays flat.
Step 3 :
After joining with chain strips, gently tug to ensure motifs sit flat and evenly spaced. Secure all connections by stitching through cap and motif body on the inside; weave in ends firmly.
— Full Runner Border (Optional unified edge) :
Info :
To give the entire runner a finished unified look, work a continuous round of gold around the outermost edge of linked motifs. This is optional but recommended for a polished finish.
Round 1 :
With gold attached at a cap seam, sl st along outer edge of first motif to the join with the next motif. Work sc evenly around the exterior curve of each motif; in concave spaces at joins work 2 sc in the edge for smooth curvature.
Round 2 :
*(sc in next 3 sts, ch 3, sl st in base of ch to form small loop)* around entire perimeter to create a continuous decorative loop chain reflecting the motif scallops. Fasten off and weave ends.
Info :
Take care when working across joins — ease fabric flat and stitch slowly so the border does not pucker. You may choose to work the border in two passes: first to stabilize joins then to add decorative loops.
— Finishing Touches and Weaving In :
Info :
After all embroidery and joining is complete, block the full runner lightly if needed (use a damp cloth, not soaking). Weave all tails into the reverse side of motifs and stitch ends securely. If desired, add a few hand stitches through the runner to a table runner fabric backing for extra stability when displayed.
Step :
Check all loops and caps, trim any stray fibers, and give the gold threads a gentle steam or press from the wrong side to enhance sheen (if yarn allows heat). The runner is ready to display.
Info :
Store the runner flat or rolled with tissue to avoid flattening the scallops. Avoid heavy stacking which could compress embroidery details.
Completing this ornament table runner will bring a sophisticated, festive vibe to your dining room — each stitched star and snowflake becomes a tiny piece of holiday magic. The rich ruby red with gilded gold trim reads like an heirloom decoration and will be admired on every table it graces. I hope you enjoy the meditative rhythm of making each circular motif and then watching them come together into a long, elegant chain. 🧶✨ Share your finished runner and celebrate your handmade holiday spirit! 🎄