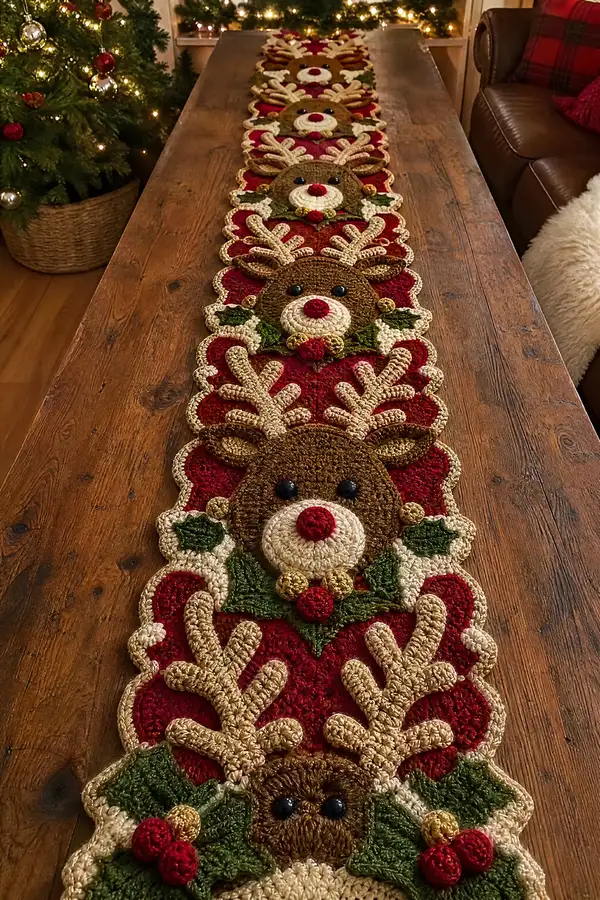
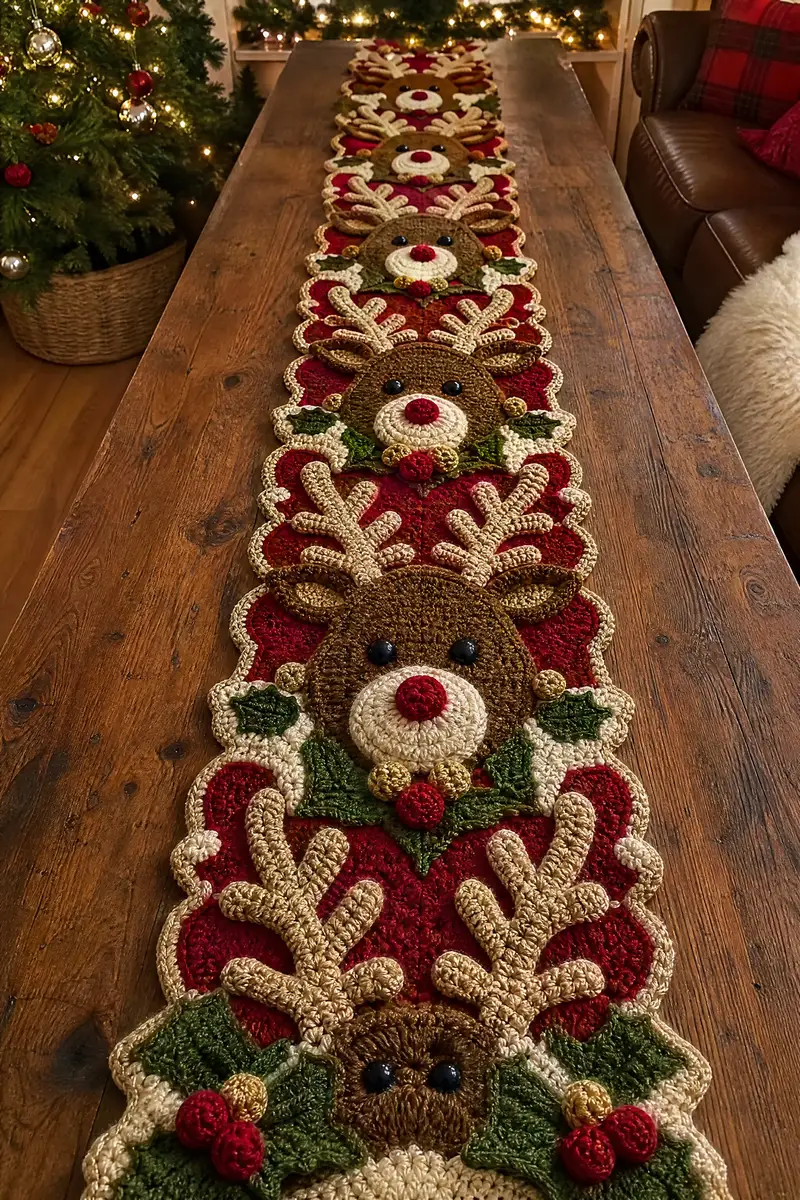
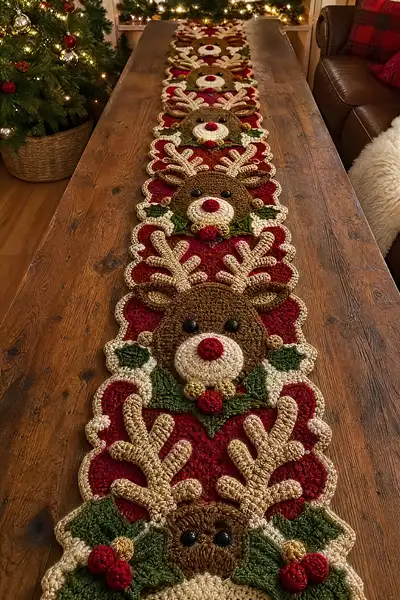
A festive, detailed crochet runner featuring repeating reindeer medallions with holly, gold bells and scalloped edging. Each motif combines textured antlers, a raised muzzle and layered leaves for a rich holiday look. Designed to join multiple identical motifs into a long table runner for holiday centerpieces. Warm color palette of deep red background, warm brown reindeer, cream trims, green holly and metallic gold accents.
Progress Tracker
0% Complete
— Reindeer Head (Face Circle) :
Round 1 :
6 sc in mr with brown yarn (6)
Round 3 :
(1 sc, inc) x 6 (18)
Round 4 :
(2 sc, inc) x 6 (24)
Round 5 :
(3 sc, inc) x 6 (30)
Round 6 :
(4 sc, inc) x 6 (36)
Info :
Keep tension even; this round begins the face that will sit centered on the medallion. Use a stitch marker at the start of each round to keep counts accurate.
Round 7 :
(5 sc, inc) x 6 (42)
Round 8 :
(6 sc, inc) x 6 (48)
Round 9-12 :
1 sc in each st around (48)
Info :
Work even rounds to build height for the face. Place safety eyes later between rounds 10 and 11. If using 12mm eyes, mark positions before embroidering the muzzle.
Round 13 :
(6 sc, dec) x 6 (42)
Round 14 :
(5 sc, dec) x 6 (36)
Round 15 :
1 sc in each st (36)
Round 16 :
(4 sc, dec) x 6 (30)
Round 17 :
(3 sc, dec) x 6 (24)
Info :
At this stage the face is slightly domed; do not stuff — this is a flat applique layer attached to the background medallion. Align rounds so the muzzle will sit centered over rounds 9-11 visually.
Round 18 :
(2 sc, dec) x 6 (18)
Round 19 :
(1 sc, dec) x 6 (12)
Info :
Fasten off leaving a long tail if you prefer to sew the face onto the background medallion; otherwise, you can carry the brown yarn through to the medallion join if working seamlessly. We will block pieces flat before assembly to ensure even joins.
— Muzzle (Raised Circle) :
Round 1 :
6 sc in mr with cream yarn (6)
Round 3 :
(1 sc, inc) x 6 (18)
Round 4 :
(2 sc, inc) x 6 (24)
Round 5 :
1 sc in each st (24)
Info :
To make the muzzle raised, use surface slip stitches around the edge after round 5 or add a very light stuffing inside before closing. If stuffing slightly, use 2–3 grams so the piece remains low-profile.
Round 6 :
(3 sc, dec) x 6 (18)
Round 7 :
(1 sc, dec) x 6 (12)
Info :
Fasten off leaving a 20 cm tail to stitch the muzzle onto the face center. Sew with mattress or whip stitch to attach, centering the muzzle over rounds 10–11 of the face circle.
— Nose Bobble :
Round 1 :
6 sc in mr with bright red yarn (6)
Round 3 :
1 sc in each st (12)
Round 4 :
(1 sc, dec) x 4 (8)
Info :
Leave a long tail and lightly stuff the bobble with a pinhead amount of fiberfill to keep it round. Sew centered onto the muzzle with a few secure stitches and weave ends inside the head applique.
— Eyes (sewn or safety eyes) :
Info :
For this runner we suggest 10–12mm glossy black safety eyes. Place eyes on the face circle between rounds 10 and 12, spaced approximately 8–10 stitches apart depending on desired expression. If using sewn eyes, embroider a small tight satin oval using black yarn.
— Ears (Make 2) :
Round 1 :
6 sc in mr with brown (6)
Round 3 :
(1 sc, inc) x 6 (18)
Round 4 :
1 sc in each st (18)
Round 5 :
(3 sc, dec) x 3 (15)
Round 6 :
(2 sc, dec) x 3 (12)
Info :
Flatten ear and join to create a slight cup by slip stitching across the bottom 4–6 stitches if you want a folded ear effect. Fasten off leaving tail for sewing.
Round 7 :
Optional: With cream yarn, sc 6 across center bottom edge to create inner ear contrast (work in FLO if you want a ridge) (6)
Info :
Sew ears symmetrically onto head along the outside edge of round 8 of the face, roughly 6–8 stitches from the top center of the head circle. Angle ears slightly forward for a natural look.
— Antler (Make 2) :
Overview :
Each antler is made as a central stem with 3–4 branches built by short tube segments worked in rows and attached by slip stitches. Work using cream or light tan for contrast. Each antler is made in multiple small rounds to create 3D branching.
Stem Round 1 :
6 sc in mr with cream (6)
Stem Round 3-4 :
1 sc in each st (12)
Stem Round 5 :
(3 sc, inc) x 3 (15)
Stem Round 6-8 :
1 sc in each st (15)
Info :
We build branches by turning and working small tubes out from the stem. Mark the branch points on stem rounds 6–8 using stitch markers where branches will attach (approx every 3–4 stitches).
Branch 1 Anchor :
At marker, ch 1, work 6 sc in FLO around the anchored stitch (6) - treat this as a small tube attached to stem
Branch 1 Tube :
1 sc in each st for 4 rounds (6)
Branch 1 Tip :
(1 sc, dec) x 2 (4)
Info :
Fasten off branch leaving tail to stitch tube back onto stem; flatten slightly and tack every 2–3 stitches to secure branch position. Repeat for subsequent branch points to create layered antler branches.
Branch 2 Anchor :
At next marker, repeat anchor sequence (6)
Branch 2 Tube :
1 sc each st for 3 rounds (6)
Branch 2 Tip :
(1 sc, dec) x 2 (4)
Branch 3 Anchor :
At next marker, ch 1, 6 sc around (6)
Branch 3 Tube :
1 sc each st for 2 rounds (6)
Branch 3 Tip :
2 dec (2) - secure and fasten off leaving long tail
Stem Finish :
Continue 1 sc in each st around stem to reach total stem length of approximately 14–18 rows (adjust to desired scale). Fasten off leaving long tail for sewing.
Info :
Sew antlers to top of head applique aligning base stem behind ears at the topmost row of the face circle. Use pins to arrange branches for attractive silhouette before sewing.
— Holly Leaf (Make 6 per motif) :
Round 1 :
6 sc in mr with forest green (6)
Round 3 :
(1 sc, inc) x 6 (18)
Round 4 :
(2 sc, inc) x 6 (24)
Round 5 :
1 sc BLO around to form a ridge (24)
Round 6 :
Work a picot edge: (sc, ch 3, sl st in 3rd ch) around every 4th stitch to create leaf tip texture. Fasten off leaving long tail for sewing.
Info :
Pin leaves in position around muzzle forming layered clusters. Slightly overlap leaves and tack down with matching yarn for stability. For crisp veins, embroider a center vein with surface slip stitch using darker green yarn.
— Berry (Make 6 per motif) :
Round 1 :
6 sc in mr with bright red (6)
Round 3 :
1 sc each st (12)
Round 4 :
(1 sc, dec) x 4 (8)
Info :
Optionally add a small French knot using embroidery thread to the berry center for a sparkling highlight. Sew berries clustered near holly leaves and stitch gold bells nearby.
— Gold Bell Accent (Make 4 per motif) :
Round 1 :
6 sc in mr with metallic gold yarn (6)
Round 3 :
(1 sc, dec) x 4 (8)
Info :
Fasten off leaving a tail and sew bells in a small chain across the neck area of the reindeer to imitate jingle-bell garland. You can also leave as flat circles for a stitched metallic effect.
— Background Medallion (Main Red Base) :
Round 1 :
6 sc in mr with red yarn (6)
Round 3 :
(1 sc, inc) x 6 (18)
Round 4 :
(2 sc, inc) x 6 (24)
Round 5 :
(3 sc, inc) x 6 (30)
Round 6 :
(4 sc, inc) x 6 (36)
Round 7 :
(5 sc, inc) x 6 (42)
Info :
These medallions will be the backdrop for the face and decorations. Work rounds even until you reach desired medallion diameter. The designer used 10-12 rounds to create a 15–18 cm medallion depending on your hook and yarn.
Round 8-10 :
1 sc each st (42)
Round 11 :
(5 sc, inc) x 6 (48)
Round 12-14 :
1 sc each st (48)
Round 15 :
Work a decorative scallop: *skip 2, 5 dc in next, skip 2, sl st* around to create textured background ridges (48 scallop points)
Info :
Position the reindeer face applique centered on top of the medallion. Use pins to center the muzzle and eye positions before sewing. Tack with small stitches around the perimeter of the face then secure the muzzle and nose.
— Scalloped Edge / Trim (Cream) :
Round 1 :
With cream yarn, join to any outer round stitch of the medallion and ch 1, sc around to create a neat border (48)
Round 2 :
1 sc in each st BLO to create a slight ridge for the scallop (48)
Round 3 :
*(sc, ch 2, 4 dc in next st, ch 2, sc) in every other stitch* around to form big scallops. Adjust to fit the medallion edge evenly.
Info :
For a refined look add a final gold round: join metallic gold and sl st around the peaks of scallops to give an elegant metallic highlight. Carry yarn on the back between points or fasten off and weave in tails for a cleaner front.
— Joining Motifs (Make N motifs & join into Runner) :
Info :
Decide how many medallions (motifs) your table length requires. Each motif measures approx 15–18 cm across. Lay motifs in sequence and pin edges together for alignment. Two common joining techniques are whip stitch join across the facing scallop peaks or join-as-you-go slip stitch method. Below uses slip stitch joining for a neat visible join.
Join Method - Round 1 :
Place two motifs with wrong sides together. Join cream yarn at a scallop peak of motif A, ch 1, insert hook through corresponding scallop peak of motif B, sl st. Continue around matching scallops with sl sts to secure the two pieces together across one point. Repeat across full adjoining edge (approx 10–12 sl st joins depending on scallop count).
Join Method - Round 2 :
After joining peaks, work a round of sc across the seam on the front to tidy the edge: sc through both thicknesses along the seam (approx 24 sc if seam covers 24 stitches). Fasten off and weave ends.
Info :
Test the seam on two sample medallions to ensure alignment. Using matching cream yarn for the join gives the appearance of a continuous scallop border.
— Border for Full Runner (Final Edge) :
Round 1 :
With cream yarn, join at any seam and sc evenly around the entire outer edge of joined motifs, working into both edges where needed to create a continuous border (work even, maintain stitch count roughly proportional to width)
Round 2 :
1 sc in each st BLO to create an inner ridge (work evenly)
Round 3 :
Work a decorative shell: *skip 2, 5 dc in next, skip 2, sl st* around contour shapes and across seams to unify motifs
Round 4 :
With metallic gold yarn, sl st into each shell peak for a refined metallic outline; fasten off and weave ends carefully
Info :
Blocking the entire runner after finishing helps align scallops and flatten seams. Pin to a flat surface and apply gentle steam-spritz blocking, avoiding saturating metallic yarns.
— Alternate Detail: Raised Scrolls and Scroll Background :
Round 1 :
To create raised scroll shapes on the background, use cream yarn and work surface slip stitches in a spiral on the red medallion where scrolls should appear
Round 2 :
Build the scroll with a short tube in dc: ch 4, sl st to anchor, then dc 6 in the chain and slip stitch back along the base - make several and tack down so they look raised and dimensional
Info :
These scrolls become the antler base and lower decorative flourish; they are purely decorative and add the layered look seen in the photograph.
— Detailed Stitch Counts & Tips for Scale :
Info :
Each medallion/face costume is built so the face applique is centered over the medallion and the whole motif is roughly circular with scallops. If your gauge produces a larger medallion, you may reduce increases in outer medallion rounds. Conversely add another increase round for larger scale. Always maintain symmetry: increases should be distributed evenly across rounds as instructed.
— Assembly & Embellishment :
Info :
Arrange holly leaves and berries in clusters under the muzzle and to each side of the face. Sew leaves and berries onto the medallion securely. Attach gold bells in small groups across the neck area of each reindeer motif. Use embroidery to add small closed stitches for nostril dimples or to emphasize leaf veins. For high durability, sew through both medallion and applique pieces several times.
— Repeating the Motif & Measuring Runner Length :
Info :
Make one complete motif as a test and measure it across widest points. Multiply motif width by number of motifs you want and add extra length for seam joins (approx 2 cm per join). The pictured runner appears to have 6 motifs to create an elongated centerpiece; adjust to your table length as required.
— Finishing Touches :
Info :
Weave all tails into the back of the work. Lightly block motifs on a foam board to ensure scallops and antlers sit correctly. If desired, place a thin non-slip runner under the crochet runner on the table to prevent sliding and protect the crochet from spills.
— Optional: Make Motif Smaller or Larger :
Info :
To scale down: use a 3.0mm hook and slightly thinner yarn, reduce final medallion increase rounds by one. To scale up: use a 4.0mm hook and add one extra increase round in the medallion to maintain proportions.
This festive runner makes a beautiful holiday centerpiece and an heirloom-worthy handmade accent. Each motif layers texture and color — from the raised muzzle to the ornate scalloped edges — creating a rich holiday tableau. Assemble a full-length runner that reflects your table and decorate with candles, garlands or a simple evergreen display. 🧶🎄 May every stitch bring holiday joy and warmth to your celebrations! ✨