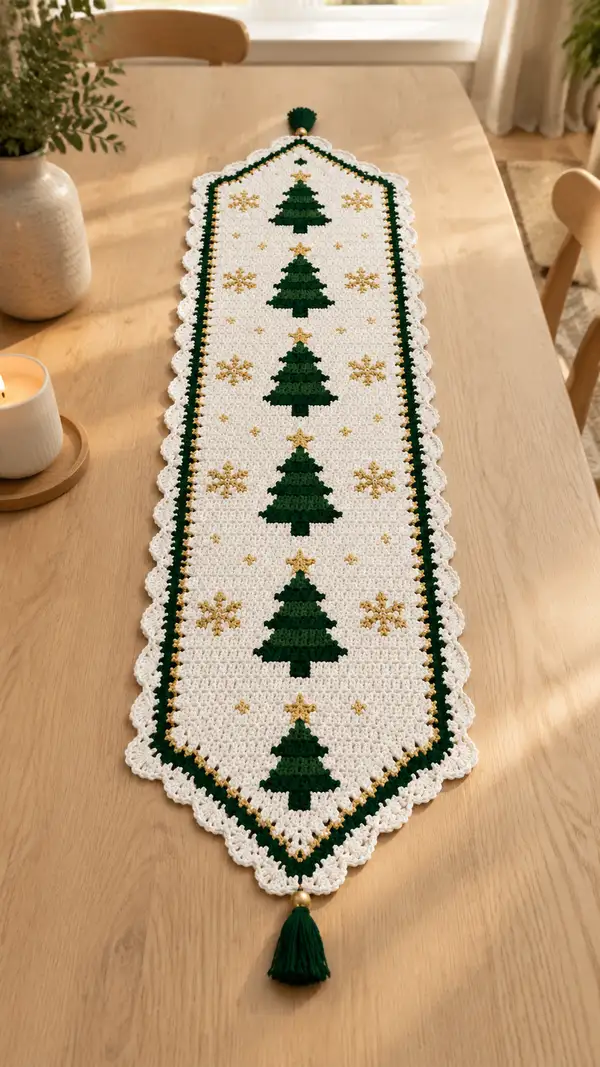
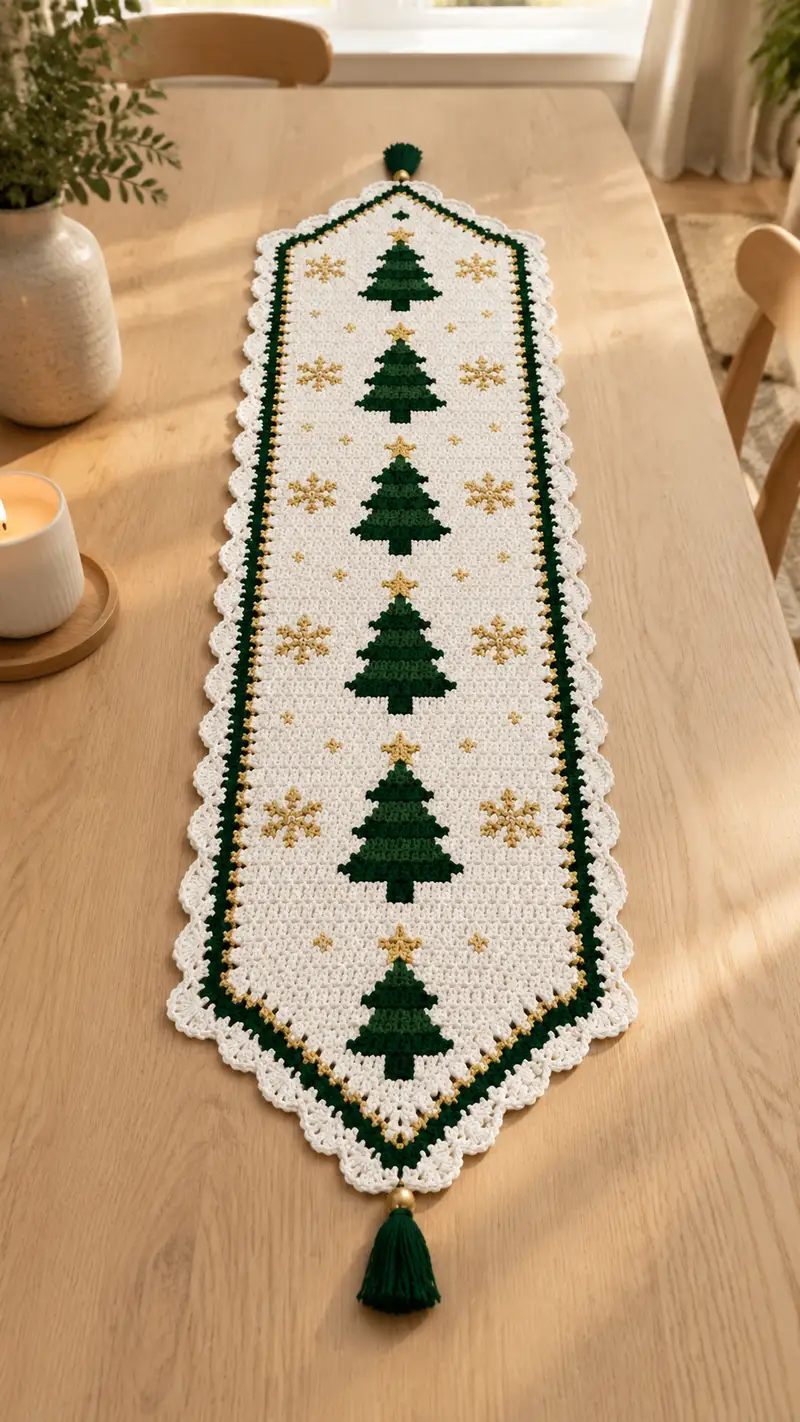
Create a charming holiday table runner featuring five stacked evergreen motifs with gold stars and snowflake accents on a crisp white background. This elegant runner has a deep green inner border, delicate gold trim, and a scalloped white lace edge finished with tasseled beads at each point. The pattern uses simple colorwork and basic crochet stitches—perfect for bringing handmade warmth to your holiday table.
Progress Tracker
0% Complete
— Overview :
Info :
This runner is worked flat in rows using double crochet (dc) colorwork. You will create a foundation chain that yields 81 working stitches across (center column at st 41). The final panel is 121 rows tall (including top/bottom margins), containing five repeated tree motifs spaced evenly. After the main panel is complete, you will add a green inner border, a narrow gold trim, and a scalloped white outer edging. Finally attach tassels with beads to the pointed ends.
Gauge :
17 dc x 10 rows = 4 inches (10 cm) using 4.0 mm hook—gauge is approximate; adjust hook size to achieve a firm, even fabric for colorwork
Panel Dimensions (Approx) :
Width: ~12-14 inches (30-36 cm) across finished runner; Length: ~50-55 inches (127-140 cm) before edging. Adjust by adding extra repeat rows if you want a longer runner.
— Foundation & Row Key :
Info :
Foundation: Chain 84, then work first row of dc. Turning chain 3 counts as first dc. After this foundation, every row will be 81 dc total. Numbered rows below are worked from top edge (Row 1) to bottom edge (Row 121). Maintain the same stitch count per row. Colors used: White (W), Forest Green (G), Gold (O). Center column is stitch 41.
Row 1 :
Ch 84. Row 1: (RS) Dc in 4th ch from hook (counts as first dc) and in each ch across — 81 dc (81)
Info :
Begin with White (W). Keep tension slightly firm to ensure colorwork stitches sit neatly. Place a stitch marker in the first stitch of Row 1 to mark the beginning of each row; move marker up each row.
Row 2-18 :
Rows 2-18: 1 dc in each st in White (W) — 81 dc (81) (work 17 more rows even to form the top margin)
Info :
Top margin creates a clean border above the first tree. You may want to add a subtle gold speckle by changing to Gold (O) for single stitches as shown later in the snowflake rows. Maintain even tension and keep floats on the WS no longer than 4-6 stitches—catch them every few stitches with the main color if needed.
— Tree Motif Repeat (one motif block: 9 rows) :
Info :
Each tree motif is 9 rows tall. Instructions below give exact color placement by stitch column (1-81); the center column is 41. Use the numbers to place green (G) and gold (O) stitches precisely; all other stitches remain white (W). Work each stitch as dc in the color specified. When changing colors, work final yarn-over of the previous dc with the new color for a tidy change.
Motif Row 1 (star) :
Row: Work dc in W for sts 1-40, dc in Gold (O) in st 41 (center), dc in W for sts 42-81 — total 81 dc (81). (This single gold center stitch forms the star point over the tree.)
Motif Row 2 :
Row: W for sts 1-39, G for sts 40-42 (3 stitches), W for sts 43-81 — 81 dc (81).
Motif Row 3 :
Row: W for sts 1-37, G for sts 38-44 (7 stitches), W for sts 45-81 — 81 dc (81).
Motif Row 4 :
Row: W for sts 1-35, G for sts 36-46 (11 stitches), W for sts 47-81 — 81 dc (81).
Motif Row 5 :
Row: W for sts 1-33, G for sts 34-48 (15 stitches), W for sts 49-81 — 81 dc (81). (This is the widest row of the tree.)
Motif Row 6 :
Row: W for sts 1-35, G for sts 36-46 (11 stitches), W for sts 47-81 — 81 dc (81).
Motif Row 7 :
Row: W for sts 1-37, G for sts 38-44 (7 stitches), W for sts 45-81 — 81 dc (81).
Motif Row 8 :
Row: W for sts 1-39, G for sts 40-42 (3 stitches), W for sts 43-81 — 81 dc (81).
Motif Row 9 (trunk) :
Row: W for sts 1-39, G for sts 40-42 (3 stitches trunk), W for sts 43-81 — 81 dc (81).
Info :
The motif sequence above forms a symmetrical stylized tree. When working color changes, carry unused yarn behind your work or catch floats every 4-6 stitches to avoid long loose strands. Use a separate bobbin of green/gold if you prefer to avoid tangles while working multiple trees on the same piece.
— Full Panel Row-by-Row (numbered top to bottom) :
Row 1 :
Dc in W across as established — 81 dc (81)
Row 2-18 :
Continue 1 dc in W across for Rows 2-18 — 81 dc each (81)
Info :
Rows 1-18 create the top white margin. Confirm your stitch marker is at the start of each row to keep columns aligned—especially important for the center column (st 41).
Row 19 (Motif 1 - m1) :
Follow Motif Row 1: W 1-40, O at 41, W 42-81 — 81 dc (81)
Row 20 (Motif 1 - m2) :
Follow Motif Row 2: W 1-39, G 40-42, W 43-81 — 81 dc (81)
Row 21 (Motif 1 - m3) :
Follow Motif Row 3: W 1-37, G 38-44, W 45-81 — 81 dc (81)
Row 22 (Motif 1 - m4) :
Follow Motif Row 4: W 1-35, G 36-46, W 47-81 — 81 dc (81)
Row 23 (Motif 1 - m5) :
Follow Motif Row 5: W 1-33, G 34-48, W 49-81 — 81 dc (81)
Row 24 (Motif 1 - m6) :
Follow Motif Row 6: W 1-35, G 36-46, W 47-81 — 81 dc (81)
Row 25 (Motif 1 - m7) :
Follow Motif Row 7: W 1-37, G 38-44, W 45-81 — 81 dc (81)
Row 26 (Motif 1 - m8) :
Follow Motif Row 8: W 1-39, G 40-42, W 43-81 — 81 dc (81)
Row 27 (Motif 1 - m9) :
Follow Motif Row 9: W 1-39, G 40-42, W 43-81 — 81 dc (81)
Info :
After completing Motif 1, slide marker to mark the row of the motif top so you can keep vertical spacing consistent for subsequent trees.
Row 28-37 (Spacing)
Rows 28-37: 1 dc in W across for 10 rows to space between trees — 81 dc each (81)
Info :
Within these spacing rows you can add small gold accent stitches (O) to create scattered stars or small snowflake dots. To add a dot on one row: work W up to desired column, change to O for 1 dc, then continue in W. Keep floats short or secure the O yarn on the WS.
Row 38 (Motif 2 - m1) :
Repeat motif: Motif Row 1 (W 1-40, O at 41, W 42-81) — 81 dc (81)
Row 39 (Motif 2 - m2) :
Motif Row 2 (W 1-39, G 40-42, W 43-81) — 81 dc (81)
Row 40 (Motif 2 - m3) :
Motif Row 3 (W 1-37, G 38-44, W 45-81) — 81 dc (81)
Row 41 (Motif 2 - m4) :
Motif Row 4 (W 1-35, G 36-46, W 47-81) — 81 dc (81)
Row 42 (Motif 2 - m5) :
Motif Row 5 (W 1-33, G 34-48, W 49-81) — 81 dc (81)
Row 43 (Motif 2 - m6) :
Motif Row 6 (W 1-35, G 36-46, W 47-81) — 81 dc (81)
Row 44 (Motif 2 - m7) :
Motif Row 7 (W 1-37, G 38-44, W 45-81) — 81 dc (81)
Row 45 (Motif 2 - m8) :
Motif Row 8 (W 1-39, G 40-42, W 43-81) — 81 dc (81)
Row 46 (Motif 2 - m9) :
Motif Row 9 (W 1-39, G 40-42, W 43-81) — 81 dc (81)
Row 47-56 (Spacing)
Rows 47-56: 1 dc in W across for 10 rows — 81 dc each (81)
Info :
Place a gold (O) cluster on alternating spacing rows to create delicate snowflakes: choose a 3x3 crossing over three rows (place three O stitches on one row centered around a chosen column, then mirror above/below) OR work small single O stitches as stars. Keep symmetry consistent between spacing bands for a balanced look.
Row 57-65 (Motif 3 rows 1-9)
Rows 57-65: Repeat Motif Row 1 through Motif Row 9 (same column placement as above) — 81 dc each row.
Row 66-75 (Spacing)
Rows 66-75: 1 dc in W across for 10 rows — 81 dc each (81)
Row 76-84 (Motif 4 rows 1-9)
Rows 76-84: Repeat Motif Row 1 through Motif Row 9 (same column placement) — 81 dc each row.
Row 85-94 (Spacing)
Rows 85-94: 1 dc in W across for 10 rows — 81 dc each (81)
Row 95-103 (Motif 5 rows 1-9)
Rows 95-103: Repeat Motif Row 1 through Motif Row 9 (same column placement) — 81 dc each row.
Row 104-121 (Bottom margin)
Rows 104-121: 1 dc in W across for 18 rows — 81 dc each (81)
Info :
At the end of Row 121, fasten off and weave in ends for all working colors securely. If you carried floats, secure at even intervals and trim tails on the WS. Block the panel gently to square it and even the rows before adding the border and scalloped edging.
— Inner Border & Gold Trim (worked in rounds) :
Info :
You will add an inner forest-green border followed by a narrow gold row. Work around the entire rectangular panel. Use sc around with increases at each corner to keep the work flat. Join with sl st at each round end. The counts given are directional; adjust slightly to match your blocked panel if your row counts differ.
Round 1 (attach green) :
With RS facing, join G with sl st to the center stitch of one short side's first row (or any corner if you prefer). Ch 1, work sc evenly across the short edge working 1 sc in each row-end space along the short edge (estimate 18 sc); when you reach the corner, work 3 sc in the corner space. Continue along the long side by working 1 sc in the top of each dc across (estimate 81 sc). At the next corner work 3 sc in corner, sc in each row-end space along the opposite short side (18 sc), 3 sc in corner, then sc across the last long edge (81 sc) to join. Total sts around will be approximately 202 but will vary with your blocking and tension. Join with sl st to first sc.
Info :
To keep an even number of scallop bases later, make note of the final stitch count around. If necessary, add or reduce a few sc along a long side to make the total a multiple of the shell repeat you plan (shells of 5 dc usually prefer an odd/even balance). The example below uses 5-dc shells spaced with 2 sc between each.
Round 2 (gold trim) :
Ch 1, join O (gold). Work 1 sc in each sc around in Gold for one round—placing 3 sc in each corner sc to maintain square corners. Join with sl st to first sc and fasten off O. This thin gold round frames the inner green border.
Round 3 (green ridge)
Join G again with a sl st at any spot of the gold round. Ch 1, *1 sc in next 2 sc, 1 hdc in next sc; rep from * around to create a subtle ridge. Work 3 sc into each corner sc. Join and fasten off G. This ridge helps the scalloped shell sit nicely.
Info :
If you prefer fewer color changes, you can combine Round 2 and Round 3 into a single green round followed by a single gold slip or surface embroidery line instead of a worked gold row.
— Scalloped White Edging (worked around) :
Info :
Scallop uses 2 rounds: a foundation sc round in White, then shell rounds to create the lace scallop. Work shells evenly spaced along the long edges; place shells around corners and short edges with adjusted spacing to keep scallops symmetrical.
Round 1 (foundation, White) :
Join W with sl st to any sc on the outermost green ridge. Ch 1, work 1 sc in each sc around, placing 3 sc in each corner sc. Join with sl st to first sc. Count your stitches around (this number will be used to space shells in the next round). Typical example ~202 sc.
Round 2 (scallop shells) :
Ch 1, *sk 2 sc, (5 dc, sl st) all in next sc (creates shell), sk 2 sc, 1 sc in next sc; rep from * around. At corners work (5 dc) into corner sc to keep shell curvature. Join with sl st and fasten off. For a slightly denser scallop repeat the shell in every 3 sc instead, or adjust to keep full shells sitting evenly across your panel edges.
Info :
Shell placement is visual—if you need to slightly adjust spacing so shells land centered along the long edge, add/remove a sc in the foundation round near the corners. Block the edge after finishing to shape shells open and flat.
— Snowflake & Gold Accent Placement :
Info :
Snowflake accents in the photo are worked as small gold star/snowflakes scattered in the white field between and beside trees. Use single gold dc stitches for tiny stars, and a 3-row 3x3 gold cluster for small snowflakes (place 3 gold dc in one row centered and mirror single gold stitches above and below if you want a cross-shaped snowflake). Coordinate spacing so each tree has matching accents to its left and right in the same vertical position for visual balance.
— Tassels & Beads :
Info :
Each pointed end of the runner (the short sides are finished to a point in the photo) receives a tassel and bead. Use the same green yarn as the trees for tassels and a gold or wooden bead to match the gold trim. Tassels add weight helping the runner lay flat and provide an elegant finish.
Tassel Instructions :
Wrap green yarn around a 2.5-3 inch board 40 times for a full tassel. Slide the looped yarn off and tie a small piece of yarn tightly about 1/2 inch from the top to create the tassel head. Fold and tie another piece around the top to create a narrow neck. Trim the bottom loops to even the ends. Thread the tassel neck through the bead and knot securely on the underside. Sew or weave the tassel neck through the tip of the runner (center of the short edge) using strong yarn and several passes, then weave ends into the runner to hide them.
Info :
For added durability, secure tassels through the panel with a small button or with a few stitches around the bead on the WS. If you want a more muted tassel, mix in a strand of metallic gold with the green wraps.
— Finishing :
Info :
Weave in all ends across the WS with a tapestry needle, burying tails at least 2 inches into the fabric and trimming flush. Lightly steam or wet-block the runner to even stitches and open the scallops. Press with a cloth if using steam to avoid flattening the shell texture. Attach tassels and make sure bead holes are large enough to accept the tassel neck—drill or enlarge bead holes if necessary before threading.
Final Touch :
Check entire runner edges for any loose stitches, reinforce any spots by working a few extra sc with matching yarn. Hang or lay flat on a prepared table—avoid placing heavy unprotected objects directly on the scalloped edging to prevent snagging.
This festive table runner brings a crisp, handmade elegance to your holiday table with stacked evergreen motifs and delicate gold accents. From the neat colorwork trees to the scalloped lace edging and tasseled beads, every step of this project is rewarding and visually delightful. The finished runner will be a warm focal point for seasonal gatherings and a cherished handmade accent for years to come. 🧶🌲✨