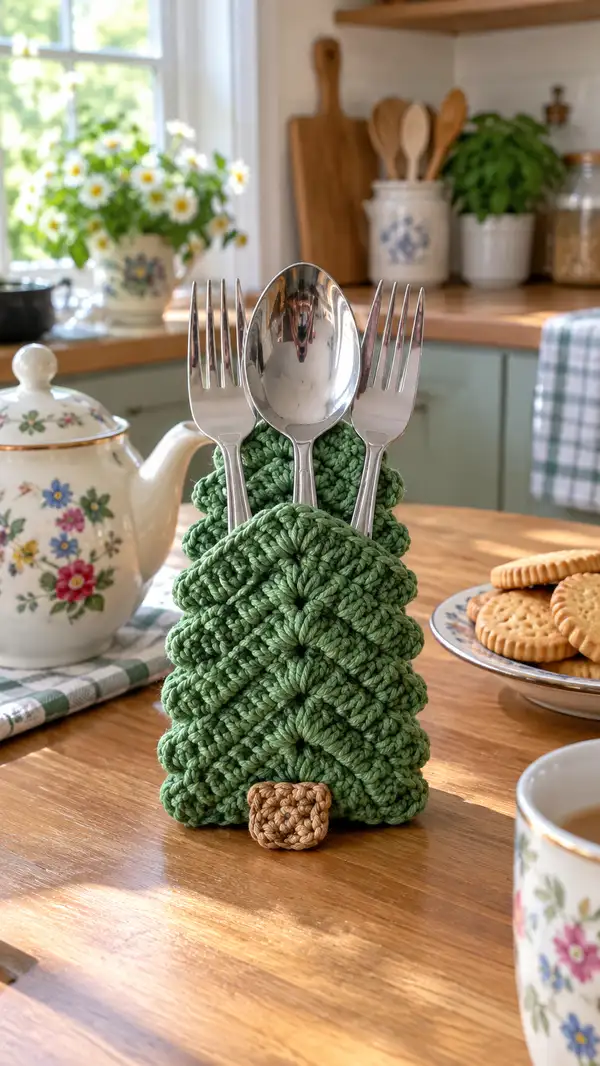
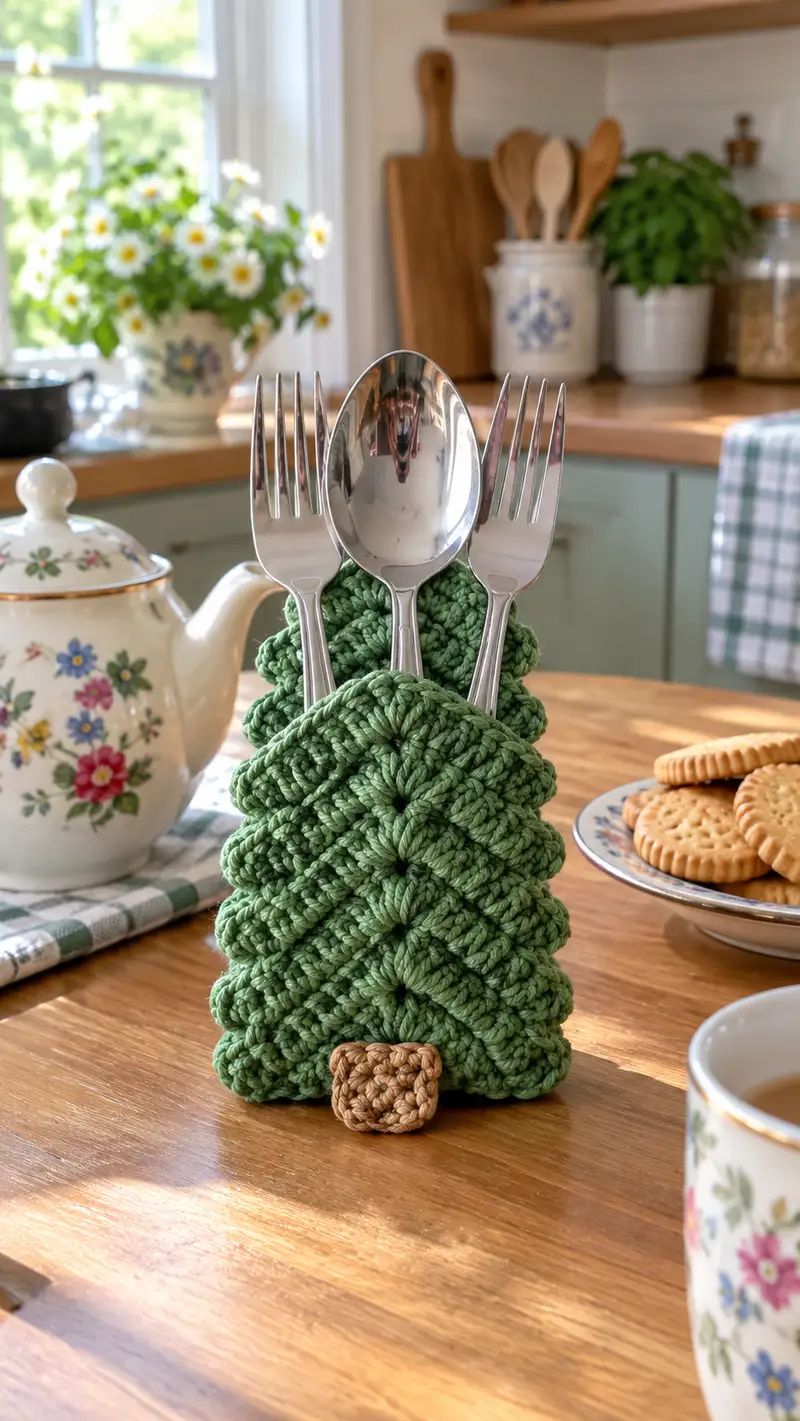
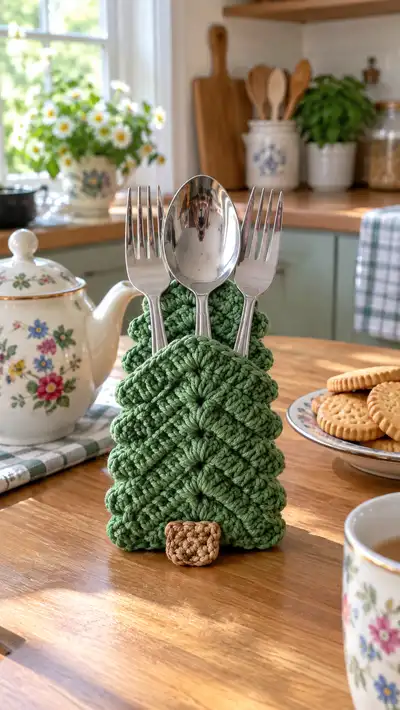
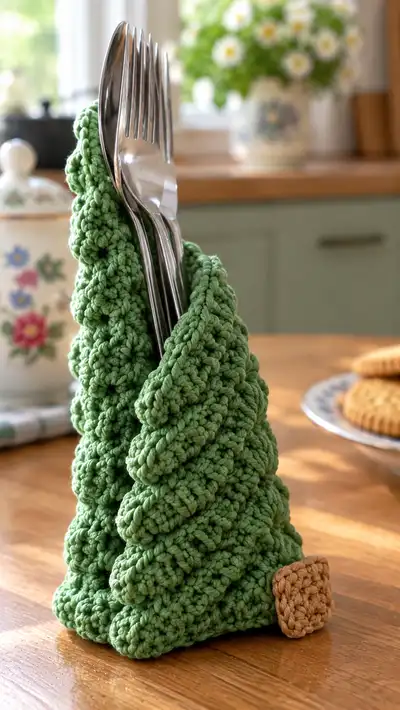
A charming tabletop utensil holder shaped like a layered Christmas tree, worked in textured puff and sc stitches for a dense, sturdy fabric. The tree features scalloped, leaf-like tiers in a warm green and a small crocheted brown trunk that acts as a base accent. Designed to hold forks, spoons and knives upright for holiday tables or everyday farmhouse settings. Clear, step-by-step instructions guide you through the textured layers, shaping, and neat finishing touches.
Progress Tracker
0% Complete
— Notes & Gauge :
Info :
Gauge is not critical for this accessory but for similar size aim for about 18-20 sc x 20 rows = 10 cm in worsted cotton using a 3.5mm hook. This pattern is worked in continuous rounds (spiral) unless otherwise noted. Work tightly to prevent stuffing or utensils from showing through; use a hook one size smaller if your fabric is too loose.
Info :
Puff stitch technique: Yarn over, insert hook into stitch, yarn over and pull up loop (repeat 3-4 times depending on puff fullness), yarn over and pull through all loops on hook, ch1 to close the puff. Keep loops even and do not tighten until all loops are on the hook.
— Tree Body :
Round 1 :
6 sc in magic ring (6)
Round 3 :
(1 sc, inc) x 6 (18)
Round 4 :
(2 sc, inc) x 6 (24)
Round 5 :
(3 sc, inc) x 6 (30)
Round 6 :
(4 sc, inc) x 6 (36)
Round 7 :
(5 sc, inc) x 6 (42)
Round 8 :
(6 sc, inc) x 6 (48)
Round 9 :
(7 sc, inc) x 6 (54)
Round 10 :
(8 sc, inc) x 6 (60)
Info :
By Round 10 you have the widest circumference (approx 60 sts). This will form the full base diameter of the tree. If you prefer a wider tree, work one or two additional increase rounds in the same increase rhythm (e.g., (9 sc, inc) x 6 = 66), but the pattern below assumes 60 sts at the widest point.
Round 11 :
Puff stitch round: *puff in next st, skip next st, sc in next st; rep from * around (60)
Round 12 :
1 sc in each st (60)
Round 13 :
1 sc in each st (60)
Round 14 :
1 sc in each st (60)
Round 15 :
1 sc in each st (60)
Info :
This 5-round sequence creates the lower leafy tier. The puff round gives the scalloped front; the following even sc rounds build body height and stability. Keep your stitches tight to maintain structure.
Round 16 :
Puff stitch round: *puff in next st, skip next st, sc in next st; rep from * around (60)
Round 17 :
1 sc in each st (60)
Round 18 :
1 sc in each st (60)
Round 19 :
(9 sc, 1 dec) x 6 (54)
Round 20 :
1 sc in each st (54)
Info :
Round 19 causes the first gentle taper. Decreases are spaced evenly; count often to ensure the 54-stitch round is achieved. After a decrease round always check that your marker is properly placed at the first stitch of the new round.
Round 21 :
Puff stitch round: *puff in next st, skip next st, sc in next st; rep from * around (54)
Round 22 :
1 sc in each st (54)
Round 23 :
1 sc in each st (54)
Round 24 :
1 sc in each st (54)
Round 25 :
1 sc in each st (54)
Info :
Work two full tiers of leafy rounds before the next decrease to give a balanced layered look. If you want deeper tiers, add an extra even round between puff rounds.
Round 26 :
Puff stitch round: *puff in next st, skip next st, sc in next st; rep from * around (54)
Round 27 :
1 sc in each st (54)
Round 28 :
1 sc in each st (54)
Round 29 :
(8 sc, 1 dec) x 6 (48)
Round 30 :
1 sc in each st (48)
Info :
Now the circumference reduced to 48. This staged decrease after a puff round keeps the scalloped profile and avoids distortion. Continue to check alignment of puffs so that scallops sit one above another for neat tiers.
Round 31 :
Puff stitch round: *puff in next st, skip next st, sc in next st; rep from * around (48)
Round 32 :
1 sc in each st (48)
Round 33 :
1 sc in each st (48)
Round 34 :
1 sc in each st (48)
Round 35 :
1 sc in each st (48)
Info :
This middle portion is very flexible: add or subtract an even round in each tier if you want deeper or tighter tiers. Keep in mind additional rounds increase height. Use a row counter to avoid losing your place during long repeats.
Round 36 :
Puff stitch round: *puff in next st, skip next st, sc in next st; rep from * around (48)
Round 37 :
1 sc in each st (48)
Round 38 :
1 sc in each st (48)
Round 39 :
(7 sc, 1 dec) x 6 (42)
Round 40 :
1 sc in each st (42)
Info :
As the tree narrows, the puffs will sit closer together and create a compact tiered effect. If puffs are too large and crowding, reduce the number of loops in the puff (3 loops instead of 4) or switch to a slightly smaller hook for subsequent puff rounds.
Round 41 :
Puff stitch round: *puff in next st, skip next st, sc in next st; rep from * around (42)
Round 42 :
1 sc in each st (42)
Round 43 :
1 sc in each st (42)
Round 44 :
1 sc in each st (42)
Round 45 :
1 sc in each st (42)
Info :
Keep the back of the tree neat—if you want a visible seam or opening for utensils, you can mark and leave a back gap intentionally (see assembly section). This pattern assumes a narrow pocket opening formed later by stitching the back edges together leaving a vertical slit.
Round 46 :
Puff stitch round: *puff in next st, skip next st, sc in next st; rep from * around (42)
Round 47 :
1 sc in each st (42)
Round 48 :
1 sc in each st (42)
Round 49 :
(6 sc, 1 dec) x 6 (36)
Round 50 :
1 sc in each st (36)
Info :
Halfway through the tiers now. If you like a fuller tree, you could increase the puff frequency here by adding an extra puff round before decreases; adjust counts carefully if you change the rhythm.
Round 51 :
Puff stitch round: *puff in next st, skip next st, sc in next st; rep from * around (36)
Round 52 :
1 sc in each st (36)
Round 53 :
1 sc in each st (36)
Round 54 :
1 sc in each st (36)
Round 55 :
1 sc in each st (36)
Info :
Take a moment to fold the tree in half to visualize the opening location (back). Make a small mock pin to mark the back center where the pocket will form. This helps when assembling later.
Round 56 :
Puff stitch round: *puff in next st, skip next st, sc in next st; rep from * around (36)
Round 57 :
1 sc in each st (36)
Round 58 :
1 sc in each st (36)
Round 59 :
(5 sc, 1 dec) x 6 (30)
Round 60 :
1 sc in each st (30)
Info :
As circumference reduces, puffs become more prominent. If your puffs are not puffing fully, try adding one extra yarn over in the puff (increase loops from 3 to 4) for the mid-section rounds.
Round 61 :
Puff stitch round: *puff in next st, skip next st, sc in next st; rep from * around (30)
Round 62 :
1 sc in each st (30)
Round 63 :
1 sc in each st (30)
Round 64 :
1 sc in each st (30)
Round 65 :
1 sc in each st (30)
Info :
At this point you may begin to visualize the top of the tree. Look for even spacing of puffs and maintain consistent tension on the chain joining of puffs so the front scallops align vertically.
Round 66 :
Puff stitch round: *puff in next st, skip next st, sc in next st; rep from * around (30)
Round 67 :
1 sc in each st (30)
Round 68 :
1 sc in each st (30)
Round 69 :
(4 sc, 1 dec) x 6 (24)
Round 70 :
1 sc in each st (24)
Info :
With 24 stitches the tree narrows clearly. If you want a taller tree, you can add one or two extra puff rounds here before continuing the taper. Remember every added group of rounds increases height but retains circumference until a decrease round.
Round 71 :
Puff stitch round: *puff in next st, skip next st, sc in next st; rep from * around (24)
Round 72 :
1 sc in each st (24)
Round 73 :
1 sc in each st (24)
Round 74 :
1 sc in each st (24)
Round 75 :
1 sc in each st (24)
Info :
Prepare for upper tapering. Keep a marker in your first stitch; when puffs become too tight, reduce loops or switch to a slightly smaller hook for the remaining puff rounds to keep proportion.
Round 76 :
Puff stitch round: *puff in next st, skip next st, sc in next st; rep from * around (24)
Round 77 :
1 sc in each st (24)
Round 78 :
1 sc in each st (24)
Round 79 :
(3 sc, 1 dec) x 6 (18)
Round 80 :
1 sc in each st (18)
Info :
We're now in the uppermost tiers; puffs form smaller scallops that read beautifully at the top. If the front scallops bunch, gently block the front layers by pinning them into shape and applying slight steam (if yarn allows).
Round 81 :
Puff stitch round: *puff in next st, skip next st, sc in next st; rep from * around (18)
Round 82 :
1 sc in each st (18)
Round 83 :
1 sc in each st (18)
Round 84 :
1 sc in each st (18)
Round 85 :
1 sc in each st (18)
Info :
Last couple of leafy tiers before the top: check that the front has a neat point at the center. If the puffs obscure the tip, you can gently fold forward the last tier to create a sharper apex.
Round 86 :
Puff stitch round: *puff in next st, skip next st, sc in next st; rep from * around (18)
Round 87 :
1 sc in each st (18)
Round 88 :
1 sc in each st (18)
Round 90 :
1 sc in each st (12)
Info :
Stuffing / Body Finishing :
DO NOT OVERSTUFF. For this holder we want a hollow pocket toward the top/back that receives utensils. Lightly stuff only if you are adding a lining; otherwise leave center mostly hollow. If you used a cardboard disk for the base, insert it now through the bottom opening before final decreases. Continue to close the top after a final shaping round.
Round 92 :
1 sc in each st (6)
Round 94 :
Sl st in next stitch, fasten off leaving long tail for sewing the very tip closed. Weave tail through remaining loops, pull tight to close, and hide the tail inside the tree body (6-8 cm tail recommended)
Info :
Optional: Instead of closing the tip tight, you can leave a small loop at the top for hanging a tiny ornament. Secure any loose ends neatly and hide tails inside the body.
— Trunk (Make 1) :
Info :
The trunk is a small crocheted square sewn to the front base. Work in brown. The trunk is intentionally short and slightly stuffed to give a subtle 3D block look.
Round 1 :
6 sc in magic ring (6)
Round 3 :
1 sc in each st (12)
Round 4 :
1 sc in each st (12)
Round 5 :
(1 sc, dec) x 4 (8)
Round 6 :
1 sc in each st (8)
Round 7 :
1 sc in each st (8)
Round 8 :
Fasten off leaving a 12-15 cm tail. Lightly stuff the trunk with a tiny amount of fiberfill—just enough to give it a little blocky height but not overly firm. Close the top by weaving the tail through the next 8 stitches and pulling tight, then secure with a few whips to flatten slightly into a square.
Info :
If you prefer a completely flat trunk, you can flatten and sew the back of the trunk to make it pancake-shaped. For a thicker trunk, continue 1-2 rounds before finishing.
— Optional Base Lining & Insert :
Info :
To give the tree a firm standing base, cut a disk of cardboard or thick felt to match the widest circumference. If using cardboard, cover it with scrap fabric or felt and glue it into the base before closing the first few rounds. Alternatively, crochet a small disk cover to slip over the cardboard for a clean finish.
Round 1 (Lining) :
Ch 2, 8 sc in second ch from hook, join with sl st to create small disk (8)
Round 2 (Lining) :
(1 sc, inc) x 4 (12)
Round 3 (Lining) :
(2 sc, inc) x 4 (16)
Round 4 (Lining) :
1 sc in each st (16)
Info :
Slip the cardboard disk into the lining if you made a crochet cover, then place inside the tree base before closing the last few rounds of the main body. Glue the cardboard lightly for permanence or leave it removable if you prefer to wash the holder.
— Edging & Pocket Formation :
Info :
The tree is intended to form a pocket at the back where utensils are inserted. To form a neat opening, fold the back sides together and whip stitch down from the base up to about 2/3 of the height, leaving a top opening for utensils. Reinforce the bottom edge around the opening so forks and spoons don't slip through.
Round 1 (Edging) :
With main green color and right side facing, join yarn at back base opening, ch1, 1 sc evenly around the opening edge (work into stitches along the back opening only) to create a neat edge. Work 1 round of sc to finish edge.
Info :
If you want a folded collar effect as seen in the photos, after you sc the edge, work 2 rounds in BLO (back loops only) around that edge to create a folded ridge that can be folded forward to become a decorative collar hiding the seam.
Round 2 (Edging BLO) :
1 sc in each st BLO around the opening edge (same stitch count as previous round)
Round 3 (Edging) :
Fasten off and weave ends. Fold the BLO ridge forward and pin in place; slip stitch or sew the ridge to the front if you prefer a fixed fold for a collar look.
Info :
Make sure the pocket opening is wide enough to accept utensils but narrow enough to hold them upright; you can adjust the width by how far up you sew the back seam and how much of the ridge you fold forward.
— Final Shaping & Closure :
Info :
Check overall silhouette. If the tree leans, add a small piece of non-slip fabric under the base or add more bulk to the cardboard disk. Press lightly and block if yarn allows—this helps the scallops sit in a pleasing curve.
Round 95 :
Optional: If you left the back base open to insert cardboard, use a tapestry needle and the long tail to sew the final opening closed with whip stitch or mattress stitch. Make sure stitches are even and hidden in the row below the BLO ridge.
Round 96 :
Fasten off and weave all ends. Trim any excess yarn close to the work after securely weaving in.
Info :
Gently shape the scallops by pulling the front puffs slightly forward. If you prefer a very stiff holder, lightly apply a fabric starch sprayed and shaped on a form until dry. Do this only if yarn can tolerate the treatment.
— Decorative Options :
Info :
Add a tiny pom-pom or star at the top by stitching a small embroidered star or a mini felt decoration. You can also sew a tiny loop at tip before closing to hang a mini ornament. Add beads or small jingle bells on select puff stitches for festive sparkle—sew securely.
Info :
To make a set of different sizes, change hook or yarn weight: a sport weight yarn with 3.0 mm hook will produce a smaller tree; a aran weight with a 4.0 mm hook will create a larger, fluffier tree (adjust stitch counts if you change drastically).
This cheerful tree utensil holder is the kind of small handmade project that brings instant charm to a table setting. Each textured layer builds into a cozy silhouette that feels both festive and practical. The compact size makes it perfect for gift-giving or for adding a handmade accent to seasonal place settings. Enjoy the meditative rhythm of the puff rounds and the satisfaction of a tidy, stable finish. 🧶🎄