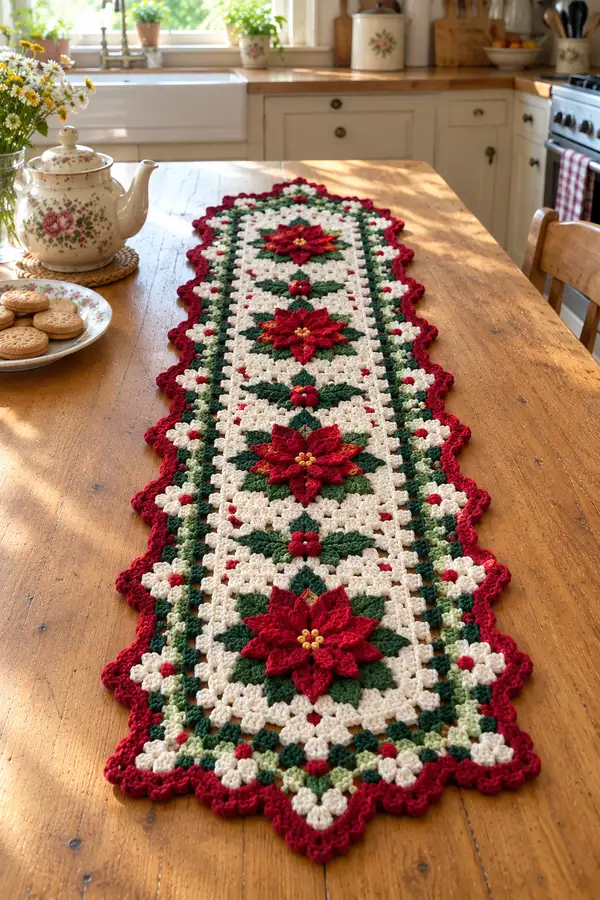
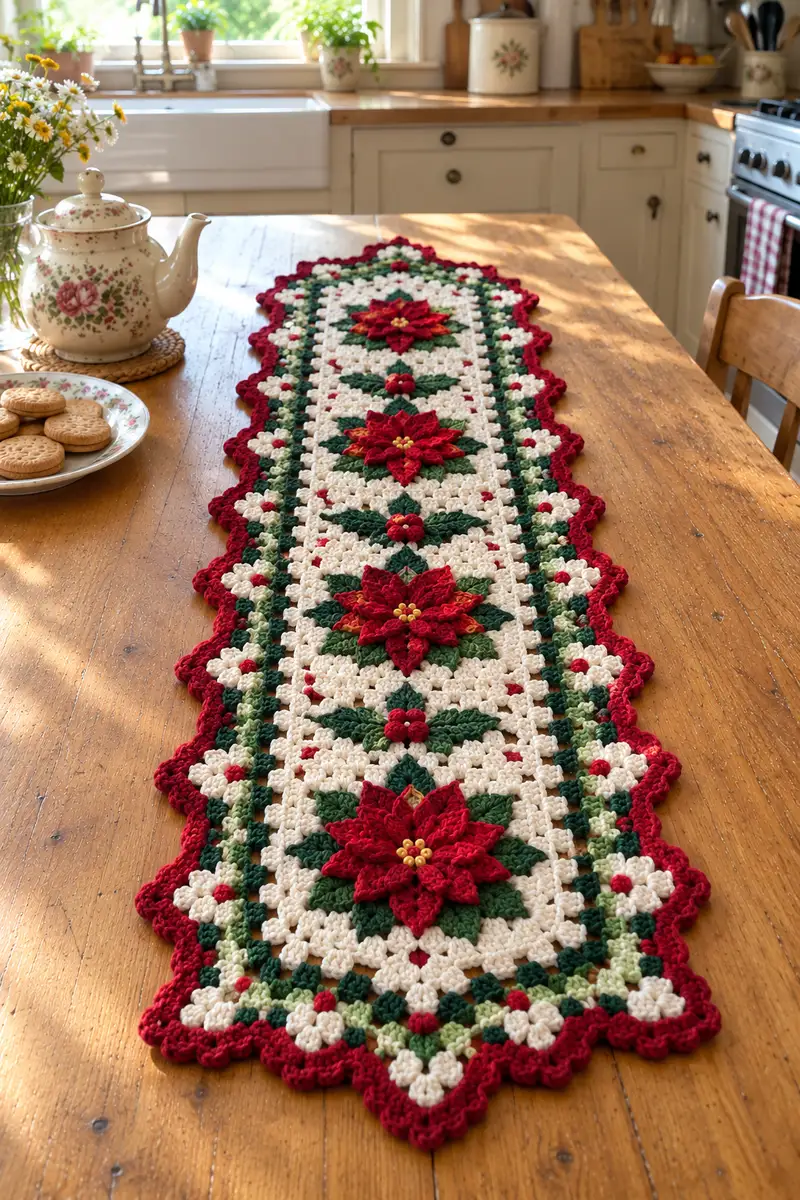
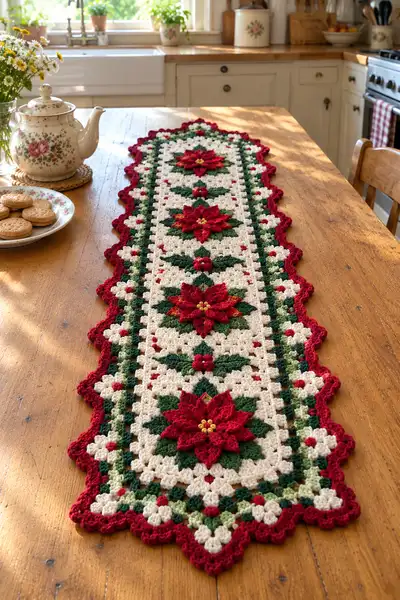
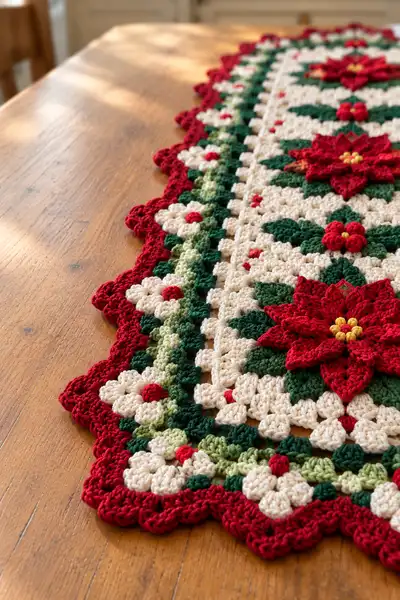
A warm, vintage-style table runner featuring layered 3D poinsettia flowers, leafy granny motifs and a scalloped border in classic holiday colors. Work this runner as connected large square motifs with detailed floral appliques and a picot scallop edge. The finished piece adds a handcrafted centerpiece to your holiday table and showcases textured petals, clusters and neat color changes.
Progress Tracker
0% Complete
— Notes & Gauge :
Info :
Runner shown measures approximately 32 cm wide x 120 cm long (12.5" x 47") using worsted weight yarn and 4.0mm hook. Gauge: a 10x10 cm square of granny rounds in cream = 12 clusters across and approximately 6 rounds. Adjust hook size to match gauge for flat motifs.
Info :
Where this pattern references 'cluster' we mean classic granny cluster groups (3 dc worked in same space). For petal shaping, use more defined dc and tr stitches as described. Work motifs flat and block pieces before assembly for best joining.
— Large Square Motif (Make 3) :
Round 1 :
Make magic ring, ch3 (counts as dc), 2 dc in ring, ch2, *3 dc in ring, ch2* repeat to total 4 groups of 3 dc with ch2 corners, join with sl st to top of ch3. (12 dc in 4 groups, 4 ch2 corners)
Info :
Keep your magic ring loose at the start so you can pull it closed flat later. Mark the beginning of round and the corner spaces for counting.
Round 2 :
Sl st into next 2 dc to reach corner ch2 sp. *(3 dc, ch2, 3 dc) in ch2 corner sp, ch1, skip to next corner; 3 dc in space between corner clusters, ch1* repeat around; join with sl st to top of first dc. (4 corner shells, 4 side shells, ch1 spaces between side shells)
Round 3 :
Sl st to corner ch2 sp. *(3 dc, ch2, 3 dc) in each corner ch2 sp; ch1, (3 dc) in each side ch1 sp, ch1 repeat across sides* join with sl st. The square will begin to show distinct edges. (Corner clusters x4, side clusters filled)
Round 4 :
Repeat Round 3 but increase side clusters: sl st to corner, *(3 dc, ch2, 3 dc) in corner; ch1, (3 dc) in each side ch1 sp twice across* join. This adds a consistent band and expands square size.
Info :
At this stage you have a basic granny square background. Continue until Round 8 to reach the size for layering the poinsettia. Make sure square lies flat—if cupping, use slightly larger hook; if ruffling, use slightly smaller hook or reduce clusters on a round.
Round 5 :
Repeat pattern: corner shells in each ch2 corner, 3-dc groups filling sides, ch1 between side groups. Maintain even tension. (This is approximately 5th growth round; counts grow by clusters per side)
Round 6 :
Work same as Round 5 to continue building foundation; ensure sides are equal and corners remain ch2.
Round 7 :
Change color to cream if not already in cream (Info below). Work one round of single crochet around the whole motif into every dc and into corner ch2 spaces placing 3 sc in each corner ch2 to square off. This creates a tidy surface for flower placement. (Count: if you have 48 dc and 4 ch2 corners, sc round will approximately be 56-64 sc depending on side clusters)
Info :
Change to cream background yarn now if your square was worked in another color; carry stray yarn inside or fasten off and join new color by sl st for a neater surface. Work sc tension slightly snug to create firm base for sewing poinsettia.
Round 8 :
Work 1 sc in each sc around; join with sl st. Fasten off and weave in ends. Block square flat to exact measurements required. Repeat to make three identical squares. (This completed square will act as the canvas for the poinsettia layer.)
Info :
Make 3 identical large squares. Blocking is essential—pin squares to equal dimensions and spray lightly with water or steam to set the stitches so the squares line up perfectly when joined later.
— Poinsettia Flower (Make 3) :
Round 1 :
With red yarn and 3.5mm hook, ch4, join to form ring, ch3 (counts as dc), 11 dc into ring, join with sl st to top of ch3. (12 dc)
Round 2 :
Ch3, dc in same st, *ch1, skip next st, 2 dc in next st* repeat around to create petal bases; join. (6 petal base points, ch1 spaces between)
Info :
Round 2 forms the inner petal anchors. Keep these slightly loose so inner petal layers can be worked around them.
Round 3 :
Work petals round: *in next ch1 sp work (sc, hdc, 3 dc, hdc, sc) all into ch1 sp to form a shaped petal* repeat for each ch1 sp around. Join with sl st. (This creates 6 rounded petals.)
Round 4 :
Fasten off red, join dark green for leaves: from back side, insert hook into the base of a red petal and ch2, then work (sc, hdc, 2 dc, hdc, sc) in same base to form a pointed leaf behind each petal; repeat behind each petal for 6 leaves total. Fasten off. (6 leaves)
Info :
Leaves are attached at back of flower to give depth. Make sure the leaves are evenly spaced under petals. If you prefer fuller foliage, add an additional green leaf between each petal.
Round 5 :
Make a second layer of poinsettia petals to create full 3D form: join red yarn at base between two existing petals, ch3, *in same base work (sc, hdc, 5 dc, hdc, sc) to create a larger petal that overlaps inner petals* repeat for 6 larger petals around, join. (6 larger outer petals)
Round 6 :
For extra definition, you can add a third tiny layer: with red, slip to middle of each outer petal and work 3 sc and a small picot (ch3, sl st to first ch) to create a small raised ridge on each petal. Fasten off and weave ends.
Info :
Optional: lightly starch outer petals with spray starch and pin flat while drying to create a slightly crisper petal that sits neatly on the square.
Round 7 :
Create the center cluster: with golden yellow, make 6 tiny bobbles by working in front of flower: *make bob: yo, insert hook in center ring or between first round stitches, pull up loop, yo, pull through 2 loops, repeat until 5 loops on hook, yo and pull through all; secure with sl st into center* repeat 6 times, arrange in small cluster and secure with yarn so they sit like small beads. Optionally sew small seed beads through the bobble cluster for a bead center.
Info :
If using small seed beads, sew through bobble centers with a short length of thread or yarn before securing to the square to avoid loose beads later. Glue beads if desired for extra security.
— Small Filler Flowers (Make 12) :
Round 1 :
With cream yarn, ch4, join to ring, ch3, 11 dc in ring, join. (12 dc)
Round 2 :
Ch1, *sc in next dc, ch1* repeat around to form small spaced sc-points, join. (12 sc)
Round 3 :
Switch to red for small center bobble: in every third sc work a bobble (see Bobble stitch description). Make 4 bobbles spaced equally to mimic the tiny red dots seen throughout runner. Fasten off and weave ends.
Info :
These small flowers are used to fill space between big motifs and along the length of the runner. Make 12 or adjust based on placement preferences.
— Leaves (Make 18) :
Round 1 :
With dark green, ch8. Starting in 2nd ch from hook work: sc, hdc, 2 dc, tr, 2 dc, hdc, sc across. Fasten off leaving long tail for sewing. (Pointed leaf, 7 sts worked)
Info :
Sew leaves under the poinsettia layers and as small paired leaves between the small filler flowers. Press lightly when blocking to give them a flat finished look.
— Preparation & Placement :
Info :
Block each large square, all flowers, and leaves flat and to scale. Lay out the runner on a flat surface in the order: large square - small connecting panel - large square - small panel - large square. The small connecting panels are narrow granny strips worked after joining and described next.
— Narrow Connecting Panels (Make 2) :
Round 1 :
With cream yarn and 4.0mm hook, ch42 (this length will form a narrow strip between large squares measured to match the width of square sides—adjust ch count to match your squares). Row 1: dc in 4th ch from hook and in each ch across, turn. (40 dc)
Round 2 :
Ch3, dc in each st across, turn. Repeat Round 2 until the strip measures same height as the square's side depth (typically 6-8 rows depending on square size). Fasten off. Make two identical strips.
Info :
Alternately you can work these connecting strips as granny rows to mirror the square texture. Keep them consistent in height so the runner lies flat when joined.
— Joining Motifs & Panels :
Round 1 :
Position squares RS up. Align the first square and a connecting panel along the long edge so corner points match. Using yarn needle and cream yarn, mattress stitch through the SC round edge or slip-stitch join through corresponding stitches. Sew with small, even stitches for a flat invisible seam. Repeat to attach second square and second panel to create a long central strip: Square1 - Panel - Square2 - Panel - Square3.
Info :
Pin pieces before sewing to ensure perfect alignment and corner match. Use blocking pins and keep pieces taut while sewing. If your squares have sc-ed edges, match sc counts exactly. Use a tapestry needle and whip stitch for stronger join if the runner will be handled frequently.
Round 2 :
After joining, go around the entire assembled rectangle with one round of sc in cream to tidy joins: sc evenly along seams, placing 3 sc in each interior corner to maintain shape. Join with sl st and fasten off. This creates a continuous base for border rounds. (Approximate sc count: width x rows, vary by assembly size)
Info :
If any seam gaps remain, insert small amounts of yarn into holes and secure with a few extra stitches. Keep the tension even to avoid puckering at seams.
— Placing Flowers & Leaves :
Round 1 :
Lay out the assembled runner RS up. Place each large poinsettia centered on each large square. Position small filler flowers in the connecting panels and center rows between large squares. Arrange leaves in symmetrical pairs under each poinsettia and near filler flowers.
Round 2 :
Sew each poinsettia through the base layer with matching yarn: use a few sturdy passes around the base to secure but avoid flattening petals. For additional security sew a few stitches through the center bobble cluster to the square. Sew small flowers and leaves in place with yarn tails, tacking down points of each leaf to sit flat.
Info :
Check placement from the WS occasionally to ensure no stray yarn loops are visible when finished. Work slowly to preserve the 3D character of petals.
— Decorative Accent Dots (Make many) :
Round 1 :
Create tiny red raised dots using bobbles: with red and 3.5mm hook, insert hook into a chosen spot on the cream background, work a 5-loop bobble (yo, insert, pull loop) repeated 4 times then draw through all loops and secure with sl st at base. Place these dots in the small diamond spaces across the runner as shown. Make at least 24 tiny dots and space evenly.
Info :
These tiny red dots mimic the small red filler bits seen in the image. They add rhythm and visual interest across the cream background. Keep them small and consistent.
— Border: Inner Checker Band (Rounds 1-6) :
Round 1 :
Change to dark green. With RS facing, attach yarn at a corner sc and work one round of sc evenly around the runner. Place 3 sc in each outside corner to maintain shape. Join with sl st. (This creates a dark green frame.)
Round 2 :
Ch3, *skip next sc, 3 dc in next sc, skip next sc, ch1, sc in next sc* repeat around to create a subtle cluster-and-space checker. Join with sl st. (Clusters spaced by sc filler stitches.)
Info :
Work these decorative rounds with even tension so the border sits flat. The dark green band is a visual rail between the cream field and the light green handshake rounds.
Round 3 :
Switch to light green. Work a round of granny-style clusters into the ch1 spaces and into each sc filler: *(3 dc in ch1 space, ch1, sc in next sc)* repeat around. Join and fasten off light green. This gives a checkered effect with subtle color changes.
Round 4 :
Change back to dark green and work one round of sc in each st to tidy the edge and prepare for the scalloped outer border. Join and fasten off. (This sets the base for scallops.)
Info :
Keep corners well defined by working 3 sc (or 3 dc depending on height needed) at corner points so outer scallops do not pull corners in.
— Outer Scallop Border (Make Scallop around entire runner) :
Round 1 :
With deep red yarn, join at corner, ch1, sc evenly until you reach a side center point, then begin scallop motif: *skip 1 st, in next st work (sc, hdc, 3 dc, hdc, sc) all in same st to make a 5-stitch scallop; skip 1 st, sc in next st* repeat scallop across each side, placing a scallop peak centered in each side's mid-run between corners. In corners work a larger scallop by making (sc, hdc, 5 dc, hdc, sc) to maintain rounded corner. Join with sl st and fasten off. (This creates pronounced scallops.)
Info :
For the scallop round, keep the shell tension looser so scallops puff slightly and read as decorative lobes. On long sides, space the scallops evenly by counting stitches and dividing to place peaks symmetrically.
Round 2 :
If you prefer a more lacy edge, work a picot trim: rejoin red at the peak of each scallop, ch3, sl st into base to form picot, then sc around the rest of scallop. Repeat picot at each scallop peak for a delicate finish. Fasten off and weave ends.
Info :
Blocking the finished runner after the scallop round is essential. Pin the scallops out to equal depth and steam lightly so they dry rounded and even. This final blocking gives a professional framed look.
— Final Finishing Touches :
Round 1 :
Securely weave in all ends using a yarn needle, running tails back through the body of the runner for at least 5 cm each. Trim closely but not flush — leave a tiny tail to avoid unraveling. If you used beads in the centers, secure them with a drop of craft glue on the knot for extra stability.
Info :
Give the entire runner a final light blocking and press once dry. Attach any last decorative bobbles in gaps and double-check for loose stitches or unsecured flower centers before placing on the table.
Round 2 :
Enjoy your finished runner and photograph it on a flat wooden table in natural light to show off depth and color contrasts. Consider making matching coasters or placemats by repeating single square units scaled down.
Info :
Store runner flat or rolled to avoid creases. If storing for a season, include a lavender sachet to keep moths away and preserve freshness.
Completing this runner will give you a beautiful seasonal centerpiece full of texture and color. The layered poinsettias and scalloped border make this piece feel like a holiday heirloom. I hope you enjoy every step of assembling petals, leaves, and tiny accent dots — the result is worth the care. 🌿🌺🧶 Display it proudly on your table or give it as a thoughtful handmade gift!