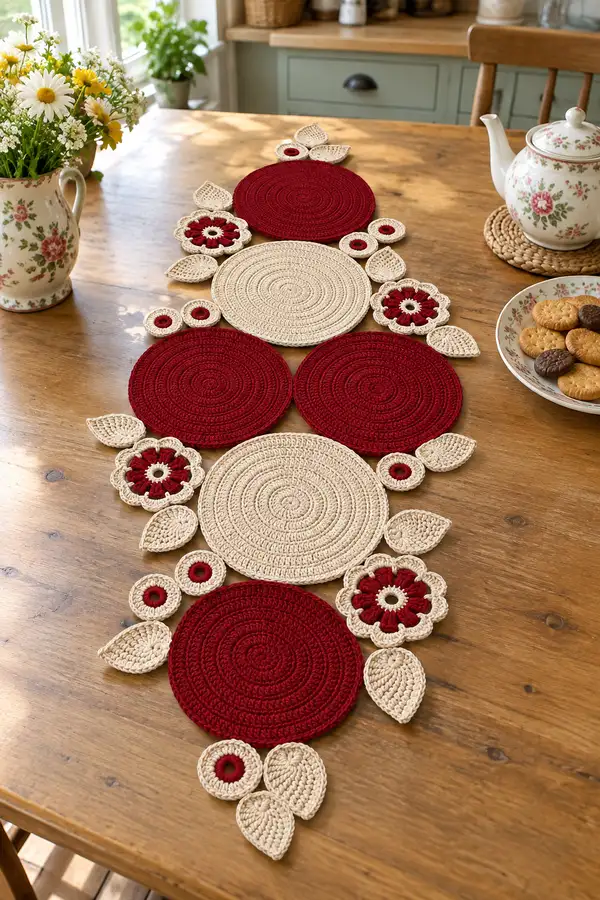
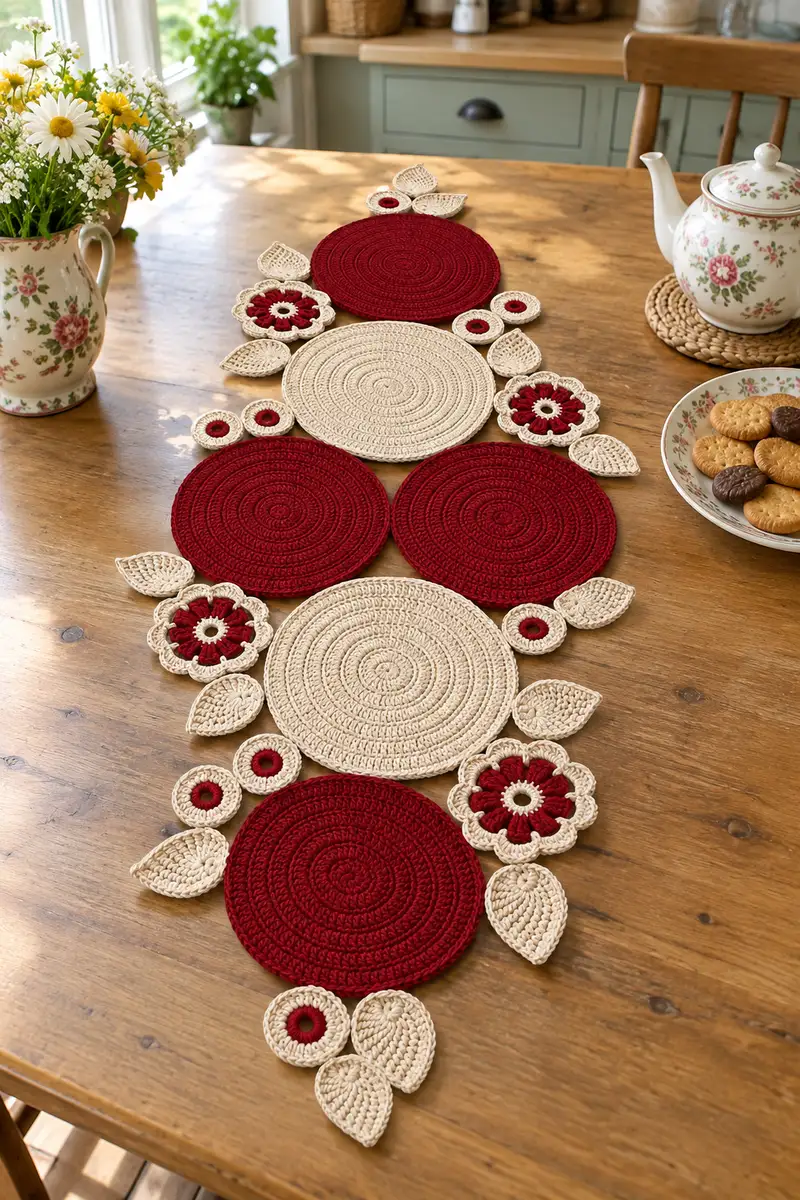
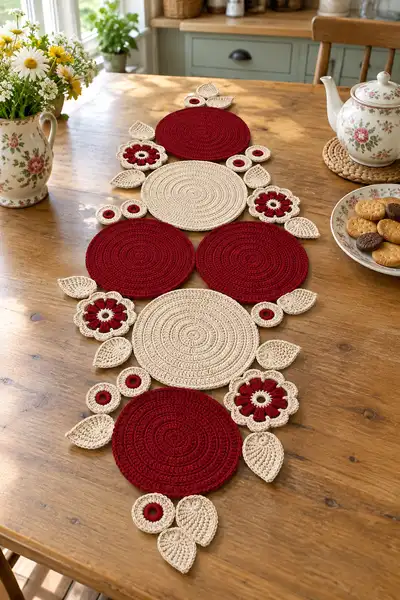
Create a warm, vintage-inspired floral table runner composed of layered circular motifs, scalloped flowers and textured leaves in deep red and natural cream. This pattern breaks the design into simple crochet discs, ring motifs, petals and leaves that are crocheted flat and then joined to form an elegant runner. Finished layout is modular so you can scale length, swap colors, or repeat motifs for longer tables. Perfect for seasonal tables or a year-round centrepiece.
Progress Tracker
0% Complete
— Materials & Gauge :
Info :
Gauge is not critical for a decorative runner, but consistent tension will keep discs uniform. Sample: one large disc (using 5.0mm hook and worsted cotton) measures approximately 18cm / 7" across after rounds 1-20. If your disc is noticeably larger or smaller, try a smaller or larger hook respectively.
— Large Round Disc (Make 3 in alternating colors) :
Round 1 :
6 sc in magic ring (6)
Round 3 :
(1 sc, inc) x 6 (18)
Round 4 :
(2 sc, inc) x 6 (24)
Round 5 :
(3 sc, inc) x 6 (30)
Info :
Work in continuous spiral or join rounds with sl st – the sample uses continuous rounds for invisible joins. Use a stitch marker to mark the first stitch of each round if working in joined rounds.
Round 6 :
(4 sc, inc) x 6 (36)
Round 7 :
(5 sc, inc) x 6 (42)
Round 8 :
(6 sc, inc) x 6 (48)
Round 9 :
(7 sc, inc) x 6 (54)
Round 10 :
(8 sc, inc) x 6 (60)
Info :
At this stage your disc should lie flat. If it ruffles up, reduce the number of increases in the next round; if it cups, add an extra increase round. Consistency between discs makes assembly easier.
Round 11 :
(9 sc, inc) x 6 (66)
Round 12 :
(10 sc, inc) x 6 (72)
Round 13-20 :
1 sc in each st around (72)
Info :
Work rounds 13-20 even to build the disc height; this produces the flat larger plate shape seen in the photo. If you prefer a slightly smaller disc, stop at round 16 or 18 depending on desired diameter.
Round 21 :
1 sc in each st BLO (72)
Round 22 :
1 sc in each st (72)
Round 23 :
1 sc in each st (72) - optional second decorative ridge
Info :
Finish off and leave a 30cm / 12" tail for sewing if joining by whip stitch. Alternatively, leave a short tail if you plan to join with single crochet join.
— Medium Round Disc (Make 2 in alternating colors) :
Round 1 :
6 sc in magic ring (6)
Round 3 :
(1 sc, inc) x 6 (18)
Round 4 :
(2 sc, inc) x 6 (24)
Round 5 :
(3 sc, inc) x 6 (30)
Info :
This medium disc is slightly smaller than the large. Work increases up to 30 or 36 stitches depending on desired diameter; our medium disc stops increasing at round 6 below.
Round 6 :
(4 sc, inc) x 6 (36)
Round 7-14 :
1 sc in each st (36)
Round 15 :
1 sc in each st BLO (36)
Round 16 :
1 sc in each st (36)
Info :
A shallow ridge around round 15 gives a subtle step between discs when they are layered; this helps create the stacked look in the photos.
Round 17 :
Optional decorative border: *sl st, ch1, sc in same st* around for a neat finish (36)
Round 18 :
Finish off and leave long tail for sewing (approx 20-30cm)
— Small Ring Motif (Make 6-8) :
Round 1 :
ch 5, join with sl st to form ring, ch1, 8 sc into ring (8)
Round 2 :
inc in each st around (16)
Round 3 :
(1 sc, inc) x 8 (24)
Round 4 :
1 sc in each st (24)
Round 5-6 :
1 sc in each st (24)
Info :
Small rings act as filler beads between the larger discs. Work them tightly and leave 15-20cm tail for sewing into place.
Round 7 :
Optional: sl st each st to create a firm bead-like edge (24)
Round 8 :
Finish off and weave tail in or leave for sewing.
— Flower Motif with Petals (Make 4) :
Round 1 :
6 sc in magic ring (6)
Round 3 :
*(1 sc, inc) x 6 (18)
Round 4 :
Change to contrast color (red) - Info: Carry cream yarn behind if you want to avoid many ends; otherwise fasten off and rejoin with red
Round 4 :
In red: ch2 (counts as first hdc), 1 hdc in same st, (2 hdc in next st) x around to create a fuller petal base—work 18 hdc total (18)
Info :
We use hdc in the petal base so petals sit raised from the center. Use a slightly smaller hook for petals if you want them tighter.
Round 5 :
Switch back to cream (or work cream over carried tail): *ch3, skip 2 sts, sl st in next st* repeat around to create loops for petals (6 loops)
Round 6 :
Working into each ch-3 loop: *10 dc in loop, sl st into next base st* repeat 6 times to form petal clusters (6 petals)
Round 7 :
sc evenly around petals joining them at the base to form a scalloped outer edge: *(3 sc in petal top, sl st into base) x 6 (18 sc)
Info :
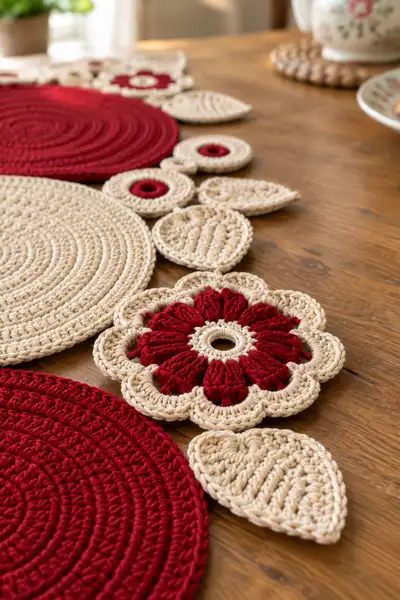
Adjust number of dc per petal for larger or smaller petals. The sample shows rounded petals with visible stitches; keep tension not too tight for a soft petal puff.
Round 8 :
Optional decorative ridge: 1 sc in each st around (18)
Round 9 :
Finish off, leaving long tail for sewing to disc assembly.
Round 10 :
Info: If you prefer a hollow center like the photo, in round 1 make a small ring of ch5 and work petal base around that ring to leave a hole in the center.
— Leaf Motif (Make 12) :
Round 1 :
ch6, sc in 2nd ch from hook, hdc in next, dc in next, hdc in next, sc in last - work back along opposite side of chain: sc, hdc, dc, hdc, sc, join with sl st into first sc. (12 sts around chain)
Round 2 :
Increases for shaping: *sc in next 2 sts, inc (2 sc in next st), sc in next 2 sts, inc* on the tip, then mirror on return side (approx 16-18 sts depending on initial chain)
Round 3 :
1 sc in each st around (16-18)
Round 4 :
Work in BLO: 1 sc in each st BLO to create a defined ridge (16-18)
Info :
Use BLO to create the central vein. If you want a raised central vein, work fpdc around the central stitch on each side: *fpdc, 1 sc* repeat.
Round 5 :
Decrease slightly towards the base: *(2 sc, dec) x repeat across tip and mirror back (12-14)
Round 6 :
Slip stitch finish along the edge to make leaf slightly cupped and finished (12-14)
Round 7-8 :
Optional row for thickness: 1 sc around, then another sl st round for a firm edge (12-14)
Info :
Blocking leaves flat with slight steam will help keep them shaped. Leave tails for sewing to discs so you can position veins as you assemble.
Round 9 :
Finish off and leave 20-25cm tail for sewing.
— Small Heart/Leaf Petal (Make 8) :
Round 1 :
Make a small magic ring and work 6 sc into it (6)
Round 2 :
*inc, sc, sc* across to form a small heart base (9)
Round 3 :
ch3, dc, tr, dc in top to form small point; sl st along sides to shape (9)
Round 4 :
Finish and leave tail for sewing.
Info :
These small elements are used as tiny filler leaves in clusters between discs and make a nice visual rhythm in the runner.
— Joining Border & Decorative Edging (Work after all motifs complete) :
Info :
Lay out your discs, flowers, rings and leaves on a table following the photo layout or your own arrangement. Pin pieces to a blocking mat or directly to the table using rust-proof pins to maintain spacing. The sample runner alternates large cream discs with red discs and fills the gaps with flower motifs and leaf clusters.
Round 1 :
Whip stitch placement: Using long tails from discs, place the first large disc and a medium disc adjacent; using a mattress or whip stitch, attach edges at 8-10 evenly spaced points along the adjoining edge. Use long stitches to secure rather than small concentrated stitches to avoid puckering.
Round 2 :
Attach small rings and flower bases: place small rings in between discs and tack them down with 3-4 tiny whip stitches each so they sit slightly raised.
Round 3 :
Sew flowers on by their long tail: align the flower centre to the small ring or disc edge and sew around the inner ring of the flower, anchoring at 6 or more points. This keeps petals free and slightly puffed.
Info :
Stitch through the back loop only on the disc when attaching flowers to create a subtle raised join, which gives the layered look in the photo.
Round 4 :
Lay leaves into the gaps and sew through their bases to both discs and flower bases to secure clusters. Use 4-6 stitches per leaf depending on size; avoid sewing too tightly so leaves can slightly lift for dimension.
Round 5 :
Edge joining: once all pieces are attached, work a single crochet join around the outer exposed edge of the entire runner using the cream yarn. Insert hook through the outermost edge of both motifs when they overlap to create a neat continuous border. This round acts as both join and tidy edge (total stitches vary by runner size).
Round 6 :
Decorative scallop: *skip 2 sc, 5 dc in next st, skip 2 sc, sl st in next sc* repeat around to form a scalloped edge if you want a frilly finish.
Info :
Keep edge tension loose to prevent the runner from becoming wavy. If scallops pull in too much, use fewer dc per scallop or add a ch-1 between scallops to relax the edge.
Round 7 :
Final finishing: weave in all tails through the back of the runner, hide ends inside motifs where possible. Block the entire runner flat by pinning to the desired shape and lightly steaming. Allow to dry completely before use.
— Optional Decorative Embellishments & Stability :
Round 1 :
To add more texture, use front post stitches on a few outer rows of discs: fpdc around a post to create a raised ridge. Work 2-4 fpdc rows spaced out for visual interest.
Round 2 :
Stabilize heavy tableware: for extra weight-bearing, cut thin felt circles and slip them under the large discs or stitch felt to the underside of discs with small running stitches. This keeps cups from leaving marks and gives form.
Info :
You can scale the pattern by varying the number of large discs used. For a short runner use 3 large discs; for a long table repeat the motif sets symmetrically while keeping flower clusters between each set.
— Layout Example and Round Counts Recap :
Info :
Sample layout: starting from one end: small ring cluster, small leaf cluster, red large disc, small ring, cream medium disc with flower + leaves, red medium disc, cream large disc with flower cluster, repeat. This alternation keeps balance in color and shape.
Info :
Total rounds for one large disc (including decorative ridges): up to 23 rounds. Medium disc: up to 18 rounds. Flower motif: up to 10 rounds (including petal construction). Leaf: 7–9 shaping rows. Small rings: 6–8 rounds. Edge join and scallop: 6–8 rounds depending on length and finishing choices.
Info :
Because many motifs are repeated, plan yarn usage and leave long tails for sewing during motif construction to save time. Keep a layout plan and photograph your layout before final joining to maintain symmetry while sewing.
This floral circles table runner is a joyful project that blends classic crochet rounds with delicate petal and leaf shaping to create a cozy centerpiece. The modular design means you can customize colors, lengths, and embellishments for every season and event. I hope you enjoy stitching each disc and watching the runner come together — every seam feels like placing a finishing touch on a handmade memory. 🧶🌸