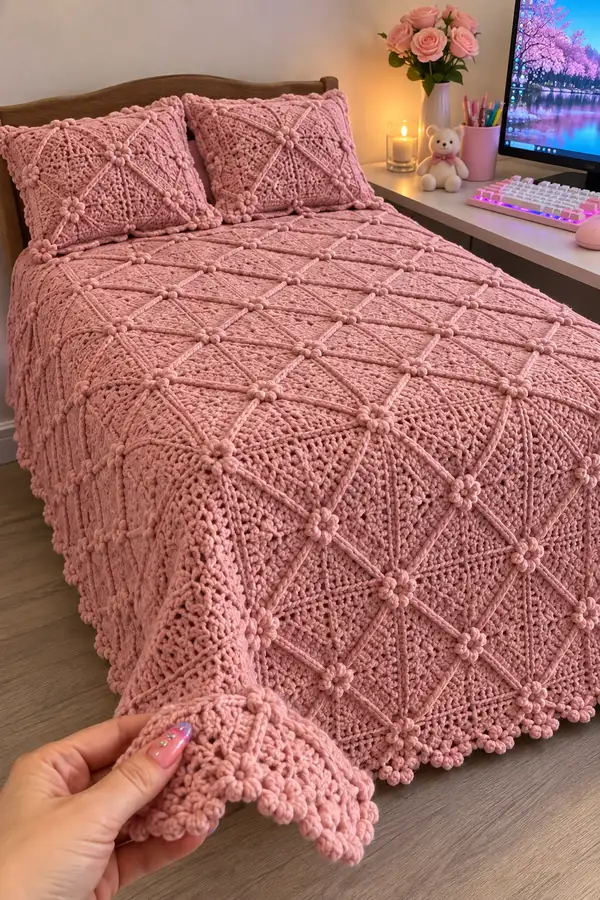
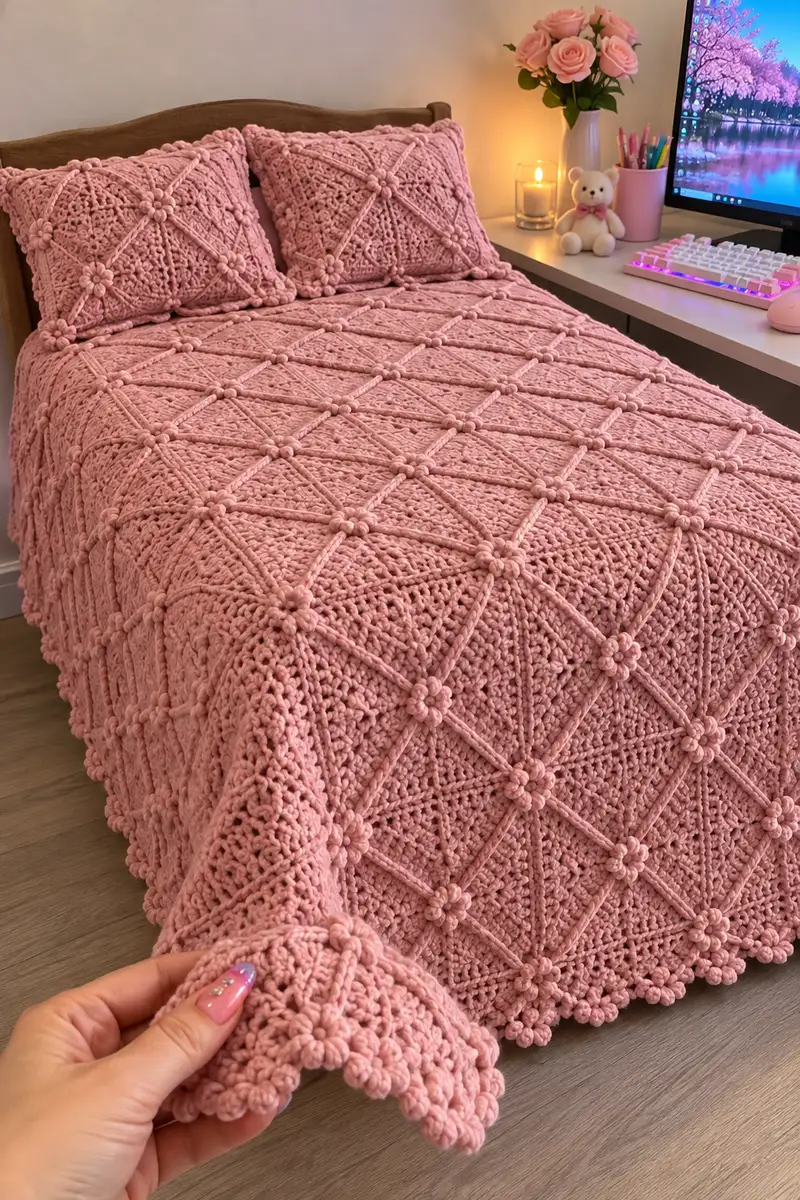
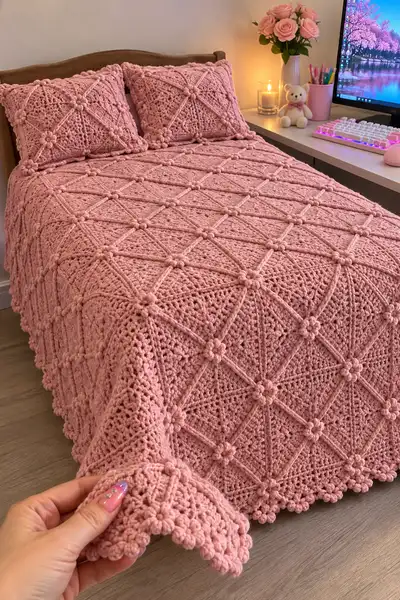
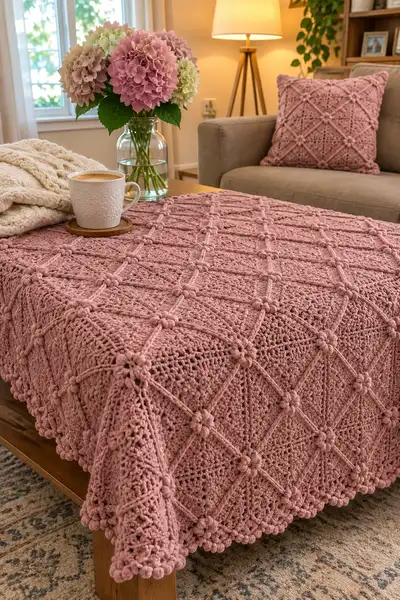
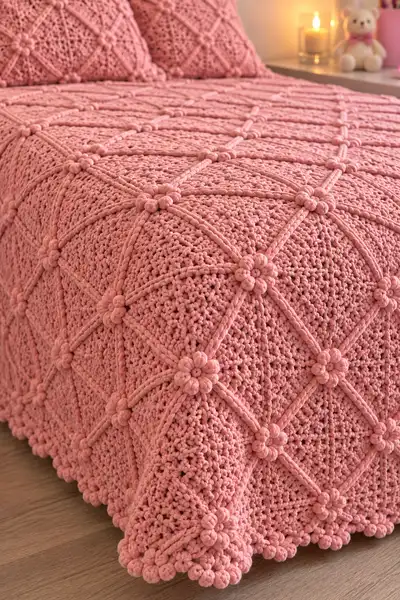
Create a romantic, textured bedspread made of large floral granny squares linked with raised diagonal cords and bobble flowers. This pattern recreates the plush puffed petals, lattice lines and scalloped border shown in the photos. Works up in bulky yarn for a cozy, drapey throw or full bedspread with matching pillow covers.
Progress Tracker
0% Complete
— Notes and Techniques :
Info :
This pattern is modular: make as many square motifs as needed for your size. Each motif is worked flat in rounds. The motif uses puff/pop bobbles for the central flower and raised diagonal cords built with chain loops and front loop slip-stitch ribs. Maintain consistent hook and tension for uniform squares. Block motifs lightly to set shape before assembly.
— Motif: Diamond Granny Square with Puff Flower (Make many) :
Round 1 :
Make a magic ring. Ch3 (counts as dc), 2 dc in ring, ch2, 3 dc in ring, ch2, 3 dc in ring, ch2, 3 dc in ring, ch2; join with sl st to top of starting ch3. (12 dc groups in 4 clusters + 4 ch-2 corner spaces)
Round 2 :
Sl st into next 2 dc to reach corner space. *Ch3, 2 dc in same corner sp, ch2, 3 dc in same corner sp*; repeat from * to * in each corner space; join to top of ch3. (12 dc clusters, 4 ch-2 corners)
Round 3 :
Work in corners: (3 dc, ch2, 3 dc) in each corner space. On sides between corners: 3 dc in the space between corner clusters. Join with sl st. (48 dc total across 16 side groups plus ch-2 corners maintain square outline)
Info :
Keep counts by treating each 3-dc group as one cluster; this round begins the square expansion. You should have 4 corner spaces and evenly spaced 3-dc clusters along sides.
Round 4 :
In each corner work (3 dc, ch2, 3 dc). Along each side work (3 dc in next 3-dc group, ch1) between corners to create texture and small chain spaces. Join. (Maintains square with added ch-1 side spaces)
Round 5 :
Repeat Round 4, placing extra ch-1 spaces evenly along sides so each side has an even number of side spaces (this will be used for diagonal cord placement later). Join.
Info :
At this stage, block one motif to check that corners are square and sides are even. The side ch-1 spaces will be the anchor points for diagonal raised cords; mark them with small stitch markers if helpful.
Round 6 :
Work 1 dc in each 3-dc group and 1 dc into each ch-1 and ch-2 space, but in each corner work (dc, ch2, dc) to preserve corner. Join. (This round evens out the fabric and fills small holes.)
Round 7 :
Switch to hdc for 2 rounds to create a denser field: 1 hdc in each st across, keeping corners as (hdc, ch2, hdc). Join. (Stitch count remains equal to number of previous dc positions; treat clusters as multiple hdc.)
Round 8 :
1 hdc in each st across; join. (This flattens the motif center and preps for the textured rounds that will follow.)
Info :
Decide which orientation will be the right side; the center puff flower will be added later. Place a marker where you want the 'top' of the motif so cords line up consistently when joining.
Round 9 :
Form puff stitch centers (flower foundation): *Ch1, sc in next 4 sts, make a 6-loop puff in next st (yarn over, pull up loop 6 times, yarn over, pull through all loops and ch1 to close puff), sc in next 4 sts.* Repeat around to make eight small groups that will read as petal bases across the central area; join. (Puff count depends on motif size; aim for one central puff cluster where diagonals meet later.)
Round 10 :
Working RS, prepare flower: In the center area of the motif form a 6-puff flower: insert hook into center and work 6 single-puff petals around one central point as follows — in chosen central ch-space: *(yarn over, insert hook, pull up long loop) repeat 6 times to create 6 tall loops, yarn over and draw through all loops, ch1 to close.* Fasten and then secure with a tiny sc around base. This creates the raised central flower cluster. (Visual center completed.)
Info :
If you prefer popcorn instead of puff for the flower, work pop stitches: 5 dc in same st, remove hook from last loop, insert hook into top of first dc and draw loop through to close, ch1 to secure. Both give a raised petal look; keep them tall for three-dimensionality.
Round 11 :
Return to hdc/dc field: 1 dc in each st and 1 dc in each ch space, keeping corners as (dc, ch2, dc). Join. (This secures the central decoration into the body of the square.)
Round 12 :
Work 2 rounds in 1 sc in each st to create a slightly nubby field that complements the raised cords later. Join each round. (Stitch count consistent with previous dc positions.)
Info :
Use these rounds to tidy the motif and ensure a square shape. Blocking now will set the motif before the raised diagonal cords are added.
Round 13 :
Establish diagonal anchor points: Identify the side ch-1 spaces that lie midway between corners; you will use these for cord endpoints. Mark them with stitch markers now — there will be one anchor per side per diagonal intersection point.
Round 14 :
Begin the diagonal cord base: From one corner ch-2, sl st into first side ch-1 space, ch20 (or adjust to desired cord length for your motif size), sl st into the corresponding ch-1 on the adjacent side to make a diagonal chain stretched across motif. Repeat from the opposite corner to create the crossed diagonal chains, forming an X across the square between corners. Tie off and weave ends under the next round. (Number of ch depends on motif dimensions; test to align chains to meet in the center.)
Info :
These long chain loops are placeholders; they are later covered with a raised slip-stitch or crocheted rope to form the visible lattice lines. Keep chains loose but even; you will secure them in subsequent steps.
Round 15 :
Work around the motif edge in sc to secure all long chain anchors: 1 sc in each st and sc around chains every 6th chain (to hold them flat). Corners: (sc, ch2, sc). Join. (This stabilizes chains while preserving flatness.)
Round 16 :
Cover chains with raised rib (first pass): Using front loop only slip-stitch technique: attach yarn at a chain base and work sl st into the back bump of chain or back loop of sc across the chain to create a raised cord. Work each diagonal chain in this manner to build a rope-like raised line across the square. Fasten and weave ends. (Cord now visible as raised diagonal.)
Info :
To make a fuller raised line, you can work two passes: first an anchoring slip-stitch pass, then a second pass of sc or hdc around the first to bulk it up. Always maintain even tension so cords lay flat and meet at the flower centers.
Round 17 :
Work 2 rounds of sc evenly across motif to integrate cords and fill any gaps: 1 sc in each st and sc into st around cords where necessary. Corners as usual (sc, ch2, sc). Join.
Round 18 :
Texture round: *Ch3, sk 1 st, fpdc in next 3 sts, sk1, ch3, sl st* across sides to create subtle raised ribs between diagonal cords. This creates a small variation in texture across the motif surface. Join.
Info :
Check that all diagonal raised cords meet neatly at the central puff flower. If they do not meet exactly, adjust by sewing ends of cords together under the flower with tail yarn to create a neat junction.
Round 19 :
Work 1 hdc in each st for 2 rounds to compress texture slightly and prepare for border shaping. Join each round. (This evens the motif thickness.)
Round 20 :
Begin final motif shaping: 1 dc in each st around for two rounds, keeping corners (dc, ch2, dc). Join. (This rounds adds body before edging.)
Round 21 :
Set up for bobble corner edging: 1 sc in each st across to the corners. At each corner work (sc, ch3, sc) to create a small scallop base. Join.
Round 22 :
Bobble placement round: Evenly around the motif, in every 6th sc (or at marked points) work a 6-loop puff/pop to create small bobbles that will show when motifs are joined. After forming each puff, secure with a single sc around base. Join.
Info :
The small bobbles along the sides will become visible along seams when motifs are joined; they also add the delicate beaded look seen along edges in the pictures. Keep the bobble size consistent for an even look.
Round 23 :
Add a decorative round of (sc, ch2, sc) in each corner and 1 sc in each st along sides. Join. (This prepares edges for a scalloped border.)
Round 24 :
Scallop round: In each corner work (5 dc, sl st) to form big corner scallops. Along sides, in every group of 6 sc work (sc, 5 dc, sc) to form mini scallops. This creates the finished motif edge. Join and fasten off. Weave ends. (Final motif size depends on yarn and hooks; for bulky yarn expect approx 12-14 inches square.)
Info :
Make as many motifs as required. Arrange motifs on floor or blocking mat in the diamond lattice so raised cords align diagonally across motifs forming continuous lattice lines and puff flowers meet at intersections.
— Raised Cord / Lattice Assembly (work for each diagonal) :
Round 1 :
To create strong raised cords that run across multiple motifs, join yarn at a marked chain-anchor point at the edge of the first motif with a sl st, ch1, then sc around the placeholder chain loops created earlier to tidy them. (This anchors the cord.)
Round 2 :
Work a second pass around the same chain/cord using sc in BLO to create a ridge: insert hook only in back loop of previous sc and work sc around cord to build thickness. Continue along the diagonal across each motif; when you reach a motif join point (flower center), finish cord and slip-stitch into adjacent motif's corresponding anchor so the cord reads seamlessly. Fasten and weave ends. (Cord formed across seam.)
Info :
For continuity, carry the cord yarn across motifs and slip-stitch into anchors so lines are uninterrupted. If you prefer, make separate cord pieces per motif and stitch them together at intersections for more control over tension.
Round 3 :
If desired, bulk the cord by working a third round of hdc around the existing cord to create a rope effect. Keep tension even so cords don't pucker the motif faces. Fasten and weave ends. (Cords now plump and strong.)
Info :
At intersections, reinforce by sewing cord ends to the underside of the flower center with a tapestry needle; this avoids the cord pulling away over time.
— Flower Bobble Detail (Make extras for intersection reinforcement) :
Round 1 :
Make a small 6-puff flower to stitch on top of cord intersections (if you want extra projection). Ch4, join to ring. In ring work 6 tall puffs (yarn over, insert hook, pull up loop) repeat 6 times, draw through all loops, ch1 to close. Fasten and leave long tail for sewing. (One small flower bobble.)
Round 2 :
Optional surround: sc around the base in the motif center for tidy finish. Fasten off. (Attach to motif with long tail and whip stitch from RS to secure above cord intersections.)
Info :
These extra flowers are decorative and help hide the meeting points of diagonal cords. Stitch from the underside first to test placement before sewing permanently to the right side.
— Joining Motifs (join-as-you-go or sew) :
Round 1 :
Arrange motifs on a blocking mat in the final layout with RS up. When ready to join, you can join-as-you-go using sc or sl st through adjacent motif corner chains: with RS facing, place two motifs RS together matching edges, and working through both layers sl st or sc through corresponding st spaces across the joining side (working through both loops). Continue joining motifs row by row until entire panel assembled. (Continuous join will show bobbles at intersections.)
Round 2 :
If sewing instead, use mattress stitch or whip stitch to join from WS for an invisible seam. Sew through base of scallops or in the ch-1 side spaces so the bobbles remain visible along outer face. Reinforce intersections with extra small stitches under flower centers. Fasten securely and weave ends. (Panel assembled.)
Info :
Take time to align raised cords across motif seams so the diagonal lattice reads as continuous lines across the whole spread. Blocking motifs before joining greatly helps alignment.
Round 3 :
Working across joined seams, check the intersections: if there are gaps where cords meet, use a short length of yarn to sew them together under the central puff, then secure the puff on top with a running whip stitch from RS. Repeat at every intersection across the bedspread.
Info :
Joining-as-you-go reduces finishing time but requires planning: join the sides of motifs in the same orientation and work diagonals after enough motifs are joined so cords span multiple motifs evenly.
— Border: Scalloped Bobble Edge (Work around entire assembled spread) :
Round 1 :
With RS facing, join main yarn at any corner. Work 1 sc evenly around entire perimeter, placing (sc, ch2, sc) in each corner to preserve shape. Count stitches so rounds remain even. Join. (Perimeter prepared.)
Round 2 :
Work a decorative bobble round: *sc in next 3 sc, work 6-loop puff/pop in next sc and secure with sc around base, sc in next 3 sc; repeat across sides; in corner work (sc, ch3, sc) then continue.* Join. (Bobble spacing should align with motif-side bobbles so the edge reads continuous.)
Info :
Spacing the bobbles evenly will reproduce the pretty bead-like edging in the photos. Adjust the sequence (sc count between bobbles) depending on spread size to keep bobbles evenly spaced.
Round 3 :
Work two rounds of 1 sc in each st to secure bobbles and tidy the edge. Join each round. (Edge stable and neat.)
Round 4 :
Scallop finishing: In each corner work (5 dc, sl st) to form large scallops; along sides, in each bobble group work (sl st, 5 dc, sl st) to make a repeating scallop. Join and fasten off. Weave ends under the border. (Finished edge is scalloped and beaded.)
Info :
Optional: add a final pass of slip-stitch around the very edge to smooth scallops if desired. For a heavier drape, work a round of hdc across the inner edge before scallops.
— Pillow Cover (Make 2 matching pillow fronts and backs) :
Round 1 :
Make motif(s) to match size of pillow (for 18" pillow make 4 motifs joined 2x2 or make one large motif depending on motif final size). Work motifs exactly as for bedspread including cords and flowers. Block motifs and join as desired to form square pillow front. (Pillow front prepared.)
Round 2 :
Pillow back option A: Make same joined motifs for a matching back. Option B: Work a solid panel: ch to desired width in sc, work in sc across for about 12 rounds for a dense fabric. Join sides with mattress stitch to create an envelope closure. (Back prepared.)
Round 3 :
Assembly: Sew pillow front and back together along three sides, insert pillow form, then close last side with hidden stitches. Or attach a zipper before final seam for removable covers. Weave in ends. (Pillow complete.)
Info :
For a premium finish, add a lining fabric to the inside of the pillow to support the bulky crochet and reduce stretching; hand stitch lining with ladder stitch before final closure.
— Finishing Touches and Blocking :
Round 1 :
Block the entire assembled spread: dampen lightly, pin to desired perimeter on blocking mats to open scallops and set motif joins. Allow to dry completely. (Blocking evens motifs and fixes shape.)
Round 2 :
Weave in all ends with tapestry needle, ensuring ends are hidden under cords or inside motif stitches and secured with several small mattress stitches. Trim remaining tails. (Work hidden and secure.)
Info :
If you notice small gaps at joins after blocking, add a few hidden stitches under the puff petals to tidy joints. For heavy use, stitch a lightweight fabric backing to the entire underside of the spread to protect motifs and reduce friction.
Round 3 :
Final inspection: check all intersections for loose cords, reinforce if necessary. Steam lightly from WS if required to relax fibers. Enjoy your finished bedspread and matching pillows. (Project complete!)
This floral pink granny-square bedspread is a lovely blend of tactile texture and romantic design—perfect for adding a cozy heirloom touch to any bedroom. Each puff flower and raised cord intersection brings depth and charm, while the scalloped bobble border finishes everything with delicate detail. Work it as a throw or a full bedspread and enjoy the slow, mindful craft of making something beautiful by hand. 🧶🌸