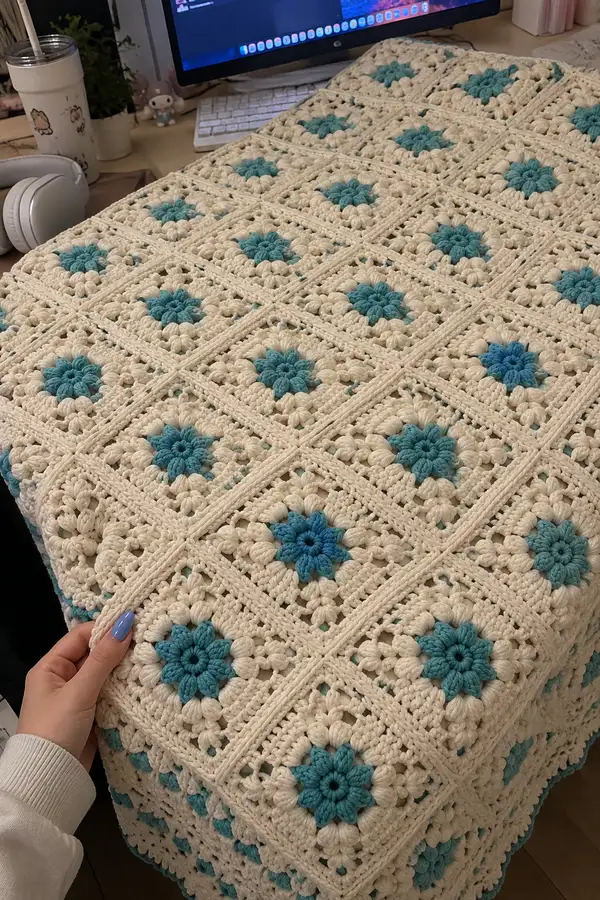
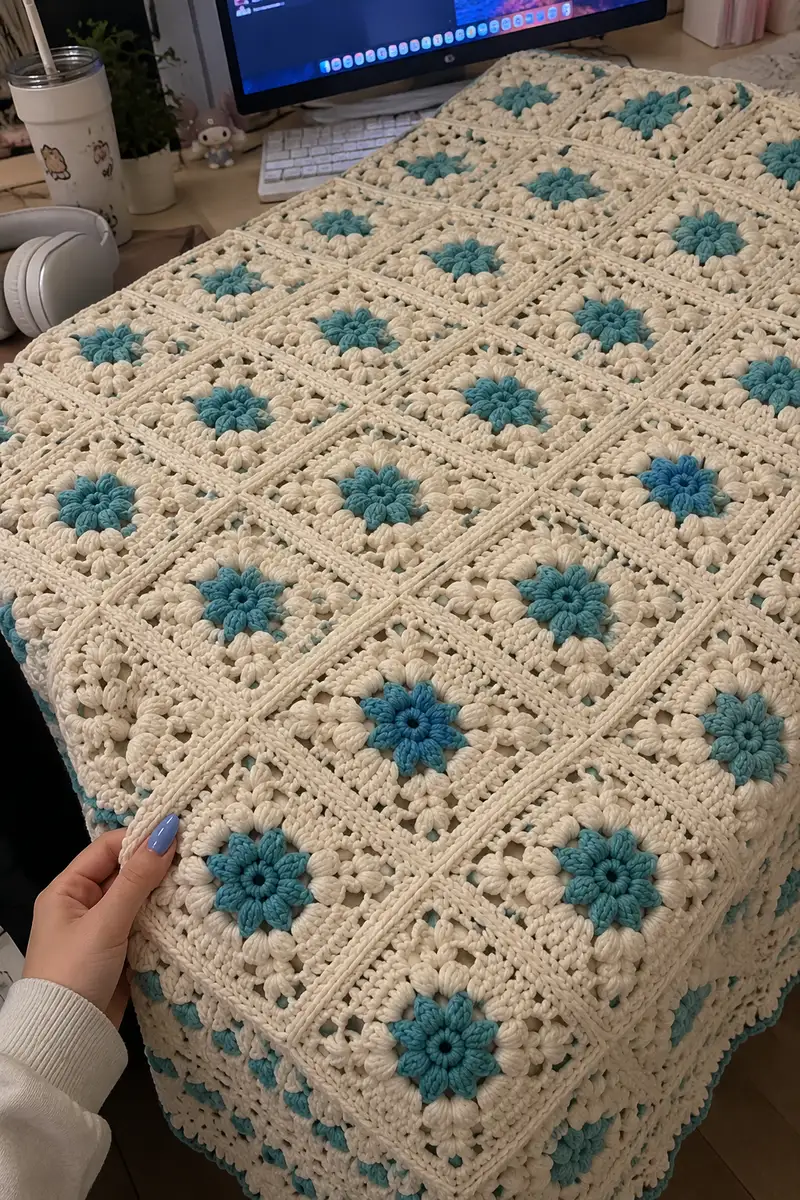
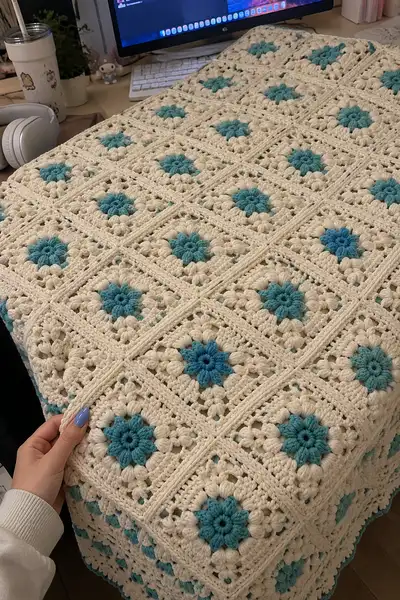
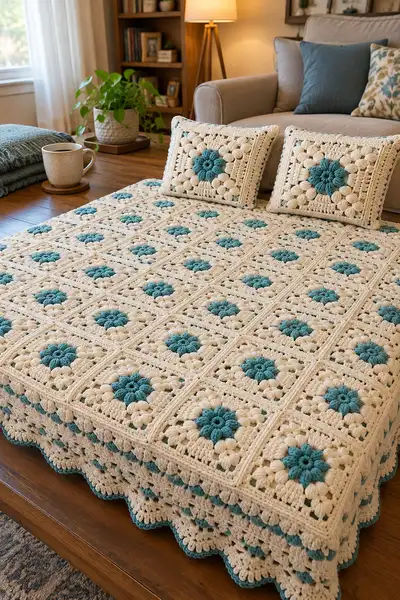
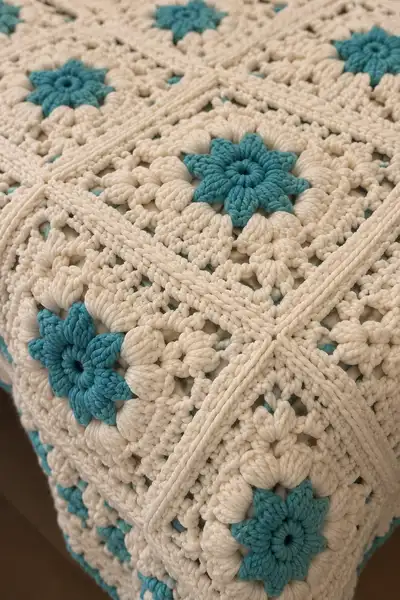
A luxurious, vintage-inspired bedspread made from oversized puff-granny squares in a soft cream with soothing teal centers. The pattern uses chunky/worsted weight yarn and textured puff clusters to create a dimensional floral motif repeated across the whole bed. Finished with a scalloped, layered border, this blanket brings coastal charm and cozy weight to a bed or sofa.
Progress Tracker
0% Complete
— Notes & Gauge :
Info :
Gauge is approximate because the bedspread uses textured puff stitches and may be affected by yarn choice. With chunky/aran yarn and 6.0mm hook, one finished motif measures approximately 9" (23 cm) square before blocking. Adjust hook or yarn to change motif size. The layout pictured is 7 motifs across by 7 motifs down (49 motifs) giving an approximate finished size for a single bedspread; you can scale to any size by adding or subtracting motifs.
— Special Stitches & Technique Notes :
Info :
Puff (ps) used in this pattern: Yarn over, insert hook into indicated stitch or space, yarn over and pull up a loop (repeat this step 3 more times so there are 9 loops on hook including initial yarn over), yarn over and pull through all loops on hook, ch1 to close puff. Each puff counts as 1 stitch. For a taller puff used on petal centers, use 4 repeats before pulling through (see rounds where 'tall puff' is called).
Info :
When changing color, finish the last pull-through of the stitch with new color. Carrying the unused color inside the center is possible for motifs that will be blocked before joining, but I recommend fasten off to avoid long floats showing through puff clusters.
— Motif (Make 49 for full bedspread pictured or as many as desired) :
Round 1 :
With teal (A) yarn make a magic ring. (ps) into ring, ch1, (ps) into ring repeat total 8 puffs. Join with sl st into first puff base. (8 puffs)
Info :
Keep the magic ring snug so center hole closes; if hole is large, weave tail through center and pull tight before stitching the round closed.
Round 2 :
Ch1, sc into same puff base, *ch3, skip to next puff base, sc into next puff base* repeat around joining with sl st to first sc. You will have 8 sc and 8 ch-3 spaces. (8 sc, 8 ch-3 sps)
Round 3 :
Change to cream (B) on final pull-through of sl st. Sl st into first ch-3 sp, ch3 (counts as dc), (2 dc, ch2, 3 dc) in same ch-3 sp (first corner), *skip next sc, (3 dc, ch2, 3 dc) in next ch-3 sp* repeat around to form 8 small corner shells. Join with sl st to top of ch3. (8 corner shells)
Info :
Round 3 creates the first square shaping. Each ch-2 corner will become the basis for square expansion. Ensure there are 8 corner shells equally spaced.
Round 4 :
Ch1, sc into same st, *ch2, sc into center of next 3-dc cluster (over the middle dc of the 3-dc shell), ch2, sc into center of next shell's 3-dc cluster; when you reach a corner shell, work (sc, ch3, sc) into corner ch-2 sp* repeat around. Join with sl st to first sc. (Work creates little open arches between shells)
Round 5 :
Ch1, sc in same st, *in next ch-2 arch work: (ps, ch1, ps, ch1, ps) across three puffs separated by ch1s to create a cluster of three medium puffs; sc into center of next 3-dc shell to anchor* repeat around, making 8 groups. Join with sl st to first sc. (8 puff-groups + anchoring scs)
Info :
When making the puff groups, keep tension consistent so each puff is the same height. Use the same 'puff' technique described above; ch1 between puffs keeps them distinct and textural.
Round 6 :
Ch2 (counts as hdc), hdc in same st, *ch1, skip next sc, (2 hdc) over the first and second puff of the puff-group cluster (treat group as three separate puff bases; work 2 hdc across edge spaces), ch1, sc in next center dc of shell* repeat around. Join with sl st to top of ch2. (Creates small bars and anchors providing square closure)
Round 7 :
Ch1, sc in same st, *ch3, sc into center of next puff (center of puff-group middle puff), ch3, sc into center of next shell cluster; at corner shells work (sc, ch3, sc) into ch-3 corner space* repeat around. Join with sl st to first sc. (Creates larger open spaces for the next puff round)
Round 8 :
With teal (A) change color on last pull-through. Sl st into first ch-3 sp, ch1, (tall puff stitch) into ch-3 sp: yarn over, insert into ch-3 sp, pull up loop, repeat 3 more times (total of 9 loops), yarn over and pull through all loops, ch1 to close. *Ch1, sl st into next ch-3 sp and make a tall puff* repeat a total of 8 tall puffs (one in each corner ch-3 space). Join with sl st to first puff base. (8 tall puffs - petals)
Info :
These tall teal puffs form the 8-petal flower. Make sure they are centered in the corner/ch-3 spaces to create a symmetrical rosette visible from the front.
Round 9 :
Ch1, sc into base of same puff, *ch2, skip one stitch, (ps) into small ch-1 spaces between teal tall puffs (make 3 small puffs to create a secondary petal ring around teal center), ch2, sc into base of next tall puff* repeat around. Join with sl st to first sc. (Creates cream petal ring surrounding teal petals)
Round 10 :
Ch3 (counts dc), in same stitch work 2 dc, *in next ch-2 space work (3 dc, ch2, 3 dc) to make a corner; between corners along each side work 3 dc in each ch-2 arch and 3 dc in each small ch-1 sp created earlier; repeat across until you have 8 corner clusters* join with sl st to top of ch3. (Counts vary by side: each side will have a set number of 3-dc groups; after this round the motif reads clearly as a square)
Info :
This round is the main square expansion round. Count carefully: each of the 8 sides (between corner ch-2 spaces) will contain the same number of 3-dc groups so the square stays even. If you get off-count, frog back to previous round and recount clusters.
Round 11 :
Ch1, sc into same stitch, *ch2, sc into top of next 3-dc group, ch2, sc into top of next 3-dc group; at each corner work (sc, ch3, sc) into corner ch-2 sp* repeat around. Join with sl st. (Creates framed squares over the 3-dc groups)
Round 12 :
Ch1, sc into same stitch, *work 3 sc into each ch-2 space between the 3-dc groups to form a dense side; at corners work (3 sc, ch3, 3 sc) into corner ch-3 space* repeat around. Join with sl st. (Tightens the square borders for a denser join later)
Round 13 :
Ch2, (hdc) across next 18 sts along side (or until reaching corner), ch2, in corner ch-3 work (hdc, ch2, hdc); continue across each side repeating hdc groups to make each side dense and even. Join with sl st. (Measurement: each side should have an equal number of hdc modules; adjust slightly depending on puff tension.)
Info :
If your motif is smaller or larger than expected at this point, you can add or remove hdc along sides to maintain square shape. Keep the number of side hdc groups the same on opposite sides.
Round 14 :
Ch1, sc around in each st and into each ch space for one tidy round of sc (this is a blocking and neatening round). Join with sl st. (Neat sc border)
Round 15 :
Ch2, *dc in next 4 sts, ch1, skip 1 st* repeat across each side creating a lacey outer arch pattern. At corners work (dc, ch2, dc) in corner spaces. Join with sl st. (Creates subtle openwork that will soften the join seams)
Round 16 :
Ch1, sc into same st, sc across each st and ch-space to create a firm frame around the motif, join with sl st. (Firm frame for JAYGO)
Info :
Fasten off cream (B) and weave in ends short if you plan to join-as-you-go. If you prefer to sew, leave long tail for sewing later. Block each motif lightly to square up before joining.
— Join As You Go (JAYGO) & Layout :
Info :
Layout pictured is a 7 × 7 grid (49 motifs). Work motifs in rows. For the first row make 7 motifs and join them as you work the final round (Round 16) using the JAYGO method described below. Join each subsequent square to the previous row and squares so that seams form the neat raised cross seen in photos.
Join Round A (for joining into a finished neighbor) :
On the last round of a new motif, when you reach a side that will attach to an already completed motif, instead of working sc into the motif st, sl st into the corresponding sc on the completed adjacent motif across the edge (matching st-to-st). Continue working the last round, joining across the full side in this manner. At corners, work (sl st to join into corner, ch3, sl st into adjacent motif corner) to keep corners aligned. Finish the round with sl st to first st and fasten off. Repeat for each side that abuts a finished motif. (This is a side-to-side JAYGO technique)
Info :
When JAYGO joining two sides, maintain consistent tension for the joining sl sts so the seam lies flat. If seam pulls, frog and re-join using fewer or looser sl sts (or use sc joins for a sturdier seam).
Join Round B (for joining into two adjacent motifs at once) :
When adding a motif that will sit between two finished motifs (i.e., joining on both the left and bottom edges), join to one edge first using technique in Join Round A; when you come to the second edge, work sl sts to attach to the second neighbor. At the corner where two neighbors meet, fasten off with a neat sl st into the corner of the already-joined square to create the raised X seam intersection. (Corner join sequence)
Info :
For the blanket pictured, each motif is joined on at least two sides except the first motif in the corner. Work the first row of 7 motifs and then add rows using JAYGO so that each new motif joins to the one left and the one above as you go; this reduces sewing and gives a continuous seam appearance.
Join Round C :
When joining long runs, maintain this rule: match each sc and ch-space on new motif to its corresponding st on completed motif. If counts differ by 1-2 due to tension, add a ch or sc evenly across the side to compensate, placing adjustments in less-visible side centers rather than corners.
Info :
If you prefer a visible ridge seam like the photo's raised cross, after joining all motifs, use a contrasting slip-stitch ridge round over the seams: with cream yarn, work a sl st into every seam across both layers to raise the join slightly and emphasize the grid lines.
— Assembly & Seaming Rounds (Whole Blanket worked row-by-row count) :
Round 1 :
After all motifs are joined into a full grid, check overall rectangle dimensions. If using 7 × 7 layout, the blanket before border should measure approximately the expected width based on motif size; adjust if necessary (add extra motifs to achieve desired width/length).
Round 2 :
Info: Weave in the bulk of shorter tails now; leave only border tails for final finishing. Use a tapestry needle and weave ends into the central puff bases to hide them from the surface.
Round 3 :
With cream (B), work one round of sc evenly around entire blanket edge: work 3 sc into each outer corner ch-3 space to maintain square corners; on sides, sc in each stitch and in each ch-space to neaten the edge. Join with sl st. (Neatening round counts = perimeter stitches vary by motif count)
Round 4 :
Ch2, *dc in next 2 sts, ch1, skip 1 st* repeat around giving a subtle open work border. At corners work (2 dc, ch2, 2 dc) in the corner spaces. Join with sl st. (Creates a spaced texture similar to motif sides)
Round 5 :
Ch1, sc around in each st and ch space to stabilize the openwork. Join with sl st. (Solidifying round)
Round 6 :
Switch to teal (A) for accent. Ch3 (counts as dc), dc in next 3 sts, *skip next st, (3 dc in next st)* repeat to create little raised v's of teal across the border side and corners. Join with sl st and fasten off teal. (Accent round)
Round 7 :
Info: Lightly block the entire blanket at this point if you can; pin to shape and air dry. This helps the border sit evenly before scallop rows.
Round 8 :
With cream (B) rejoin and ch1, sc around the edge in each stitch forming a thick frame. Join with sl st. (Sturdy frame round)
Round 9 :
Ch3, dc in same st, *ch1, skip 1, (2 dc, ch2, 2 dc) in next ch-space or st for corner* continue to create alternating 2-dc clusters and corner shells across. Join with sl st. (Beginning scallop foundation)
Round 10 :
Ch1, sc in each st and ch-space including shells and clusters to tidy. Join with sl st. (Tidy foundation)
Info :
From Round 11 onward we will build the scalloped border with alternating puff clusters and dc shells to mimic the layered wavy edge in the photo. Work tightly to ensure scallops remain defined.
Round 11 :
With cream ch1, *in next 5 sts work (ps, ch1, ps, ch1, ps) (three puffs separated by ch1), skip next 3 sts, in next st work 6 dc in same st to form a full shell; repeat across until corner where you do (ps, ch1, ps) then 6 dc corner shell* join with sl st. (Creates alternating puff cluster / shell pattern)
Round 12 :
Ch2, hdc in each st across shells and puffs, in ch1 spaces work 1 hdc to firm them up. Join with sl st. (Evening round to balance texture)
Round 13 :
Change to teal (A) on last pull-through. Ch1, sc around, placing a single sc in the top of each shell cluster and a sc in the first loop of each puff. Join with sl st and fasten off teal. (Teal highlight row)
Round 14 :
Rejoin cream. Ch3, (dc, ch2, dc) into each shell top to form big rounded shell points; between shell tops, work (3 dc) across the top of each puff cluster. Join with sl st. (Creates pronounced scallop)
Round 15 :
Ch1, sc around in each st to firm the scallop. Join with sl st. (Firming round)
Round 16 :
Repeat Round 11 but making puffs slightly taller (use 4 repeats in each puff) for the final deep scallop edge across the entire blanket perimeter. Join with sl st. (Final scallop texture)
Round 17 :
Ch1, sc around entire perimeter into each st and into back loops of scallop shells to create a crisp edge and slightly roll the scallop outwards. Join with sl st. (Finished edge stabilization)
Info :
Weave in all remaining ends using a yarn needle and trim. Lightly steam or wet-block the finished blanket to even out scallops and seams. Avoid direct high-heat ironing over puffs; instead steam from a distance to relax stitches.
— Optional Decorative Accent Rows (add extra texture if desired) :
Accent Row 1 :
With teal, work a delicate raised ridge round: sl st into each seam across the joined grid (through both layers of seam) to emphasize the raised cross grid lines seen in the photos. This will add visual definition between squares.
Accent Row 2 :
With cream, work a reverse sc round in the BLO to create thin raised ridges between motifs and along border frames. Join with sl st. (Creates subtle texture lines)
Info :
These accents are optional but contribute to the luxury finish. Test on a small swatch to see how they change drape and thickness before committing to the full blanket.
This luxurious puff-granny bedspread blends vintage charm with modern coastal color, creating a beautifully textured and cozy statement piece. Each oversized motif brings tactile depth and floral elegance while the scalloped border finishes the bedspread with graceful movement. I love how every stitch adds to the overall weight and luxe feel—perfect for layering on chilly evenings or styling as a decorative throw. 🧶🌊 Enjoy the making process and the warm comfort it brings! ✨