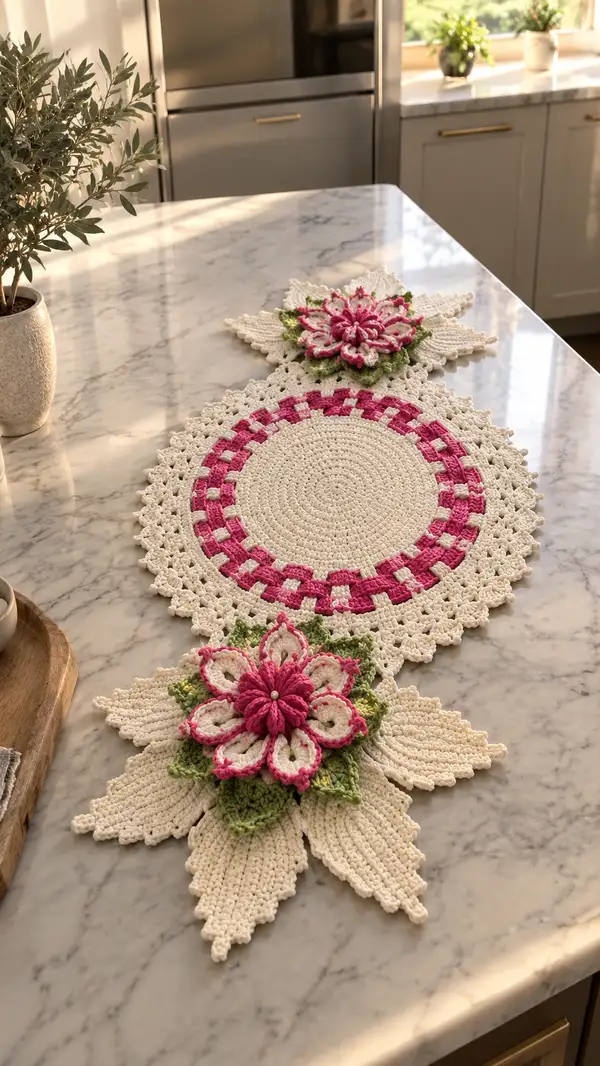
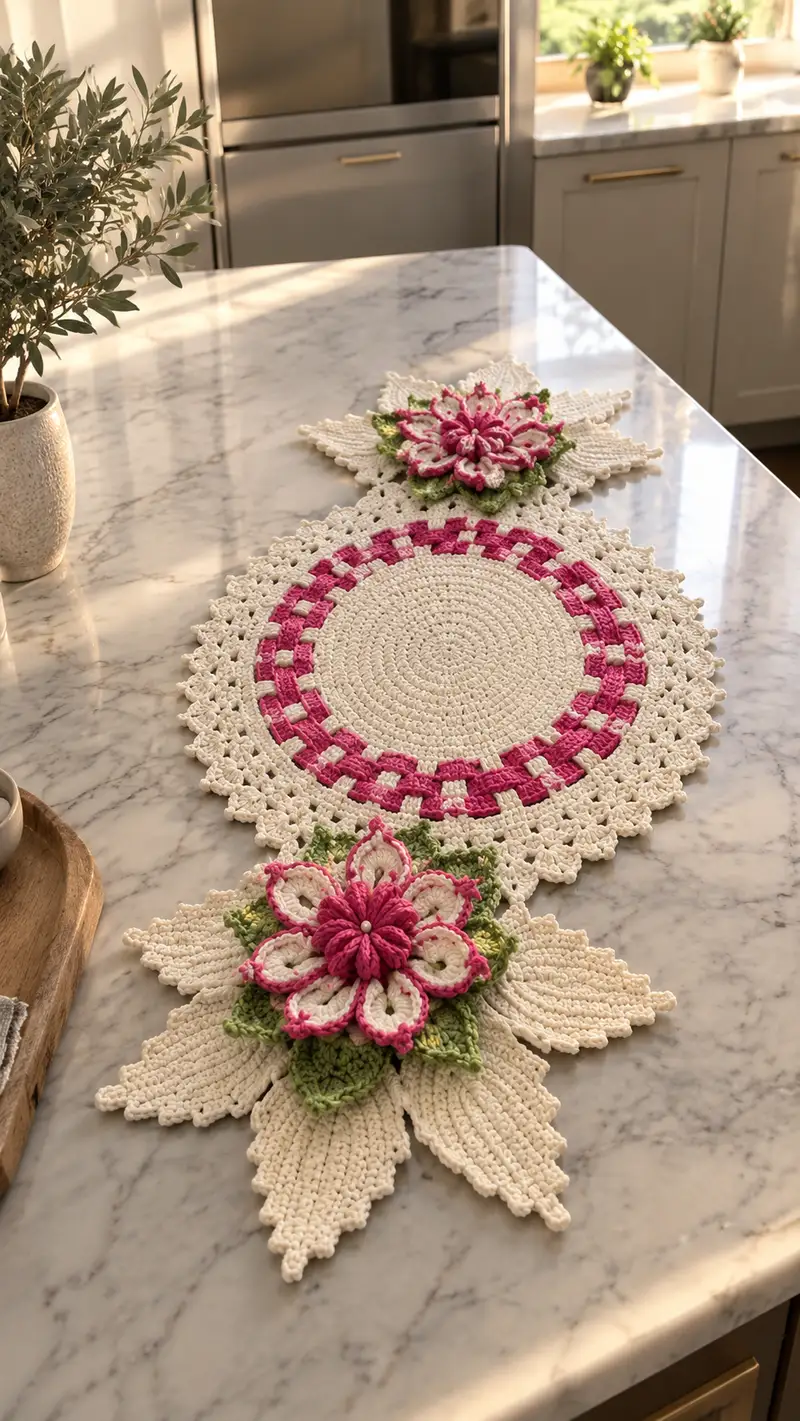
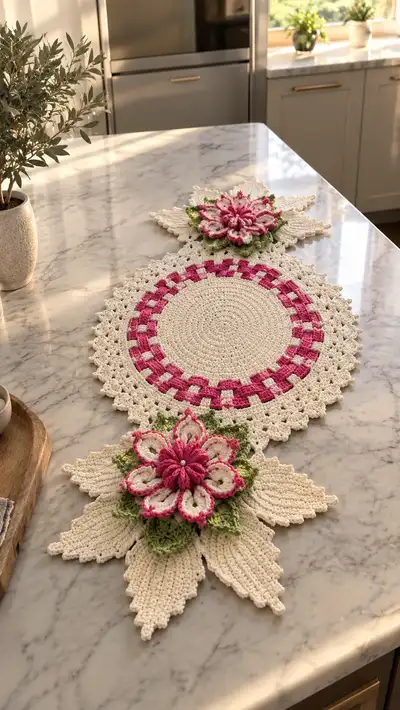
Bring a touch of handmade charm to your dining table with this elegant crochet table runner. Featuring a large cream circular center, a bold pink checker ring, delicate lace edging and two layered floral motifs with green leaves, this runner is designed to make a statement. The pattern uses cotton yarn for crisp stitch definition and includes step-by-step instructions for each element. Perfect for special occasions or everyday style, it combines texture, colorwork and 3D floral accents for a beautiful finished piece.
Progress Tracker
0% Complete
— Central Round Disc :
Round 1 :
6 sc in magic ring (6)
Round 3 :
(1 sc, inc) x 6 (18)
Round 4 :
(2 sc, inc) x 6 (24)
Round 5 :
(3 sc, inc) x 6 (30)
Info :
Use stitch marker at the first stitch of each round. Work tightly enough that the spiral does not show through; choose a hook to match your cotton yarn for a flat disc.
Round 6 :
(4 sc, inc) x 6 (36)
Round 7 :
(5 sc, inc) x 6 (42)
Round 8 :
(6 sc, inc) x 6 (48)
Round 9 :
(7 sc, inc) x 6 (54)
Round 10 :
(8 sc, inc) x 6 (60)
Round 11 :
(9 sc, inc) x 6 (66)
Info :
Check your work every few rounds by laying the disc flat; if ruffling begins, either reduce increases or block later to flatten. This round count builds a proportion similar to the pictured runner.
Round 12 :
(10 sc, inc) x 6 (72)
Round 13 :
(11 sc, inc) x 6 (78)
Round 14 :
(12 sc, inc) x 6 (84)
Round 15 :
(13 sc, inc) x 6 (90)
Round 16 :
(14 sc, inc) x 6 (96)
Round 17 :
(15 sc, inc) x 6 (102)
Info :
If you prefer a slightly smaller central motif, stop increases two rounds earlier; for the pictured scale continue to Round 20. Keep the disc flat by avoiding extra increases in a single sector.
Round 18 :
(16 sc, inc) x 6 (108)
Round 19 :
(17 sc, inc) x 6 (114)
Round 20 :
(18 sc, inc) x 6 (120)
Round 21-24 :
1 sc in each st (120)
Info :
Work even for 4 rounds to create a flat field for the checker ring to sit on; place a marker every 10th stitch if you want to count spacing for the checker squares later.
Round 25 :
(9 sc, inc) x 12 (132)
Round 26 :
1 sc in each st (132)
Round 27 :
1 sc in each st (132)
Info :
At the end of Round 27 fasten off main color if you want to prepare for the checker ring in accent color. We recommend weaving in tails temporarily or carrying the yarn across the back for one round.
— Pink Checker Ring :
Info :
Change to pink yarn. Join with sl st to an easy-to-reach stitch on the last even round of the central disc. This ring uses blocks of dc and chain spaces to create the checker pattern.
Round 1 :
Join pink. *dc in next 5 sts, ch2, skip 2 sts; rep from * around, ending with dc in last 5 sts. Adjust last repeat so pattern completes evenly (pattern approx 22 dc blocks and 22 ch2 spaces) (132)
Round 2 :
Working into dc blocks only: 1 dc in each of the next 5 dc, then in the first ch2 space work (ch2, dc) to create a bridge; rep around (132)
Round 3 :
Switch between blocks: *1 sc in each of next 5 dc, in next ch2 space work (ch2, sc) to create small square; rep around (132)
Info :
The visible checker effect is made by alternating filled dc blocks and small open chain squares. Count carefully and adjust number of dc per block if your stitch count differs; maintain overall stitch count by replacing dc with sc in later rounds as needed.
Round 4 :
Repeat Round 2 to make the top of the checker ring even (132)
Round 5 :
Switch to main cream color with Info: Change to cream yarn now and join to top of pink blocks to start the lace border. Carry unused pink yarn loosely on the wrong side to weave in later.
— Lace Scallop Edge Around Disc :
Round 1 :
With cream: *ch3, skip 2 sts, 1 sc in next st, ch3, skip 2 sts, 5 dc in next st (shell); skip 3 sts, 1 sc in next st; rep from * around to create open lace (132)
Round 2 :
*Into the 5 dc shell from previous round work: (1 sc, ch1) between the middle dc and next dc, then 5 dc in the shell top again to build height; rep around (approx 44 shells)
Round 3 :
*Work (sc, ch3, sc) into the top of each shell to form picot arches; rep around (44 arches)
Info :
Blocking after this section helps open the lace and make the scallops crisp. Pin each scallop to shape while damp and allow to dry for best result.
Round 4 :
Edging round: *In ch3 arch work (sc, hdc, 3 dc, hdc, sc) to form pronounced scallop; rep around (44 scallops)
Round 5 :
*Sl st into center of scallop, ch1, sc around scallop edge to tidy; rep around (44)
Round 6 :
Fasten off and weave ends. Block the disc so it lies flat; pin scallops gently to match photo spacing.
Info :
The disc is now complete and should match the large round portion of the runner. Repeat this process to make the second disc if you want two round centers; the pictured runner uses one central disc with two floral medallions attached to opposite ends to elongate the runner.
— Connecting Bridge & Central Band :
Info :
This bridge creates the long runner look between the central disc and the flower medallions. Work rows of dc and filet lace in cream to match the pictured narrow band.
Row 1 :
With cream, ch 60 (or enough chains to reach desired length from disc edge to flower base). Turn and join to disc edge by sl st or by single crochet into edge spacing every 6-8 stitches to attach as you go (60)
Row 2 :
Turn, ch2, dc in each st across (60)
Row 3-8 :
Repeat Row 2 to build a band 6 rows high (60)
Info :
You may work the bridge in one long strip and then join both ends to the disc and flowers, or attach gradually as you crochet rows for smoother joins. Ensure tension matches the disc so the runner lays flat.
Row 9 :
To create a subtle lace edge on the band: *skip 1 st, dc in next 2 sts, ch2, skip 2 sts; rep across (approx 30 dc clusters)
Row 10 :
Even row: dc in each st across to tidy (60)
Info :
If your runner length differs, lightly block and measure to confirm the band will reach the flower medallion spacing. Add or subtract starting chains in multiples of 4 to keep pattern alignment.
— Flower Motif Base (Make 2 identical) :
Round 1 :
Using cream: 6 sc in mr (6)
Round 3 :
(1 sc, inc) x 6 (18)
Round 4 :
(2 sc, inc) x 6 (24)
Round 5 :
(3 sc, inc) x 6 (30)
Info :
This smaller base forms the backing for layered petals. Keep it slightly domed to give the layer beneath the petals some lift.
Round 6 :
1 sc in each st (30)
Round 7 :
*ch3, skip 1 st, sc in next st; rep around to create small arches (30)
Round 8 :
Into each arch work (sc, ch2, sc) to form anchor points for petals (30)
Info :
Fasten off cream if you will add green leaf cluster next; otherwise continue to petal rounds using pink for edge highlights. Make two of these bases for both ends of the runner.
— Flower Petal Layer A (Inner, pink center) (Make 2) :
Info :
These inner petals are worked in pink to create the bright center puff seen in the photo. Use a slightly smaller hook (3.5 mm) for tighter petals if desired.
Round 1 :
Join pink to an anchor ch2 space: ch1, sc, ch3, in same anchor work (5 dc cluster) to make a petal base; sl st to next anchor. Repeat to make 8 inner petals around (8 petals)
Round 2 :
In each petal top work: (sc, hdc, 7 dc, hdc, sc) to create a full rounded petal; sl st to next petal base (8 large petals)
Info :
After forming petals, leave a long tail for sewing to the base if you plan to stitch them together rather than working them on. Block petals gently to shape.
Round 3 :
Around the very center between petals: with pink, create a 3D puff by making 10 sets of 'popcorn' or 'bobble' stitches: *make 5 dc in same st, remove hook, reinsert and pull loop through, ch1 to close pop; rep 10 times to form a raised button center*
Round 4 :
Weave tail and sew petal bases to the cream base; ensure even spacing and secure with mattress stitch or whip stitch at the back. Fasten off & hide ends.
— Petal Layer B (White with Pink Edge) (Make 2) :
Info :
This outer petal layer uses cream with a pink accent on the edges to match the photo which shows bicolored petals with a pink outline. Work petals individually and join to central base.
Round 1 :
With cream, in each (sc, ch2, sc) anchor from Flower Motif Base work: ch1, sc, ch4, in same anchor sc (creates petal loop); rep to make 8 loops (8)
Round 2 :
Into each loop: work (sc, hdc, 9 dc, hdc, sc) all in cream to form a full oval petal; sl st to next loop top (8)
Round 3 :
Edge petals with pink: join pink to top of petal and work reverse single crochet (crab stitch) around the outer edge of each petal to give a crisp pink outline; rep for all petals.
Info :
Reverse single crochet gives a subtle corded edge. If you prefer a lighter outline, work sc in pink around petal tip instead.
Round 4 :
Sew Petal Layer B to Petal Layer A by stacking so the pink-outlined petals sit slightly staggered behind the inner pink petals; secure in multiple places around the base so layers do not shift.
— Flower Leaf Cluster (Make 2 clusters for each flower; each cluster has 4 leaves) :
Info :
Leaves are worked in green and cream as layered leaves: inner small green leaves and outer larger cream leaves (the photo shows light green little leaves under the flower and larger cream leaves radiating out).
Leaf Small (Make 4 per flower) Round 1 :
With green: ch 8, sc in 2nd ch from hook, hdc in next, dc in next 3 ch, hdc in next, sc in last (7 sts)
Leaf Small Round 2 :
Turn and work along the opposite side of the chain: sc, hdc, dc, dc, hdc, sc to mirror, join with sl st at base. Fasten off. (approx 12 sts around)
Info :
Make four small leaves and arrange them in a square under the petal layers; stitch down in the center and then add larger cream leaves on top or beneath as shown in the photo.
Leaf Large (Make 8 per flower around base) Round 1 :
With cream: ch 20, sc in 2nd ch from hook, sc next 2, hdc next 2, dc next 5, tr next 4, dtr next 2, tr next 1, dc next 2, hdc next 2, sc next 3; finish by working back along the other side of the chain with mirrored stitches to create symmetrical leaf (approx 40 sts)
Leaf Large Round 2 :
Edge leaf with picot or small shells: into the outer edge work *sc, ch3, sl st into ch3 to create pointed scallop; rep until end. Fasten off leaving long tail for sewing.
Info :
Arrange leaves evenly around the flower base with large cream leaves forming a star, and small green leaves tucked near the center as accent. Pin in place and tack in several places before sewing fully.
— Final Assembly and Finishing :
Info :
Make two identical flower medallions (flower + leaves). Block each motif lightly so petals and leaves lay flat. Assemble the runner by joining the band to the central disc and then to each flower medallion.
Round 1 :
Position flower medallion at end of connecting bridge. Pin in place ensuring symmetry; use the band as a guide so both flower centers are aligned with the disc center line.
Round 2 :
Sew the flower base to the end of the band and to the lace edge using mattress stitch or whip stitch with the long tails left earlier; sew through base rounds 6-8 of the flower to catch both motifs securely (approx 20-30 secure stitches per attachment point)
Round 3 :
Weave in all ends from color changes on the wrong side, making sure no carried yarn shows through the lace. Add a drop of fabric glue to secure the bead in the flower center if using a bead, then stitch bead in place.
Info :
After joining, block the entire runner carefully: pin edges straight, flatten flowers and petals, and shape scallops. Allow to dry completely for the crispest finish.
Round 4 :
Optional stiffening: If you want the motif petals to hold shape permanently, apply a light spray starch or diluted fabric stiffener on the petals following manufacturer's directions and pin into shape until fully set.
Round 5 :
Final check: press gently with a warm iron through a pressing cloth on the wrong side if needed to smooth any bumps; avoid direct heat on beads or fragile fibers.
Info :
Your runner is complete. The modular approach allows you to adjust spacing and proportions: add another disc or extend the connecting band if you prefer a longer runner.
This beautiful floral table runner blends lace, texture and 3D petals for a striking centerpiece that will brighten any table. Each modular section — the large round center, the pink checker ring, the scalloped lace edge and the layered floral medallions — comes together in a satisfying way, creating a runner that's both decorative and durable. I love how the contrast of cream, pink and green creates a fresh, stylish look that's perfect for seasonal displays or everyday elegance. 🧶🌸💚