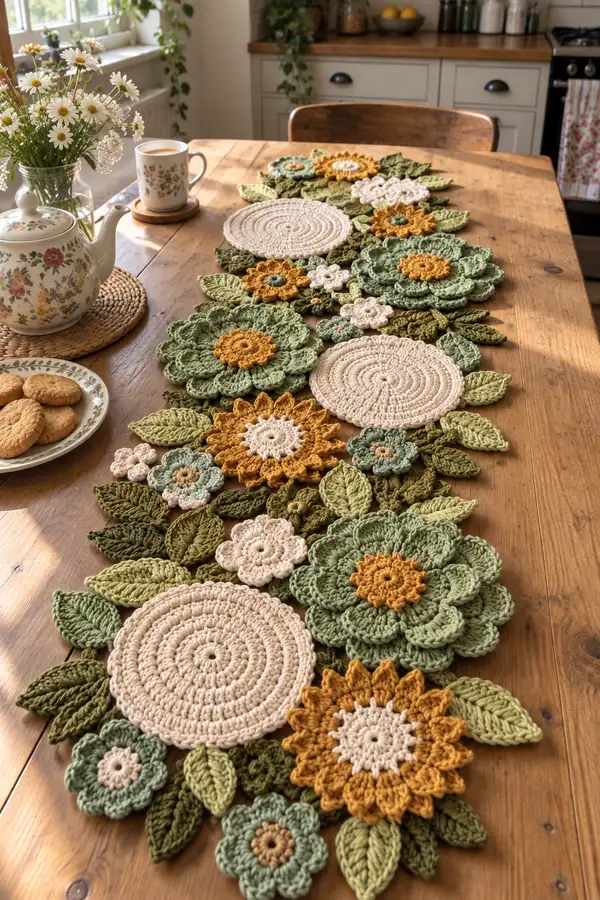
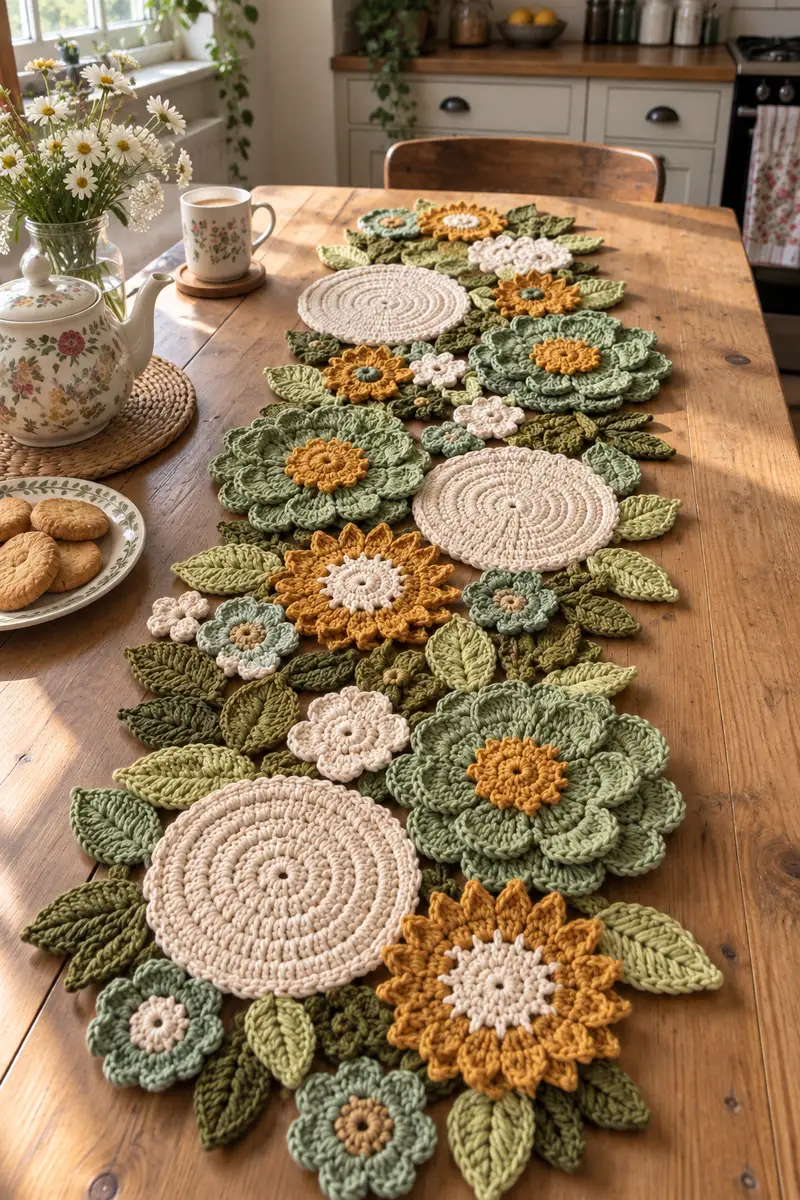
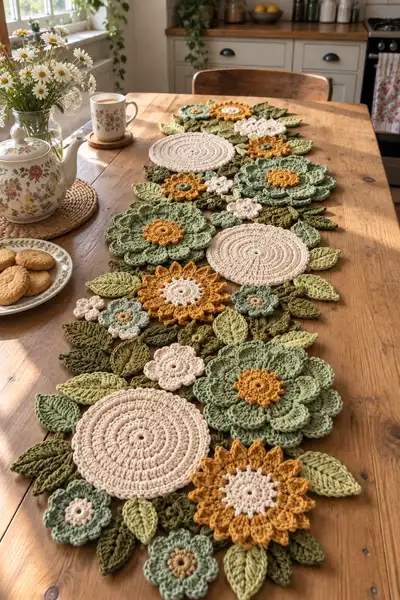
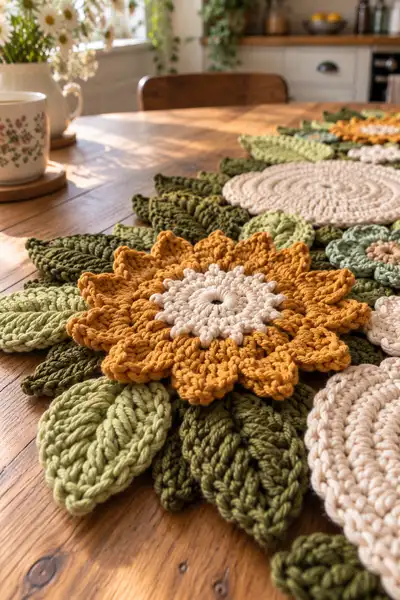
Create a charming, layered floral table runner using modular crochet motifs — large round mats, layered petal flowers, sunflowers, and an abundant assortment of textured leaves. This pattern recreates the natural, relaxed arrangement seen in the photo with warm cream, mustard and multiple leafy greens. Detailed motif-by-motif instructions and extensive joining guidance make it possible to stitch, arrange and assemble a stunning runner for your table.
Progress Tracker
0% Complete
— Materials & Gauge :
Info :
Use aran/medium weight cotton yarn and 5.0mm hook for the main motifs. Gauge is flexible for a home decor runner but aim for approx 12 sc x 12 rows = 10cm in single crochet for a dense fabric. Adjust hook size to achieve firm stitches that don't show stuffing or sag when joined.
— Large Round Mat (Make 3-4) :
Round 3 :
(1 sc, inc) x 6 (18)
Round 4 :
(2 sc, inc) x 6 (24)
Round 5 :
(3 sc, inc) x 6 (30)
Info :
Keep your tension consistent and work in a continuous spiral or place a marker and join each round depending on preference. Continuous spiral helps avoid visible seams on a mat.
Round 6 :
(4 sc, inc) x 6 (36)
Round 7 :
(5 sc, inc) x 6 (42)
Round 8 :
(6 sc, inc) x 6 (48)
Round 9 :
1 sc in each st (48)
Round 10 :
1 sc in each st (48)
Round 11 :
1 sc in each st (48)
Info :
At this point the mat will have a small curve; continue even rounds to expand diameter. If the mat begins to ripple, undo one increase round or tighten tension slightly.
Round 12 :
1 sc in each st (48)
Round 13 :
1 sc in each st BLO (48)
Round 14 :
Join with sl st to first sc, fasten off and weave tail securely. Finish edge with 1 sl st around for a clean edge if desired (48)
Info :
Block flat on a mat with pins to ensure nice round shape. These mats serve as base pieces under layered flowers and create negative space between petals.
— Layered Petal Flower A (Large layered green flower with mustard center) :
Round 1 :
mr, ch1, 8 sc in ring, pull tight (8)
Round 2 :
inc in each st around (16)
Round 3 :
(1 sc, inc) x8 (24)
Round 4 :
Change to mustard for center detail. Ch1, 1 sc in each st (24)
Round 5 :
Switch back to green. Ch3 (counts as dc), *skip next st, (dc, tr, dc) into next st (petal shell made over 1 st), skip next st, sl st into next st* repeat around to create 12 small petals (24)
Info :
Work petals into indicated stitch groups; keep petals evenly spaced. Use contrasting center color to make the flower 'pop' as in the photo.
Round 6 :
In back loops of previous round (24), 1 sc in each st BLO (24)
Round 7 :
Ch3, *fpdc around petal base, ch1, sl st in base between petals* repeat around to start layering (12 fpdc, 12 sl st)
Round 8 :
For larger petals: into each petal space: (ch3, 2 dc, tr, 2 dc, ch3) sl st to next petal base; repeat 12 times to create 12 large petals (counts variable but structure creates 12 petals)
Round 9 :
Working behind last petal row, sl st around to strengthen join; then 1 sc in each stitch to create neat underside (approx 48)
Round 10 :
Optional decorative ridging: 1 sc in each st BLO around petals to create texture (48)
Info :
Sew in center color tails. If petals lift too much, steam lightly to relax fibers, or tack petals to the base with a few hidden stitches near the base for a natural curve.
Round 11 :
Edge finish: sc around the outer edge of petals placing 2 sc in each petal tip space to smooth jagged edges, fasten off (approx 60)
— Sunflower / Radiant Petal Flower (Make 2-3) :
Round 1 :
mr, ch1, 10 sc in ring (10)
Round 2 :
inc in each st (20)
Round 3 :
(1 sc, inc) x10 (30)
Round 4 :
Change to cream for small ring accent: 1 sc around (30)
Round 5 :
Switch to mustard. Work petal base: *ch3, (tr, 2 dc, tr) into same st, ch3, sl st into next st* repeat around for 15 petals (30)
Info :
These petals are slightly taller than the layered petal flower and sit atop leaves neatly. Keep the mustard yarn tension firm so petals stand upright.
Round 6 :
Working behind petals, make a decorative second petal row: Into the base of every second petal, make (ch4, tr, ch4), sl st to secure; repeat to create staggered petal visual (15)
Round 7 :
Fasten off mustard. With brown center color: make 6 sc in mr, then 1 sc in each of first 6 chain spaces between petal bases to create a raised center ring, fasten off (12)
Info :
Sew sunflower center to petal base with whip stitch, pulling slightly so center sits snug and petals fold gently outward.
— Medium Rosette Flower (Cream circular rosette) :
Round 1 :
mr, ch1, 6 sc in ring (6)
Round 3 :
(1 sc, inc) x6 (18)
Round 4 :
(2 sc, inc) x6 (24)
Round 5 :
(3 sc, inc) x6 (30)
Round 6 :
1 sc in each st (30)
Round 7 :
Rnd 7-10: 1 sc in each st (30) - work 4 even rounds to build height giving a flat disc
Info :
This cream rosette acts as a soft neutral circle in the runner and is best blocked flat for the neat concentric look seen in the photo.
Round 11 :
Join with sl st, fasten off, weave in tail (30)
— Small 5-Petal Flower (Make several) :
Round 1 :
mr, ch1, 6 sc in ring (6)
Round 2 :
ch3, (tr, sl st) into same st to form a petal, *(ch3, (tr, sl st) into next st)* repeat around to make 6 small petals. Fasten off and weave tails.
Info :
These tiny flowers appear frequently to fill gaps. Use cream or light green for a delicate contrast against larger florals.
— Tiny Rosette with Raised Center (Make multiple) :
Round 1 :
mr, ch1, 6 sc in ring (6)
Round 3 :
With small contrasting center, embroider a simple knot or add a few sc around center and fasten off (12)
Info :
These tiny rosettes are decorative accents; stitch them onto gaps between leaves and larger flowers for a natural collected look.
— Large Leaf (Make many in dark and mid greens) :
Round 1 :
Ch10 (foundation) row. In 2nd ch from hook: sc, hdc, 2 dc, tr, 2 dc, hdc, sc across to end (9 sts total across foundation) - work along one side of chain to form one half of leaf
Round 2 :
Turn and work mirror side into remaining chain: sc, hdc, 2 dc, tr, 2 dc, hdc, sc - sl st into base to form leaf tip (18)
Round 3 :
Edge: sc around entire leaf, placing 3 sc at tip for rounded point and 2 sc in wider places to maintain shape. Fasten off (approx 36)
Info :
Leaves are worked flat rather than in rounds; counts are approximate and will vary with yarn thickness. Block leaves with pins to shape and ribs.
Round 4 :
Optional center rib: with contrasting lighter green, surface slip stitch down center vein from base to tip, then return with small diagonal stitches to mimic venation.
— Small Leaf (Make many in light greens) :
Round 1 :
Ch7. In 2nd ch from hook: sc, hdc, dc, hdc, sc across (5 sts across)
Round 2 :
Mirror back down chain on opposite side: sc, hdc, dc, hdc, sc. Sl st to base. Fasten off. Edge with single crochet around if thicker leaf is desired. (approx 20)
Info :
Vary leaf sizes and shades to create depth. Some leaves in the photo are chunky and twisted slightly; you can achieve this by using a larger hook for selected leaves and blocking them with a slight curve.
— Decorative Petal Row (Alternate medium flower style) :
Round 1 :
mr, ch1, 10 sc in ring (10)
Round 2 :
inc in each st (20)
Round 3 :
(1 sc, inc) x10 (30)
Round 4 :
Change to petal color. *ch5, sl st into next st* repeat around to form 15 chain loops (30)
Round 5 :
In each chain loop: (sc, hdc, 3 dc, hdc, sc) to form little sunflower petals—repeat 15 times. Fasten off (approx 90)
Info :
Use this motif to create the layered mustard flowers in the runner. The petal counts and chain loop size can be adjusted to alter the petal fullness.
— Joining Circles, Small Flowers and Leaves (Connector Units) :
Round 1 :
Create small filler rosettes: mr, 6 sc (6). Make at least 6-10 for a runner of this length.
Round 2 :
Make small half leaves by ch5 and returning as sc pattern; these are used between larger leaves to soften the edge.
Info :
Make more filler pieces than you think you need — they are essential to produce a natural layered composition and to hide seams between motifs.
— Decorative Raised Petal Row for Layering (for extra texture) :
Round 1 :
Work a base disc: mr, 8 sc (8). Rnd2: inc x8 = 16.
Round 2 :
Change color, ch3, *into next st: (fpdc, tr, fpdc), sl st into next st* repeat around to create 8 raised petals. Fasten off and tack onto a larger motif as an additional petal layer.
Info :
Raised petals are the little textured centers you see layered on top of green petals in the photo. They give a succulent, dimensional feeling to the arrangement.
— Edge and Joining Step-by-Step (Join Motifs into Runner) :
Round 1 :
Layout: Arrange all made motifs on a flat table, alternating large round mats, layered flowers, sunflowers and clusters of leaves. Move pieces until you have a flowing composition similar to the photo—a central line of large motifs with leaves spreading out to edges.
Round 2 :
Pin motifs in place using craft pins, overlapping edges so that at least 1-2 cm of each motif overlaps adjacent motifs to create stable seams when sewn.
Round 3 :
Joining: Using a length of matching yarn and a blunt tapestry needle, whip stitch through both layers of motifs where they overlap, making small, tight stitches and pulling gently to flatten the join. Try to hide stitches under petals and leaves.
Round 4 :
For larger seams, use a running backstitch: sew from underside through both pieces several times to secure. Space stitches close together for durability.
Info :
Place heavier stitches along the base of larger flowers to prevent toppling when the runner is handled. Use additional smaller filler motifs to bridge wider gaps and disguise irregular edges.
Round 5 :
When joining leaves, insert a few stitches into the leaf's underside only (not into petals) so leaves can swivel slightly and maintain a natural look without warping the flower motif.
Round 6 :
Edge finish: Once all pieces are joined, work a decorative sc border along the outermost edge where motifs meet the table. Work 1 sc in every 2-3 sts and 3 sc at points where leaves meet to create a tidy, slightly scalloped edge.
Round 7 :
Optional join: For a more permanent join, danish join: pick up two adjacent motifs and single crochet through both edges, working through both loops for a visible seam. This gives a robust join but is more obvious than hidden whipstitching.
Info :
Test how the runner lays flat and adjust joins by adding or loosening stitches. Some motifs may benefit from a few strategic stitches near petal bases to make them sit flat.
— Final Touches & Texture Tricks :
Round 1 :
Weave in all tails on the underside. Tuck ends along seams then clip close. Use a yarn needle to bury ends in the motif body for security.
Round 2 :
Light blocking: pin the assembled runner to a flat surface and lightly steam from 20cm away. Do not press iron directly onto yarn; instead use a steam setting to relax stitches and help petals and leaves sit in chosen directions.
Info :
If you want a stiffer runner, apply a sprayed fabric stiffener to the underside only. Allow to dry fully before using on a dining table with food or cups.
Round 3 :
Final inspection: Flip runner and ensure joins are secure. Add additional hidden stitches beneath any loose petals or leaves.
— Pattern Yield, Sizing & Scaling :
Info :
This set as written creates a runner approximately 120-140cm long and 25-30cm wide depending on motif spacing. To scale up, add additional round mats or duplicate flower clusters and extend the assemblage. To make a placemat instead, arrange fewer motifs into a circular or rectangular cluster.
Info :
For a denser runner, place motifs closer together and add extra small rosettes and leaves to fill negative space. For a lighter, airier runner, space motifs further apart and reduce filler pieces.
Finishing this floral table runner is such a satisfying moment — watching all the petals, rosettes and leaves come together into a flowing composition feels like arranging a little piece of the garden on your table. The layered textures and warm colour palette make it a perfect seasonal centerpiece. Whether you gift it or keep it, every stitch contributes to a handmade heirloom you'll enjoy for years. 🌿🧶