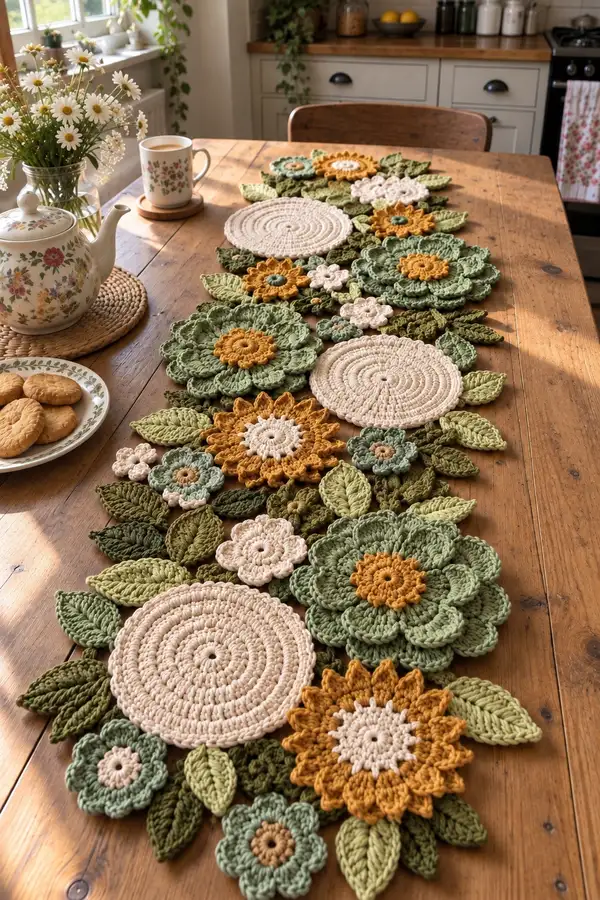
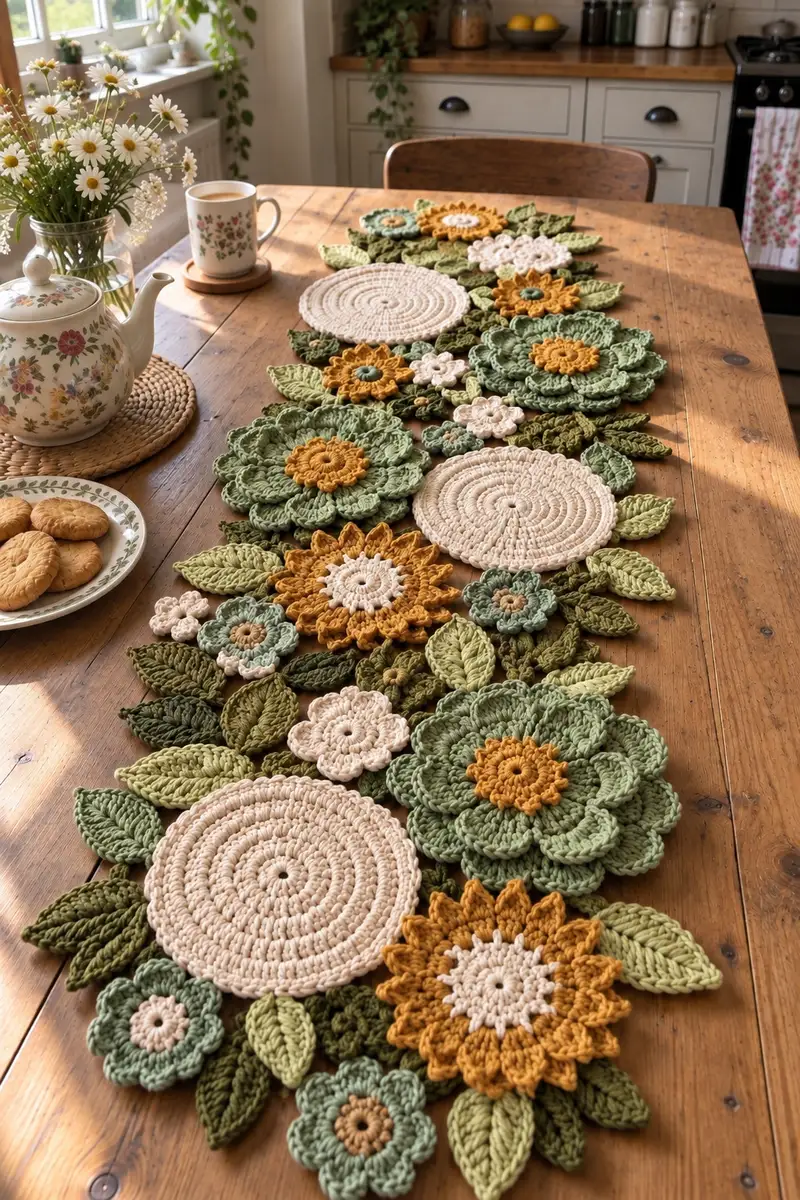
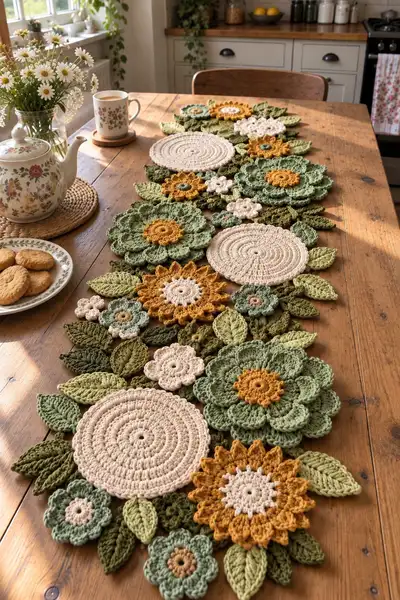
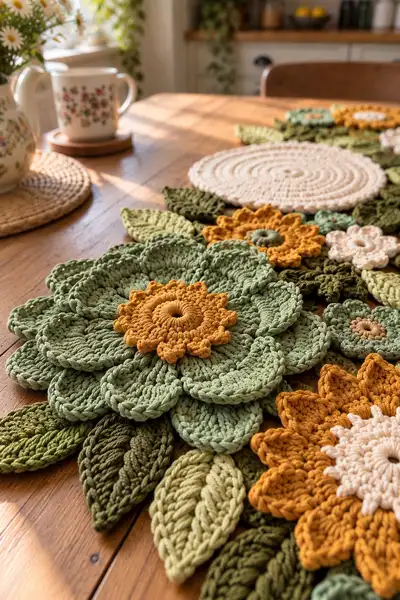
Create a lush, layered floral table runner featuring oversized disc motifs, textured layered petals, sunflower centers and sculpted leaves. This pattern uses chunky cotton yarn in warm cream, soft sage, olive and mustard tones to build dimensional flowers that interlock across a table. Detailed motif instructions and clear joining guidance make it easy to assemble into a long runner similar to the photographed layout. Perfect for a botanical tablescape or seasonal centerpiece.
Progress Tracker
0% Complete
— Materials & Gauge :
Info :
Gauge is flexible for decorative runner; aim for firm stitches so motifs hold shape. Sample gauge: 10 sc x 10 rows = 4 in (10 cm) in single crochet using 5.5mm and worsted cotton. Adjust hook to achieve a firm fabric.
— Large Round Disc (Cream) - Make 3 :
Round 1 :
6 sc in magic ring (6)
Round 3 :
(1 sc, inc) x 6 (18)
Round 4 :
(2 sc, inc) x 6 (24)
Round 5 :
(3 sc, inc) x 6 (30)
Round 6 :
(4 sc, inc) x 6 (36)
Info :
Check for flatness: the disc should lie flat; if it cups, add one more even round before continuing increases. If ruffling, reduce next increase round.
Round 7 :
(5 sc, inc) x 6 (42)
Round 8 :
(6 sc, inc) x 6 (48)
Round 9 :
1 sc in each st (48)
Round 10 :
1 sc in each st (48)
Round 11-12 :
1 sc in each st (48)
Info :
If you prefer a more pronounced coil, these even rounds can be worked in BLO to create a subtle ridge between rounds 9-12.
Round 13 :
(6 sc, dec) x 6 (42)
Round 14 :
(5 sc, dec) x 6 (36)
Round 15 :
(4 sc, dec) x 6 (30)
Round 16 :
(3 sc, dec) x 6 (24)
Round 17 :
(2 sc, dec) x 6 (18)
Round 18 :
(1 sc, dec) x 6 (12)
Info :
Fasten off leaving a long tail to whip-stitch disc onto runner backing or to join to adjacent motifs. For a thicker look, work 2 discs and join them back-to-back before finishing.
— Layered Petal Flower (Large Sage) - Make 4 :
Round 1 :
7 sc in magic ring (7)
Round 3 :
(1 sc, inc) x 7 (21)
Round 4 :
(2 sc, inc) x 7 (28)
Round 5 :
1 sc in each st (28)
Info :
This center forms the base for stacked petal rounds. Keep center tight; avoid over-increasing to maintain a compact hub.
Round 6 :
Switch to petal shaping color if desired. *(ch2, 3 dc) in same st, sl st in next st; repeat from * around to form 14 small petals (14 petals)
Round 7 :
Working behind the small petals, 1 sc around each petal base (14)
Round 8 :
(3 sc, inc) x 7 (28)
Round 9 :
1 sc in each st (28)
Round 10 :
Petal round: *(ch3, 5 dc) in next st, sl st in next 2 sts; repeat around to create 7 larger petals (7 petals)
Info :
Adjust ch counts in petal foundation to change petal height; longer chains create taller petals. Use consistent tension to ensure petals align.
Round 11 :
Working behind the large petals, sc around petal bases with 2 sc in the ch-spaces to anchor (28)
Round 12 :
(2 sc, inc) x 7 (21)
Round 13 :
Form secondary petal layer: in each of the 7 base sts, work *(ch3, 3 tr, ch3) sl st in same st; repeat for 7 scalloped tall petals
Round 14 :
Anchor with sc around petals: 1 sc in each anchoring st and 2 sc in wider spaces (28)
Info :
For a fuller flower, repeat rounds 12-14 to add an extra outer petal layer. Block petals lightly to shape and allow them to overlap naturally when assembling.
Round 15 :
Final edge round: 1 sc in each st BLO to create a defined rim (28)
Round 16 :
Fasten off leaving long tail for sewing. Weave in ends or reserve for joining.
— Sunflower-Like Motif (Mustard & Tan) - Make 3 :
Round 1 :
6 sc in magic ring (6)
Round 3 :
(1 sc, inc) x 6 (18)
Round 4 :
(2 sc, inc) x 6 (24)
Round 5 :
Change to mustard color. 1 sc in each st (24)
Info :
Switching colors here defines the sunflower’s petal base. Carry unused yarn on wrong side or fasten off.
Round 6 :
Petal foundation: *(ch2, 7 dc) in next st, sl st in next st; repeat around to make 12 pointed petals (12 petals)
Round 7 :
Anchor petals with 1 sc around petal bases in the body rounds (24)
Round 8 :
Decorative picot edge: *(sc, ch3, sl st in 3rd ch) in tip of each petal; repeat around (12 picots)
Round 9 :
Fasten off mustard and change to tan: sc around the very center to tidy and create a subtle button (24)
Round 10 :
Add small raised ring: using tan, work 3 rounds of hdc in each st around (24)
Info :
For a more sculpted center, use a smaller hook (4.5mm) for rounds 9-10 to create tighter texture, then switch back to 5.5mm for petals.
Round 11 :
Fasten off leaving long tail for sewing. Weave in ends or use tail to anchor motif to runner layout.
— Small 5-Petal Flower (Cream) - Make 8 :
Round 1 :
5 sc in magic ring (5)
Round 2 :
Inc in each st (10)
Round 3 :
*(ch3, 5 dc) in next st, sl st in next st; repeat 5 times for 5 petals
Round 4 :
Anchor petals with 1 sc around the base, 2 sc in wider spaces (10)
Round 5 :
Fasten off leaving tail to sew; these are flat filler flowers used to break up negative space.
— Tiny Rosette (Sage or Tan) - Make 10 :
Round 1 :
6 hdc in magic ring (6)
Round 2 :
*(hdc, ch2, hdc) in same st to form a loop, sl st in next st; repeat 3 times to form 3 tiny scallops (3 scallops)
Round 3 :
Sl st to center and fasten off leaving tail for sewing. These rosettes add texture to gaps.
— Sculpted Leaf (Make 30 assorted in two sizes) :
Info :
Make two sizes: Large leaves (Make 14) and Small leaves (Make 16). Use olive for darker leaves and pale sage for lighter leaves.
Leaf Round 1 :
Ch 10, sc in 2nd ch from hook, hdc next, dc next 4, hdc next, sc next, sl st in last to turn and work along opposite side: sc, hdc, dc x4, hdc, sc. Fasten off (leaf is worked in rows and mirrored)
Leaf Round 2 :
For a raised midrib, rejoin at stem tip, ch1, sc across center top sts, then finish with sc along underside; fasten off. (This creates a two-sided leaf with visible ridge.)
Leaf Round 3 :
Make small leaves by ch 8 and following same shaping with fewer dc to create proportionate size.
Info :
For sculpted look, work leaf edge in BLO on the final row to create a folded ridge. Block leaves lightly on a mat to set shape before assembly.
— Bud / Mini Puff Cluster - Make 12 :
Round 1 :
6 sc in magic ring (6)
Round 3 :
Work 6 mini puff stitches around: *(yarn over, insert hook, pull up loop 3 times, yarn over and pull through all loops) in each st; sl st to close (6 puff)
Round 4 :
Fasten off leaving a long tail. Insert a tiny bit of stuffing if desired and sew to runner underside so the puff stands slightly off the table.
— Filler Moss Cluster (Make 12 clusters) :
Round 1 :
Ch4, join with sl st to form ring. Work 12 sc in ring (12)
Round 2 :
*(ch2, sl st in same st) repeat around to form 12 tiny loops for moss texture; fasten off and leave tail to sew flat onto runner.
Info :
These clusters help fill negative space and secure leaf edges when joining motifs.
— Decorative Joining & Edging (Join motifs into a runner layout) :
Info :
Arrange motifs on a flat surface following the photo layout first: alternating large discs with layered petals, filling gaps with sunflower motifs, small flowers and leaves. Pin each piece to ensure pleasing flow before joining.
Round J1 :
With cream yarn, work a continuous slip-stitch seam along adjacent disc edges to secure two discs: insert hook through both margins, sl st across using tails and mattress stitches where possible to create an invisible seam.
Round J2 :
When joining a petal to a disc, place petal layered flower on top of disc edge and use the long tail to whip-stitch the base of petals to the disc back, catching 2 strands of each motif per stitch for strength.
Round J3 :
Attach leaves individually by sewing their stem ends beneath overlapping petals or discs so leaves point outward; use tiny whip-stitches and bend the leaf slightly before tightening to create natural curvature.
Round J4 :
To secure sunflower motifs, overlap their outer petals under adjacent petal layers and mattress-stitch around three-quarters of the center circumference so the top petals remain free and dimensional.
Round J5 :
Create small connector motifs (mini rosettes) to fill gaps: sew them flat into crevices and tack edges with hidden stitches.
Round J6 :
Edge the entire runner with a single round of sc in worsted cream or olive: work into the outside edges of motifs, 1 sc per visible stitch, and use 3 sc in deeper gaps to avoid puckering.
Round J7 :
Optional scalloped border: *(sc, ch3, sc) into rim at intervals (approx every 6–8 sts) to create a decorative finish; adjust spacing to keep border even.
Info :
When joining, keep stitches small and avoid pulling too tightly to preserve the dimensional petals. Use matching color yarn for each seam to reduce visibility.
— Finishing Touches & Tips :
Info :
Weave all ends into the back of motifs using a yarn needle. Steam-block large petals and discs to flatten and shape them gently - use a cloth and iron on a low steam setting, do not press directly onto cotton yarn.
Info :
If planning to launder runner occasionally, use colorfast cotton and test washing technique on a spare motif. Consider stitching a cotton backing fabric to the underside to protect seams and table surface.
Info :
Store runner flat to avoid distorting layered petals; do not fold sharply across larger motifs. For seasonal display, change accent colors or swap sunflower motifs for small pumpkins or seasonal centerpieces.
Bringing this floral runner together is such a rewarding finishing moment — the layered petals and sculpted leaves form a lovely garden across your table. Each stitch adds texture and personality, and seeing the motifs join into a flowing design feels like planting a tiny crochet meadow. Use it for seasonal dinners or everyday charm — it makes a beautiful handmade statement. 🧶🌼