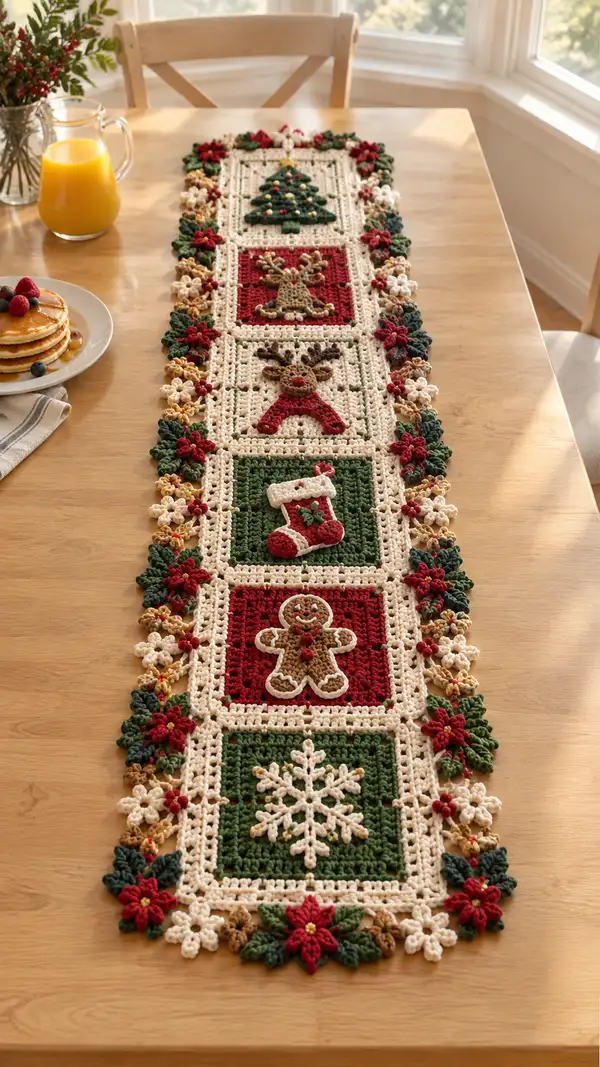
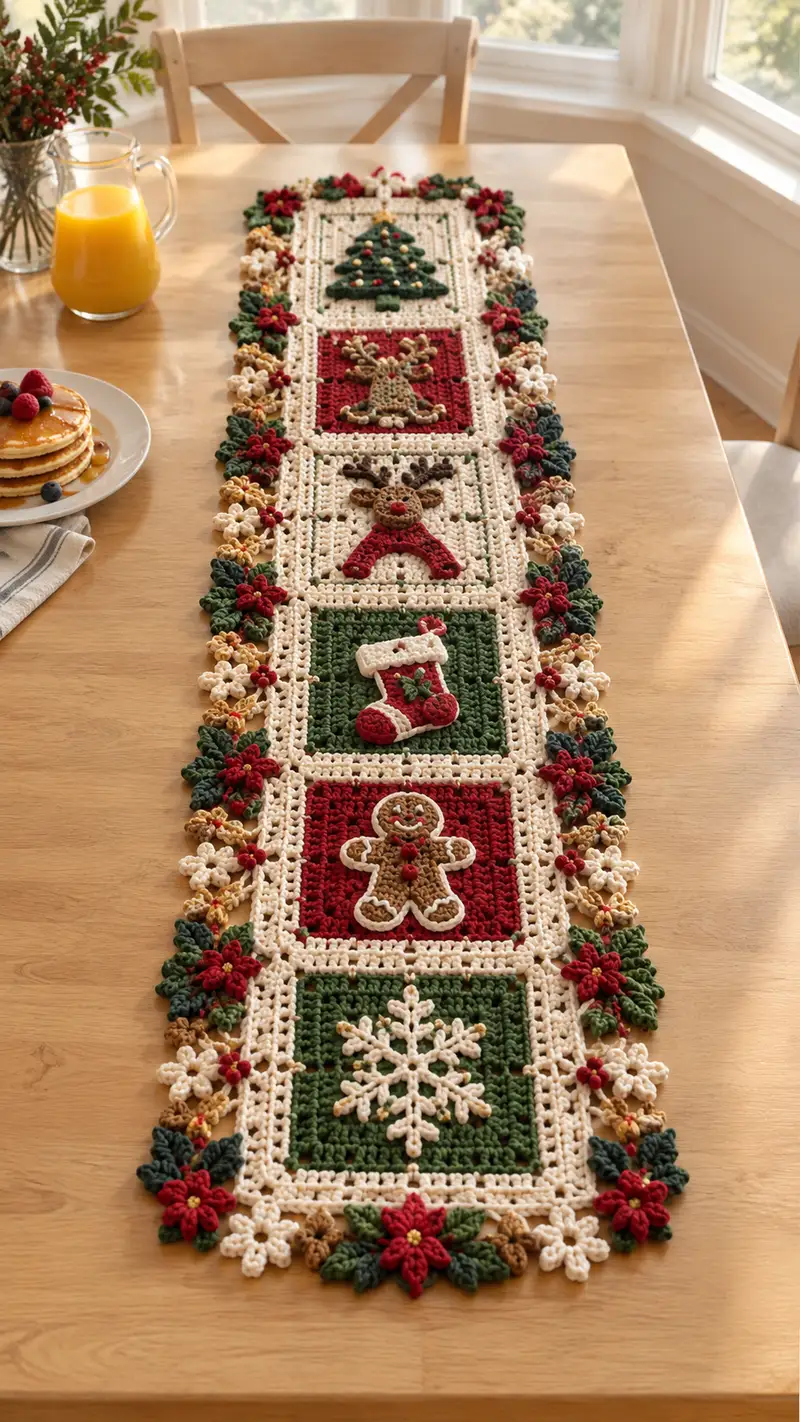
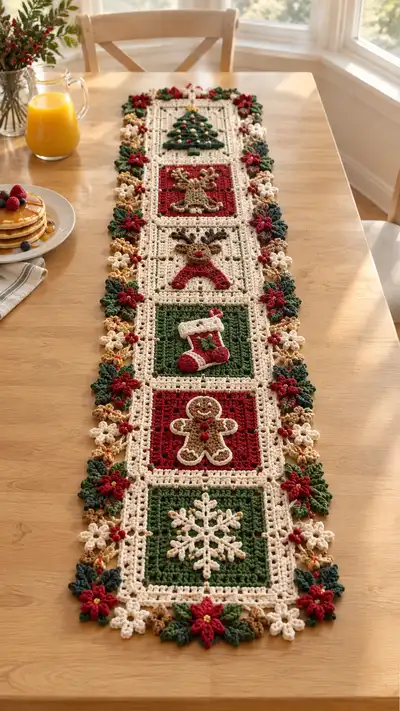
A festive, handcrafted table runner featuring six detailed holiday squares—snowflake, gingerbread, stocking, reindeer, and trees—framed in warm ivory with a lush floral border. Rich forest green, deep red, soft tan and cream combine to create a heirloom centerpiece that dresses any holiday table. Structured as joined squares with appliques and layered flowers, this pattern is written step-by-step for clear construction and decorative finishing.
Progress Tracker
0% Complete
— Notes & Gauge :
Info :
Gauge is not critical for this decorative runner, but a 10cm/4in square in sc rounds should be approximately 16 sc x 18 rows as a guide using 4.00mm hook and worsted yarn. Work tightly enough so small appliques maintain shape but loosely enough that joins lie flat. Block each square lightly before joining.
Info :
Colors used in the instructions: Ivory (I), Forest Green (G), Deep Red (R), Tan/Brown (T), Dark Brown (B), Gold (Y). Carry unused yarn inside if you prefer, or fasten off and weave tails; details often work better when crocheted separately then sewn on.
— Common Base Square (use for each motif) :
Round 1 :
6 sc in magic ring (6)
Round 3 :
(1 sc, 1 inc) x 6 (18)
Round 4 :
(2 sc, 1 inc) x 6 (24)
Round 5 :
(3 sc, 1 inc) x 6 (30)
Round 6 :
(4 sc, 1 inc) x 6 (36)
Round 7 :
(5 sc, 1 inc) x 6 (42)
Round 8 :
(6 sc, 1 inc) x 6 (48)
Info :
These first 8 rounds create a circular disc that will be squared out with corner increases. Maintain consistent tension. Place a stitch marker at the first stitch of each round to keep track and move marker each round.
Round 9 :
(7 sc, 1 inc) x 6 (54)
Round 10 :
(8 sc, 1 inc) x 6 (60)
Round 11-16 :
1 sc in each st (60)
Info :
Rounds 11-16 build the body of the square and will give height to accept appliques. If you need a slightly larger square, work additional even sc rounds (always in multiples of sides you need to keep corners aligned).
Round 17 :
To create a squared border, change to alternating sc and dc clusters around: *1 sc, 1 dc in next st*, rep around keeping corners in the same position (60)
Round 18 :
1 sc in each st BLO (60) - this gives a ridge for appliques to sit against
Round 19 :
Switch to background color if needed; 1 sc in each st (60). Fasten off and weave ends if you are making this square aside from others.
Info :
Make 6 base squares following these 19 rounds. Background colors alternate per image: starting at one end make Green (snowflake), Red (gingerbread), Green (stocking), Ivory (reindeer background), Red (tree background), Ivory (topmost tree/ornament background) — adjust order as you prefer. Block each square flat before adding appliques.
— Snowflake Square (Base in Forest Green + Snowflake Applique in Ivory) :
Info :
Work base square in Forest Green (G) using Common Base Square Rounds 1-19. Place the snowflake in the center — make the applique then sew in place using matching thread and small stitches.
Snowflake Round 1 :
With Ivory (I), ch 6, sl st to form small loop, ch 1, 8 sc into loop, sl st to join (8)
Snowflake Round 2 :
*ch 6, sl st into next sc to make arm loop* rep 8 times around to create 8 arms, fasten off (no numeric stitch count for loops)
Snowflake Round 3 :
Rejoin I at base of each loop: around each loop work (sl st, ch 2, 3 tr, ch 2, sl st) to make an elongated arm; repeat for all 8 arms
Info :
Using a small hook (3.5mm) makes the snowflake crisp. Block it lightly on a flat surface with pins to open the arms and let dry before attaching to square.
Snowflake Round 4 :
Using I, embroider small picot stacks at the center between arms: *ch 3, sl st into center* repeat 8 times for decorative center nubs
Snowflake Round 5 :
Attach snowflake to center of forest green square using invisible stitch; secure at arm bases and center (use a long tail and yarn needle)
Info :
Placement: Count the square’s center by measuring from four corners or place marker at round 10 center stitches to ensure snowflake is centered and aligned with the square ribs.
— Gingerbread Square (Base in Deep Red + Gingerbread Applique in Tan/Brown) :
Info :
Work base square in Deep Red using Common Base Square Rounds 1-19. All applique work is done in Tan (T) with icing and face details in Ivory (I) and small buttons in red (R)
Gingerbread Round 1 :
With Tan (T), mr, ch 1, 6 sc in mr (6)
Gingerbread Round 2 :
6 inc (12)
Gingerbread Round 3 :
(1 sc, inc) x 6 (18) — this begins to form head
Gingerbread Round 4 :
1 sc in each st (18) — fold to shape neck area later
Gingerbread Round 5 :
Ch 1, *sc 3, ch 2, skip 2 sts* across to form arm openings (work evenly across to shape arms), finishing in same row to create a flattened central body (approx 18 stitches counted)
Info :
The gingerbread body is best built as a flat applique worked in rows rather than rounds to give the classic gingerbread silhouette. Use a 3.5mm hook for crisp edges. The counts above assume shaping by skipping chain spaces to create arms and legs; adjust visually to create a pleasing gingerbread outline.
Gingerbread Round 6 :
Turn and work single crochet around the shaped outline to tidy edges: sc around whole shape, making 2 sc in corners or curved leg/arm tips to round them (approx 36 sc around)
Gingerbread Round 7 :
With Ivory (I) and embroidery needle, stitch outline 'icing' around arms and legs with a raised chain stitch (surface chain), add two small red buttons to chest with French knot style or stitch through with small red yarn
Gingerbread Round 8 :
Sew gingerbread applique to center of deep red square, aligning head near top third and legs near bottom third. Secure with small stitches and hide tails inside applique.
Info :
When sewing applique, place pins and check symmetry by folding square gently in half vertically to ensure gingerbread is centered. Use small stitches to avoid puckering the base square.
— Stocking Square (Base in Forest Green + Stocking Applique in Red/Ivory) :
Info :
Base square in Forest Green made using Common Base Square Rounds 1-19. Stocking applique is layered: main stocking red (R), cuff in Ivory (I), holly leaves in green and berry in red detail.
Stocking Round 1 :
With Red (R), ch 10, sc in 2nd ch from hook and across to make a small rectangle (9 sc)
Stocking Round 2 :
Turn, ch 1, sc in each st across (9)
Stocking Round 3 :
Work increases on last 3 sts to create boot toe shaping: sc 5, (inc, sc) in next 2 sts, sc to end; continue forming toe by working around edges to create a small 3D toe (approx 18 sc around after turning and edging)
Stocking Round 4 :
With I, make cuff: ch 10, join into loop, work 2 rounds of sc around cuff then attach cuff to top of red stocking body with slip stitches
Stocking Round 5 :
Make holly: With Green (G), ch 6, sl st to form leaf center, (ch3, sl st) x3 to make three small leaves; attach to side of cuff and add a small red French knot berry using spare red yarn
Stocking Round 6 :
Sew stocking onto center of green square with small invisible stitches around the edge of the stocking body. Add a slight nub of stuffing in the toe if you want raised shape, but keep very light to avoid distortion.
Info :
For the stocking toe and cuff, using 3.5mm hook will make the shape crisper and reduce sloppiness from chain loops. Pin before sewing and check that cuff sits level and centered.
— Reindeer Square (Base in Ivory + Reindeer Applique in Tan/ Brown/Red Scarf) :
Info :
Base square in Ivory (I) per Common Base Square Rounds 1-19. The reindeer applique is multi-part: body/face in Tan (T), antlers in Dark Brown (B), nose in Red (R), scarf in Red (R) and accent in Gold (Y).
Reindeer Head Round 1 :
With T, mr, ch1, 6 sc in mr (6)
Reindeer Head Round 2 :
6 inc (12)
Reindeer Head Round 3 :
(1 sc, inc) x 6 (18)
Reindeer Head Round 4 :
1 sc in each st (18) — shape into slight oval by varying tension on two sides for cheeks
Reindeer Face Round 5 :
With B, create small antler base tabs: ch 6, sc back along chain, fasten off — make two and sew to top of head. For antler branches, work tiny ch-3 picots attached along the tab (3 branches each)
Reindeer Nose & Scarf Round 6 :
Make small nose: with R, mr, 6 sc (6), fasten off and sew centered on lower face. For scarf: with R, ch 12, sc across, fasten off and drape across neck; sew ends to body. Add small gold stitch as scarf tassel if desired.
Reindeer Body Round 7 :
Make tiny body tab to sew behind head (if you want a small standing reindeer look) with T: ch 6, sc back to create a short rectangle about 6x2 stitches, sew behind head onto square; alternatively place head directly onto square and skirt body with embroidery stitches to simulate torso.
Info :
Positioning the reindeer in the center: use the base square ridges as alignment guides. Sew antlers with several small stitches at their base so they stand up slightly and keep shape. Use a small amount of fabric stiffener if needed to make antlers hold shape.
— Christmas Tree Square (Bases: Red or Ivory depending on square) :
Info :
Tree motif is constructed in layered triangle tiers to create depth. Use Forest Green for tree body, add tiny ornaments in red and gold and a small star at the top in gold/yellow.
Tree Base Round 1 :
With G, ch 4, tr 3 into first chain to create small triangle point, turn and work rows of dc to form first tier: Row 1: dc 3 into base, Row 2: ch2, turn, dc across increasing at each edge to create triangular tier (approx 7-9 dc depending on desired size)
Tree Tier Round 2 :
Work 3 tiers, each wider than the previous. For Tier 2 increase both sides until tier measures roughly half the square width; Tier 3 increases to nearly three-quarters square width. Each tier finished by slip stitch across top to anchor to central trunk.
Tree Trunk Round 3 :
With Brown (B), ch 4, sc across to create small rectangular trunk of 3-4 sc high; sew to underside of lowest tier centered on square.
Tree Decoration Round 4 :
Sew on tiny red and gold French-knot beads or small round puff dots made by 3 sl sts in same spot in contrasting colors to simulate ornaments. Top with a gold star made with ch 5 and picot details.
Info :
Use a yarn needle and careful placement of ornaments to make tree appear balanced. Avoid overloading the tree with appliques; a few well-placed dots and a star read nicely from a distance.
— Join-As-You-Go Lacy Border Between Squares :
Info :
Once all six squares have appliques attached and are blocked, join them lengthwise using a lacy mesh strip worked around each square edge to create one continuous runner. Work the join in Ivory (I) for a cohesive frame.
Join Round 1 :
With I, join at any corner of square 1, ch 4 (counts as 1 dc + ch1), *dc in next 5 sts, ch 3, skip corner, dc in next 6 sts* repeat along side until corner; at corner work (dc, ch3, dc) to create corner space; continue for all four sides to create a framed square (this adds an estimated 12-16 dc per side depending on exact stitch counts)
Info :
When joining two squares, align them side-by-side and use the ch-3 corner spaces to connect squares: work sl st into the adjacent square's corresponding corner loop then continue the join pattern across seam so that the squares are connected by ch-3 spaces and lacy dc runs.
Join Round 2 :
After joining adjacent squares lengthwise, work one additional round of sc around entire joined assembly to tidy any loose loops and create a stable border for the floral edge (work 1 sc in each dc and 3 sc in each corner ch-3 space).
Info :
Be sure the seams remain flexible—avoid overtightening stitches at the join. Lay runner flat and check alignment frequently. If edges pull inward, block and dampen to reshape.
— Outer Floral Scallop Border (Poinsettias, Leaves & Berry Clusters) :
Info :
The decorative scalloped border is worked in segments around the joined runner edge. You will make small motifs (poinsettia petals, small 5-petal flowers, leaf clusters and tiny berries) and sew them in an alternating pattern. Work petals in Deep Red for poinsettia, leaves in Forest Green, small filler flowers in Ivory and tan, centers in Gold.
Poinsettia Petal Round 1 :
With R, ch 6, sl st to form a small loop, *ch3, sl st into loop* repeat 5 times to make 5 petal loops; Fasten off and sew 5 petals together at center with a small gold bead or French knot center (5 petal set)
Poinsettia Petal Round 2 :
For fuller petals: rejoin R to each petal loop and work (sl st, ch2, 3 hdc, ch2, sl st) to puff out the petal. Repeat for all 5 petals. Fasten off and block petal cluster on a flat surface.
Leaf Cluster Round 3 :
With G, ch 6, sc back along chain, working (sl st, ch3, picot, sl st) along the top to create a pointed leaf; make 2 leaves and sew beneath each poinsettia cluster.
Small 5-Petal Flower Round 4 :
With I, mr, (ch 3, sl st) x 5 to form 5 tiny loops; join center with a gold bead or small knot; these alternate between poinsettia clusters for a delicate chain of filler flowers.
Info :
Arrange border motifs symmetrically: at every outer corner place a large poinsettia, with two small leaves and two small filler flowers in the gaps between squares. Use pins to arrange motifs around the runner and adjust spacing before final sewing.
Border Round 5 :
Sew all motifs onto the outer sc round of the joined runner using a yarn needle and small, hidden stitches. For each poinsettia use 6-8 stitches through the square border and through the flower center to anchor firmly. Leave tiny tails and weave in carefully on the runner backside.
Info :
If you prefer a less dimensional look, crochet a scalloped lace leaf border directly to the sc edge using *ch 3, skip 1 st, sl st* to create a decorative chain and then attach small flowers intermittently.
— Final Edge & Finishing Rounds :
Final Round 1 :
With I, working into the outermost sc round, *sc 3, picot (ch 3, sl st in 3rd ch), sc 3, sl st in next st* repeat around to give a delicate picot edging and to anchor the floral clusters (stitch count varies depending on runner size)
Final Round 2 :
Work one final pass of slip stitches around the very outer edge to neaten and ensure no motifs catch (use small, even stitches). Fasten off, weave in all tails, and trim close to work.
Info :
Block the finished runner lightly by pinning it flat to a blocking surface and spraying with water or lightly steaming; allow to dry fully to set the shape, especially the floral edging and appliques which benefit from blocking.
Care :
Hand wash gently in cool water and lay flat to dry. Spot cleaning is recommended for small spills. Avoid heavy agitation to protect appliques and seams.
Completing this Forest Green Ivory Christmas Table Runner is such a rewarding moment—you'll watch six tiny holiday scenes come together into a beautiful table centerpiece. The detailed appliques and floral border make it a heartfelt, handcrafted keepsake perfect for seasonal decorating. I love how it reads like a curated string of mini artworks, and how the colors bring a classic holiday warmth to the table. 🎄🧶