🧶 Beautiful ✨ Detailed 💝 Adorable

Gatitos Amigurumi Pattern

Gatitos Amigurumi Pattern
4.1★ Rating
2-3 Hours Time Needed
4.2K Made This
✂️

Beginner Friendly Level

Perfect for those just starting their crochet journey, with clear instructions and simple techniques

⏱️

Bite-Sized Project

Finishes in 2-4 hours—perfect for an afternoon of creative relaxation.

🧸

Cute Companion

An adorable friend to cherish, handcrafted with love to bring comfort and joy for years to come.

About This Gatitos Amigurumi Pattern

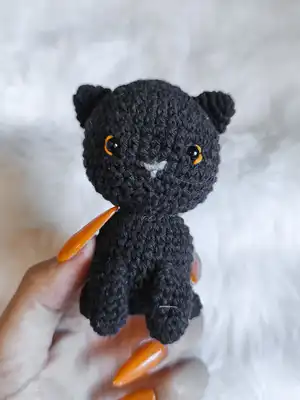
This pattern teaches you to crochet a small, cuddly kitten (gatito) using simple amigurumi techniques and clear step photos. Youll work in the round with basic increases and decreases to shape head, body, legs, ears and tail. The pattern also shows how to embroider the nose and eye details for personality.

Gatitos Amigurumi Pattern crochet pattern - detailed view of completed project

Ideal for a quick gift or to practice shaping and finishing skills, the design is compact and portable. No advanced stitches are required—just basic single crochet work and simple embroidery.

Why You'll Love This Gatitos Amigurumi Pattern

I absolutely love this pattern because it captures so much character with just a few simple rounds and a little embroidery. I enjoy how quickly the little kitten comes together and how satisfying it is to sew the parts and see the face appear. I love that the pattern is accessible—beginners can follow it and still create a polished toy. Making multiples in different colors is one of my favorite, relaxing weekend activities.

Gatitos Amigurumi Pattern step 1 - construction progress Gatitos Amigurumi Pattern step 2 - assembly progress Gatitos Amigurumi Pattern step 3 - details and accessories Gatitos Amigurumi Pattern step 4 - final assembly and finishing

Switch Things Up

I love customizing these little kittens with different color combinations; try stripes, patches, or two-tone faces to give each one a unique personality.

I often make minis by switching to a finer yarn and smaller hook for tiny keychain versions that are great for gifts.

For a chunkier, cuddlier look I use a bulkier yarn and a larger hook to make a lovably oversized kitten.

I sometimes replace safety eyes with embroidered eyes for baby-safe toys or a softer aesthetic.

I add tiny accessories like crocheted bows, collars, or tiny hats to give each kitten its own character and story.

I experiment with eyelid colors or contrast rings around the eyes using a small amount of yarn to change expression and style.

I like to embroider different nose shapes or add whiskers with embroidery thread to vary facial expressions.

If I want posable limbs I add thin wire inside the legs before stuffing carefully so the toy can hold simple poses.

I create little sets in matching palettes so they look cohesive on a shelf or as a themed gift collection.

I also try different yarn textures like cotton blends or soft acrylics to see how the finish and drape change the final look.

Common Mistakes & How to Fix Them

✗ Placing safety eyes too late can misalign facial features; insert eyes before stuffing as instructed to ensure correct spacing. ✗ Not stuffing evenly leads to lumpy shapes and poor silhouette; stuff gradually and adjust while shaping to keep a smooth finish. ✗ Skipping stitch counts when increasing or decreasing creates uneven rounds; count stitches after each round to stay accurate. 
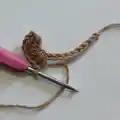
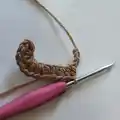
✗ Cutting the tail of yarn too short can make sewing parts difficult; leave a long tail when finishing so you can sew pieces securely. ✗ Pulling yarn too tight when embroidering flattens the face; use gentle tension and hide knots inside the fabric for a neat look.

Gatitos Amigurumi Pattern

Create an adorable mini cat amigurumi with this clear, photo-supported pattern. Youll make a tiny, loveable kitten with simple crochet rounds and charming embroidered details. Perfect for gifts, keychains, or a sweet handmade collection. Follow step-by-step instructions to finish a neat, professional-looking toy.

Beginner Friendly 2-3 Hours

Materials Needed for Gatitos Amigurumi Pattern

— Main Fabric

  • 01
    80g fine cotton yarn (or 3-ply yarn) - main quantity
  • 02
    Colors of your choice for body and details - small amounts each
  • 03
    Small amounts of contrasting yarn for nose/eye embroidery

— Tools Required

  • 01
    Aguja lanera (tapestry needle)
  • 02
    Aguja de coser (sewing needle) for finishing
  • 03
    Embroidery needle for facial details
  • 04
    Ojos de seguridad n6 (safety eyes size 6)

Progress Tracker

0% Complete

— Head :

Round 1 :

V 1. 6 pb en Anillo Me1gico (6pb)

Round 2 :

V 2. 6 aum seguidos *6 veces (12pb)

Round 3 :

V 3. (1 pb, aum) (18pb)

Round 4 :

V 4. (2 pb, aum) (24pb)

Round 5 :

V 5. (3 pb, aum) (30pb)

Round 6 :

V 6. (4 pb, aum) (36pb)

Round 7 :

V 7. (5 pb, aum) (42pb)

Round 8-14 :

V 8 - 14 (solo pb) (42pb)

Round 15 :

V 15. (5pb, dism) (36pb)

Round 16 :

V 16. (4pb, dism) (30pb)

Info :

*Colocar ojos, bordar detalles y rellenar*

Round 17 :

V 17. (3pb, dism) (24pb)

Round 18 :

V 18. (2pb, dism) (18pb)

Round 19 :

V 19. (1pb, dism) (12pb)

Round 20 :

V 20. (6 dism seguidas) (6pb)

Info :

Terminar con punto deslizado y cortar el hilo con suficiente longitud para pasar con una aguja de coser por los 6pb. Tirar del hilo. Hacer un nudo

— Ears :

Round 1 :

V 1. 6 pb en Anillo Me1gico (6pb)

Round 2 :

V 2 (solo pb) (6pb)

Round 3 :

V 2. 6 aum seguidos *6 veces (12pb)

Round 4 :

V 3. (solo pb) (12pb)

Info :

Terminar con punto deslizado y cortar el hilo con suficiente longitud para usar este mismo hilo para coser la oreja a la cabeza

— Body :

Round 1 :

V 1. 6 pb en Anillo Me1gico (6pb)

Round 2 :

V 2. 6 aum seguidos *6 veces (12pb)

Round 3 :

V 3. (1 pb, aum) (18pb)

Round 4 :

V 4. (2 pb, aum) (24pb)

Round 5 :

V 5. (3 pb, aum) (30pb)

Round 6 :

V 6. (4 pb, aum) (36pb)

Round 7-12 :

V 7 - 12 (solo pb) (36pb)

Round 13 :

V 13. (4pb, dism) (30pb)

Round 14 :

V 14. (3pb, dism) (24pb)

Info :

*Colocar ojos, bordar detalles y rellenar*

Info :

Terminar con punto deslizado y cortar el hilo con suficiente longitud para coser el cuerpo a la cabeza

— Face Embroidery (Hocico y parte del ojo) :

Info :

1 calculamos el lugar donde va a ir nuestra nariz

Info :

2 metemos la aguja en un punto un poco alejado de donde va a ir nuestra nariz

Info :

3 sacamos la aguja en uno de los puntos marcados

Info :

4 metemos la aguja en nuestro segundo punto y sacamos la aguja en el primer punto

Info :

5 comenzamos a envolver este hilo hacemos tantas vueltas como nos parezca

Info :

6 pasamos la aguja al centro de la nariz y bordamos una linea vertical, luego pasamos la aguja hacia donde metimos la aguja la primera vez. Hacemos un nudo con ambos hilos y los escondemos dentro del tejido

Info :

Bordamos desde uno de los extremos de arriba (rojo) o abajo (rojo) hacia el medio (azul) y luego desde el medio (azul) hacia el extremo de abajo (rojo) o arriba (rojo)

— Front Legs :

Round 1 :

V 1. 5 pb en Anillo Me1gico (5pb)

Round 2 :

V 2. 5 aum seguidos *5 veces (10pb)

Round 3-8 :

V 3 - 8 (solo pb) (10pb)

Info :

Terminar con punto deslizado y cortar el hilo con suficiente longitud para usar este mismo hilo para coser las patas al cuerpo

— Back Legs :

Round 1 :

V 1. 5 pb en Anillo Me1gico (5pb)

Round 2 :

V 2. 5 aum seguidos *5 veces (10pb)

Round 3-4 :

V 3 - 4 (solo pb) (10pb)

Info :

Terminar con punto deslizado y cortar el hilo con suficiente longitud para usar este mismo hilo para coser las patas al cuerpo

— Tail :

Info :

Hacemos 12 cadenas. Salteamos la ultima y la antefaltima cadena que realizamos y pasamos a hacer pm desde la cadena que sigue, en la cual vamos a hacer 3pm, pasamos a la cadena siguiente y hacemos 3pm. Despue9s hacemos 6pm seguidos (uno en cada cadena) para que nos queden libres las ultimas 2 cds donde vamos a hacer en cada una nuevamente 3pm.

Info :

Terminamos con pd, y cortamos el hilo. Con ese mismo hilo cosemos la cola al cuerpo.

Assembly Instructions

  • Place the safety eyes and embroider the nose and eye details before closing the head; insert eyes and finish embroidery while you still have access to the inside.
  • Sew each ear to the head using the long tail left when finishing the ear; position ears symmetrically and secure with small stitches.
  • Attach the body to the head using the long tail left when finishing the body; sew through the rounds indicated and secure firmly.
  • Sew front and back legs to the underside of the body using the tails left when finishing each leg, spacing them evenly for balance.
  • Sew the tail to the back of the body using the same tail left when finishing the tail and hide ends inside the toy.

Important Notes

  • 💡Work with consistent tension throughout to keep your amigurumi proportional and neat.
  • 💡Place eyes and embroider facial details before final stuffing and closing for best placement control.
  • 💡Leave long yarn tails when finishing pieces so you can sew parts together without adding extra thread.
  • 💡Use a tapestry or sewing needle to hide knots and weave ends securely inside the toy.

This little Gatitos pattern was made to bring small smiles and cozy charm to your projects. Create a whole family in different colors and give them as thoughtful handmade gifts. Share your finished kittens and spread the joy of handmade crafts! 🧶🐱

You ask,

we answer.

FAQs

What size will the finished piece be?

The finished amigurumi measures approximately 8-12 cm tall depending on your yarn thickness and tension when using the recommended fine cotton or similar yarn.

Can I use different yarn weights for this pattern?

Yes, you can use different yarn weights; changing yarn weight and hook size will change the final size—use appropriate hook for your chosen yarn and adjust stuffing accordingly.

Do I need prior crochet experience for this pattern?

This pattern is rated beginner friendly, so basic knowledge of single crochet, increases, decreases, and working in the round is recommended.

How long does this project typically take to complete?

Most crocheters finish a single kitten in about 2-3 hours, depending on experience and how much time you spend on embroidery and assembly.