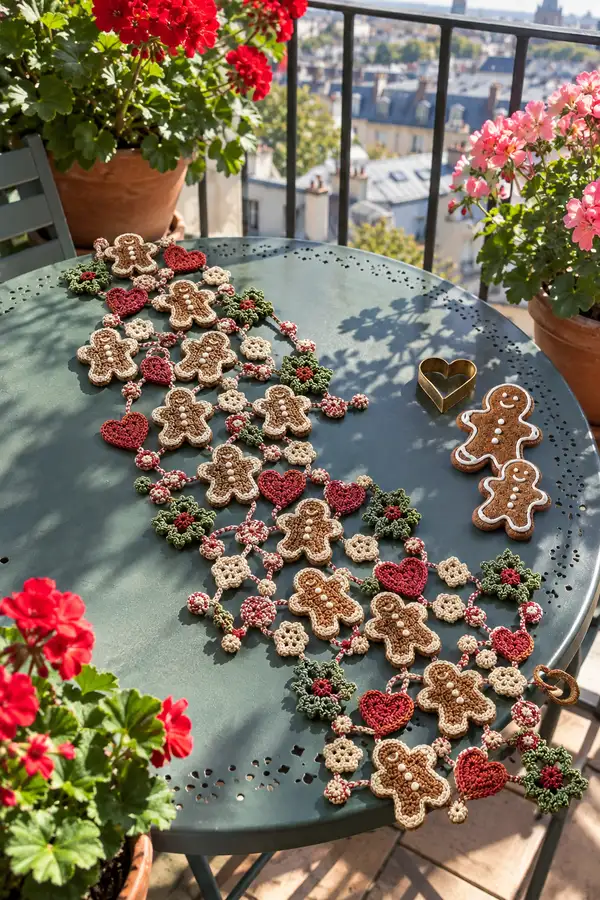
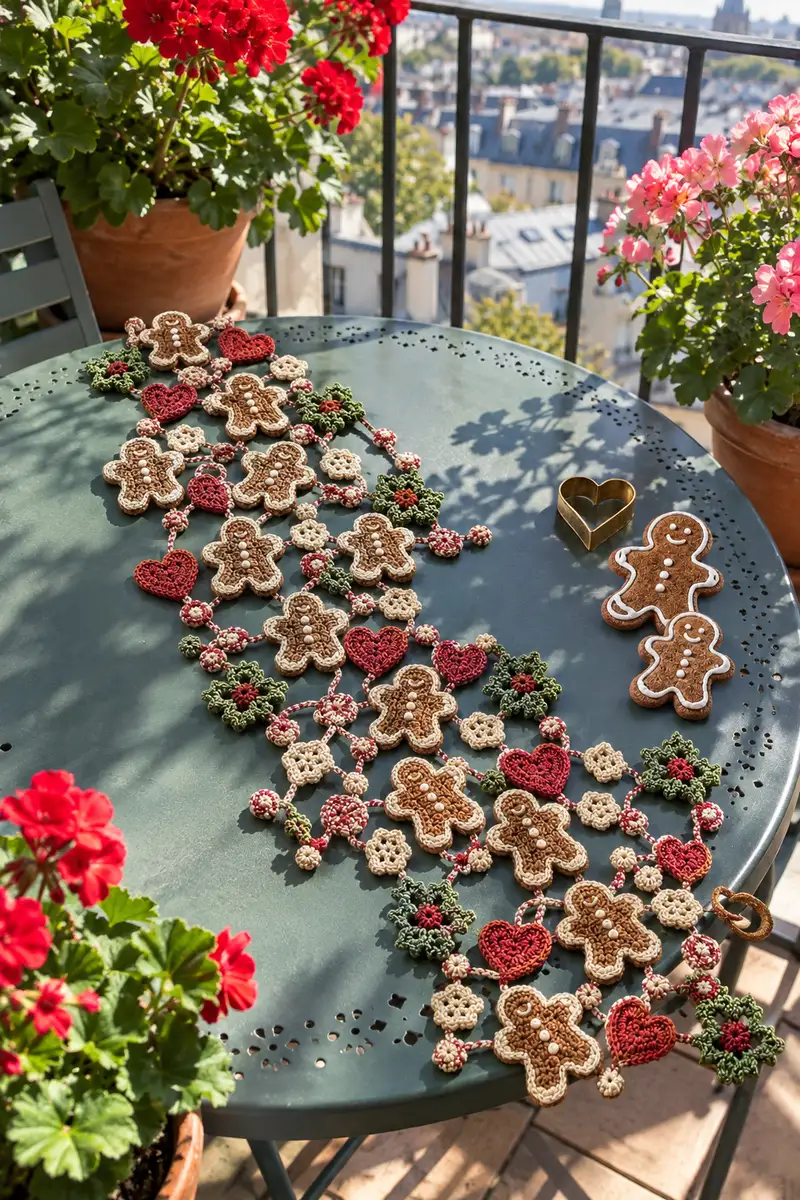
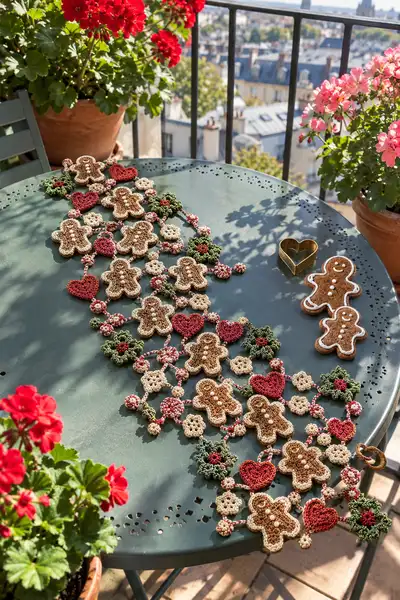
Create a charming, festive table runner made from crochet gingerbread motifs, hearts, holly stars and little bead spacers. This pattern uses small, layered applique9-style cookie motifs with a delicate cream icing border and braided cords to join everything into a long runner. The finished runner is decorative, lightweight and perfect for holiday tabletops, mantels or as a cheerful festive table centerpiece.
Progress Tracker
0% Complete
— Materials & Notes :
Info :
This pattern was written using DK/light worsted cotton at a tight but not overly firm tension. Gauge is not critical, but motifs should be consistent in tension so they connect neatly. Use stitch markers to mark round starts and pin motifs to plan the runner layout before joining.
— Gingerbread Cookie Motif (Make 10-12 depending on runner length) :
Info :
Each gingerbread motif is made as a slightly domed flat cookie: two identical cookie layers are worked and joined with a narrow mattress stitch edge, then trimmed with a cream icing border. Work both cookie layers the same colour (brown), then use cream for the icing. Motif finished diameter approx 8-9 cm depending on yarn/tension.
Round 1 :
6 sc in magic ring (6)
Round 3 :
(1 sc, inc) x 6 (18)
Round 4 :
(2 sc, inc) x 6 (24)
Round 5 :
(3 sc, inc) x 6 (30)
Round 6 :
(4 sc, inc) x 6 (36)
Round 7 :
(5 sc, inc) x 6 (42)
Round 8 :
(6 sc, inc) x 6 (48)
Round 9-12 :
1 sc in each st (48) - work 4 rounds even to flatten the disk and build 'cookie' thickness
Info :
If you would like a slightly thicker cookie, add an extra even round here before shaping; do not overstuff later to keep edge neat.
Round 13 :
(6 sc, inc) x 6 (54)
Round 14 :
(7 sc, inc) x 6 (60)
Round 15 :
1 sc in each st (60)
Round 16 :
(7 sc, dec) x 6 (54)
Round 17 :
(6 sc, dec) x 6 (48)
Info :
At this point you have a round, slightly domed cookie disc. To get the 'gingerbread' silhouette (rounded head and 4 limbs) we will create scallops that form the lobed outline. The next rounds work shell scallops around the edge; these create the arms/legs and head appearance visually.
Round 18 :
(1 sc, 1 hdc, 3 dc, 1 hdc, 1 sc) in next st, skip 3 sts, *(1 sc, 1 hdc, 3 dc, 1 hdc, 1 sc) in next st, skip 3 sts; rep from * around (12 scallops) (48)
Round 19 :
Working into the center of each scallop: sl st into center dc of each scallop, ch1, 6 sc into the center (12 x 6 = 72) (72)
Info :
Round 19 increases the number of outer stitches to create a broader scallop surface that resembles limbs and head. Count carefully: 12 scallops x 6 sc in each = 72 stitches.
Round 20 :
1 sc in each st (72)
Round 21 :
1 sc in each st BLO (72) - this creates a subtle ridge for the icing border later
Round 22 :
1 sc in each st (72)
Info :
Fasten off leaving a long tail for joining two cookie layers together. Make two identical layers for each gingerbread motif. If you prefer a single-layer flat motif, omit the joining step and work icing directly over single layer.
Round 23 (Join) :
Place two cookie layers together, WRONG SIDES out if you want a tighter seam. Using brown yarn and yarn needle, mattress stitch around edge to join, leaving a small opening for a thin layer of polyester fiberfill or a scrap of thin batting to create slight dimension; fasten off and weave ends (72)
Info :
Adding a tiny bit of batting between the two layers gives a 'cookie' puff. Do not overstuff. Use a few grams only to keep shape low and believable.
Round 24 (Icing Border - cream) :
Join cream yarn at any seam, sl st to bring yarn to the raised ridge (worked in BLO earlier). *Ch1, sc around each stitch along the ridge, working 3 sc into the center of each scallop to create a rounded icing scallop; rep from * until you return to start. Work evenly to make an icing border that sits slightly proud of the cookie (72)
Round 25 (Icing Picot Trim) :
Working into each sc of icing border: *sl st, ch3, sl st into same st (small picot), skip 1 sc; rep from * around. Fasten off and weave ends.
Info :
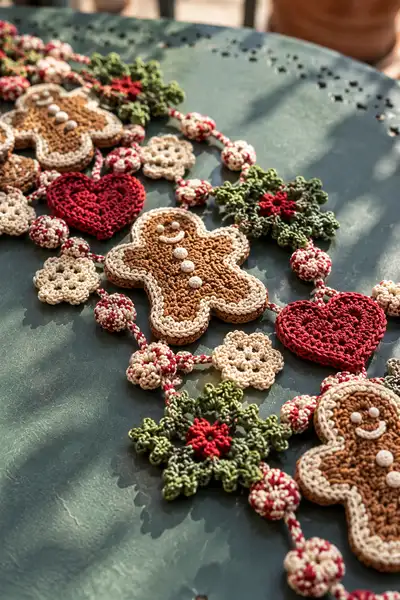
To get the neat white piping you see in the photo, work the cream round slowly and keep stitches uniform. If you prefer smoother piping, use a smaller hook (2.5 mm) for the icing rounds only.
— Gingerbread Button & Face Decoration :
Round 1 :
Using cream or ivory, sew three tiny French-knot style buttons along center using small yarn/wool or embroidery thread; space evenly down center of cookie (Info: place first button at upper torso approx two scallops down from head)
Round 2 :
Embroider smile and eyes with small french knots or tiny beads. Eyes approx 10-12 stitches apart depending on desired expression (Info: attach before final icing round is fully secured)
Info :
If you prefer totally washable decoration, crochet three tiny 3-sc clusters (make as small disks) and sew in place as buttons.
— Small Cream Rosette Motif (Make many for connectors) :
Round 1 :
6 sc in magic ring (6)
Round 3 :
(1 sc, inc) x 6 (18)
Round 4 :
*Ch2, skip 1, sc in next st; rep from * around to create tiny openwork flower edge. Fasten off. (18)
Info :
These little rosettes act as spacers between larger motifs. Make a variety of cream, red and variegated rosettes for visual interest.
— Deep Red Heart Motif (Make 6-8) :
Round 1 :
Ch4, join to form ring, ch2 (counts as first hdc), 3 hdc into ring, ch1, 4 dc into ring, ch1, 4 dc into ring, ch1, 3 hdc into ring, ch2, sl st to top of first ch2. (Heart base formed)
Round 2 :
Turn heart, work 1 sc evenly across each stitch and into the ch1 spaces to tidy edge, placing 3 sc into the top point to form the dip. Fasten off and weave ends.
Info :
Use a smaller hook (2.5-2.75 mm) for a crisp heart edge. Block lightly if needed to flatten and refine the curve.
— Holly Star / Green Snowflake Motif (Make 6-8) :
Round 1 :
6 sc in magic ring (6)
Round 2 :
Ch3 (counts as dc), dc in same st, *ch2, 2 dc in next st; rep from * around, sl st to top of ch3 (12 dc grouped in 6 clusters)
Round 3 :
Switch to green contrast if desired. In each ch2 space: *(sc, ch3, sc) to make point; rep around to create 6 points. Fasten off (12 points)
Round 4 :
Using red yarn, join at center of star and make a small 6-sc round flower center: 6 sc in magic ring, sl st to join, fasten off and sew to star center for berry accent.
Info :
The holly star is purposely slightly open and lacy so it reads as greenery from a distance. Use two greens (dark and medium) to make subtle depth.
— Crochet Covered Bead (Make many for connectors) :
Round 1 :
6 sc in magic ring (6)
Round 3 :
(1 sc, inc) x 6 (18)
Round 4 :
1 sc in each st (18)
Round 5 :
(1 sc, dec) x 6 (12)
Round 6 :
6 dec (6) - do not fasten off
Info :
Before closing completely, insert a small bead or a little scrap of batting to keep bead rounded. Pull tightly, weave tail through several stitches for security and hide end inside bead.
— Braided Twisted Cord Connector (Make multiple lengths) :
Info :
The connectors that run between motifs are made by crocheting a three-strand twisted cord or a narrow I-cord and then working small sl sts around it to create a slightly thicker braided look. Here are two methods; choose one.
Method A - 3-strand Twist :
Make three long chains of same length in alternating colors (approx 30-40 cm each depending on spacing). Knot ends and twist strands until they coil; tie off or sew ends to secure. To give them a crochet surface, work tight sl sts around twisted cord to make it neat and stable.
Method B - Crochet Cord :
Ch 2, 1 sc in 2nd ch from hook, continue to desired length working 1 sc in each ch. For a thicker cord, ch 3 and work 2 sc in each ch along back loop to make chain puff, sl st to finish. Use variegated yarn or alternate colors every few stitches for candy-striped look.
Info :
Trim and secure ends by sewing into motifs or covering with small crochet beads for seamless joins.
— Assembly & Joining (Layout & Fastening) :
Info :
Plan the runner layout on a flat surface. Alternate gingerbread motifs with hearts and holly stars, using small cream rosettes and crocheted beads as spacers. Use short braided cord links (approx 6-10 cm) to join larger motifs and longer cords to link columns. Pin carefully before joining.
Joining Step 1 :
Place first gingerbread motif and position a heart to its lower left. Use a short crochet-covered bead and a small rosette as a bridge: sew rosette to both motifs with a few secure stitches. Then use the cord to attach the bead to the rosette with a whip stitch through the bead center. Repeat for each connection point described in layout.
Joining Step 2 :
Join gingerbread motifs center-to-center along the runner spine by laying braided cord into position and sewing cord ends into the seam of cookies at the icing ridge (where BLO round created a natural seam). Use 6-8 small whip stitches per join for security.
Info :
Use matching color thread to sew; tiny stitches are less visible. Keep tension even so motifs lie flat when joined. If connecting many motifs, work symmetrically from center outwards to keep runner balanced.
Joining Step 3 :
Where two cords cross or meet, hide ends by stitching them under a small rosette or bead. Glue is optional but stitch-only joins are stronger for washing and wear.
Info :
If you wish to make the runner reversible, join pieces with slip stitch join so seams sit flat. If you prefer the dimensional effect in the photo, use sewn joins with a little gap to allow shadow between motifs.
— Heart Detail Alternate (Dense Crochet Heart for Weight & Shape) :
Round 1 :
Ch5, join to ring, ch2, 3 dc into ring, ch1, 4 dc into ring, ch1, 4 dc into ring, ch1, 3 dc into ring, ch2, sl st to top ch2 (heart shape) (Info: counts variable, shape refined in next rounds)
Round 2 :
With smaller hook, 1 sc around each dc and into ch spaces, placing 3 sc at the top center to form the heart indent; fasten off and weave ends
Info :
Make two hearts and slightly stuff before closing for a plumper look if desired; stitch closed and place as focal motif in runner.
— Finishing Touches & Blocking :
Info :
Steam block or wet block flat motifs to even out stitch tension and to flatten the runner. Lay flat and pin into shape; allow to dry fully. Use a fine mist and press with a towel between iron and work (do not iron directly) if yarn allows. For cotton, blocking will give crisp edges similar to photo.
Info :
Weave in all ends, trim flush and make any small embroidered enhancements (extra icing lines, piped edges, or tiny seed bead berries) as final accents.
— Suggested Motif Counts for a Table Runner ~ 90-110 cm :
Info :
Gingerbread motifs: 10; Red hearts: 6; Holly stars: 6; Small rosettes: 24; Crochet beads: 30; Braided cord connectors: ~18 lengths (mix long and short). Adjust quantity to make runner shorter or longer.
Info :
All motif counts are approximate; make a test motif and measure spacing on your table before committing to final assembly to ensure it looks balanced.
This charming gingerbread motif runner brings sweet, handmade warmth to your holiday table. With layered cookie motifs, piped-icing edges, tiny hearts and holly accents, every stitch contributes to a festive, cozy centerpiece. It's a delightful project that rewards you with a keepsake you can use year after year. Happy crocheting and enjoy the smiles this runner will inspire! 🧶🎄