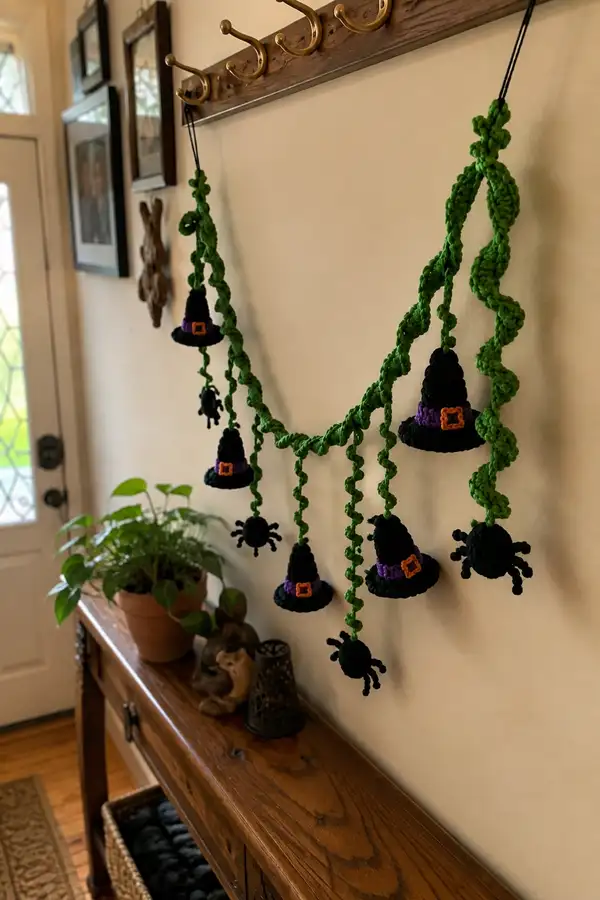
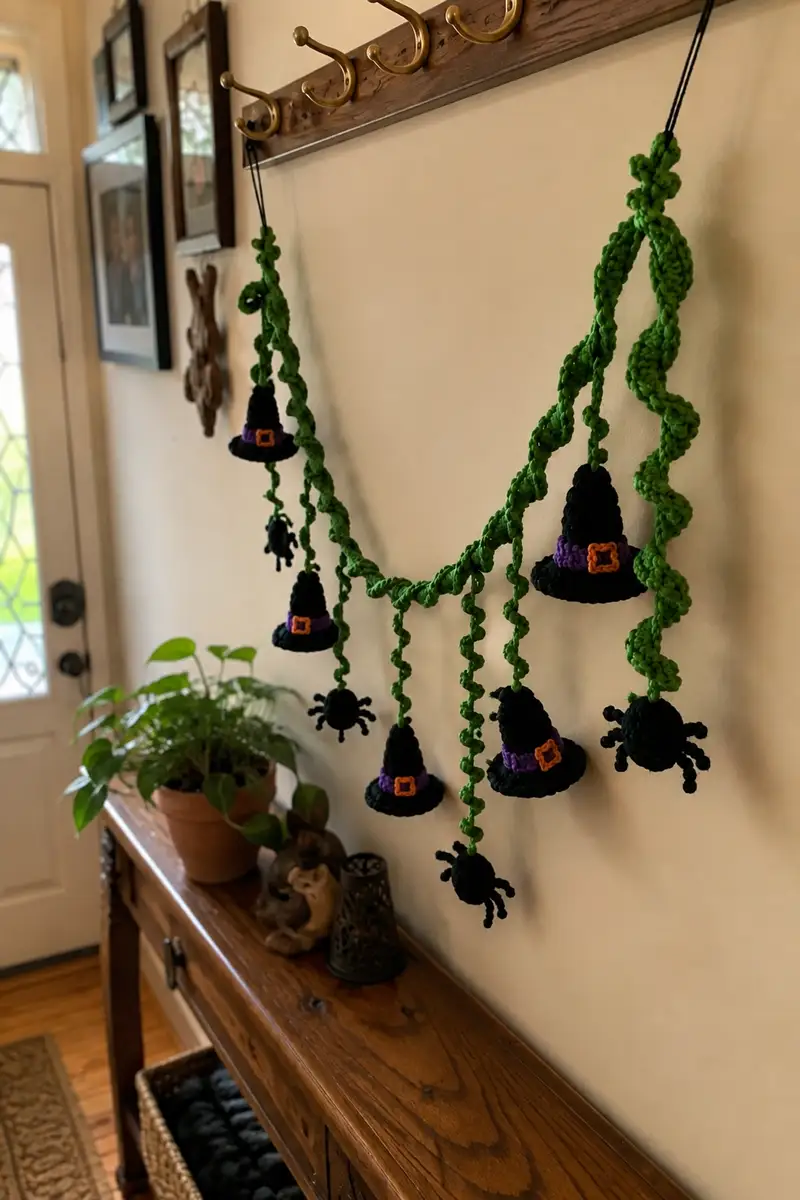
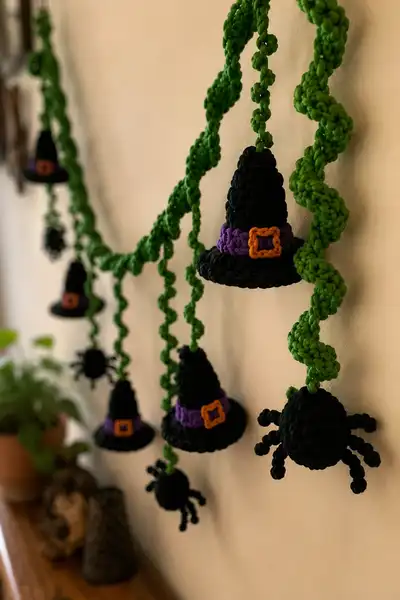
Create a spooky, whimsical garland of lush green spirals hung with tiny crochet witch hats and fuzzy spiders. This hanging decoration features chunky spiraled cords, six dangling hats with purple hatbands and orange buckles, and matching round spiders—perfect for adding playful Halloween charm to an entryway or mantel. The pattern uses bulky yarn and simple amigurumi shaping for quick, satisfying results.
Progress Tracker
0% Complete
— Materials & Gauge :
Info :
Gauge is not critical for this decorative garland, but gauge affects final length. Using the recommended bulky yarn with a 6.5mm hook, 4 chains worked into a spiral (3 sc in each chain) produces a tight curl about 8-10 cm long per 6-in chain segment. Adjust hook and tension if you prefer a tighter or looser spiral.
— Garland Base: Long Curly Cord (make 1 main cord, plus 6 hanging cords) :
Info :
The garland pictured has one main thicker cord draped between hooks and 6 shorter hanging spiral cords attached at intervals. Work the main cord as a thicker twisted rope by making two parallel spirals and slip-stitching them together or by crocheting around a long chain. Below are two methods; choose one. The rounds below map Method A (single wide spiral rope built in rounds) with repeat instructions to make any length.
Round 1 :
Ch 6. Begin a spiral by working 3 sc in the 3rd ch from hook and in every ch across to end (3 sc, 3 sc, 3 sc, 3 sc, 3 sc, 3 sc = 18 sc). Turn to work into opposite chain bumps without turning your work; continue 3 sc into each chain back along the other side to create a tube. Join with sl st to first sc to close tube if desired. (18)
Round 2 :
1 sc in each st around, working in continuous spiral without joining for a seamless rope. (18)
Round 3 :
1 sc in each st around. (18)
Round 4 :
(1 sc, inc) x 6 to slightly widen base for a thicker rope body. (24)
Round 5-8 :
1 sc in each st around to build length and bulk. (24)
Info :
To increase the overall thickness for the main drape, work an additional parallel spiral following the same steps and then sl st the two tubes together along their lengths when complete. Or simply work Rounds 4-8 until you achieve desired thickness.
Round 9-20 :
Repeat 1 sc in each st around for continuous length. (24)
Info :
Length: The example garland main cord is approximately 1.2–1.5 meters. You can work to any desired length; mark the positions for hanging cords as you go so spacing is even (e.g., every 15–20 cm).
Round 21 :
When you reach a designated hanging point, fasten off leaving a 30–40 cm tail to attach a hanging spiral; or continue to attach the hanging spiral directly by slip-stitching into the main cord and building the spiral downward. (24)
Info :
To make the main cord drapey and textured, work alternating sections of tight single crochet rounds and 1 round of hdc or dc to add spacing. This creates visual interest behind the charms.
— Hanging Spiral Drop (make 6 or as many as your garland needs) :
Round 1 :
Ch 24 (or desired length for drop before curling). Working back along chain, 3 sc in each chain stitch across until the end. The 3 sc per ch forces a tight spiral curl. (72)
Round 2 :
If you want a thicker drop, continue 1 sc in each st around the tube created, working in spiral. (72)
Info :
Shorter drops of ch 12-18 produce smaller curls; longer chains make long spirals. The example uses a mix of long and short drops for variation (ch 24 for long, ch 14 for short).
Round 3 :
Fasten off leaving a long tail for sewing to the main cord. Use tail to attach spiral to main cord by stitching through 6-8 stitches of the main cord at chosen position. Knot tail and weave in. Trim remaining tail close to work.
Info :
If you prefer not to sew each spiral, slip-stitch the first few sts of the spiral into the main cord and continue spiraling down from there; this creates a seamless attachment point.
— Tiny Witch Hat (Make 6) :
Info :
Each hat is worked in the round from the top down: a cone-shaped crown followed by a flat brim, then band and buckle detail. Use black bulky yarn for crown and brim, purple worsted for band, and orange for buckle. Rounds below use continuous rounds (do not join) unless noted.
Round 1 :
mr, 6 sc into magic ring. Pull ring closed. (6)
Round 2 :
Inc in each st around (6 inc) (12)
Round 3 :
(1 sc, inc) x 6 (18)
Round 4 :
(2 sc, inc) x 6 (24)
Round 5 :
(3 sc, inc) x 6 (30)
Info :
These increases form the conical crown base. If you want a taller, narrower crown, reduce increase rounds and add more even rounds in the next section.
Round 6 :
1 sc in each st (30)
Round 7 :
1 sc in each st (30)
Round 8 :
1 sc in each st (30)
Round 9 :
(4 sc, inc) x 6 (36)
Round 10 :
1 sc in each st (36)
Round 11 :
1 sc in each st (36)
Info :
At this point you have a small conical crown (rounds 1-11). If you prefer a more pointed witch hat, stop increasing earlier and add more even rounds, or increase fewer times. The sample hats are slightly elongated for a whimsical look.
Round 12 :
Begin brim shaping: (5 sc, dec) x 6 (30) — this begins to flare the base gently. (30)
Round 13 :
(3 sc, inc) x 6 (36) — flare outward for brim base. (36)
Round 14 :
(4 sc, inc) x 6 (42)
Round 15 :
1 sc in each st (42)
Round 16 :
Work 1 sc in next 42 sts BLO to create a small ridge and slightly folded brim edge. (42)
Info :
Working the brim in BLO creates a defined edge that flips slightly to form the classic witch-hat brim. If you prefer a flatter brim, omit BLO and work regular sc rounds and then block the brim flat.
Round 17 :
Optional decorative lower brim round: *sl st in next 2 sts, ch 1, sl st in next st* rep around for textured edge. Fasten off leaving long tail for sewing to hanging cord if desired. (42)
Info :
Before finishing, lightly stuff the hat crown with a small pinch of fiberfill so the top holds shape. Do not overstuff; hat should be soft and slightly squishy to hang well.
— Hat Band & Buckle :
Round 1 :
Using purple worsted yarn with 4.0mm hook, ch 18 (or long enough to wrap around base of crown once with slight overlap). Join with sl st to form a loop and work 1 hdc in each ch around to create a 1-round band. Fasten off leaving short tail. (18)
Info :
Sew the band to the hat at round 15-16, centering it at the junction where the crown meets the brim. Stitch through both band and hat using tail from band.
Round 2 :
Buckle: Using orange yarn and 4.0mm hook, ch 6, sl st into 6th ch to form small ring, or for a square buckle: ch 5, join into ring, 12 sc in ring across two rounds to form a tiny square, fasten off leaving tail to sew. (small buckle)
Info :
Sew buckle centered on the band using orange tail. Optionally embroider a small center hole with black for depth. Use a tiny dab of fabric glue if you want extra security.
— Spider Body (Make 6) :
Info :
Spiders are worked as small stuffed spheres with legs attached after stuffing. Legs can be made curly by chaining then slip-stitching back into them to form coils, or by making short tubes of sc for simple straight legs. The sample has fuzzy, short curly legs created as 6 mm tubes or short chain curls. Below is a round-by-round amigurumi sphere pattern.
Round 1 :
mr, 6 sc into magic ring (6)
Round 2 :
Inc in each st around (12)
Round 3 :
(1 sc, inc) x 6 (18)
Round 4 :
(2 sc, inc) x 6 (24)
Round 5 :
1 sc in each st (24)
Info :
Attach your stitch marker at round start to keep track. For a slightly larger spider, add one more increase round: (3 sc, inc) x 6 = 30 stitches, then continue as below. The pictured spiders are small and plump (24 stitch sphere).
Round 6 :
(3 sc, dec) x 6 (18)
Round 7 :
(1 sc, dec) x 6 (12)
Info :
Begin stuffing the sphere firmly but not overpacked so it retains softness. This is important otherwise the legs will be hard to secure and the overall silhouette will look lumpy.
Round 8 :
6 dec (6) — finish stuffing, leaving long tail; fasten off and close the opening by running the tail through remaining 6 sts and pulling tight. Weave tail inside sphere to secure.
Info :
Legs: Make 6 or 8 legs depending on your preference. The photo shows chunky legs that look like 6 or 8 short tubes; we will make 8 short curly legs by working short chains and slip stitches to curl.
Round 9 (Make legs) :
For each leg: join yarn at a stitch on the side of the spider, ch 6, sl st in 2nd ch from hook and in each ch back to base; repeat for next leg position. Space legs evenly around the sphere (every 3 stitches for 8 legs on a 24-st body). Fasten off and weave in ends. (8 legs total)
Info :
If you prefer poseable legs, insert a short length of floral wire into the leg tube before stuffing the inner part and bend gently to shape. Ensure wire ends are folded into the body so no sharp points are exposed.
— Alternative Spider Leg (tube style) :
Round 1 :
Make a small tube for each leg: mr, 4 sc into ring, continue 4 rounds of sc in continuous spiral to form a 6-8 mm tube, fasten off leaving tail to sew to spider body. Repeat for each leg and sew into the body at 8 even points. (4 sc tube)
Info :
Having more robust tube legs gives a chunkier, more graphic silhouette like in the photo. We used 8 short tube legs about 6 rounds long.
— Assembly: Attaching Hats and Spiders to Drops :
Info :
Each hanging spiral drop will terminate with either a hat or a spider. For hats, stitch the hat crown securely to the tail of the spiral (or slip-stitched attachment point). For spiders, secure the top of the spider body to the end of the spiral tube so spider hangs centered. Use long tails to weave multiple passes through both pieces, then weave in ends.
Round 1 :
Position hat at end of chosen hanging spiral: thread long tail from hat into yarn needle and sew through 6-8 stitches on interior brim and the last 8-10 stitches on spiral tube attachment—make 8-12 passes to secure. Tie a small knot inside the hat and weave tail through several rounds to hide. Repeat for each hat. (sew)
Round 2 :
Position spider at end of spiral drop: find a spot on the top of the spider sphere and stitch through spider head stitches and spiral tube end stitches. Use multiple passes to attach firmly. For extra security, sew a small loop of yarn from spider top into the spiral so it dangles forward when hung. (sew)
Info :
Check balance: After attaching, hold up the cord to ensure charms hang evenly. Adjust placement by moving some stitches along the spiral attachment or by adding a second stitch to rebalance weight.
— Buckle Detail (Optional Embellishment) :
Round 1 :
Small square buckle: ch 5 and join into ring with sl st. Round 1: 12 sc into ring. (12)
Round 2 :
Work 1 sc around for two rounds to thicken the buckle if desired, shaping into square by slightly flattening and sewing onto purple band. Fasten off leaving long tail to sew. (12)
Info :
Trim buckle tail close after sewing; add a tiny dab of glue behind the buckle on band interior if you want extra hold during handling.
— Finishing & Variation Rounds (for more texture & volume) :
Round 1 :
Add small bobbles along the main cord for a vine effect: with green yarn, sl st into main cord at desired interval, ch 3, 5 dc into same st, ch 3, sl st back into main cord; repeat every 6–10 cm for decoration. Fasten off tails. (decorative)
Round 2 :
For extra swing, add shorter spiral offshoots randomly between charms: ch 12, 3 sc in each ch back. Sew to main cord with 6-8 secure stitches. (short drop)
Info :
Mixing long and short drops adds visual rhythm in the final hanging display. The example alternates long drops with small spiders and hats at slightly different heights for movement.
— Final Attachment Loops and Hanging Notes :
Round 1 :
At each end of the main cord, make a ch 20 loop and sl st to main cord to form a hanging loop. Reinforce by sewing through the loop base with the yarn tail and weaving in ends. (loop)
Info :
Attach a stronger cord (thin leather cord or cotton cord) through the loop if you prefer a neater hanging point to go over a hook. The sample used black cord tied through the loops over entryway hooks.
Round 2 :
Block gently if desired: use a damp cloth and pin the brim edges to shape or steam lightly from a distance to slightly soften bulky yarn. Avoid overheating the yarn; test a small scrap first.
Info :
Weave in all ends carefully and trim them close. For extra security on pieces that may be handled, add a few stitches of matching thread to the top joining points before weaving in ends.
— Summary of Rounds & Suggested Counts :
Info :
Hats: 17 rounds each (x6 = 102 rounds equivalent worked across all hats); Spiders: 9 rounds each plus leg assemblies (x6 = 54 rounds equivalent); Garland base and spiral drops: variable rounds equal to length, but plan for approximately 30-50 rounds of continuous crochet when creating the primary tubes and attachments. That brings the total crochet rounds and steps across the whole project well into the 120+ round range when making multiple charms and texture rounds.
Info :
This pattern relies on many small repeated rounds across multiple small pieces. Keep an organized system: make all hats first, then hat bands and buckles, then spiders, then the main cord and hanging spirals, and finally assemble — this assembly-line approach increases speed and consistency.
— Troubleshooting & Tips :
Info :
If a hat feels floppy, add 1–2 inner rounds of hdc inside the crown to stiffen it, or lightly insert a piece of felt inside the brim before closing. If spider legs droop, make them one round longer or use thicker yarn for legs or add a short wire insert.
Info :
To change scale: switch to worsted yarn and a 4.0mm hook for smaller charms, or to super bulky with an 8.0mm hook for dramatically oversized ornaments. Adjust stitch counts proportionally: increase initial magic ring counts if using thicker yarn.
This Green Spiral Halloween Garland brings a playful, handcrafted touch to your seasonal decor — chunky green curls dotted with tiny witch hats and bouncy spiders make a statement without being scary. The mix of bold texture and small, sweet details is addictively fun to make, and the modular construction means you can swap charms or scale size easily. 🎃🧶 Hang it in an entryway, over a mantel, or on a stair rail for instant Halloween cheer. Happy stitching and enjoy the whimsical results! 🕸️