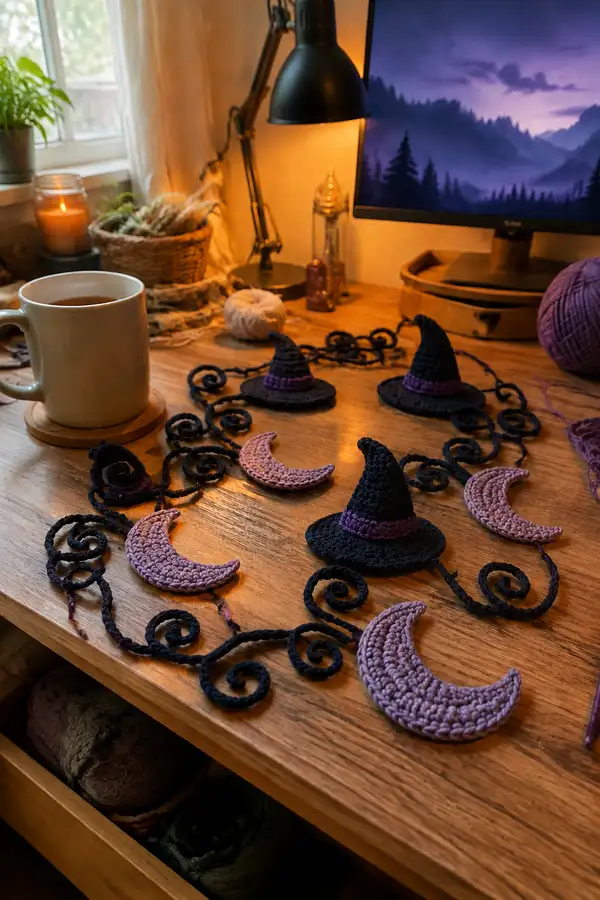
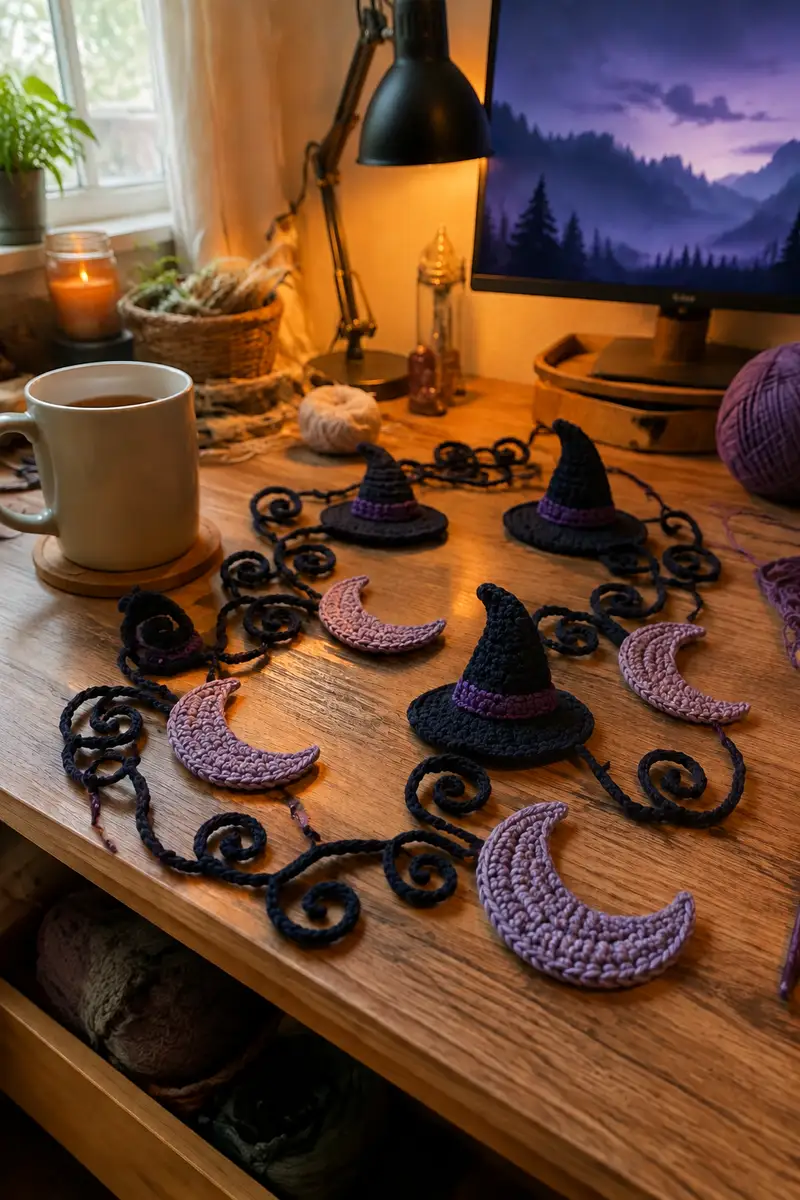
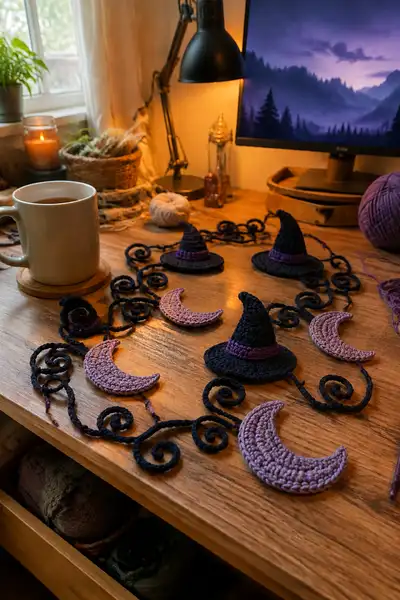
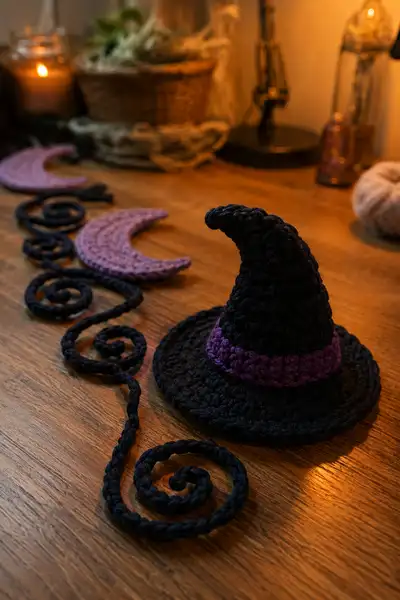
A cozy, spooky garland featuring tiny crochet witch hats, lavender crescent moons, and ornate spirals. This pattern creates multiple motifs you link into a flowing garland — perfect for mantel, doorway, or a seasonal vignette. Worked in worsted yarn, the motifs are flat and lightweight for easy hanging. Includes step-by-step rounds, assembly tips, and styling notes to make a polished Halloween decoration.
Progress Tracker
0% Complete
— Overview :
Info :
This garland is made of three primary motif types: Witch Hat (structured, 3D), Crescent Moon (flat, textured), and Spiral Links (flat coiled cords). Make multiple motifs and join with a crocheted cord or braid. Follow the hat and moon repeat counts to make 5 hats, 6 moons and connecting spirals for a 1.4-1.8m garland. Adjust counts to lengthen or shorten.
Info :
Tension: Work tightly enough to avoid gaps but not so tight the hook drags excessively. Use stitch markers at round starts for all motifs. All rounds are worked in continuous spirals unless noted 'join' and 'turn'.
— Witch Hat Brim :
Round 3 :
(1 sc, 1 inc) x 6 (18)
Round 4 :
(2 sc, 1 inc) x 6 (24)
Round 5 :
(3 sc, 1 inc) x 6 (30)
Round 6 :
(4 sc, 1 inc) x 6 (36)
Round 7 :
(5 sc, 1 inc) x 6 (42)
Round 8 :
(6 sc, 1 inc) x 6 (48)
Info :
By round 8 you have a small circle. Continue increasing to add diameter for a brim about 9-10cm across depending on yarn/hook.
Round 9 :
(7 sc, 1 inc) x 6 (54)
Round 10 :
(8 sc, 1 inc) x 6 (60)
Round 11 :
(9 sc, 1 inc) x 6 (66)
Round 12 :
(10 sc, 1 inc) x 6 (72)
Info :
Switch to BLO for one round to create a subtle ridge that visually separates the brim from the crown base. If using a contrasting brim color, change yarn now as described below.
Round 13 :
1 sc in each st BLO (72)
Round 14 :
1 sc in each st (72)
Round 15 :
1 sc in each st (72)
Info :
Optional decorative edge: work one round of hdc or dc around to make brim sit flatter. For a subtle look, use sc; for a stronger, flatter brim, use hdc.
Round 16 :
1 hdc in each st (72) OR 1 sc in each st (72) depending on desired brim stiffness
Info :
If you worked hdc in the last round, fasten off and weave ends for a clean underside, otherwise prepare to attach cone directly to center of brim in later assembly steps. Do not stuff the brim; it should remain flat and flexible.
— Witch Hat Cone (Make 5 for garland) :
Round 3 :
(1 sc, 1 inc) x 6 (18)
Round 4 :
(2 sc, 1 inc) x 6 (24)
Round 5 :
(3 sc, 1 inc) x 6 (30)
Info :
These increases create the base circumference of the cone. Check that the cone base will nest inside the brim center comfortably; adjust rounds 4-5 if you prefer a wider or narrower cone.
Round 6 :
1 sc in each st (30)
Round 7 :
1 sc in each st (30)
Round 8 :
1 sc in each st (30)
Round 9 :
1 sc in each st (30)
Info :
Work even rounds to build height. Decide hat height: for a compact, crooked hat, 8-12 even rounds work; for a taller hat add more even rounds. Stuff lightly as you go starting around round 11.
Round 10 :
1 sc in each st (30)
Round 11 :
1 sc in each st (30)
Round 12 :
1 sc in each st (30)
Round 13 :
1 sc in each st (30)
Round 14 :
(3 sc, 1 dec) x 6 (24)
Info :
Info :
Begin decreasing gently to create a tapered tip while stuffing lightly. Use small amounts of fiberfill; cone should be hollow but hold shape. Continue to place stuffing through open base as you decrease—do not overstuff or cone will appear bulbous.
Round 15 :
(2 sc, 1 dec) x 6 (18)
Round 16 :
(1 sc, 1 dec) x 6 (12)
Info :
Stop decreasing before fully closing to allow the brim center to slip over the base. Fasten off leaving a long tail for sewing to the brim. Stuff just enough that the cone tip keeps a gentle curl but remains soft; for a crooked point bend tip with optional thin wire inserted before final closing if you want a poseable curl.
— Hat Band (Make 5) :
Info :
Band is a short strip worked in purple and sewn around cone base. Make a 3-4 round strip or a small round collar depending on style.
Round 1 :
Ch 24, sl st to join into small tube (24)
Round 2 :
1 sc in each ch around (24)
Round 3 :
1 sc in each st (24)
Round 4 :
1 sc in each st (24). Fasten off, weave ends and position band around cone at base to cover the seam between cone and brim.
Info :
For a more textured band, work a round of hdc or puff stitches in contrasting color before sewing in place. Sew band to cone and brim through both layers with mattress stitch for a clean finish.
— Crescent Moon (Make 6) :
Round 3 :
(1 sc, 1 inc) x 6 (18)
Round 4 :
(2 sc, 1 inc) x 6 (24)
Info :
We're creating a rounded base which will be offset to make a crescent. Work increases until you have a semicircular wedge of fabric; later rows shape the inner cut of the crescent by removing stitches and offsetting arc points.
Round 5 :
(3 sc, 1 inc) x 6 (30)
Round 6 :
(4 sc, 1 inc) x 6 (36)
Round 7 :
1 sc in each st (36)
Round 8 :
1 sc in each st (36)
Info :
To carve the crescent shape, we will decrease along one side while leaving the opposite arc full. Mark a point on one side to be the inner cut and start decreases there in the next rounds.
Round 9 :
(5 sc, 1 dec) x 6 (30)
Round 10 :
(4 sc, 1 dec) x 6 (24)
Round 11 :
(3 sc, 1 dec) x 6 (18)
Round 12 :
1 sc in each st (18)
Round 13 :
1 sc in each st (18)
Info :
Now make a partial round across only the outer arc to create scalloped texture: work 9 sc across the outer arc, then skip 9 inner stitches to leave gap; repeat in following rounds to deepen the crescent shape.
Round 14 :
1 sc in next 9 sts (outer arc), ch 1, skip next 9 sts (inner arc) (9)
Round 15 :
Turn work and 9 hdc across the 9 sts (outer arc) to add texture; fasten off inner arc area leaving trailing tail for sewing
Info :
Flatten the crescent and block before joining to cord to accentuate the curve. If you prefer a thicker moon, make two crescents and sew together around the outer curve leaving inner arc slightly open, then topstitch for texture.
— Spiral Cord Motifs (Make multiple lengths) :
Info :
Spiral cords are made by creating long crocheted ropes and coiling them into spirals. You will make several short spirals and longer linking ropes. Each spiral comprises a chain base worked into a rope by single crocheting around the chain to make a tube, then coiling.
Round 1 :
Ch 60 (or desired length for a long link). Do not join unless you want a ringed rope.
Round 2 :
1 sc in 2nd ch from hook and each ch across (59)
Round 3 :
Continue 1 sc in each st (59) to make a firm rope. For a thicker rope, work a 2nd round of sc (59) to create a sturdier cord.
Info :
Once the rope is made, coil it clockwise into a spiral on a flat surface. Pin coil center to the table or blocking board. Use a tapestry needle and matching yarn to sew coil rounds together along the underside so they remain coiled. For small spirals ch 12, sc back along chain, coil and sew (11 sts).
Round 4 :
For a small spiral ch 12, 1 sc in 2nd ch and each ch across (11). Coil into spiral and sew the underside with a yarn needle through the tube at 4-6 points to secure (no numerical stitch count change).
Info :
For a decorative swirled flourish, after coiling, run a single strand of metallic thread around the outer edge and tack down every 6-8 sts to secure and glint in light.
— Mini Hat Variation (Make 3-4 for visual interest) :
Round 3 :
(1 sc, 1 inc) x 6 (18)
Round 4 :
(2 sc, 1 inc) x 6 (24)
Round 5 :
1 sc in each st (24)
Round 6 :
1 sc in each st (24)
Round 7 :
(2 sc, 1 dec) x 6 (18)
Round 8 :
(1 sc, 1 dec) x 6 (12)
Round 9 :
6 dec (6) Fasten off leaving tail to sew to a tiny flat brim made by increasing to 36 sts then tacking under brim edge.
Info :
Mini hats add depth when mixed with full-size hats. Make these with black and a single purple round for contrast. No stuffing necessary; they are flat-coned and attached to brim like a peaked applique.
— Garland Cord (Crocheted Chain Base) :
Round 1 :
Ch 200 for approx 1.5-1.8m garland length (adjust as needed). Fasten off tail at each 50-60cm mark if you prefer multiple hanging segments.
Round 2 :
Join a contrasting strand and 1 sc in each ch across for a thinner cord, or 2 sc in each ch for a chunkier braided look. For stitch count continuity use 199 or 398 accordingly.
Info :
Alternatively braid three ropes together for a rustic look. Secure ends with tight wrapping of leftover yarn and a dab of fabric glue for durability. Leave long tails at ends for hanging loops.
Round 3 :
Once cord is complete, plan motif placement: place hats approximately 18-22cm apart and moons between them by visual spacing; pin motifs with sewing pins before attaching.
— Joining Motifs to Cord :
Info :
Pin motifs to the cord in your chosen arrangement on a flat surface. Use contrasting spacings to create visual rhythm: 1 hat, 1 moon, long spiral, 1 hat, 1 moon, small spiral, repeat. Sew through both motif and cord using a tapestry needle and matching yarn for invisible joins.
Round 1 :
Sew cone base to center of brim: align cone bottom to brim center, mattress stitch through cone base and brim center in 8-10 evenly spaced stitches to hold securely. Use the long tail left from cone to sew.
Round 2 :
Sew hat to cord by placing hat brim over cord and sewing through the underside of the brim and over the cord in several passes: 6-10 passes around base for stability (no stitch count numbers change).
Info :
For moons, place inner arc facing cord then sew along the inner curve so the moon appears to hang from the cord. Use small invisible stitches spaced about 1 cm apart to avoid distorting the crescent arc.
Round 3 :
Attach small spirals by sewing a few stitches through the underside where coil overlaps cord. For long spirals form a loop around cord and tack at 3 points to secure.
Info :
When all motifs are attached, weave in any remaining ends and lightly steam-block the finished garland laid flat to ensure moons and brims sit flat. Do not press the cone tip vigorously; steam lightly from distance if needed.
— Decorative Finishes & Optional Embellishments :
Round 1 :
Add a decorative fringe: work 10 small tassels along brim edges or add tiny felt stars sewed to moons. For sparkle, tack a few metallic beads into spiral centers with thread.
Round 2 :
For a hanging loop at each end: ch 12, sl st into last chain to form loop, fasten off and weave the tail back along the cord to secure. Repeat at other end.
Info :
Test hang before final finishing: drape garland and adjust motif positions and spacing by removing some stitches and re-sewing if necessary. Small changes make large visual differences.
— Sizing & Variations :
Info :
Change yarn weight and hook size to scale motif sizes: use bulky yarn with 6mm hook for oversized statement garland, or sport weight yarn and 3.5mm hook for delicate miniature garlands. Adjust increase rounds proportionally to retain shape.
Info :
To make a double-sided moon or hat, crochet two identical motifs and sew them right sides together with a small cord or stuffing between them. This creates a plush, fuller look ideal for hanging where both sides are visible.
— Final Care & Storage :
Info :
Store flat or loosely coiled to avoid misshaping brims or spirals. Spot clean with damp cloth and mild soap; avoid soaking to preserve shape and any metallic accents. Re-block if motifs lose form after storage.
Finishing this Midnight Spiral garland is such a satisfying moment — all the tiny witches and moons come together to create a whimsical, seasonal display! The spiraled cord and textured moons add layered visual interest, and the crochet details feel handmade and special. Hang it on a mantel, across a window, or over a bookcase for instant Halloween charm. 🧶✨ 🎃