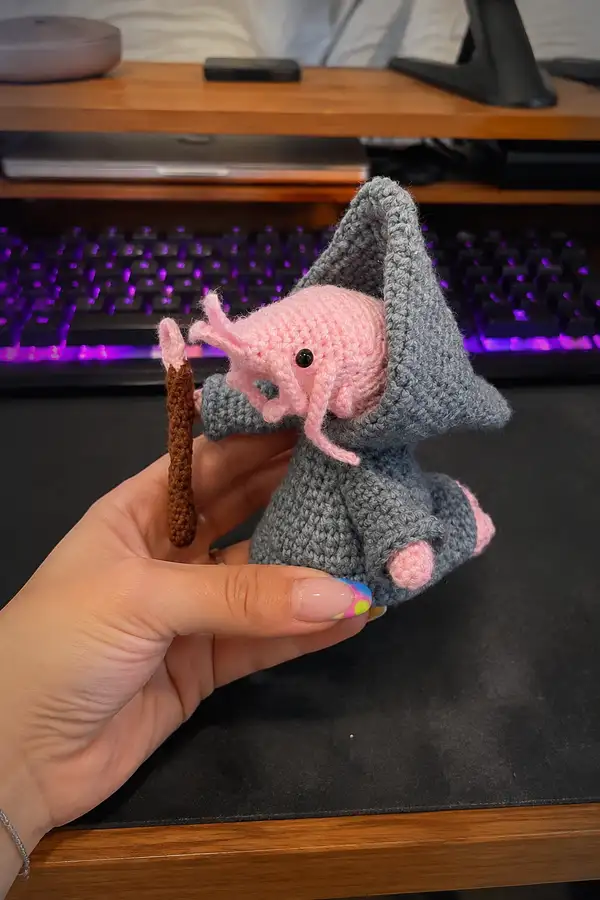
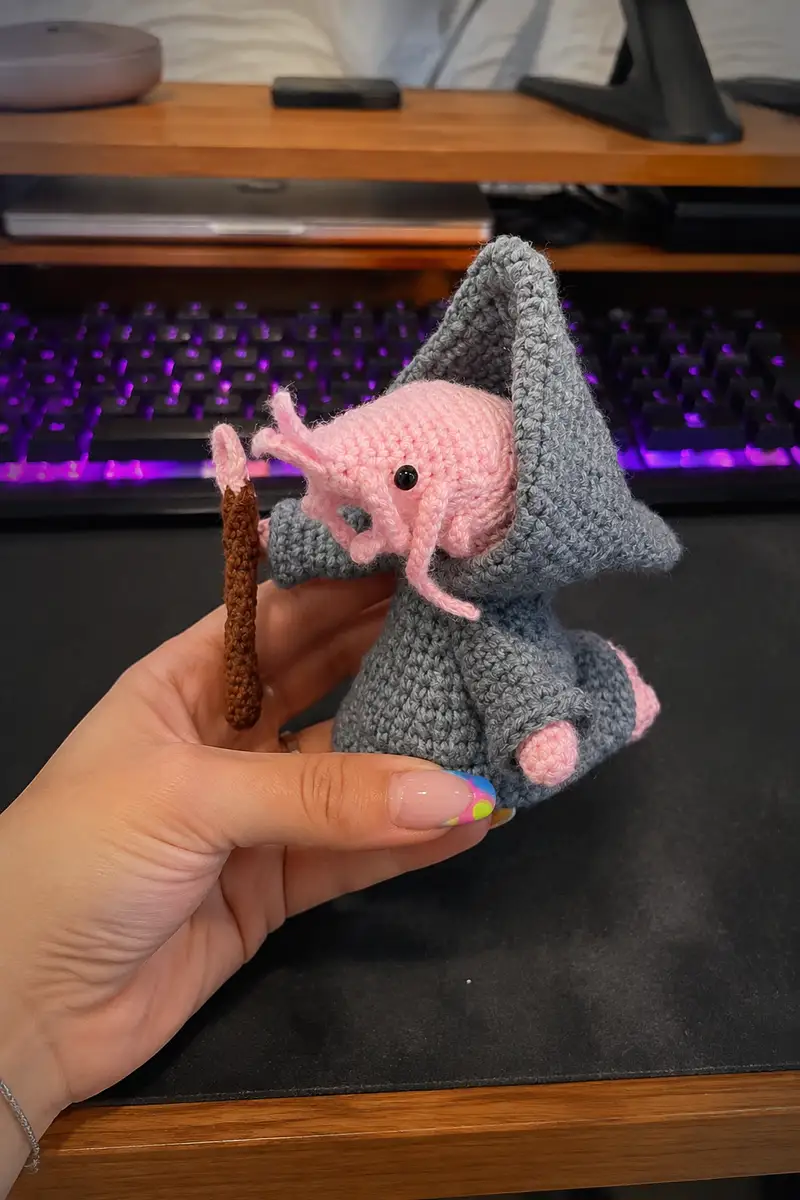
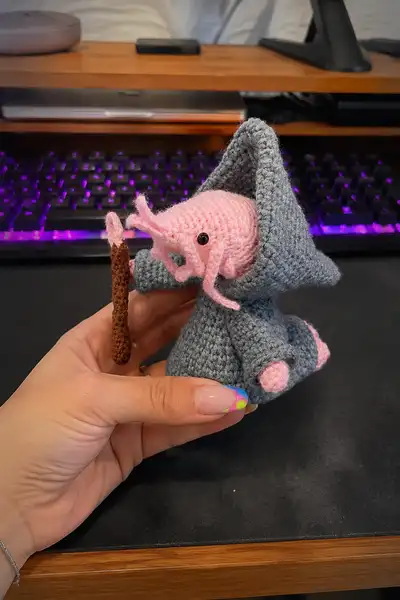
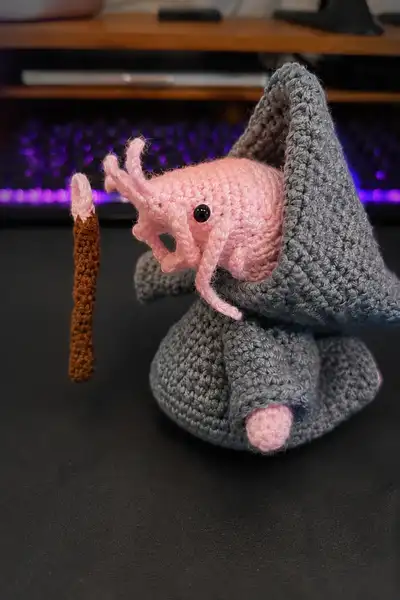
Make a spooky-cute Shrimp Reaper amigurumi with a soft pink shrimp head, curling tentacles and a mysterious grey hooded robe. This small plush sits upright and holds a tiny staff/wand — perfect for Halloween displays or as a quirky gift. The pattern includes detailed head, tentacle, robe, arms, legs and accessory instructions to help you build this character stitch-by-stitch.
Progress Tracker
0% Complete
— Head / Shrimp Skull :
Round 1 :
6 sc in magic ring (6)
Round 3 :
(1 sc, inc) x 6 (18)
Round 4 :
(2 sc, inc) x 6 (24)
Round 5 :
(3 sc, inc) x 6 (30)
Round 6 :
(4 sc, inc) x 6 (36)
Round 7 :
(5 sc, inc) x 6 (42)
Round 8 :
(6 sc, inc) x 6 (48)
Round 9-12 :
1 sc in each st around (48)
Info :
Place safety eyes between rounds 11-12, approximately 10-12 stitches apart depending on desired expression; pin first to check look. If embroidering, mark eye positions now.
Round 13 :
1 sc in each st (48)
Round 14 :
1 sc in each st (48)
Round 15 :
1 sc in each st (48)
Info :
Begin to shape the muzzle area: these next decreases will form the rear curve. Start stuffing lightly into the head—just enough to hold shape so you can still work the tentacle anchors.
Round 16 :
(6 sc, dec) x 6 (42)
Round 17 :
(5 sc, dec) x 6 (36)
Round 18 :
(4 sc, dec) x 6 (30)
Round 19 :
(3 sc, dec) x 6 (24)
Info :
At this point the head should look rounded with a tapered back where you will add the tentacles. Add more stuffing so the head is firm but still squeezable. Check eye placement and alignment now.
Round 20 :
(2 sc, dec) x 6 (18)
Round 21 :
(1 sc, dec) x 6 (12)
Info :
Fasten off leaving a long tail for sewing the head into the hood later. Do NOT close the hole completely because you will attach tentacles and possibly a neck join to the body. If you prefer a small neck, close to 6 and then embroider a seam.
Round 23 - Optional Neck Tube :
Join new yarn at one stitch along base, ch1, work 6 sc in continuous rounds for 4 rounds to create a short neck tube (6) x4 rounds
Info :
If adding neck tube, stuff lightly and leave tail for sewing. This gives a convenient area to sew the head into the robe opening. If not, simply use the long tail from R22 to sew and close into robe.
— Tentacles (Make 6: 4 frontal curly, 2 small side feelers) :
Method A - Curly Tube Tentacle (front, make 4) :
Ch 20, sc in 2nd ch from hook and across (19). Sl st at end to create a small tube, or join and continue single crocheting in rounds into a tiny tube for 3 rounds, then dec to taper: (sc2tog) twice, fasten off leaving tail. Wrap tail around finger to curl and steam lightly or block with hot water to set curl. Alternatively, after making flat strip, hold strip and using your hook work 2 sc in each chain for the first 10 ch to create curl automatically.
Info :
Make 4 of these longer curly tentacles for the shrimp mouth area. Curling method: use more increases on the top side or add a chain-and-turn method to form spiral. You can also use a small wire inside for poseable curls.
Method B - Short Feelers (Make 2) :
mr, 6 sc in ring, sl st to join (6). Work 1 sc in each st for 6 rounds (6). Fasten off leaving long tail for attaching at sides of head near base of main tentacles. You may also make these as ch10, then sc back for a thin feeler if you prefer flatter pieces.
Info :
Position the tentacles so four curl under the front of the face and two tuck at the sides. Sew securely through the head rounds 11-14 area; go through the head fabric and knot inside to anchor. Trim tails and weave ends back into head.
— Eye & Facial Details :
Info :
Sew safety eyes between R11-13, spaced about 10-12 sts apart for the 8mm eyes. If using 6mm, place slightly closer. Add a small embroidered mouth under the tentacles if desired: use 6 strands of yarn and a blunt needle to make a short horizontal stitch or 'v' shaped mouth between rounds 13-15.
— Body / Robe Base :
Round 1 :
6 sc in magic ring (6)
Round 3 :
(1 sc, inc) x 6 (18)
Round 4 :
(2 sc, inc) x 6 (24)
Round 5 :
(3 sc, inc) x 6 (30)
Round 6 :
(4 sc, inc) x 6 (36)
Round 7 :
(5 sc, inc) x 6 (42)
Round 8 :
(6 sc, inc) x 6 (48)
Round 9-11 :
1 sc in each st around (48)
Info :
We are creating a rounded base that will flatten slightly to let the character sit. If you want a wider skirt, add one more increase round at this stage: (7 sc, inc) x 6 to reach 54 sts.
Round 12 :
1 sc in each st (48)
Round 13 :
1 sc in each st (48)
Round 14 :
1 sc in each st (48)
Info :
Begin robe shaping now. The next rounds will create a subtle waist and then flare for the robe. Keep the fabric tight (use smaller hook if needed) to avoid holes where stuffing could show.
Round 15 :
(6 sc, dec) x 6 (42)
Round 16 :
(5 sc, dec) x 6 (36)
Round 17 :
1 sc in each st (36)
Round 18 :
1 sc in each st (36)
Round 19 :
(4 sc, dec) x 6 (30)
Round 20 :
1 sc in each st (30)
Info :
At the end of R20 the body has a narrower top which helps the hood sit naturally. Stuff the base somewhat firmly to allow the toy to sit. Leave opening at top for head insertion unless you plan to sew from inside.
Round 21 :
(3 sc, dec) x 6 (24)
Round 22 :
(2 sc, dec) x 6 (18)
Round 23 :
(1 sc, dec) x 6 (12)
Info :
Fasten off leaving a long tail for sewing the bottom closed neat if you worked the body bottom closed; alternatively stop at R20 and save the opening for head/arm assembly. If closing here, stuff firmly but do not overstuff—leave a little give so the hood can rest.
— Robe Skirt (Flared Section) :
Option A - Flare from round 12 (if you left it open) :
Pick up 48 sts at flare line and work (1 sc, inc) x 24 to add 24 sts = 72. Round next: 1 sc in each st (72). Continue 3-4 rounds even to create base flare. Or if you prefer pleats, work (3 sc, inc) x 18 to add subtler flare.
Info :
For the pictured look, a moderate flare works best: increase to about 66-72 stitches, then work even so skirt sits flat. Use BLO on last round before flare to create a ridge that looks like a hemline.
— Hood (Make 1) :
Round 1 :
With robe yarn, ch 24, join to form a loop without twisting, sc in each chain around (24)
Round 2 :
1 sc in each st (24)
Round 3 :
(3 sc, inc) x 6 (30)
Round 4 :
1 sc in each st (30)
Round 5 :
(4 sc, inc) x 6 (36)
Round 6-8 :
1 sc in each st (36)
Info :
Bend the hood as you crochet to form a cowl shape; you can sl st or decrease slightly at the back to get the pointed hood seen in the photos. The front wide portion should be large enough for the shrimp head to peek out comfortably.
Round 9 :
(5 sc, dec) x 6 (30)
Round 10 :
1 sc in each st (30)
Round 11 :
(3 sc, dec) x 6 (24)
Round 12 :
(2 sc, dec) x 6 (18)
Round 13 :
Fold hood in half from center back and sc through both layers across to close back seam for 9-12 stitches to create pointed hood tip. Fasten off and weave ends.
Info :
The hood should be roomy—attach it to the body by sewing the lower edge around the body opening at the neck area. Pin the front edge to create an arched cowl that frames the head nicely.
— Arms (Make 2) :
Round 1 :
6 sc in magic ring (6)
Round 3 :
(1 sc, inc) x 6 (18)
Round 4-6 :
1 sc in each st (18)
Info :
These rounds form the hand. Stuff the hand area firmly but leave the arm hollow for a bit to allow you to insert wire if making them poseable.
Round 7 :
(2 sc, dec) x 6 (12)
Round 8-12 :
1 sc in each st (12) — lengthen these rounds to match the sleeve length; work 5 rounds here for a short arm or up to 8 for longer sleeve.
Info :
Switch to robe grey yarn at the point where cuff should begin. Join grey and work several rounds even to create the sleeve. Put the seam side under to match the pictured cuff roll.
Round 13-18 :
1 sc in each st with robe yarn (12)
Round 19 :
(1 sc, inc) x 4 (16)
Round 20 :
1 sc in each st (16)
Info :
Stuff the arm lightly; keep the hand firmer and arm softer. Leave long tail for sewing into sides of the robe at approximately R18-R20 of body, making sure the hand protrudes slightly from the sleeve (as in the photo).
— Legs / Base Feet (Make 2) :
Round 1 :
6 sc in magic ring (6)
Round 3 :
(1 sc, inc) x 6 (18)
Round 4-6 :
1 sc in each st (18)
Info :
These form the round toes that peek from under the robe. Stuff the foot firmly to give a stable base. For the pictured look make the feet short and stubby.
Round 7 :
(2 sc, dec) x 6 (12)
Round 8-12 :
1 sc in each st (12)
Round 13 :
(1 sc, dec) x 4 (8)
Round 14 :
Work 2 rounds sc even (8)
Info :
Fasten off leaving a long tail. Position the feet at the base of the robe so they peek out evenly on each side and sew securely through the skirt base. Reinforce with extra stitches for stability.
— Staff / Wand :
Round 1 :
With brown yarn ch 2, 6 sc in 2nd ch from hook (6)
Round 2-20 :
1 sc in each st around (6) — work 18-25 rounds to desired length for a thin staff (approx. 3-4 inches). For the pictured thin wand use about 20 rounds.
Info :
Stuff lightly or insert a toothpick/wire for rigidity. For flame tip: use a small amount of pink to form a ch6 flame, sc back to create a tapered tip; sew to top of wand. Fasten off and weave ends.
— Tentacle Attachment & Final Face Finishing :
Info :
Sew tentacles into place at front of head around rounds 16-20 area where head tapered. Use the long tails left when making tentacles to lock them in with securing knots into the head fabric. Curl outer tentacles slightly outward to frame eyes.
Info :
Use a few small whip stitches to attach the longer tentacles under the nose area; weave ends into head to hide. Add tiny French knots or embroidered dots if you want texture on the face.
— Hood Interior & Head Insertion :
Info :
Before closing the hood to the body, insert the head into hood opening and test for fit. Pin the hood front so the head peeks out correctly. If using the neck tube, match the tube to the body opening and sew with ladder stitch for invisible seam. Make sure tentacles are outside the hood.
Info :
Sew around the hood opening using the long tail left on body or hood; use even stitches and check that the head sits centered. Reinforce by sewing through head neck tube if present for a secure attachment especially if toy will be handled often.
— Robe Details & Hem :
Round 1 :
With robe yarn, join at front hem, 1 sc in each stitch around hem edge (work 1-2 rounds depending on desired thickness)
Round 2 :
Work 1 round BLO to create a visible cuff/rim (sc in each st BLO)
Info :
Roll the cuffs slightly outward by blocking or by working an extra round in FLO to create a visible cuff like in the images. The hood edge also benefits from one round in FLO for a neat border.
— Assembly :
Info :
Position head into hood and pin. Sew the head to the robe at the neck join using the long tail and invisible stitches. Make sure tentacles remain free from being sewn into the seam. Attach arms at body R18-20 and legs at base R9-12 depending on how you shaped the skirt. Attach staff into hand by sewing through hand center or placing into a small pocket of stitches inside the hand.
Info :
Weave all tails inside the body, use small, even stitches and pull slightly to tuck the ends. Add a few extra anchor stitches where the arms meet to prevent sagging when the staff is held. Block the hood slightly to set shape if desired.
Final Touches :
Add optional blush to cheeks with pastel or fabric paint, stitch small mouth lines beneath tentacles if desired, and adjust tentacles for personality. Your Shrimp Reaper is complete!
Pattern Notes :
This pattern uses standard amigurumi technique working in continuous rounds. Use a stitch marker at beginning of round and move it each round. Maintain a tight gauge and check symmetry frequently. For poseable arms/tentacles insert thin wire before final stuffing and seal ends so wire does not poke through yarn. If making for small children, substitute embroidered eyes for safety eyes to avoid choking hazard.
This Shrimp Reaper amigurumi blends spooky charm with kawaii cuteness and makes a fantastic handmade gift or Halloween display. Each section is worked carefully to create a compact, poseable character with personality. I hope you enjoy stitching the tiny tentacles and shaping that dramatic hood — it's so rewarding to see it all come together. 🧶👻✨