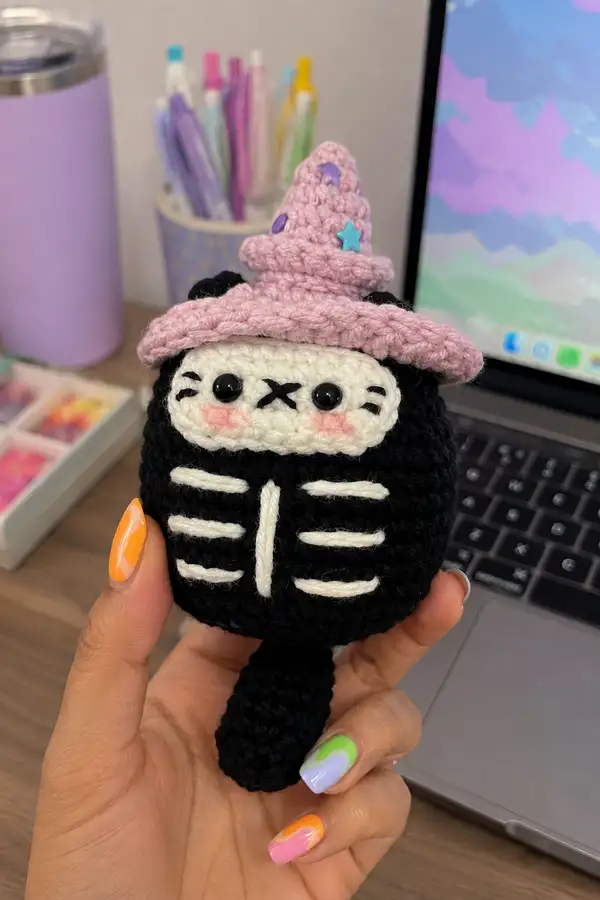
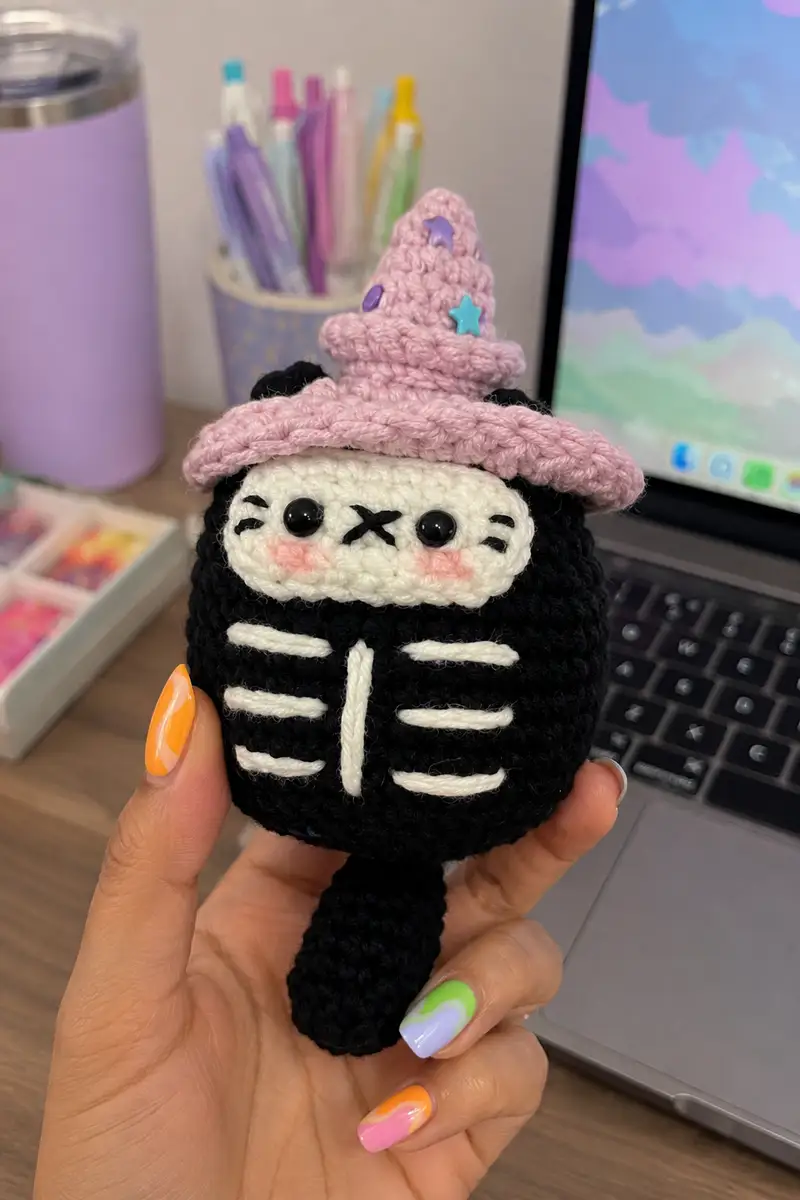
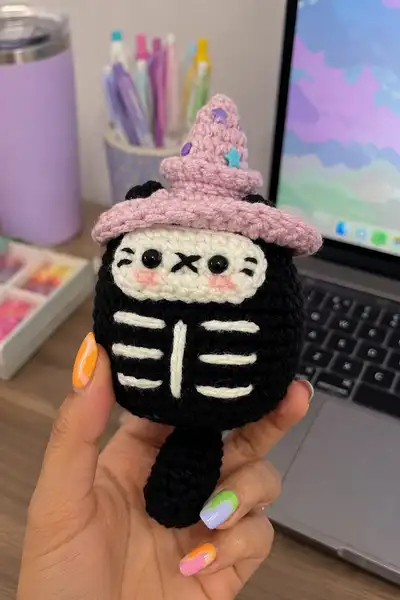
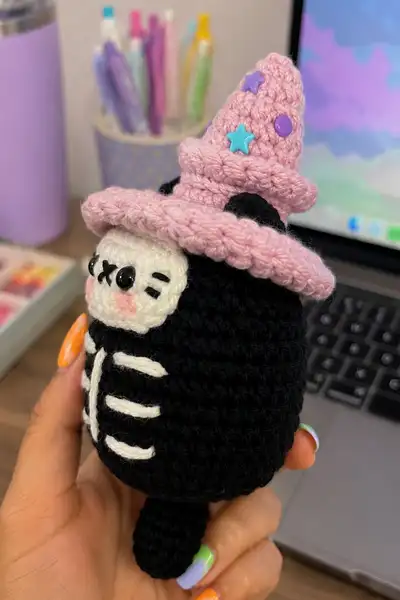
This cute Halloween cat skeleton amigurumi features a cuddly black body, embroidered white skeleton ribs, a soft white face patch with X-mouth and blush cheeks, and a jaunty pastel pink witch hat decorated with star buttons. The pattern includes step-by-step, round-by-round instructions to recreate the whimsical character with sturdy construction and charming details. Perfect as a seasonal gift, desk companion, or party favor, finished with safety eyes and hand-stitched accents.
Progress Tracker
0% Complete
— Head :
Round 1 :
6 sc in magic ring (6)
Round 3 :
(1 sc, 1 inc) x 6 (18)
Round 4 :
(2 sc, 1 inc) x 6 (24)
Round 5 :
(3 sc, 1 inc) x 6 (30)
Round 6 :
(4 sc, 1 inc) x 6 (36)
Round 7 :
(5 sc, 1 inc) x 6 (42)
Round 8 :
(6 sc, 1 inc) x 6 (48)
Info :
Switch to working in continuous rounds (do not join) and place a stitch marker at first stitch; this marker moves up each round. This head sits on top of the body and will later be joined at the neck rounds.
Round 9-14 :
1 sc in each st (48)
Info :
Place safety eyes between rounds 12-13, approximately 10-12 stitches apart center to center depending on eye size. For this small cat use 6-8mm eyes and space them 10 stitches apart for the soft expression shown.
Round 15-18 :
1 sc in each st (48)
Info :
Mark front-center of head (between eyes) to know where to attach face patch. If adding embroidered whiskers later, mark guidelines lightly with a removable marker or pins.
Round 19 :
(6 sc, 1 dec) x 6 (42)
Round 20 :
(5 sc, 1 dec) x 6 (36)
Round 21 :
(4 sc, 1 dec) x 6 (30)
Info :
Begin stuffing the top of the head firmly but cushiony. Use small amounts of fiberfill and tamp into place to avoid lumps. Keep stuffing shallow for now; you will add more when joining to the body.
Round 22 :
(3 sc, 1 dec) x 6 (24)
Round 23 :
(2 sc, 1 dec) x 6 (18)
Round 24 :
(1 sc, 1 dec) x 6 (12)
Info :
Fasten off leaving a 20-25cm tail for sewing if you plan to close this as a separate head. For this design the head is joined to the body later, so do not close completely; instead stop here and hold onto the tail for joining.
— Body (including lower head join) :
Info :
This body is worked from top (neck) down in continuous rounds to create the egg-shaped torso seen in the photos. We will create the neck opening to accept the head and then increase to body circumference, then taper to a flat base where the tail attaches.
Round 1 :
6 sc in magic ring (6) - This is the neck ring that will be expanded to match head neck opening
Round 3 :
(1 sc, 1 inc) x 6 (18)
Round 4 :
(2 sc, 1 inc) x 6 (24)
Round 5 :
(3 sc, 1 inc) x 6 (30)
Round 6 :
(4 sc, 1 inc) x 6 (36)
Info :
At this point the opening should align with the neck decrease of the head (Rounds 22-24). Slip the head onto the neck ring and match stitch counts, pinning around to ensure even attachment before sewing. If you prefer, sew the head and body together later after both are completed.
Round 7 :
(5 sc, 1 inc) x 6 (42)
Round 8 :
(6 sc, 1 inc) x 6 (48)
Round 9-12 :
1 sc in each st (48)
Info :
These rounds form the upper torso; make sure tension matches the head so the seam is invisible. If you see a gap between head and body, tighten the yarn and add a few more stitches around the neck while sewing to close any hole.
Round 13 :
(6 sc, 1 inc) x 6 (54) - increase to create rounder chest for rib embroidery
Round 14-18 :
1 sc in each st (54)
Info :
Begin planning placement of the white rib embroidery. Mark a central vertical line on the front panel with a removable pin or thread so the ribs will be centered. The ribs are embroidered across rounds 16-20 area for best visibility.
Round 19 :
(7 sc, 1 inc) x 6 (60)
Round 20-26 :
1 sc in each st (60)
Info :
Stuff the body fairly firmly from top through rounds 20-26. Use small amounts of stuffing and press evenly with your fingers. The aim is a firm but squishy torso that holds shape for the embroidered ribs and hat placement.
Round 27 :
(7 sc, 1 dec) x 6 (54)
Round 28 :
(6 sc, 1 dec) x 6 (48)
Round 29 :
(5 sc, 1 dec) x 6 (42)
Round 30 :
(4 sc, 1 dec) x 6 (36)
Info :
Continue stuffing as you decrease. The body tapers toward the base; keep the bottom slightly less stuffed than the chest so the toy can sit upright when placed on a surface. Stop stuffing when shape is consistent with pictures: round and slightly egg-shaped.
Round 31 :
(3 sc, 1 dec) x 6 (30)
Round 32 :
(2 sc, 1 dec) x 6 (24)
Round 33 :
(1 sc, 1 dec) x 6 (18)
Info :
Do not fasten off; leave the opening large enough to insert the tail base and to close later. If making a weighted base, now is the time to add a small bag of poly-pellets before final closure to help it sit upright.
— Face Patch (White panel) :
Info :
The white face patch is worked flat in rounds to create an oval rectangle that is sewn to the front of the head over the eye area. It is small—approximately 18-20 stitches wide at widest point.
Round 1 :
6 sc in magic ring (6)
Round 3 :
(1 sc, 1 inc) x 6 (18)
Round 4 :
1 sc in each st (18)
Round 5 :
(1 sc, 1 inc) x 6 (24) - widen slightly at top to form oval
Round 6-7 :
1 sc in each st (24)
Info :
Flatten patch slightly and stitch across the center horizontally to make an oval shape if needed. Block gently with steam if your yarn allows to flatten and even out stitches before sewing onto head.
Round 8 :
(3 sc, 1 dec) x 6 (18)
Round 9 :
(2 sc, 1 dec) x 6 (12)
Info :
Fasten off leaving a long tail for sewing. Position patch so eyes sit within the top half of the patch and nose X sits in center. Sew around edges with whip stitch and then weave tail to back. Add a tiny dab of stuffing under the patch before fully closing to give a subtle padded look like the original.
— Ears (Make 2) :
Info :
Small black triangular ears peek from under the hat brim. They are worked flat then folded and seamed to create a plush triangle. Place them on the top of the head before attaching the hat brim so brim tucks slightly forward.
Round 1 :
4 sc in magic ring (4)
Round 3 :
(1 sc, 1 inc) x 4 (12)
Round 4 :
1 sc in each st (12)
Round 5 :
(1 sc, 1 dec) x 4 (8)
Round 6 :
1 sc in each st (8)
Round 7 :
(1 sc, 1 dec) x 2 (6)
Info :
Fold ear flat with right sides facing and seam along the straight edge with slip stitch or whip stitch to create a slight cup. Leave base open for sewing to head.
Round 8 :
Fasten off leaving long tail for sewing. Make second ear to match. When placing on head, position ears symmetrically on either side of center top, approximately 6-8 stitches from center depending on size.
— Arms (Make 2 small stubs) :
Info :
The original toy does not show long arms; small stub arms give a rounded look at the sides and help hide the hat brim area. These are short tubes worked in rounds and sewn into the sides of the torso at rounds 20-22 area.
Round 1 :
6 sc in magic ring (6)
Round 3-6 :
1 sc in each st (12)
Round 7 :
(2 sc, 1 dec) x 3 (9)
Round 8-10 :
1 sc in each st (9)
Info :
Stuff hand/paw lightly to keep it rounded. Fasten off leaving long tail for sewing. Sew arms to body at side seam around rounds 20-22 so they sit slightly forward and blend with the rib embroidery lines.
— Tail :
Info :
Short stub tail shown is a short tube worked in rounds. Attach to lower back center at base rounds after closing body. Optionally insert wire for poseability before final stuffing.
Round 1 :
6 sc in magic ring (6)
Round 3-8 :
1 sc in each st (12)
Round 9 :
(2 sc, 1 dec) x 3 (9)
Round 10-12 :
1 sc in each st (9)
Info :
Fasten off leaving long tail for sewing. Stuff moderately. Sew tail to the back bottom center of the torso where the body base was partially closed. Use the tail yarn to pull through the base rounds and secure with multiple stitches to be sturdy.
— Witch Hat Brim :
Info :
The hat is crocheted separately in pastel pink and is comprised of a rolled brim and a cone. The brim is a wide flattened tube worked in rounds then flared out by increasing to create the classic floppy brim.
Round 1 :
6 sc in magic ring (6)
Round 3 :
(1 sc, 1 inc) x 6 (18)
Round 4 :
(2 sc, 1 inc) x 6 (24)
Round 5 :
(3 sc, 1 inc) x 6 (30)
Round 6 :
(4 sc, 1 inc) x 6 (36)
Info :
Now we will work additional rounds without increasing to create a small tube that will be folded to form the rolled brim. Work 6-8 rounds at this circumference to create stable height for brim roll.
Round 7-12 :
1 sc in each st (36)
Info :
To make the brim roll, fold the tube outward and stitch the inner edge down using slip stitches or single crochet to create the thick rolled brim effect in the photos. Alternatively, work another round of BLO single crochet to create a ridge before folding.
Round 13 :
Fold and join inner edge with sl st around to secure roll. Fasten off leaving long tail for sewing to head. Pin brim in place so it sits low on the face patch, slightly covering the top of ears.
— Witch Hat Cone :
Info :
The cone is worked in continuous rounds attached to the top of the brim. Decrease the cone slightly to create the point, and curl the tip for a whimsical look. Add star buttons or beads as embellishments.
Round 1 :
Join pink yarn to brim center; ch1 and 6 sc in same join (6)
Round 3 :
(1 sc, 1 inc) x 6 (18)
Round 4 :
(2 sc, 1 inc) x 6 (24)
Round 5-8 :
1 sc in each st (24)
Round 9 :
(2 sc, 1 dec) x 6 (18)
Round 10 :
1 sc in each st (18)
Round 11 :
(1 sc, 1 dec) x 6 (12)
Round 12 :
1 sc in each st (12)
Round 13 :
(1 sc, 1 dec) x 4 then 1 sc x 4 (8 + 4 = 12) - shape tip gently
Round 14 :
1 sc in each st (12) - shape & tighten
Round 15 :
Slip stitch 6 times around then fasten off, pull tail to close tip slightly and curl cone as desired (do not overstuff cone)
Info :
Decorate cone with flat star buttons, small beads, or embroidered dots using yarn needle. Sew embellishments securely from the back so they do not come off easily. In photos, pastel-blue and purple stars are used, spaced asymmetrically for charm.
— Skeleton Rib Embroidery :
Info :
Use white yarn or thin stranded cotton to embroider horizontal ribs and a vertical sternum line on the front torso. It is easiest to use a yarn needle and couching technique: lay short lengths on the surface and stitch down each end and along the center with small tacking stitches.
Step 1 :
Cut five short lengths of white yarn: three pairs about 18-20mm long (for upper ribs) and two shorter pairs about 14-16mm long (for lower ribs), and one longer length about 30mm for the vertical sternum.
Step 2 :
Position ribs across the front center of body approximately between rounds 16-24. The top rib aligns under the face patch, the bottom rib aligns above the belly taper. Pin placements to adjust symmetrical look.
Step 3 :
Using a yarn needle, tack each rib end with hidden stitches into the body. For a raised effect, couch the yarn onto the surface and add small securing stitches approximately every 3-4 stitches along the rib instead of pulling it through to the inside.
Step 4 :
Sew the vertical sternum over the center, tacking it at top and bottom and in a few spots down the middle to keep the yarn flat and neat. Trim and weave ends to the inside.
Info :
For a neater look, use yarn one weight thinner than the body yarn for embroidery. Alternatively, use surface slip stitch (surface crochet) for permanent, neat lines.
— Eyes and Facial Embroidery :
Round 1 :
Insert 6-8mm safety eyes between head rounds 12-14 and secure washers tightly. Place them within the top half of face patch, roughly 8-10 stitches apart depending on eye size.
Round 2 :
Using black yarn and a yarn needle, embroider an X for the mouth centered below the nose area. Make 2 diagonal stitches crossing in the middle for the X. Secure ends inside patch and weave in.
Round 3 :
Embroider three short whisker/cheek lines on each side using satin stitch or straight stitch: two short lines above and one slightly below the eye level as seen in photo. Use black yarn and keep stitches short (4-6mm).
Info :
For blush cheeks, use a tiny dab of blush ink, pastel chalk, or fabric paint applied with a cotton swab and sealed with a tiny bit of textile medium. Test on scrap yarn first to avoid staining where you don't want it.
— Final Finishing :
Step 1 :
Join head and body (if not already joined): use mattress stitch or whip stitch around the neck opening aligning stitch counts so there are no gaps. Sew through rounds on both pieces pulling slightly tight to close seam neatly.
Step 2 :
Sew ears in place between brim and head top so they peek out slightly. Sew hat brim onto the head just enough to prevent slipping or leave removable depending on preference.
Step 3 :
Weave in all ends and hide tails inside body. Tidy embroidery and trim excess yarn. Add star buttons to hat cone using coordinating thread and secure from back with a few stitches.
Info :
Use small safety stitches if giving to small children to further secure buttons and eyes. For toy safety, embroider eyes and nose if intended for young children instead of using safety eyes.
This adorable Halloween cat skeleton combines classic amigurumi techniques with playful, spooky charm! Each carefully crafted section — from the embroidered ribs to the jaunty witch hat — comes together to create a whimsical keepsake you will love. The removable hat and hand-stitched details make this a special gift or a delightful desk buddy. 🧶🎃✨