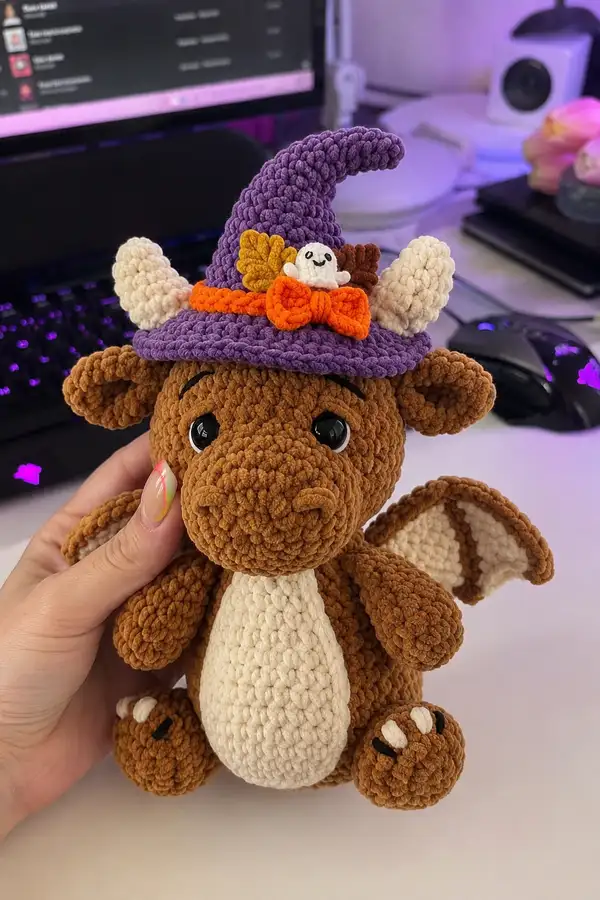
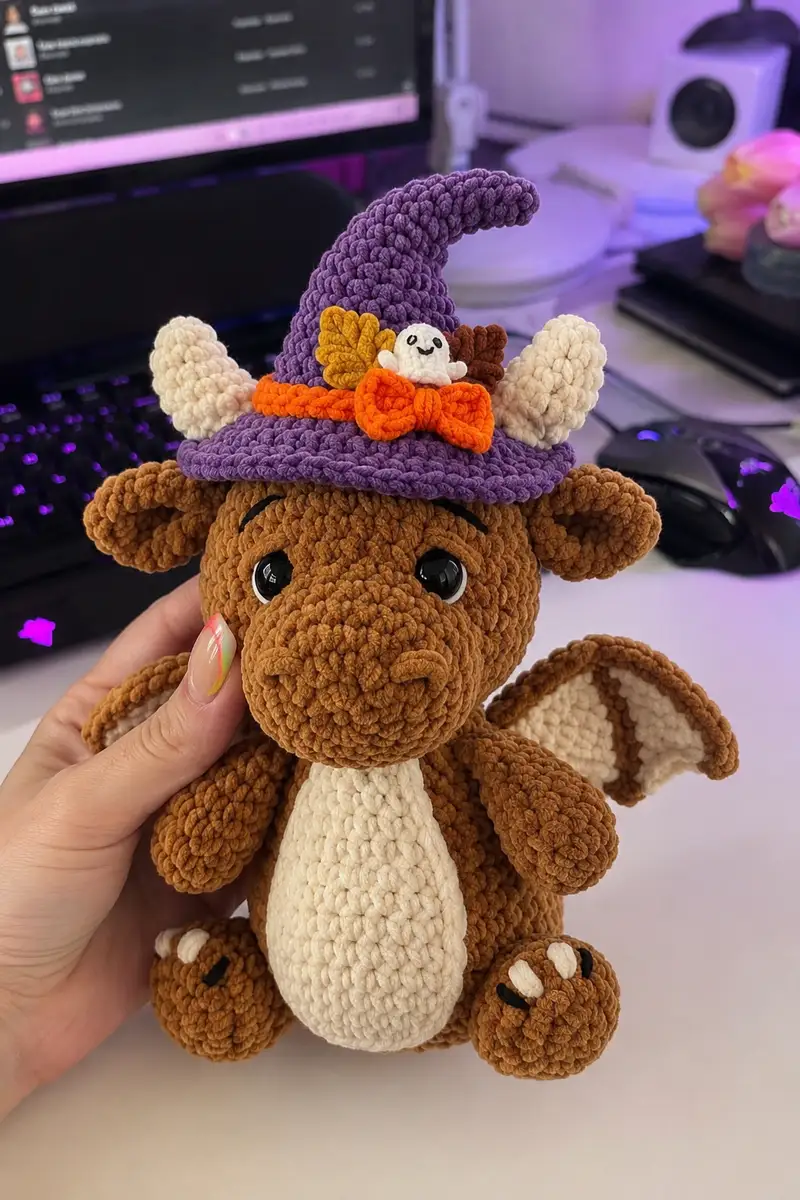
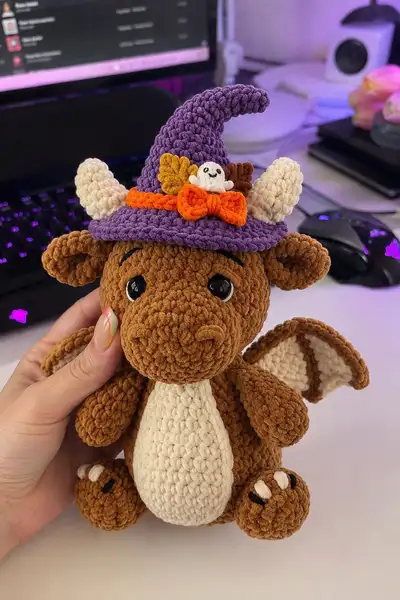
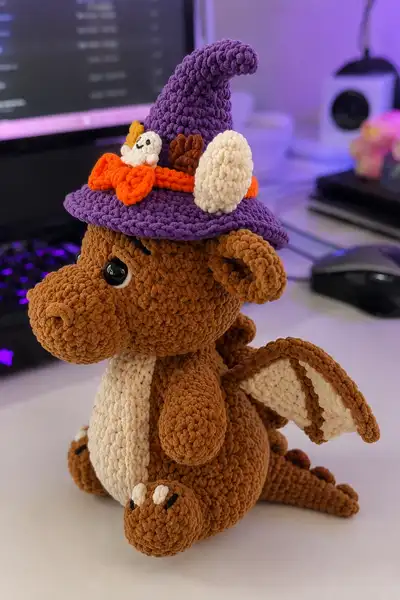
Create an adorable plush dragon dressed in a tiny witch hat — perfect for Halloween decor or a spooky cute gift. This pattern recreates the brown plush dragon with cream belly, folded wings, tiny claw details, and a purple pointed witch hat decorated with a small ghost, bow and autumn leaves. Written for plush chenille-style yarn with clear step-by-step shaping and plenty of assembly notes.
Progress Tracker
0% Complete
— Head :
Round 1 :
6 sc in magic ring (6)
Round 3 :
(1 sc, inc) x 6 (18)
Round 4 :
(2 sc, inc) x 6 (24)
Round 5 :
(3 sc, inc) x 6 (30)
Round 6 :
(4 sc, inc) x 6 (36)
Round 7 :
(5 sc, inc) x 6 (42)
Round 8 :
(6 sc, inc) x 6 (48)
Round 9-16 :
1 sc in each st (48)
Info :
Place safety eyes between rounds 13-14 approximately 8 stitches apart for a wide, friendly expression. Insert eyes before stuffing; secure washers firmly
Round 17 :
(6 sc, 1 dec) x 6 (42)
Round 18 :
(5 sc, 1 dec) x 6 (36)
Round 19 :
(4 sc, 1 dec) x 6 (30)
Info :
Start light stuffing now, filling the forehead and upper head firmly but leaving space to shape the cheeks and muzzle later
Round 20 :
(3 sc, 1 dec) x 6 (24)
Round 21 :
(2 sc, 1 dec) x 6 (18)
Round 22 :
(1 sc, 1 dec) x 6 (12)
Round 23-24 :
1 sc in each st (12) — work 2 rounds even to create neck opening for sewing to body
Info :
Do not fasten off; leave long tail after finishing Round 24 for sewing. Finish stuffing head firmly through the neck opening so the head keeps its round shape
— Muzzle / Snout (Make 1) :
Round 1 :
6 sc in magic ring (6)
Round 3 :
(1 sc, inc) x 6 (18)
Round 4 :
(2 sc, inc) x 6 (24)
Round 5-6 :
1 sc in each st (24)
Round 7 :
(2 sc, 1 dec) x 6 (18)
Round 8 :
(1 sc, 1 dec) x 6 (12)
Info :
Stuff muzzle firmly to maintain a rounded shape. Leave a long tail for sewing. Sew muzzle to front of head centered between eyes and slightly below them (approximately aligned with rounds 11-13 on the head)
— Nostrils & Smile Embroidery :
Info :
Using black yarn and a yarn needle, embroider two small nostrils on the front of muzzle by taking a few small stitches through two adjacent stitches. For a subtle smile, embroider a short curve under the muzzle using backstitch
— Ears (Make 2) :
Round 1 :
6 sc in magic ring (6)
Round 3 :
(1 sc, inc) x 6 (18)
Round 4 :
(2 sc, inc) x 6 (24)
Round 5-6 :
1 sc in each st (24)
Round 7 :
BLO: 1 sc in each st BLO (24)
Round 8 :
Fold ear slightly and sc through both layers along bottom 6 sts to shape ear base; fasten off leaving tail for sewing
Info :
Sew ears to top sides of head near round 8-10, angled slightly forward. Pin before sewing to ensure symmetry
— Cheeks & Eyebrows :
Info :
Optional tiny embroidered eyebrow arches above eyes using black yarn; place 2-3 stitches lengthwise. For soft cheeks, use a small tuft of stuffing sewn into the side before closing the head to create subtle fullness
— Horns (Make 2) :
Round 1 :
4 sc in magic ring (4)
Round 3 :
(1 sc, inc) x 4 (12)
Round 4-6 :
1 sc in each st (12)
Round 7 :
(1 sc, 1 dec) x 4 (8)
Round 8 :
4 dec (4) — stuff lightly and fasten off leaving tail for sewing
Info :
Sew horns on head between ears and hat base (if hat will sit over them), position them with tips curving slightly outward
— Body :
Round 1 :
6 sc in magic ring (6)
Round 3 :
(1 sc, inc) x 6 (18)
Round 4 :
(2 sc, inc) x 6 (24)
Round 5 :
(3 sc, inc) x 6 (30)
Round 6-8 :
1 sc in each st (30)
Info :
If adding the cream belly panel later, you can add it now by crocheting a separate panel and sewing on; otherwise continue in main color. Work next rounds in BLO for a subtle waist ridge if desired
Round 9 :
BLO: 1 sc in each st (30)
Round 10-15 :
1 sc in each st (30)
Info :
Start stuffing body from the bottom up once you reach round 12–fill firmly but keep shape soft for a cuddly body. Leave top opening wide to insert neck for sewing
Round 16 :
(3 sc, 1 dec) x 6 (24)
Round 17 :
(2 sc, 1 dec) x 6 (18)
Round 18 :
(1 sc, 1 dec) x 6 (12)
Round 19 :
1 sc in each st (12) — leave opening for neck attachment; do NOT fasten off
Info :
Sew head to body by aligning round 24 of head with round 19 of body; use mattress or whip stitch to join securely, adjusting stuffing as needed so head sits naturally
— Belly Panel (Make 1, Cream) :
Round 1 :
6 sc in magic ring (6)
Round 3 :
(1 sc, inc) x 6 (18)
Round 4 :
(2 sc, inc) x 6 (24)
Round 5-6 :
1 sc in each st (24)
Info :
Shape belly into an oval by adjusting panel width before sewing. Sew the panel to the front of the body starting a few rounds below the neck and ending near round 8-10 of the body
— Arms (Make 2) :
Round 1 :
6 sc in magic ring (6)
Round 3-4 :
1 sc in each st (12)
Round 5 :
(2 sc, inc) x 4 (16)
Round 6-9 :
1 sc in each st (16)
Info :
Stuff hands firmly to keep them rounded. Leave the top of the arm slightly less stuffed to create a natural shoulder slope when sewing
Round 10 :
(2 sc, 1 dec) x 4 (12)
Round 11-12 :
1 sc in each st (12)
Round 13 :
(1 sc, 1 dec) x 4 (8)
Round 14-16 :
1 sc in each st (8) — stuff to desired fullness and leave long tail for sewing
Info :
Sew arms to sides of body approximately at rounds 10-12 for a natural seated position; use ladder stitch for an invisible seam and reinforce with extra passes if child play is expected
— Legs / Feet (Make 2) :
Round 1 :
6 sc in magic ring (6)
Round 3 :
(1 sc, inc) x 6 (18)
Round 4 :
(2 sc, inc) x 6 (24)
Round 5 :
(3 sc, inc) x 6 (30)
Round 6-8 :
1 sc in each st (30)
Info :
For a flat, stable foot, flatten the last round and sc across to create a short sole if desired; stuff the foot firmly for stability when sitting
Round 9 :
(3 sc, 1 dec) x 6 (24)
Round 10 :
(2 sc, 1 dec) x 6 (18)
Round 11 :
(1 sc, 1 dec) x 6 (12)
Round 12-14 :
1 sc in each st (12)
Round 15 :
(1 sc, 1 dec) x 4 then 2 sc (8) — shape ankle
Round 16-20 :
1 sc in each st (8) — stuff foot firmly and leave long tail for sewing
Info :
Attach legs to bottom of body spaced about 6-8 stitches apart (depending on body circumference). Sew through body and foot multiple times for a secure join
— Claws / Toe Pads (Make 6 small pads) :
Round 1 :
4 sc in magic ring (4)
Round 3 :
1 sc in each st (8) — flatten and sew three pads to top of each foot, embroider small black lines for claws
Info :
Sew pads symmetrically along the top of each foot; place black embroidery for claw separations between pads
— Tail :
Round 1 :
6 sc in magic ring (6)
Round 3-4 :
1 sc in each st (12)
Round 5 :
(2 sc, 1 dec) x 3 (9)
Round 6-12 :
1 sc in each st (9) — work length in rounds until desired tail length (~7-10 cm)
Round 13 :
(1 sc, 1 dec) x 3 (6)
Round 14-20 :
1 sc in each st (6) — stuff tail lightly; leave long tail for sewing
Info :
If you want a poseable tail, insert a thin floral wire before stuffing and wrap extra stuffing around it. Sew tail to back center of body at around round 6-8
— Back Bumps / Scales (Make 6-8 small bumps) :
Round 1 :
3 sc in magic ring (3)
Round 3 :
1 sc in each st (6) — fasten off leaving short tail for sewing
Info :
Sew bumps down the center back and along tail at regular intervals. Space them evenly for a natural look
— Wings (Make 2) :
Wing Inner Panel (Cream) Round 1 :
6 sc in magic ring (6)
Round 3 :
(1 sc, inc) x 6 (18)
Round 4 :
1 sc in each st (18)
Wing Outer Border (Brown) Round 5 :
Join brown yarn and sc evenly around the cream panel, placing 2 sc in each point where you want a scallop to create the folded wing look (approx. 22-24 sc total)
Round 6 :
BLO 1 sc in each st to create a defined ridge (22-24)
Info :
Sew wings to upper back slightly behind arm attachment points; allow the top edge to tuck under the back so wings look folded
— Hat Brim :
Round 1 :
6 sc in magic ring (6) with purple yarn
Round 3 :
(1 sc, inc) x 6 (18)
Round 4 :
(2 sc, inc) x 6 (24)
Round 5 :
(3 sc, inc) x 6 (30)
Round 6 :
(4 sc, inc) x 6 (36)
Round 7 :
(5 sc, inc) x 6 (42)
Round 8 :
(6 sc, inc) x 6 (48) — this creates a wide brim; you can stop earlier for a smaller brim
Round 9-10 :
1 sc in each st (48)
Info :
Flatten brim and add a few sc rounds under the brim toward the center to make it sit flat on the head. Adjust brim diameter to fit head circumference measured earlier
— Hat Crown / Cone :
Round 1 :
Join purple yarn to center of brim. 6 sc in magic ring (6)
Round 3 :
(1 sc, inc) x 6 (18)
Round 4 :
(2 sc, inc) x 6 (24)
Round 5-8 :
1 sc in each st (24)
Round 9 :
(3 sc, inc) x 6 (30)
Round 10-14 :
1 sc in each st (30)
Round 15 :
(4 sc, inc) x 6 (36)
Round 16-20 :
1 sc in each st (36)
Round 21 :
(6 sc, 1 dec) x 4 (30)
Round 22 :
1 sc in each st (30)
Round 23 :
(4 sc, 1 dec) x 5 (25)
Round 24 :
1 sc in each st (25)
Round 25 :
(3 sc, 1 dec) x 5 (20)
Round 26-28 :
1 sc in each st (20) — curve the cone by stuffing lightly and shaping the top to have a slight curl
Round 29 :
(2 sc, 1 dec) x 5 (15)
Round 30 :
(1 sc, 1 dec) x 5 (10) — stuff lightly and close if desired; leave tail to sew to brim
Info :
To get the curled tip shown in photos, work last 6-8 rounds more tightly and use additional stuffing only at the very tip; you can also bend the tip slightly while sewing it to the brim
— Hat Band & Bow :
Band Round 1 :
With orange, ch 48 (or length matching brim circumference), join ends with sl st to form a ring; sc around ring for 2 rounds creating a thick band (48)
Bow (Make 1) Round 1 :
Ch 8
Round 2 :
Sc in 2nd ch from hook and across (7)
Round 3-4 :
Ch 1, turn, sc across (7)
Info :
Fold the little rectangle into a bow and wrap a short length of orange yarn around the middle to secure; sew bow to hat band centered at front
— Tiny Ghost (Decoration) :
Round 1 :
5 sc in magic ring (5) with white
Round 3-4 :
1 sc in each st (10)
Round 5 :
(1 sc, 1 dec) x 3 then 1 sc (7)
Round 6 :
1 sc in each st (7) — embroider two small black eyes and a smiling mouth; fasten off leaving short tail to sew to band
Info :
Sew ghost to band slightly off-center in front of bow; place leaves behind ghost using mustard and dark brown yarn
— Leaves (Make 2-3) :
Round 1 :
ch 6, sc in 2nd ch from hook, hdc, dc, hdc, sc (5 worked stitches) — fasten off and shape into a leaf by sewing a running stitch down center to gather
Info :
Use mustard and dark brown for autumn leaves; sew behind ghost and bow to give layered accent
— Assembly & Final Finishing :
Info :
Weave in all loose ends. Use pins to position parts before sewing to ensure symmetry. Add extra stitches through attachment points for durability if giving as a toy
Info :
Use a yarn needle and matching yarn color to sew pieces together invisibly. For plush yarn, make sure stitches are snug to hide gaps where stuffing could show
Info :
Embroider small facial features like eyebrows and mouth after pieces are attached so placement matches the overall look
This whimsical Halloween dragon is the perfect mix of plush texture and seasonal charm — from its curled purple witch hat to the tiny smiling ghost accent. Each carefully shaped part comes together to form a cuddle-worthy friend with personality and quirky details. Whether you gift it or keep it, this dragon makes fall crafting extra cozy. 🧶🎃🐉